
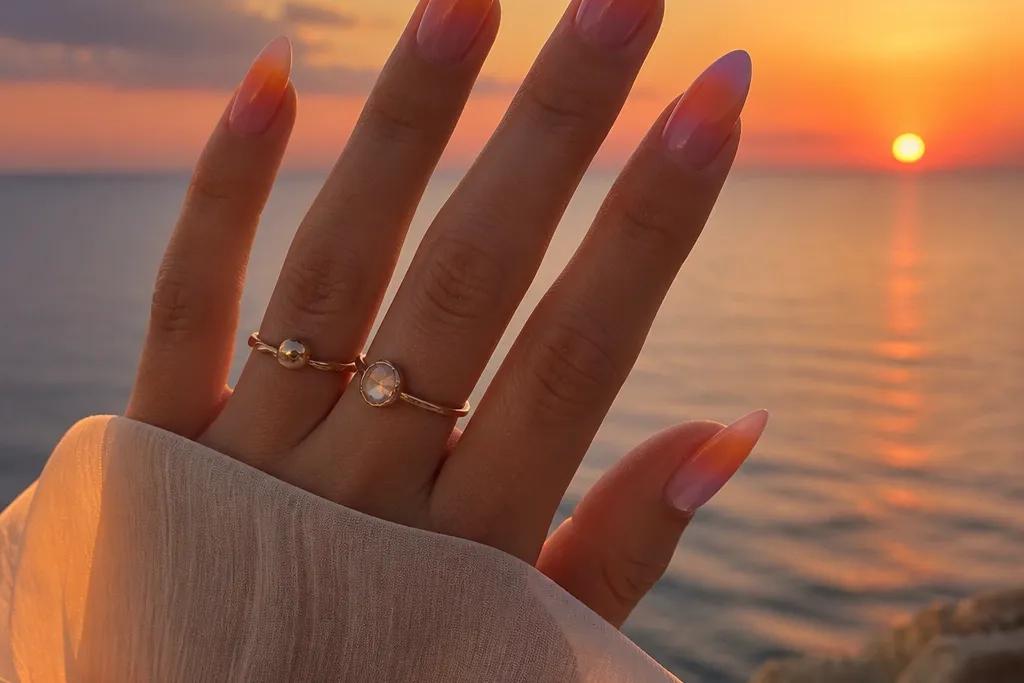
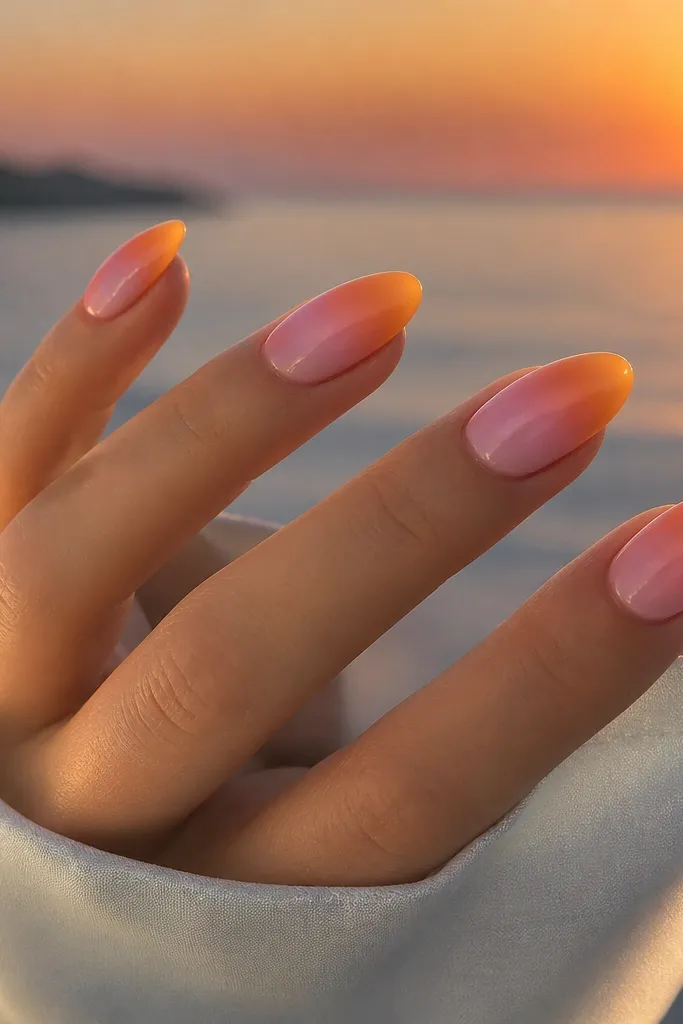
1. Coral-to-Magenta Beach Dusk
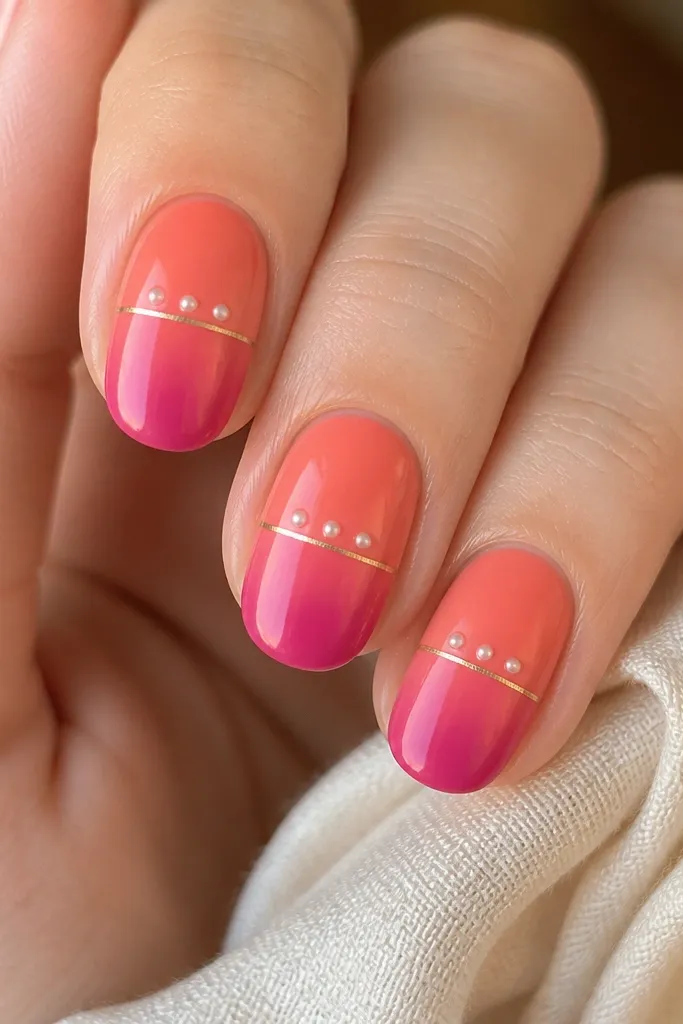
This one reads like the last light hitting the sand. Coral and tangerine give you warmth at the base, and magenta at the tip mimics the deeper evening sky. The thin gold line adds a "horizon" cue so your brain locks the sunset instantly. Pearl dots (super small) make it feel dreamy without adding bulk.
Paint a sheer peach base first. Sponge coral on the lower half, then sponge magenta on the upper half and blend while still slightly tacky (or lightly dampen a corner of the sponge for regular polish). Top with a glossy top coat, then use a striping brush for a gold line at about 45% up the nail.
Pro tipIf your gold line looks thick, drag it with a nearly dry brush - less gel/polish is more here.
Watch outDon't paint the horizon line too close to the cuticle or it makes the ombre look like a stain.
2. Peach Rose Sunset Smoke
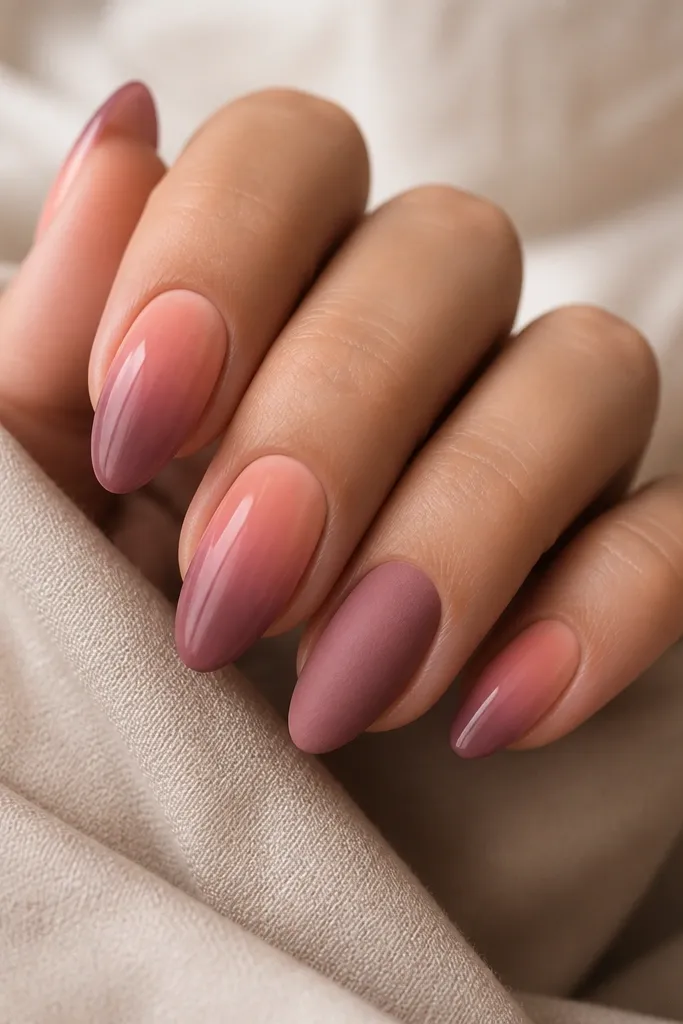
This ombre feels like foggy sunset clouds. Peach and dusty rose keep it romantic, while a whisper of smoky plum at the tips adds depth. The "cloudy" mid-blend is what makes it dreamy - it looks like the sky is moving. Switching one nail to matte (or using matte on the center) breaks up the shine and makes the gradient feel more dimensional.
Sponge peach at the cuticle area, then sponge dusty rose starting halfway down. For the smoky plum, dab it only on the top third and blend with a dry sponge edge. Finish glossy on 4 nails and matte only on the ring finger for contrast.
Pro tipFor the smoky part, use a smaller sponge piece and press for one second only per nail.
Watch outAvoid using opaque layers for the rose - if it covers too much, you lose the hazy look.
3. Tangerine Sun Glow (Half-Moon Fade)
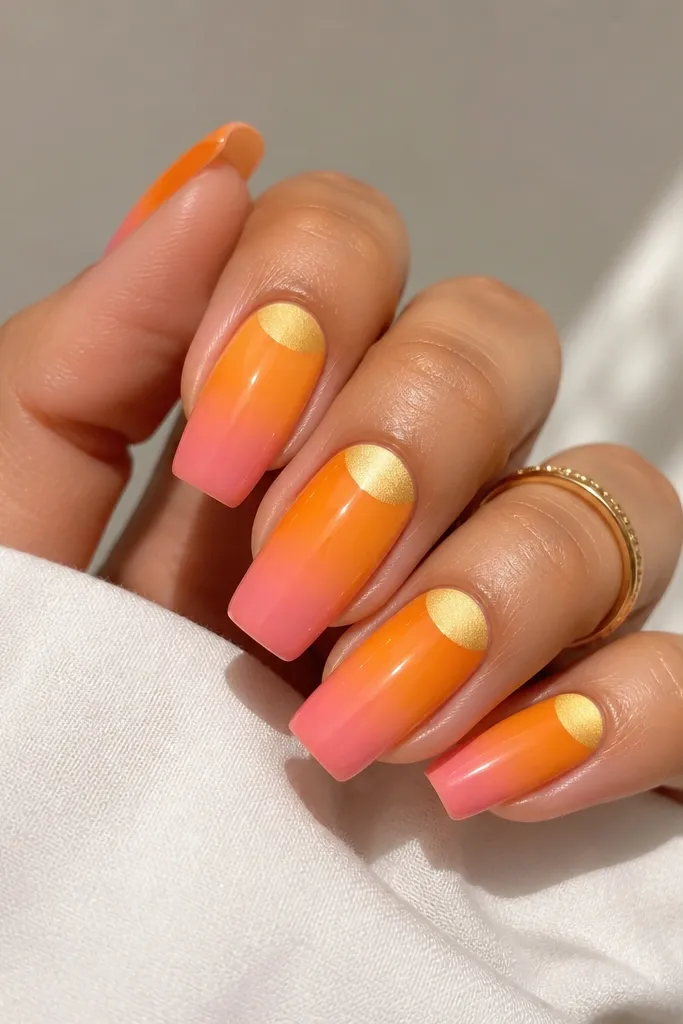
This design uses the cuticle like a sunrise. Tangerine gives you that orange heat, and pink at the tips makes the sky feel airy. The pale gold half-moon reads as the sun without needing a full circle. Keeping the half-moon edge softly blended makes it look painted, not stickered.
Start with a sheer nude base. Sponge tangerine from the cuticle up to the middle, then blend to pink on the top half. For the half-moon, use a small makeup sponge to dab pale gold inside a half-moon guide (or freehand carefully with a flat brush). Seal with glossy top coat.
Pro tipIf freehanding is scary, paint the half-moon first with a thin gold striping brush, then soften the outer edge with the sponge.
Watch outDon't make the gold too opaque - solid foil gold can look like chrome over a gradient.
4. Indigo Night Fade with Hot Pink Tips
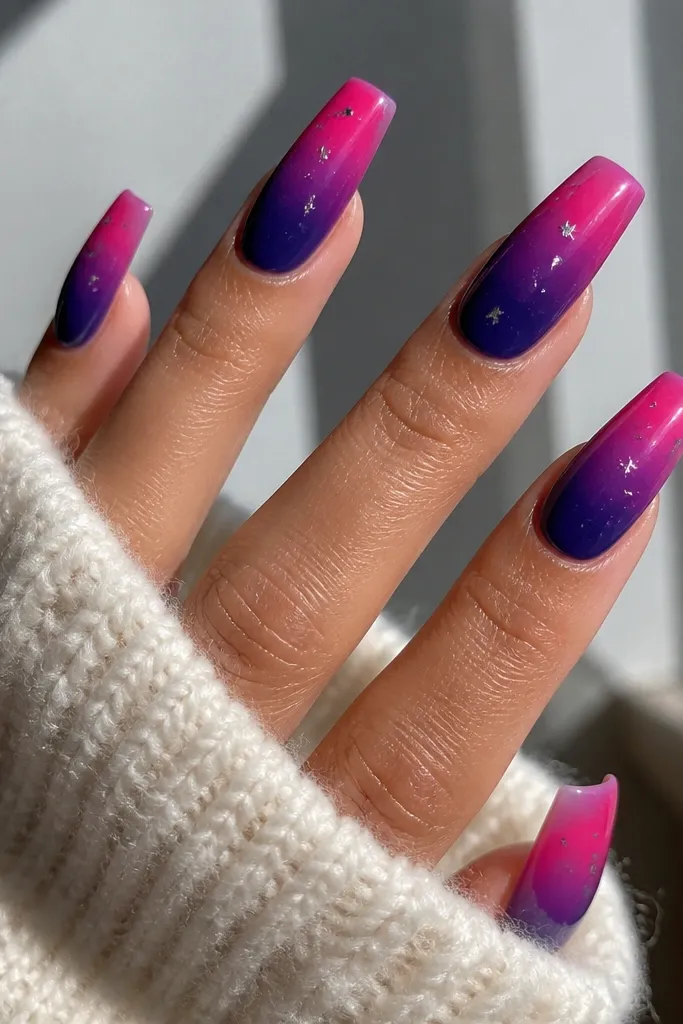
This one flips the sunset energy - it feels like night arriving fast. Indigo at the base anchors the gradient, and hot pink at the tips gives you that electric glow. Silver star specks add the "evening sky" feeling without stealing attention. The contrast is bold, but the fade keeps it cohesive.
Apply a sheer base first. Sponge indigo starting near the cuticle down about 60% of the nail, then sponge hot pink on the remaining top 40%. Add silver star specks with a dotting tool and a tiny amount of silver glitter polish. Finish with a glossy top coat so the stars look suspended.
Pro tipUse a toothpick to move glitter specks - it lets you place them like constellations.
Watch outSkip heavy glitter - chunky sparkles make the gradient look messy.
5. Rosewater Gradient with Pearl Ombre Dot
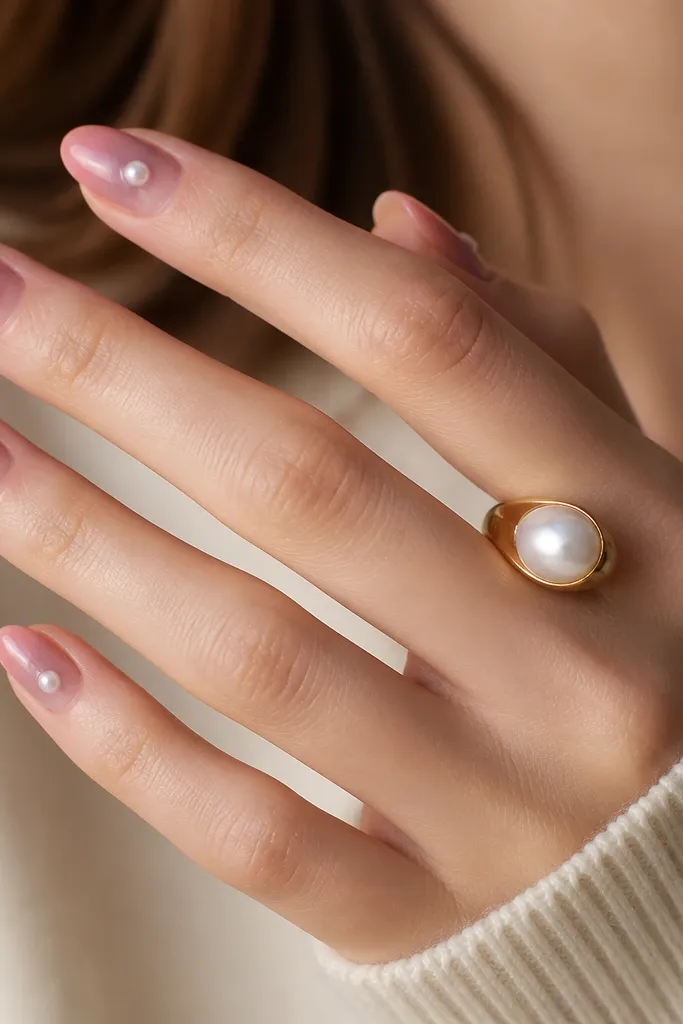
This is for the "clean but dreamy" crowd. The rosewater palette stays gentle, and the single pearl dot gives a focal point like a glint of sunset. The halo is subtle, so the dot looks like it belongs to the gradient rather than sitting on top. It's minimal, but it still reads as sunset because of the warm-to-deeper fade.
Sponge pale rose near the cuticle, then blend deeper rose halfway up. Keep the fade narrow - about 1/3 of the nail should transition, not the full length. Place a micro pearl dot near the center, then drag a tiny bit of top coat around it to create a soft halo. Seal everything with glossy top coat.
Pro tipIf the dot looks too bright, mix pearl polish with clear top coat to sheer it out.
Watch outDon't place the dot at the tip or cuticle - center placement reads more like light.
6. Orange Sherbet with Thin V-Cut Horizon
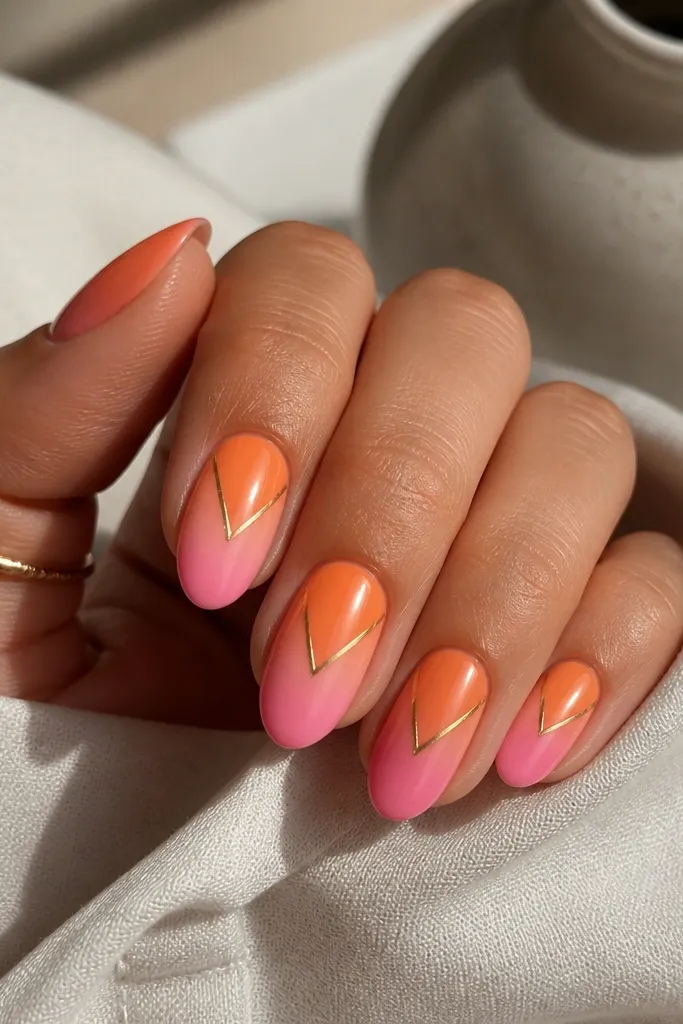
Sherbet orange and pink give you a playful sunset that still looks grown-up. The V-cut horizon line adds a "sun sinking" feeling. Because the horizon is thin, it doesn't crowd the ombre. The gold color ties the whole palette together.
Sponge orange on the lower half, then sherbet pink on the upper half. Blend by tapping the sponge at the boundary for 2-3 seconds. Draw the V with a striping brush, starting two points around the middle third and meeting at the center. Top coat and clean edges with a small brush dipped in remover.
Pro tipLet the horizon line dry fully before top coat so it doesn't smear.
Watch outAvoid thick nail art gel - it makes the V line look like a sticker.
7. Sunset Ombré with Micro Glitter Fade
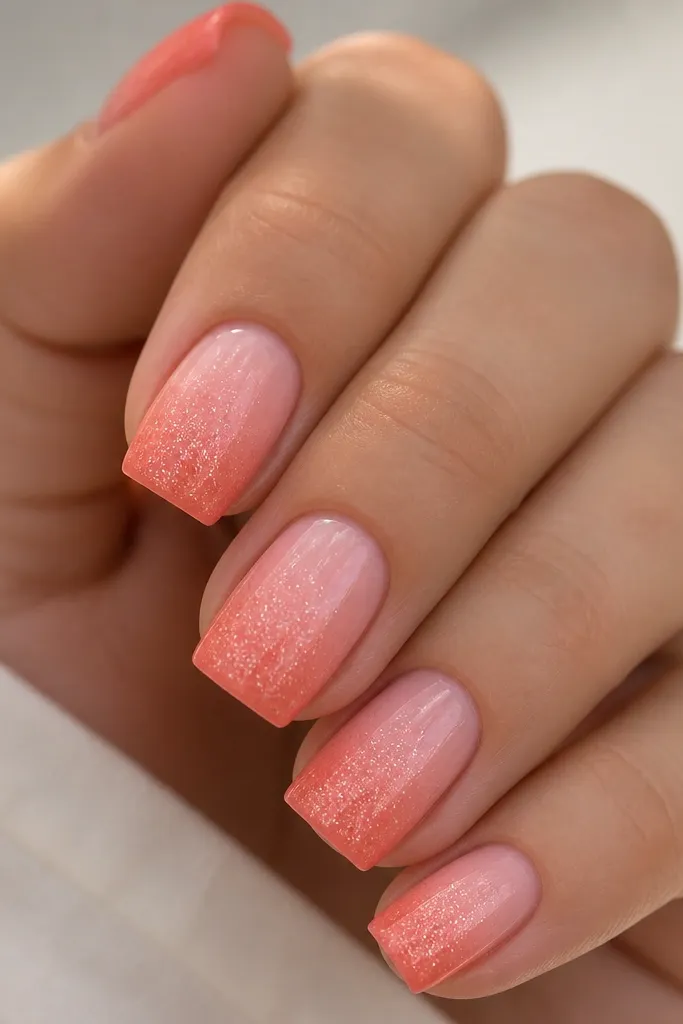
This looks like sunset light catching on water. The ombre sets the color story, and micro glitter at the tips gives a "shine layer" without ruining the gradient. Keep the glitter fine so it blends into the fade instead of sitting as chunks. It feels dreamy because it's subtle and directional.
Sponge coral near the cuticle and blend to pink at the tips. Then sponge a tiny amount of micro glitter polish only on the last 20-25% of the nail, blending upward slightly. Finish with glossy top coat twice - first thin, then a second normal coat.
Pro tipPress glitter sponge lightly; if you scrub, it pulls up the base layer.
Watch outDon't use big glitter - it hides the ombre and makes the tips look gritty.
8. Mauve Lavender Sunset (Soft Lilac Tips)
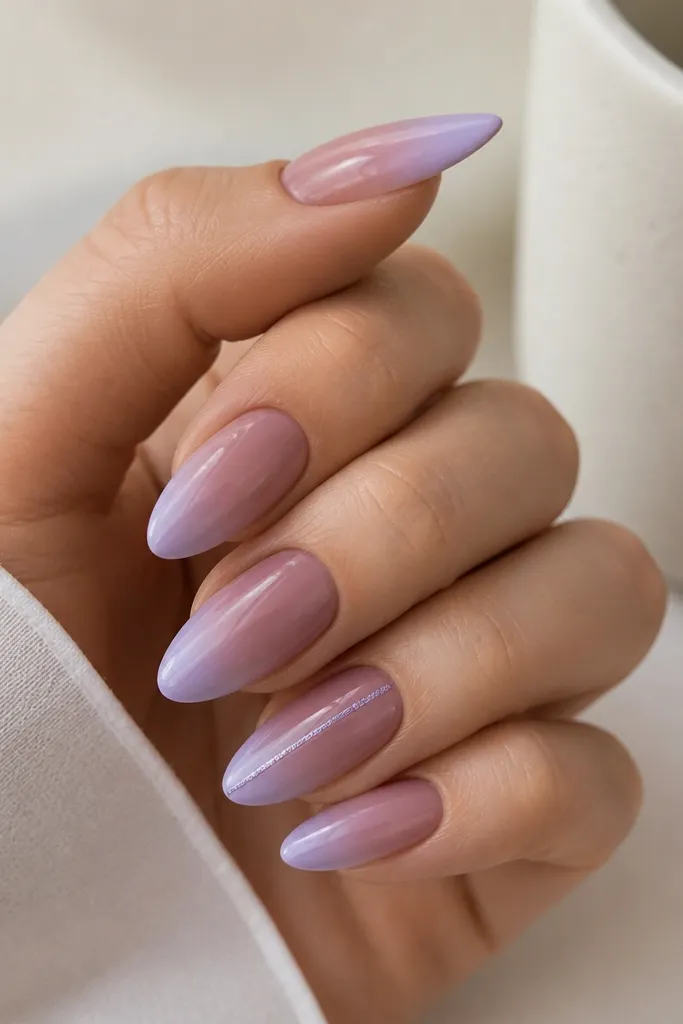
This sunset palette is for the "cool dusk" look. Mauve gives you the warm base, and lavender at the tips makes it feel like a twilight sky. The thin shimmer line on one nail acts like a passing highlight. It's dreamy because the colors feel like they're blending through light fog.
Sponge mauve from the cuticle up to mid-nail. Blend into lavender on the top half, keeping the transition soft. Add shimmer line with a fine brush only on the ring finger. Top coat glossy to make the lavender glow.
Pro tipUse a sheer shimmer polish for the line, not full coverage glitter.
Watch outAvoid going too dark - heavy purple can make it look bruised instead of dreamy.
9. Classic Summer Sunset with Orange Peel Tips
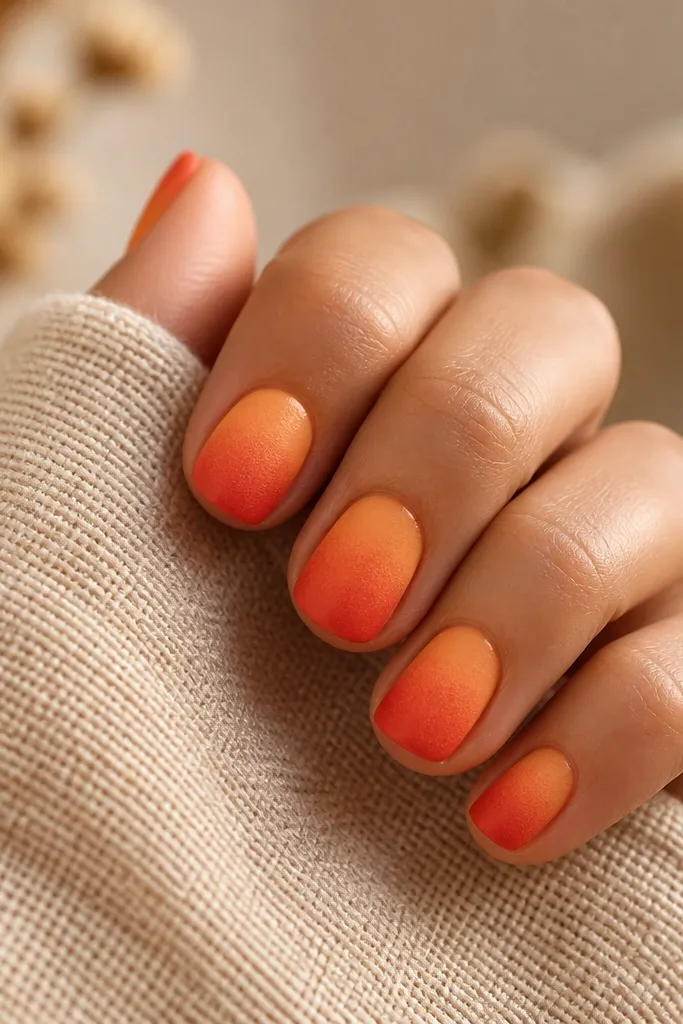
This is the most "real sunset" palette I've worn - it looks like the sky right after the sun drops. Peach to orange gives warmth, and the red-orange tips give that last flare. The satin finish on tips makes it feel like orange peel sparkle, not flat color. It's still wearable because the gradient stays smooth.
Sponge peach at the cuticle and blend to orange mid-nail. Add red-orange only at the top third. For satin tips, tap a satin top coat only on the tips (avoid the lower half so you keep contrast). Use glossy top coat on the rest of the nail.
Pro tipMask the lower half with a small foil strip if you're new to mixing finishes.
Watch outDon't satin the whole nail - it kills the airy sunset effect.
10. Peach-to-Plum Sunset with Tiny Palm Silhouettes
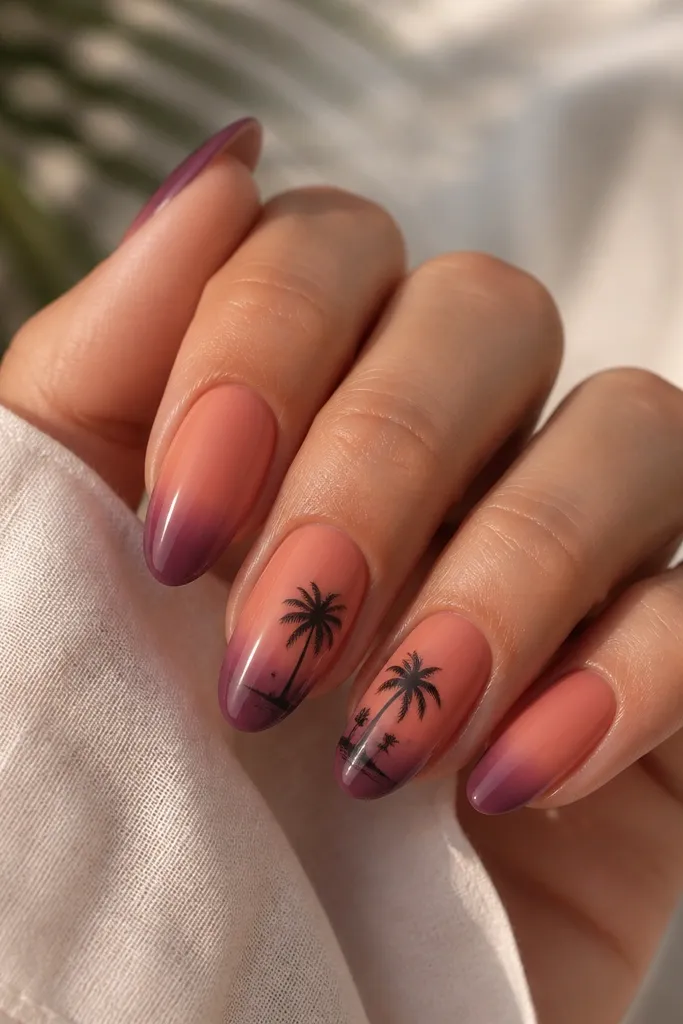
The silhouette detail is what makes this feel like a real scene. Peach and plum create the sky range, and black palms only need to be two or three strokes each. Keep them small - the ombre should still dominate. It reads dreamy because silhouettes make the sunset feel far away.
Sponge peach near the cuticle, blend to rose, then dab plum at the tips. On the index and ring finger, use a fine liner brush with black gel/polish and paint a simple palm trunk plus three fronds. Place silhouettes near the bottom third and keep them about 1-2 mm tall.
Pro tipPractice the palm on a paper towel first - tiny fronds need quick, confident strokes.
Watch outSkip full trees or mountains - too much scene detail makes the ombre look busy.
11. Pink Sky Ombre with Gold Foil Sun Burst
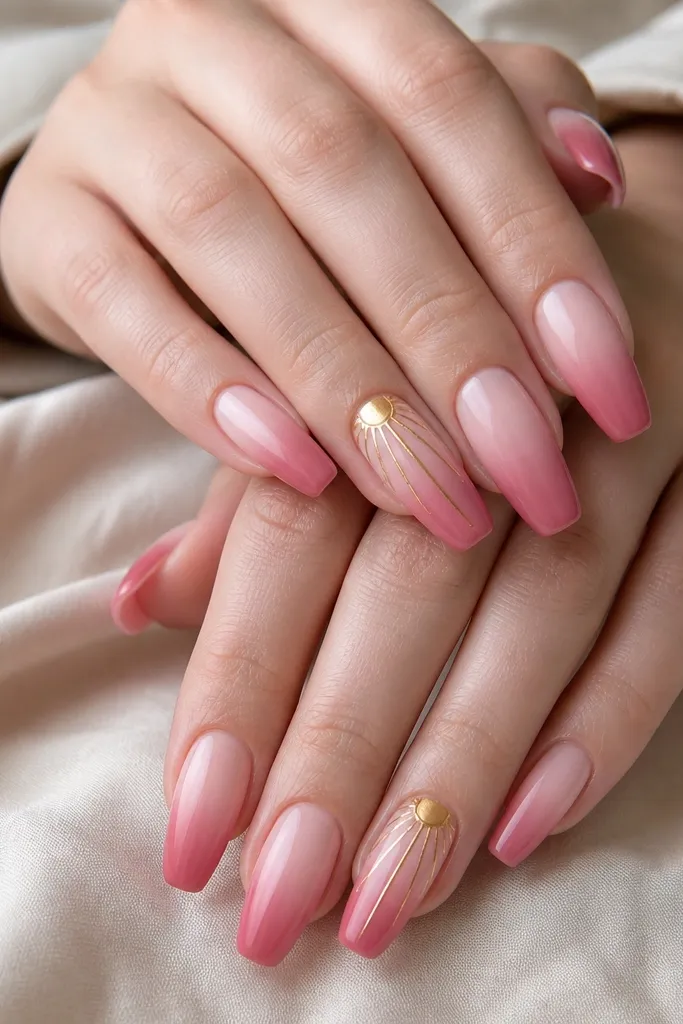
This one has that "party sunset" energy. The blush-to-rose ombre looks soft and flattering, and the gold foil sun burst adds sparkle without using heavy chrome. Foil rays are thin, so they don't block the gradient. It feels dreamy because the gold looks like it's catching the sunrise light.
Sponge pale blush near the cuticle and build to deeper rose on the top half. For the sun burst, place small bits of gold foil on a tacky base and press lightly, then draw 6-8 thin rays with a striping brush. Keep the sun burst within the lower third so it doesn't compete with the ombre.
Pro tipPress foil with a silicone tool or the back of a spoon - it flattens edges.
Watch outDon't cover the whole nail in foil - it hides the ombre.
12. Bronze Sunset Ombre with Shimmer Topcoat Only
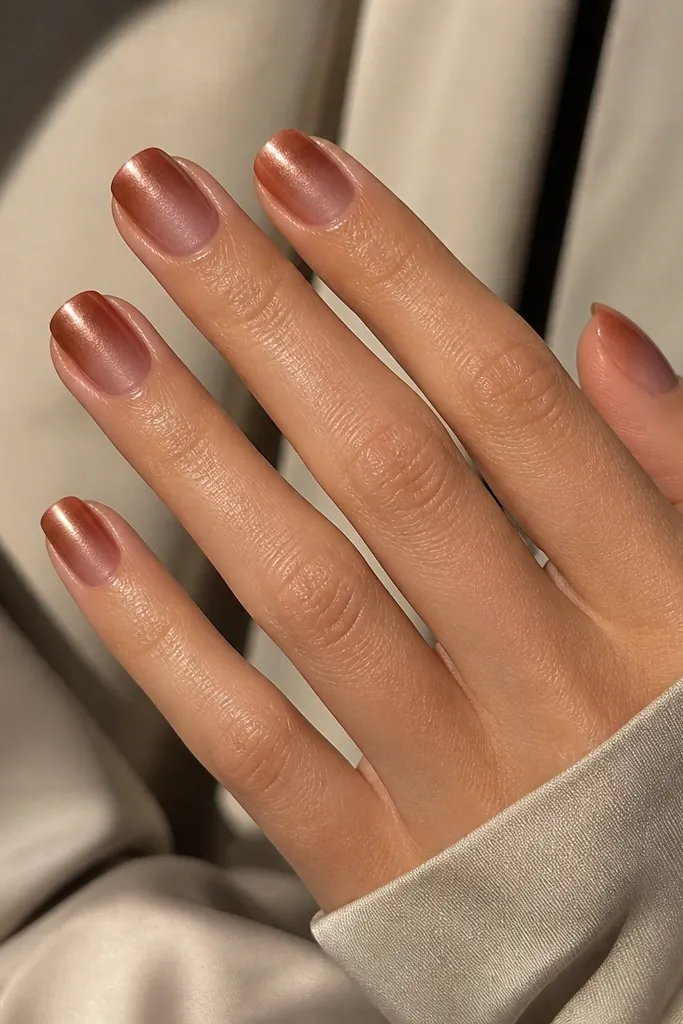
When you want maximum "dreamy glow" with zero nail art, this works. Bronze tones near the cuticle look like warm sunlight, and rose at the tips makes it feel like dusk. The shimmer topcoat is the secret - it turns the gradient into something that looks lit from the inside. Because there's no extra design, the fade has to be clean.
Use a bronze polish for the lower half, then sponge rose toward the tips. Blend at the center boundary using a dry sponge edge. Finish with a shimmer top coat over the entire nail, then seal a second clear top coat on top if you want extra durability.
Pro tipChoose a shimmer top coat with fine particles - it won't blur your fade.
Watch outAvoid thick shimmer - it makes the ombre look grainy.



