
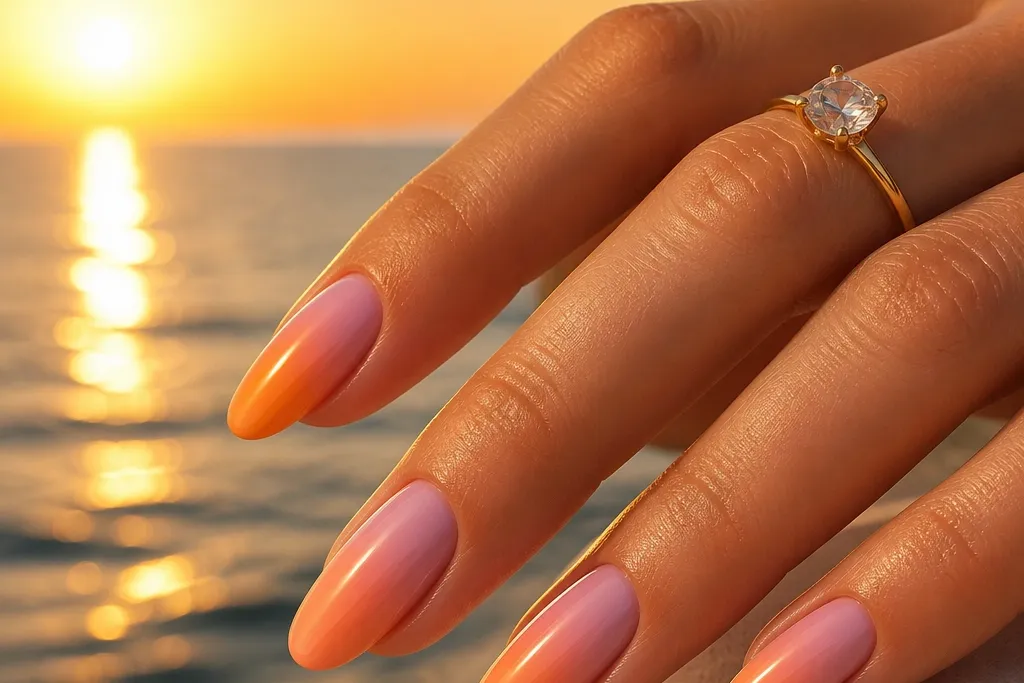
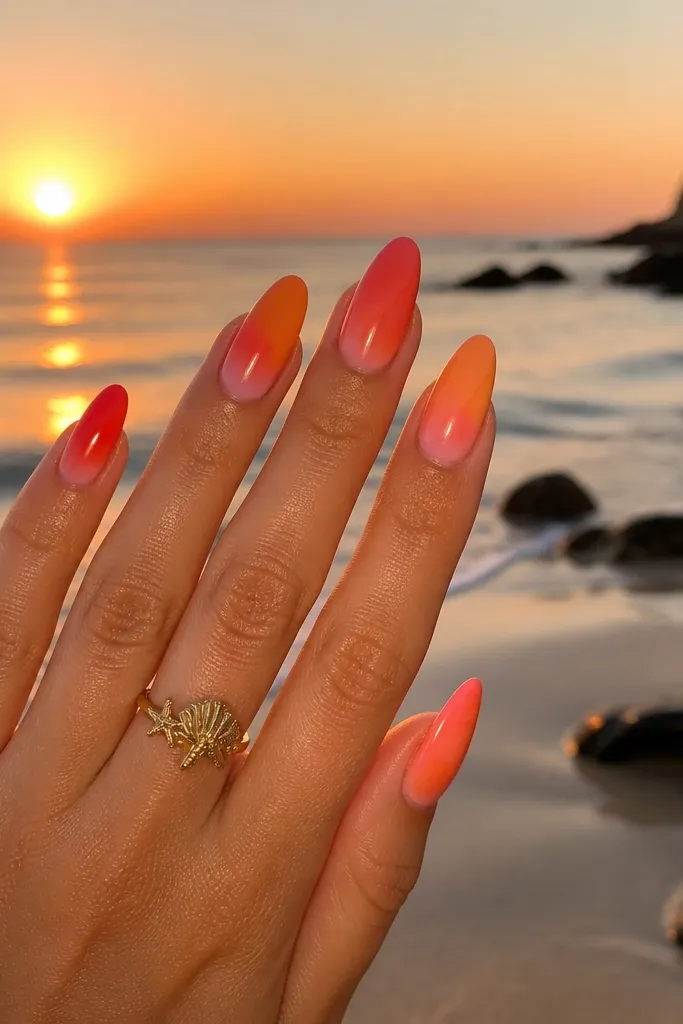
1. Wet Sand Sunset Ombre with Micro-Glitter Line
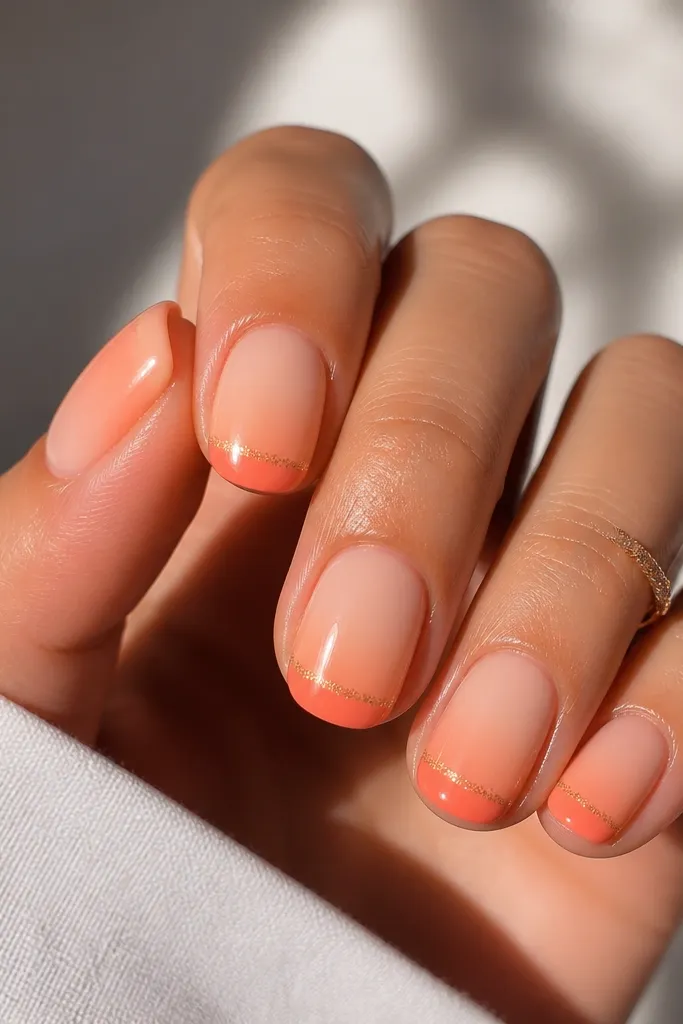
This one looks expensive because the glitter is controlled - a single line, not a full glitter nail. The base is a warm peach that fades into orange, then coral at the edge so the gradient still reads in photos. The gold line mimics sun hitting wet sand and gives that "luxury high end" brightness without looking chunky.
Start with a sheer nude-peach base, then sponge or brush a warm orange in the middle third. Add coral only along the tip edge, keeping it narrow. Top coat glossy and draw a straight micro-glitter line with a gel liner brush, then cure fully.
Pro tipUse a liner brush that's 1-2 sizes smaller than you think you need. Smaller brush = thinner line = more high-end.
Watch outSkip full-coverage glitter if you want this to look clean and costly.
2. Coral Sunrise Tips with Clear Jelly Center
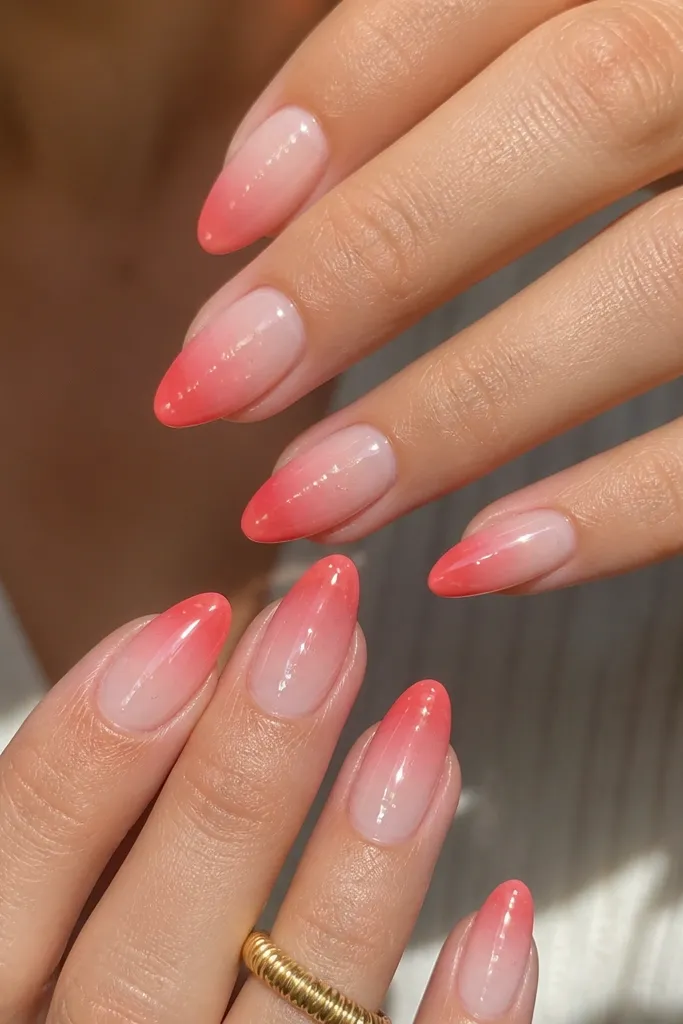
A jelly center makes sunset nails look modern and pricey because it creates depth. The coral sunrise sits like a light source near the edge, while the clear middle keeps everything airy. Add fine holo shimmer inside the jelly so it catches the sun without turning sparkly everywhere.
Apply a sheer clear jelly gel or a milky clear with fine shimmer. Build coral gradient only on the last 20-25% of the nail, softening upward a little. Finish with a thick, glossy top coat and make sure the jelly doesn't flood the cuticle.
Pro tipLeave a tiny "window" at the center - don't overblend the coral into the clear.
Watch outDon't let the coral reach the cuticle; it kills the jelly look fast.
3. Sunset Skyline Gradient with Tiny Wave Cutouts
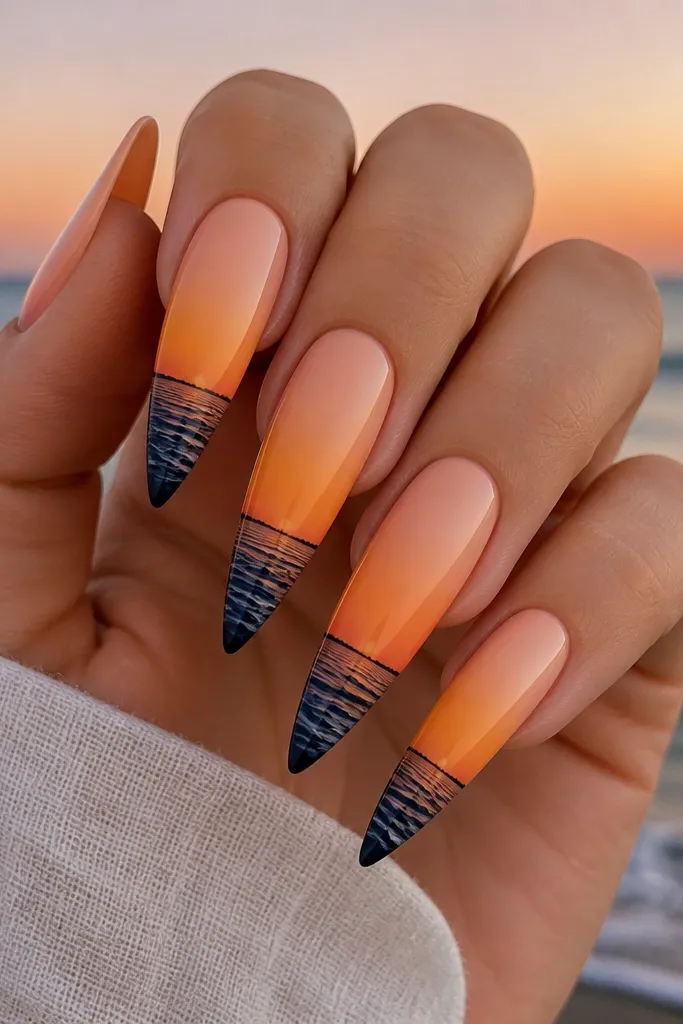
This set reads coastal because the art is small and placed at the right height. The skyline silhouette anchors the sunset so it doesn't float. Dark navy or espresso-brown wave cutouts add contrast - that's the "high end" trick that makes pastel gradients pop.
Paint a peach-to-orange gradient first, then cure. With a striping brush, add a 1-2 mm thin shoreline line near the tip. Add wave shapes underneath using a slightly thicker dark gel and a dotting tool for the crests.
Pro tipKeep the wave art consistent across fingers, but vary size by 1 mm so it looks intentional, not stamped.
Watch outAvoid using black - it looks too harsh against orange and can look like a sticker.
4. Palm Shadow Sunset with Negative Space Half-Moons
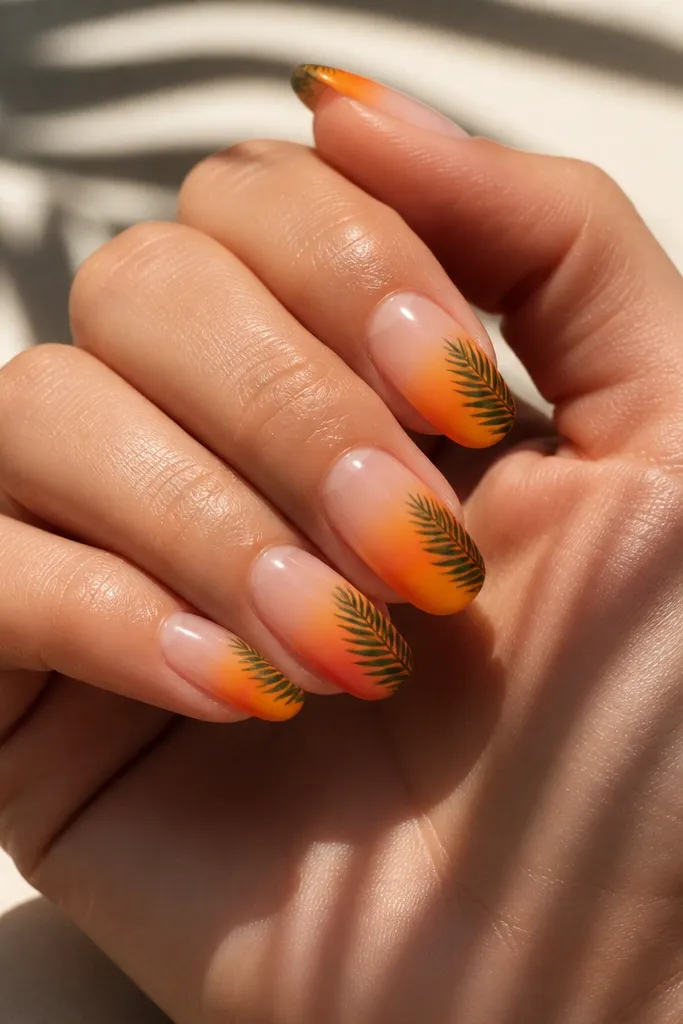
Negative space makes this look designer because it gives the eye a clean break. The palm shadow is the luxury detail - thin fronds over orange feel like a real sunset behind trees. Use a deep olive or forest green, not bright neon, so it stays coastal and grounded.
Apply a sheer nude base, then fade orange over the outer half of the nail using a small makeup sponge. Leave the cuticle half-moon bare or fully clear. Paint palm fronds with a fine liner brush, starting with thick stems and tapering fronds.
Pro tipIf your fronds go shaky, do them in two passes: stem first, then add the thin branches.
Watch outDon't fill the negative space with glitter; it makes the set look crowded.
5. Seashell Chrome Sunset (Pink-Orange Shift)
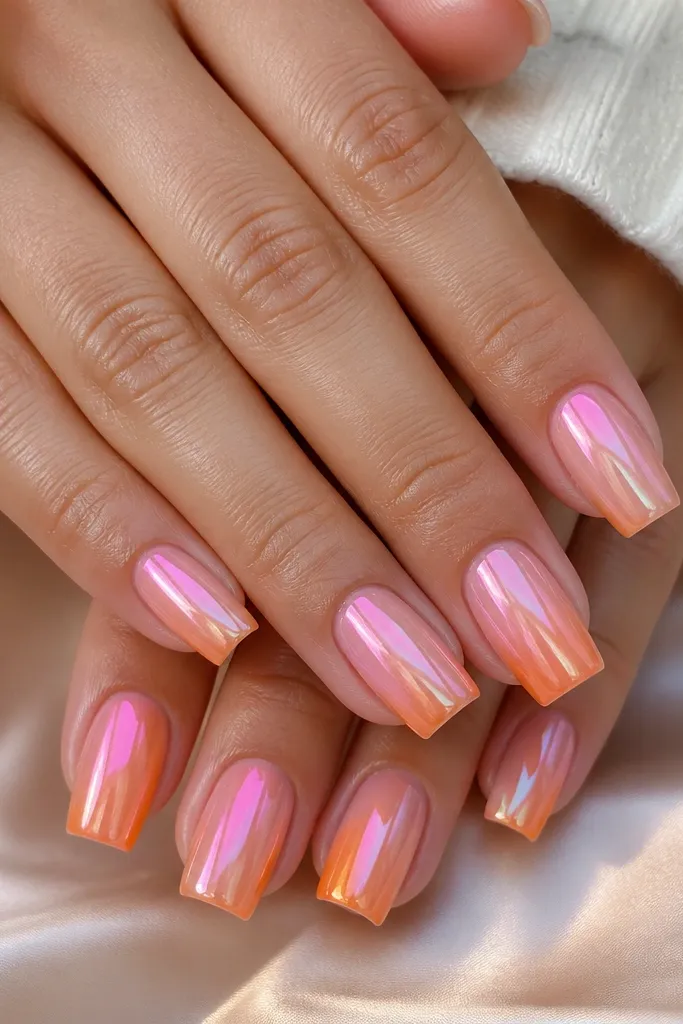
Chrome makes sunset nails feel instantly high end because the light moves across the surface. This particular look works because the base gradient is still visible under the chrome. A pink-orange shift chrome powder looks like shell under sun - it's not the same as silver chrome.
Build a pink-to-orange gradient, then apply a tacky chrome base layer. Rub seashell pink-orange chrome powder over the whole nail and seal with a non-wipe or gentle top coat. Keep the chrome finish smooth; too much pressure creates streaks.
Pro tipPress chrome lightly with a foam applicator, then stop. Overworking streaks show in close-up photos.
Watch outDon't use a matte top coat over chrome unless you want a different look; it dulls the shift.
6. Sunset French with Thin Gold Coastline
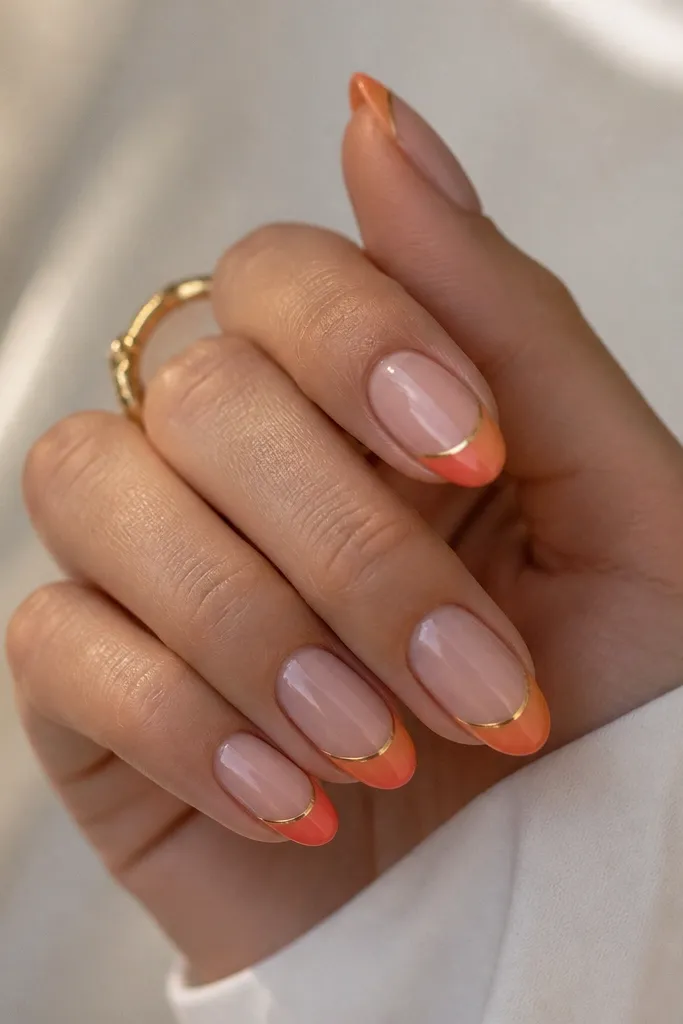
French placement is what makes this feel polished. The sunset tip is the color hit, and the gold coastline line gives it that "boutique manicure" finish. Keep the gold line thin and curved - thick lines look like costume jewelry.
Use a French guide sticker or a steady-hand template to keep the tip shape even. Paint sunset gradient only inside the French area. Add gold gel line 1 mm above the tip edge, then top coat glossy.
Pro tipIf your French smile line is uneven, fix it with a second thin pass of orange - don't scrape and restart the whole nail.
Watch outAvoid thick French tips on short nails; they swallow the gradient.
7. Sunset Marble with Burnt Orange Veins
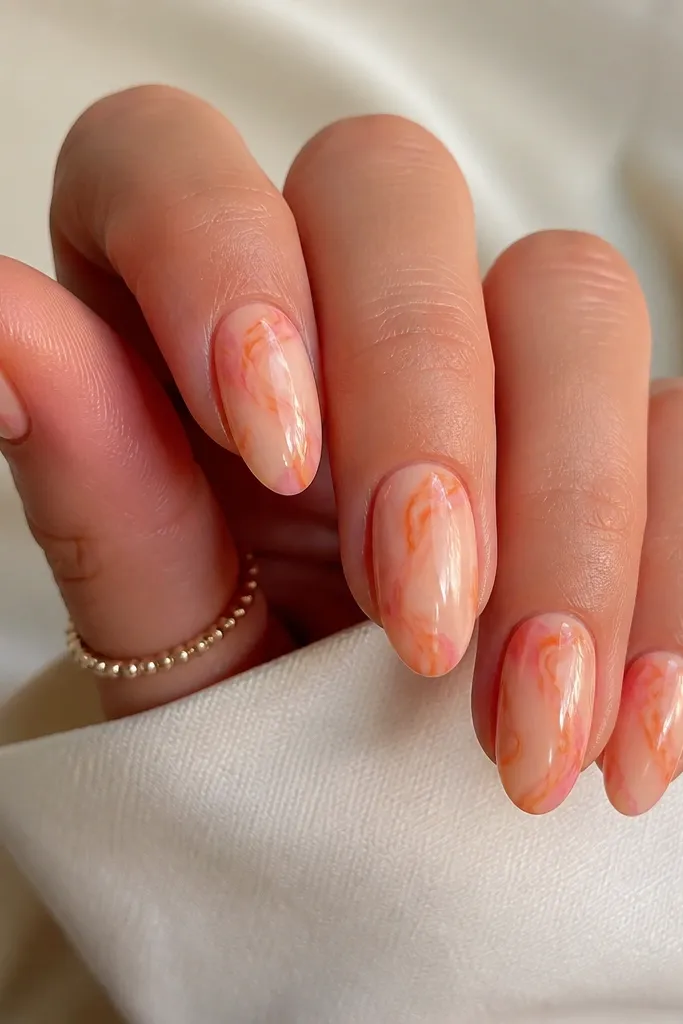
Marble reads luxury when the veining is controlled and the base stays sheer. Burnt orange veins over peach look like sunset clouds caught in stone. Add a whisper of pink at the perimeter so the marble feels sunlit, not flat.
Start with a sheer peach gel, then drag burnt orange gel in thin ribbons using a small nail art brush. Add a few pink micro-veins near the tip edge. Seal with a glossy top coat and cap the free edge so the marble stays smooth.
Pro tipWork in thin lines. Thick marble veins look like craft paint and break the high-end illusion.
Watch outSkip stamping plates for this one; freehand veining looks more natural.
8. Coral Sunset Dots Over Nude Base
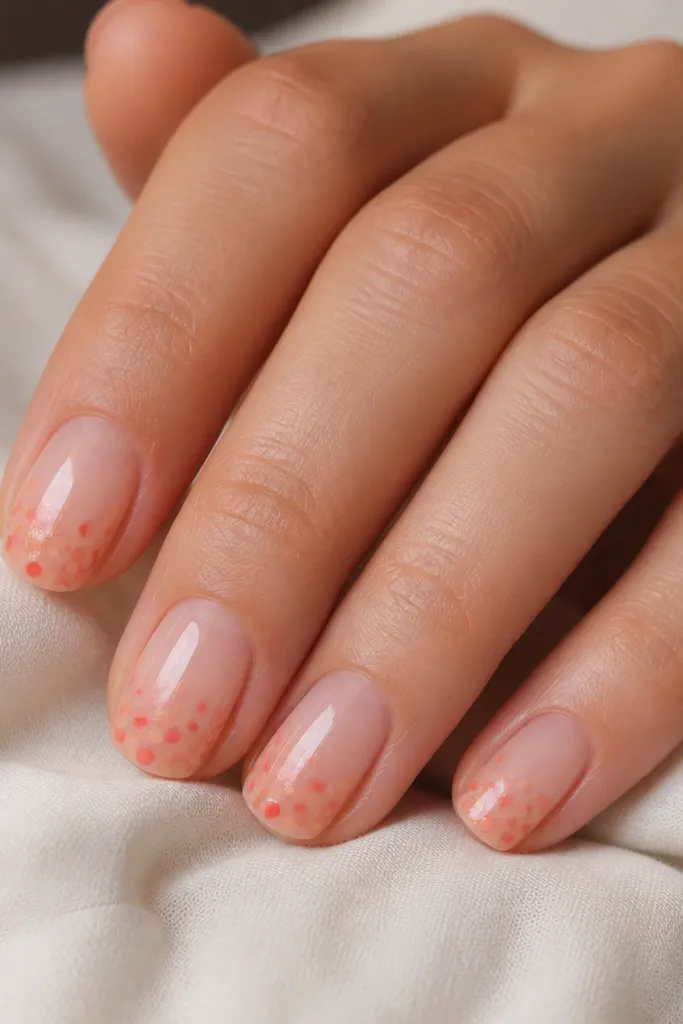
Dots are the easiest way to look intentional fast, and they photograph well because they create texture. The secret is the fade: fewer dots near the cuticle, denser near the tip, plus gold micro-specks only in the brightest area. This gives a sunset effect without needing a perfect gradient.
Paint a nude base, then use a dotting tool to place peach dots around the tip area. Add orange dots in the center of the cluster and finish with tiny gold accents on the brightest dots. Cure between colors if your gel smears.
Pro tipUse two dot sizes - larger dots for the outer layer, smaller dots for the inner "sun."
Watch outDon't line up dots in a perfect grid; it looks mechanical.
9. Ocean Wave Ombre with Navy Edge
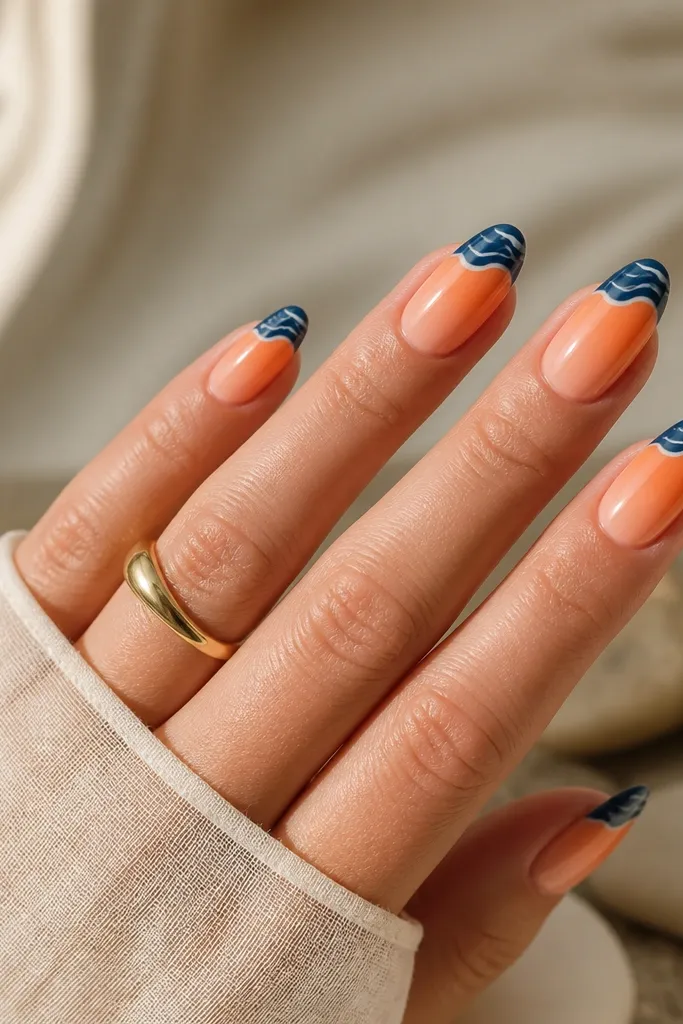
Adding navy turns sunset into "coastal summer" instantly. The navy edge looks like the ocean at dusk, and thin white wave lines make it feel alive. Keep the navy as a band, not a full dark nail, so the sunset stays the star.
Make a peach-to-orange ombre first. Then paint a navy band at the tip edge about 15-20% of the nail length. Draw 2-3 curved white lines through the navy band and top coat glossy.
Pro tipPull white lines with a liner brush in one smooth stroke. Multiple short strokes look scratchy.
Watch outAvoid using heavy white gel that turns chalky; use a thin, opaque line gel.
10. Sunset Starburst with Gold Foil Flecks
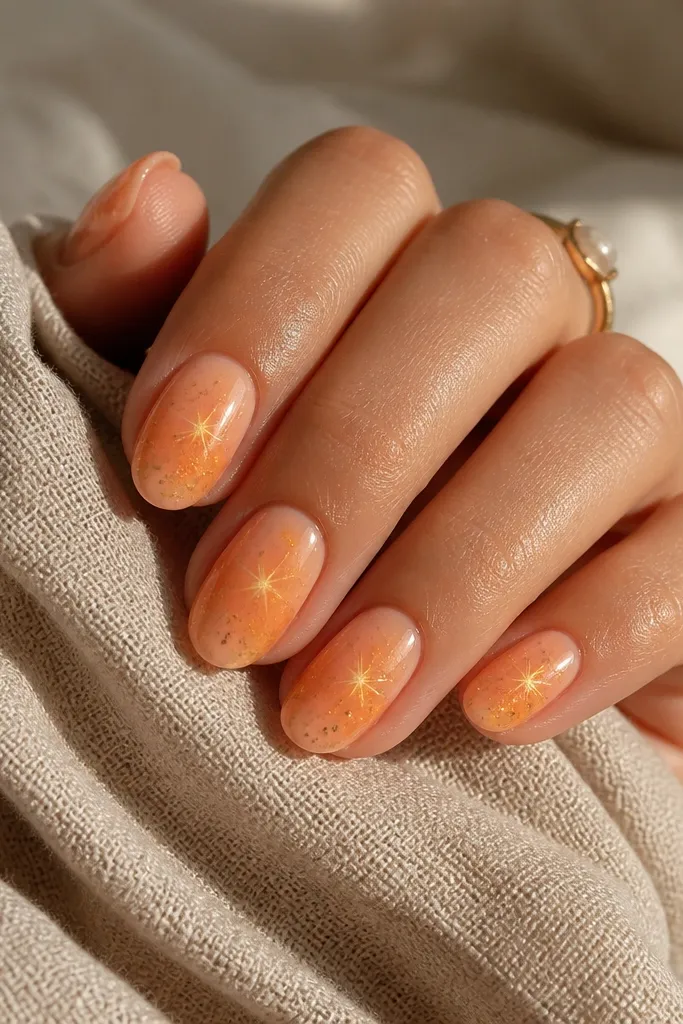
Starbursts add drama but stay wearable when you keep them small. The foil flecks bring that beach sparkle without making the whole nail glittery. Use warm gold foil, not cool silver, so it matches the orange and coral tones.
Paint a light gradient across each nail. Place a small starburst using thin lines radiating from a dot with a fine brush. Dab gold foil flecks with gel tack so they look scattered, then seal with a glossy top coat.
Pro tipMake the starburst slightly off-center toward the tip. That placement looks more natural in photos.
Watch outDon't put foil right against the cuticle - it lifts and looks messy.
11. Beach Sunset Negative Space Half-Moon Tips
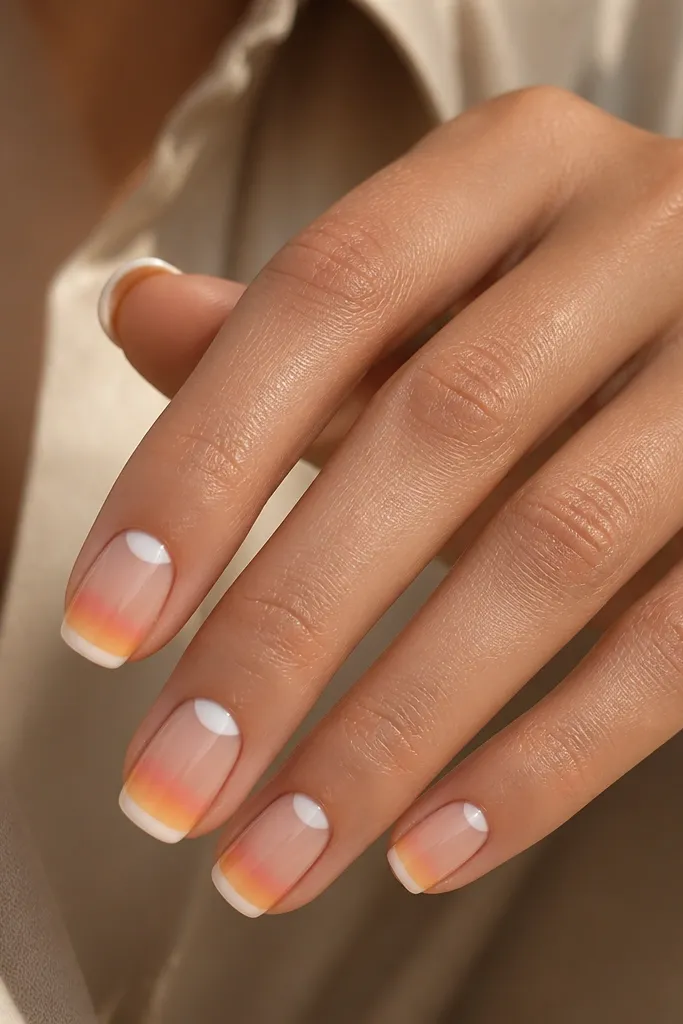
This is the cleanest way to do sunset without full art. The negative space half-moon makes the set look fresh, and the tip gradient keeps the focus where you want it. Crisp stopping lines are what make it feel high end.
Apply a nude base. Use striping tape to mask a half-moon at the cuticle. Paint sunset gradient on the tip only, then remove tape before curing the last layer.
Pro tipAfter you remove tape, clean the edge with a tiny brush dipped in gel cleanser so the border stays sharp.
Watch outDon't freehand the stop line - sloppy edges make it look like a beginner manicure.
12. Satin Dusty Sunset with Matte Top + Glossy Stripe
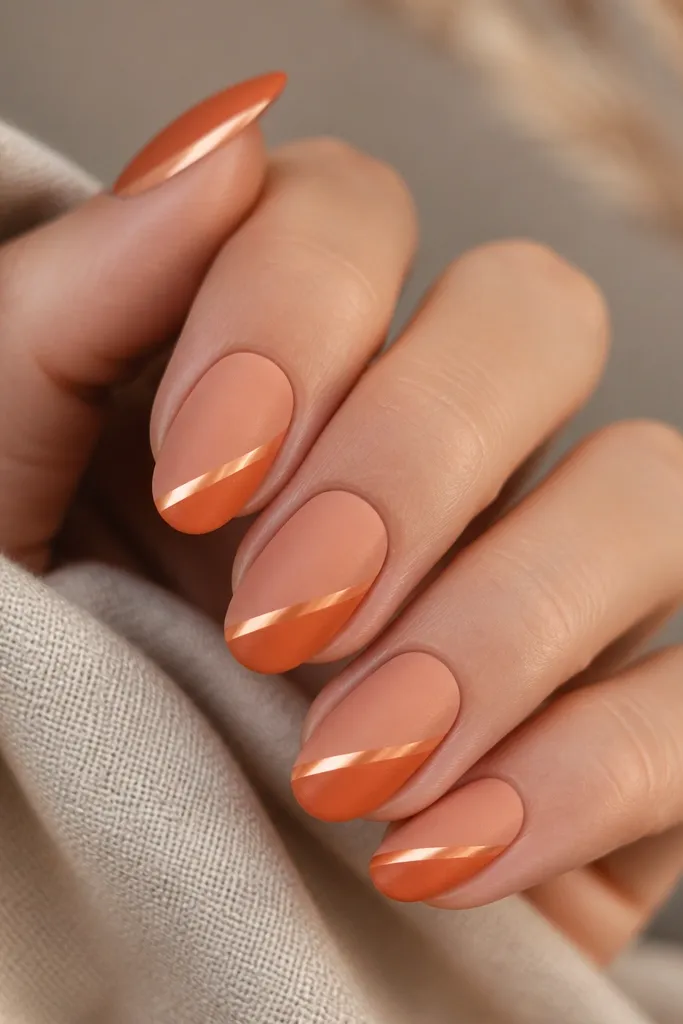
Matte makes sunset colors look like dried sand and gives a designer, editorial feel. The single glossy stripe brings contrast and keeps it from looking flat. This combo looks luxe because it mixes finishes on purpose.
Build a soft gradient with dusty peach and muted orange. Seal with matte top coat. With a fine brush, paint a diagonal glossy stripe using a clear gel with a tiny amount of gold shimmer, then cure.
Pro tipKeep the stripe width under 1 mm. Wider stripes look like paint, not light.
Watch outDon't matte over fingerprints or gel smears; matte shows everything.



