
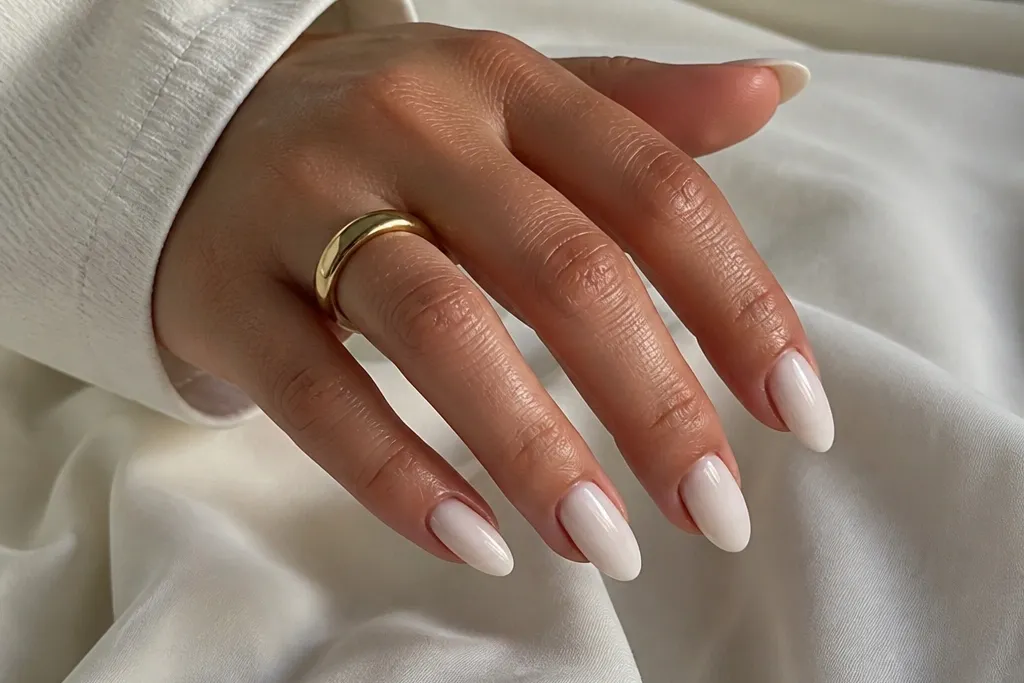
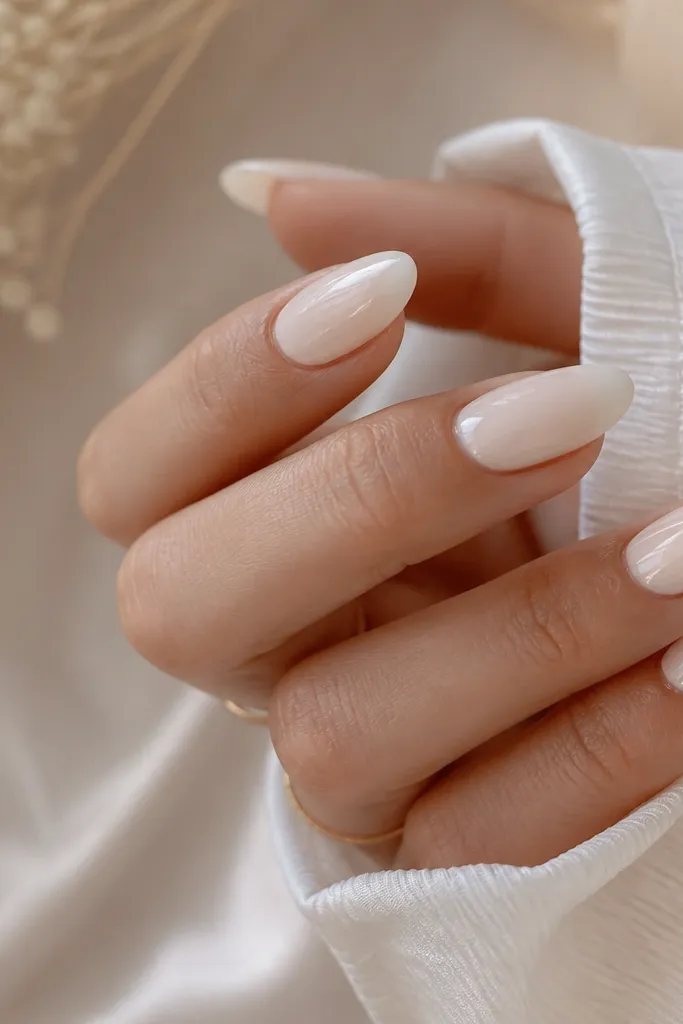
1. Milk Glass Micro French
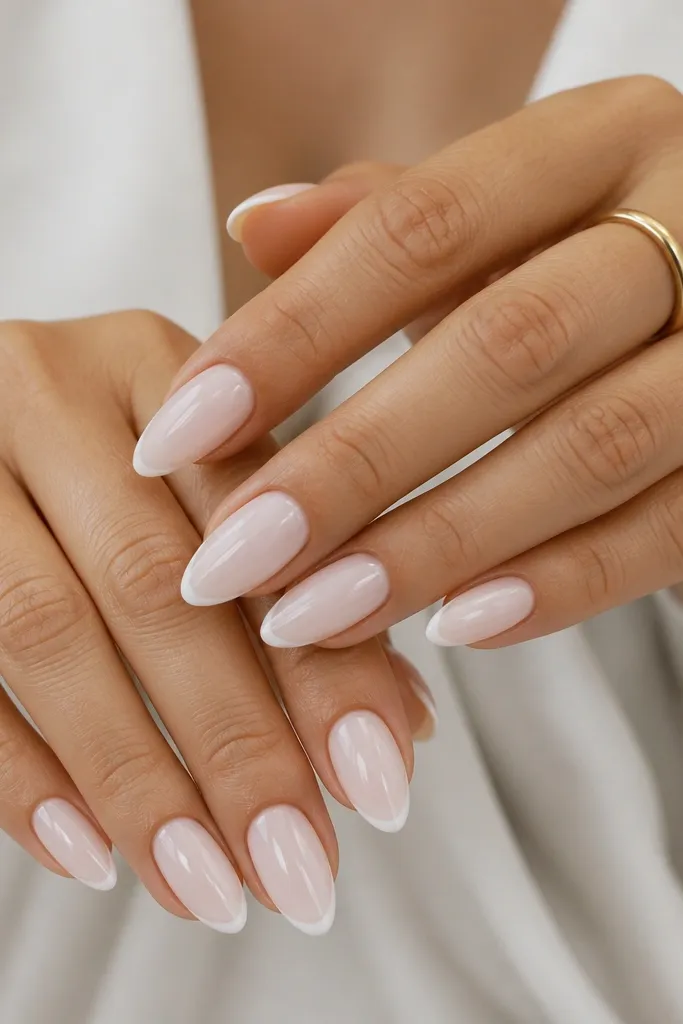
This is the milky white almond nails aesthetic for people who want "done" without big decoration. The base stays translucent so your nail still looks natural, and the micro French adds structure at the tip. Because the line is thin, the almond shape looks longer instead of blocky. Glossy top coat makes the white look like it's glowing from underneath.
Start with 2 thin layers of milky builder gel or milky gel polish, curing each layer fully. Draw the micro French using a striping brush - keep the line about 1 mm wide at the center and taper at the sides. Seal with a medium-viscosity glossy top coat so it self-levels on the curve.
Pro tipDo a quick "smile line map" with the brush by lightly touching the sidewalls first, then connect the tips. It keeps the line even on both hands.
Watch outDon't use opaque white for the tip - it turns the set flat and cheap-looking.
2. One-Ring Pearl Drop Accent
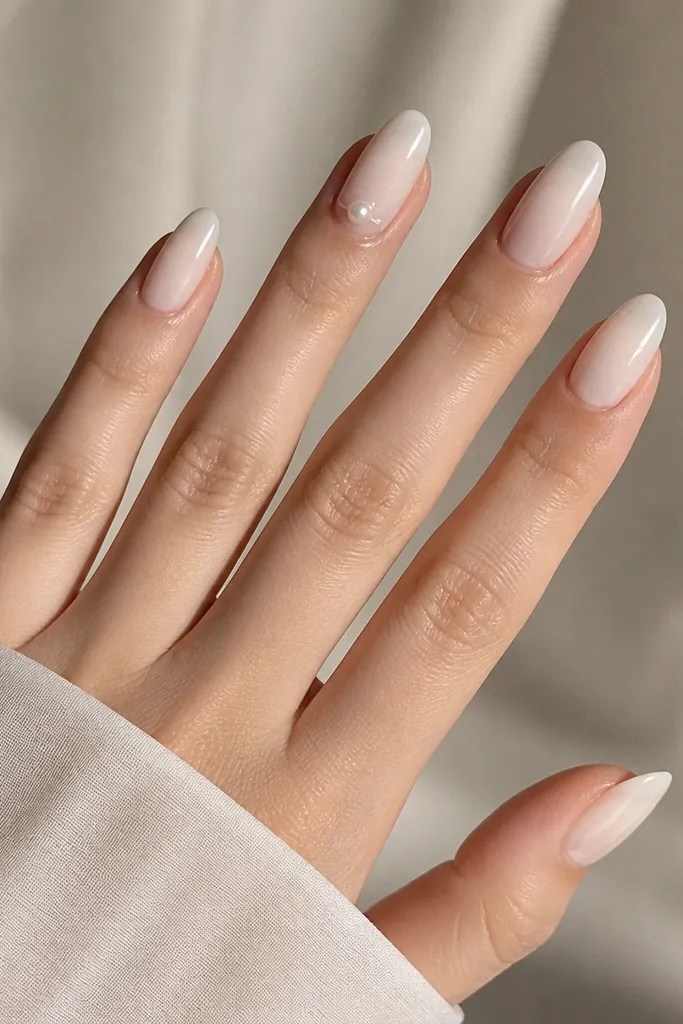
One pearl on the ring finger reads elegant fast because it's a single focal point. The milky base softens the contrast, so the pearl doesn't look like costume jewelry. The glossy "drop" around it mimics a gel dome and makes the pearl look set, not pasted. It's classy for weddings, dinners, and office days.
Use 2-3 sheer milky coats over the whole nail for a uniform glow. Place a 2.0-2.5 mm pearl about 2-3 mm down from the cuticle. Add a thin gel outline around the pearl, cure, then cap with a clear top coat dome over the accent.
Pro tipPress the pearl onto a tacky gel spot first, then cure before capping - it prevents sideways slipping.
Watch outDon't put pearls too close to the tip or the almond point - it looks top-heavy.
3. Milky White With Barely-There Rose Gold Foil
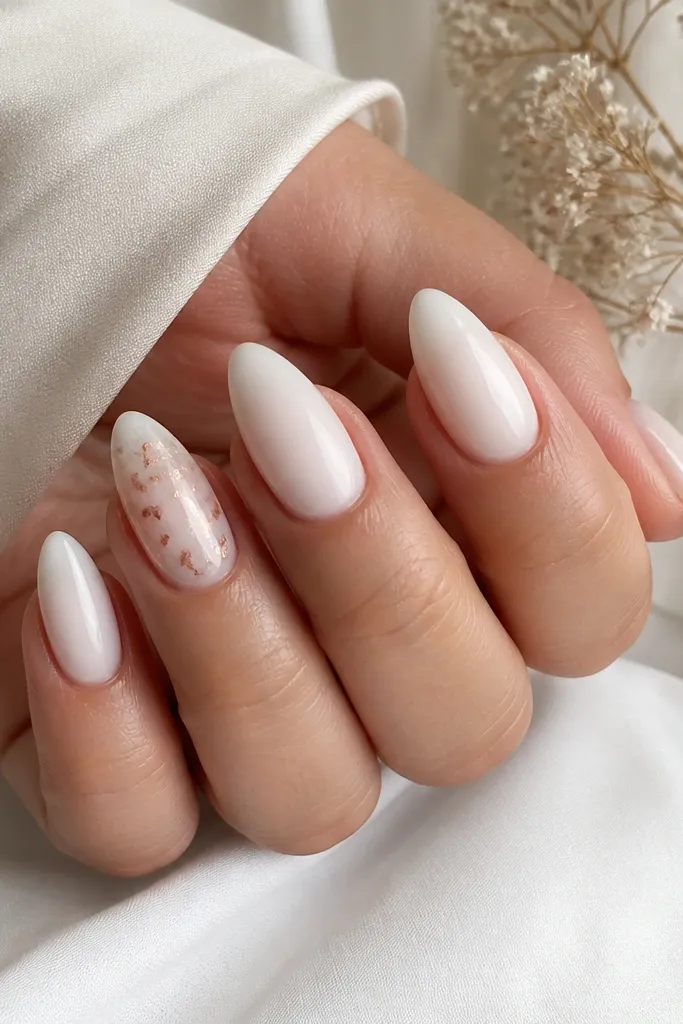
Foil works when you keep it sheer. The milky base makes rose gold look softer and warmer instead of bold. Place flakes in the center third of the nail so the almond apex stays visually clean. This looks expensive because the foil catches light in tiny sparks without turning the nail busy.
After milky base layers, dab rose gold foil glue (or tacky layer) only in the center band. Press foil lightly, then wipe away excess so you keep negative space. Finish with glossy top coat, and cap the foil edges gently with a thin clear layer.
Pro tipUse a small makeup wedge to press foil - it grips the curve without smearing.
Watch outDon't fully cover the nail with foil; solid coverage kills the "milky glow" effect.
4. Matte Milky White With Glossy Cuticle Halo
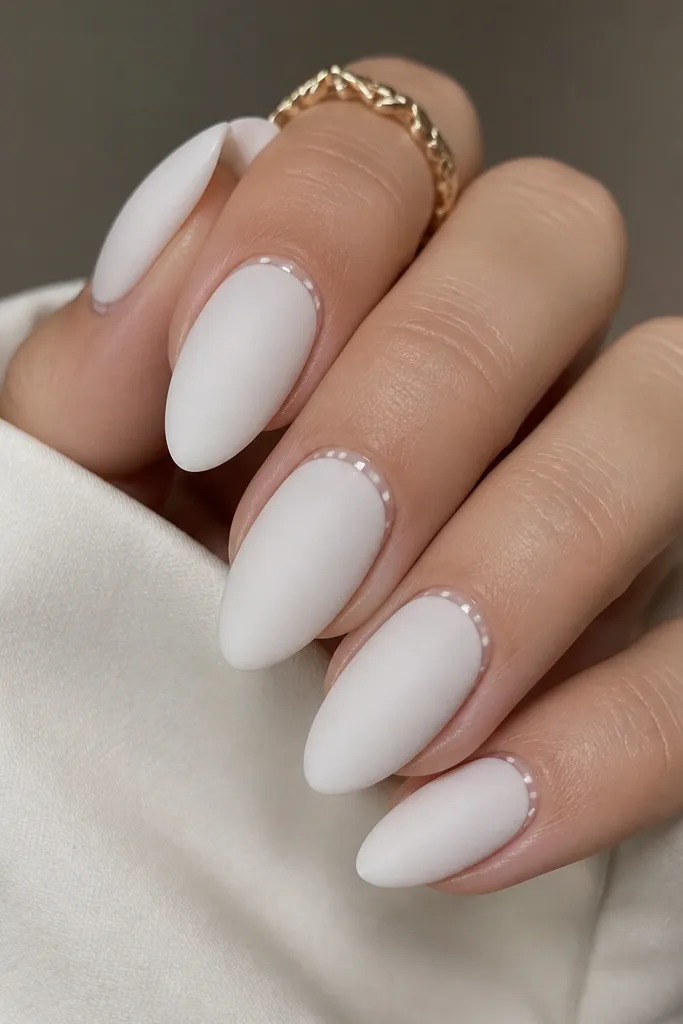
This set flips the texture contrast in a way that looks really clean. Matte milky white hides tiny ridges and makes the color look soft, not shiny. The glossy cuticle halo brings back light at the base, which frames your nails and makes the almond shape feel sharper. It photographs well because the halo reflects without looking chunky.
Build the nails with milky white layers, then apply a matte top coat over the whole nail. With a fine brush, paint a thin glossy gel ring around the cuticle area, cure it, then keep the rest matte. If your matte top gets too dusty, buff lightly between coats.
Pro tipLeave a 0.5 mm gap between the halo and the skin so it doesn't flood and lift.
Watch outDon't over-thicken the halo line; wide rings make it look like a sticker.
5. Milky White Reverse French With Clear Center
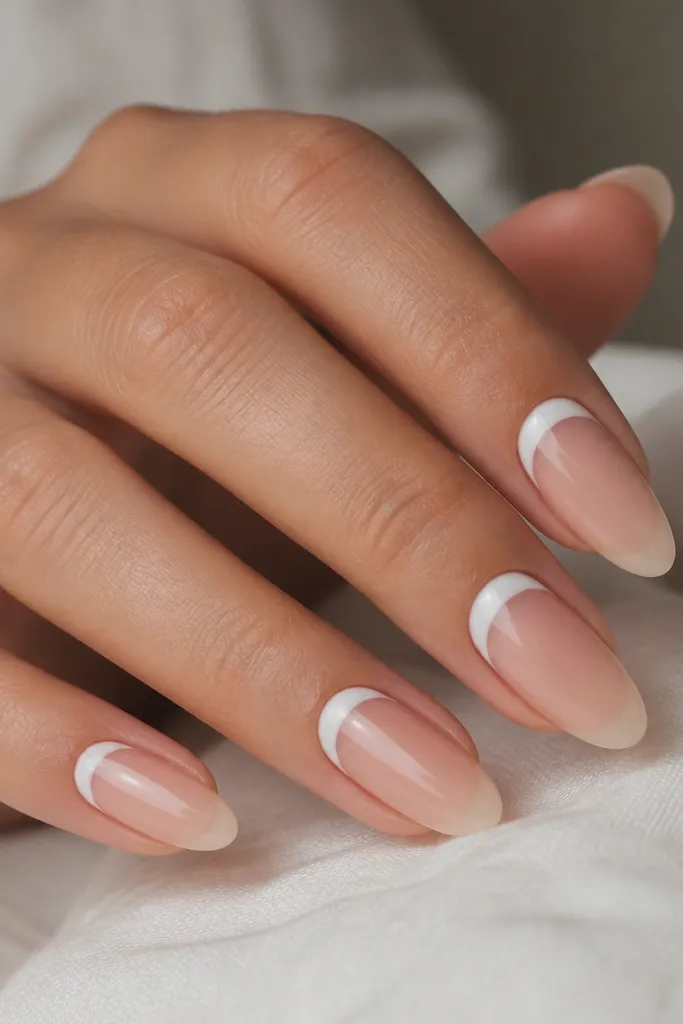
Reverse French looks elegant because it draws attention to the cuticle line, not the tip. Keeping the center sheer keeps the set light and modern. Milky white in the reverse placement flatters because it softens the cuticle area and makes it look intentional. The clear center also helps nails look longer.
Apply a sheer base coat (or clear builder gel) first. Create a thin milky white band along the cuticle curve, leaving the center transparent. Feather the edges with a damp brush so the transition looks smooth, then seal with glossy top coat.
Pro tipUse a nail art tape strip as a guide for the cuticle curve - it keeps the band consistent across nails.
Watch outDon't bring the milky band all the way to the sidewalls - it drags attention to side skin.
6. Milky White Ombre Into Soft Cloud Tips
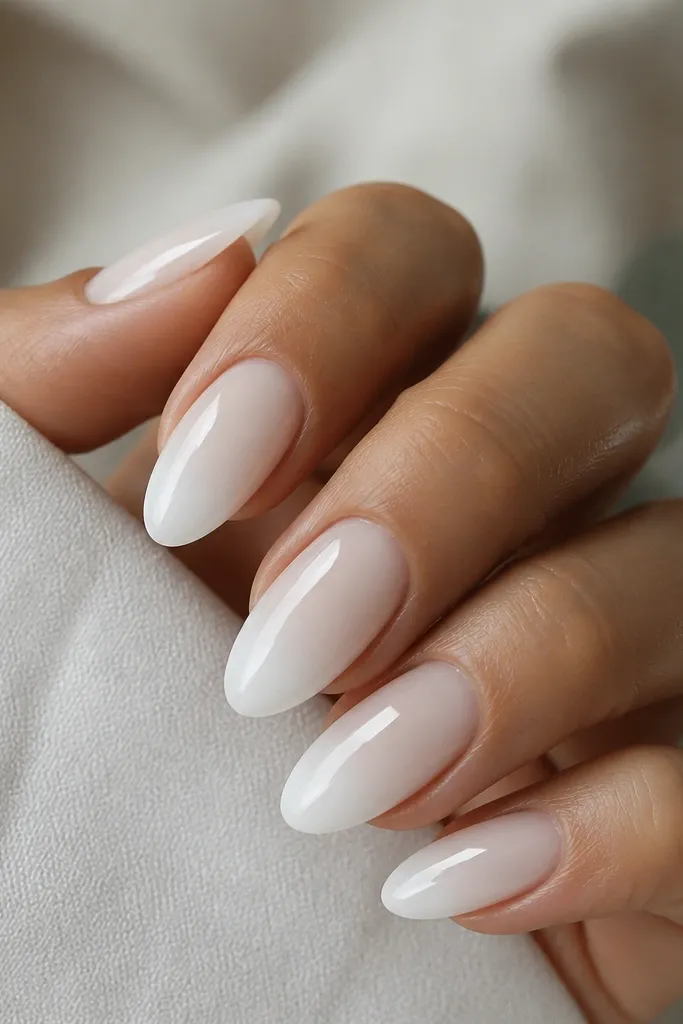
Ombre makes almond nails look smooth and long because the color shift follows the nail curve. This version stays gentle: the tip is slightly brighter, but not stark. The cloud fade gives a softer edge than a French line, and it looks great on shorter almonds. Glossy finish keeps the "milky" effect luminous.
Use a sheer milky base layer first. Sponge milky white gel from the mid-point toward the tip, then blend downward with a clean sponge or ombre brush. Cure each layer if you need it built up, then cap with glossy top coat for a glassy surface.
Pro tipWipe your sponge between nails. If you reuse pigment, the gradient turns muddy.
Watch outDon't use one thick layer for the ombre - it creates a ridge on the almond curve.
7. Thin Milky White Lines Over Nude Core
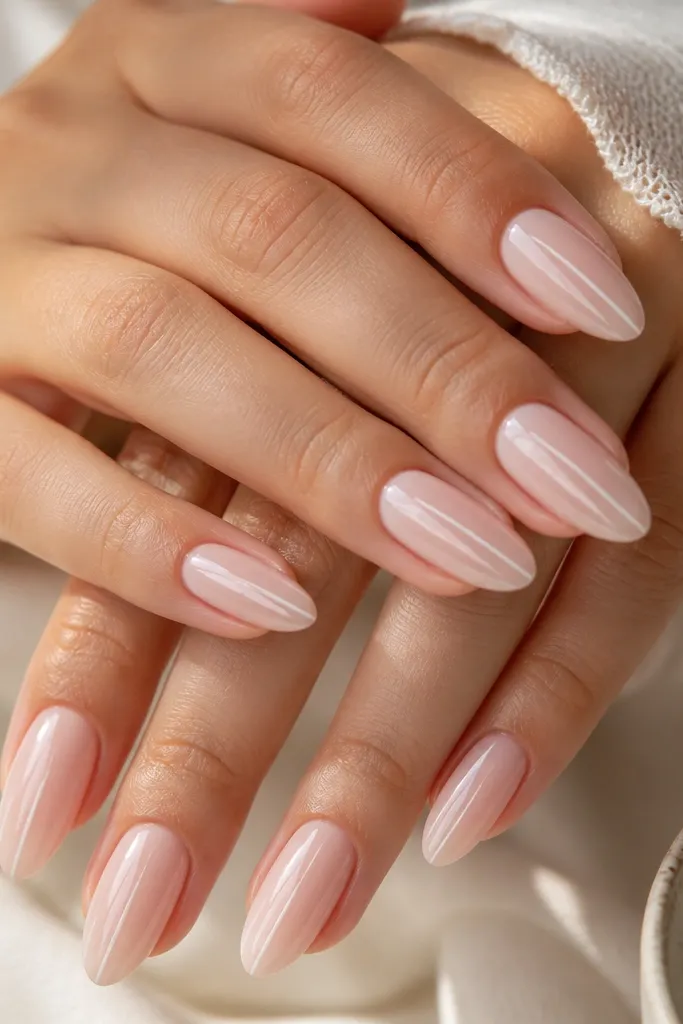
This design looks elegant because it uses milky white as "sculpting." The nude core keeps it natural, and the thin vertical lines guide the eye upward, which makes the almond shape look extra refined. The milky lines are opaque but narrow, so you get contrast without heavy decoration. It's a great option if you want white but don't want full milky coverage.
Start with a nude builder gel or nude polish base. Paint 2-3 vertical milky white lines per nail using a striping brush, keeping them about 0.5-0.8 mm wide. Space the lines so they don't crowd - leave 1-2 mm gaps. Finish with glossy top coat to lock in the lines.
Pro tipUse a matte palette or silicone mat so milky gel doesn't spread too fast on your brush.
Watch outDon't let the lines touch the sidewalls - it makes nails look narrower in a bad way.
8. Milky White Star Confetti (Tiny Only)
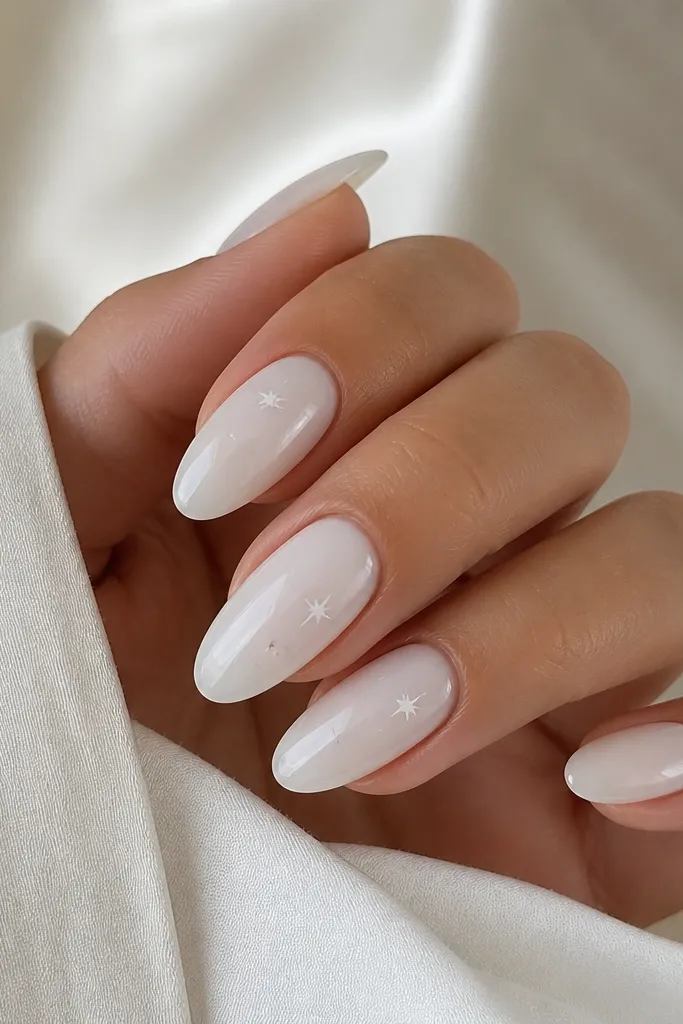
Confetti looks cute when it's microscopic. Tiny star accents on milky white keep the vibe airy instead of party. Because the stars match the white tone, the set stays cohesive. It's a good "date night" option that still reads classy in daylight.
Apply milky white base layers. Add micro star charms or star glitter in a few spots only - I place 3-5 pieces on one accent nail, centered. Cure if using gel glitter, then top coat with a smooth, medium-viscosity layer to avoid bumps.
Pro tipIf you're using loose glitter, mix it with a clear gel medium first so it lays flat.
Watch outDon't cover the nail in stars; the milky white loses its clean look.
9. Milky White Half-Moon With Clear Sparkle
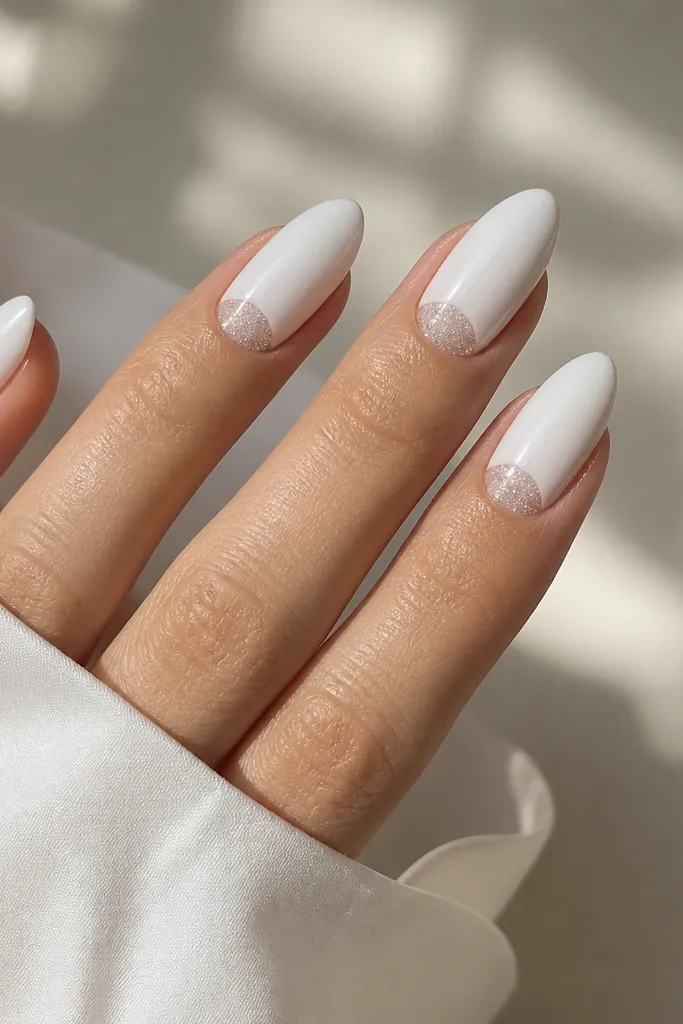
Half-moons feel elegant when the rest of the nail is milky and smooth. Leaving the cuticle area clear keeps it airy and makes your cuticles look neat. The fine clear sparkle gives dimension without adding extra color. This is one of the few ways I like "sparkle" on white because it stays subtle.
Build milky white over the whole nail. Use a small curved stencil or freehand with a detail brush to carve out a half-moon shape about 2 mm tall. Fill the negative space with clear glitter gel, cure, then cap with glossy top coat.
Pro tipUse a lint-free wipe right before top coat so glitter doesn't grab onto dust.
Watch outDon't make the half-moon too big; oversized gaps make nails look unfinished.
10. Milky White Marble Vein Accent
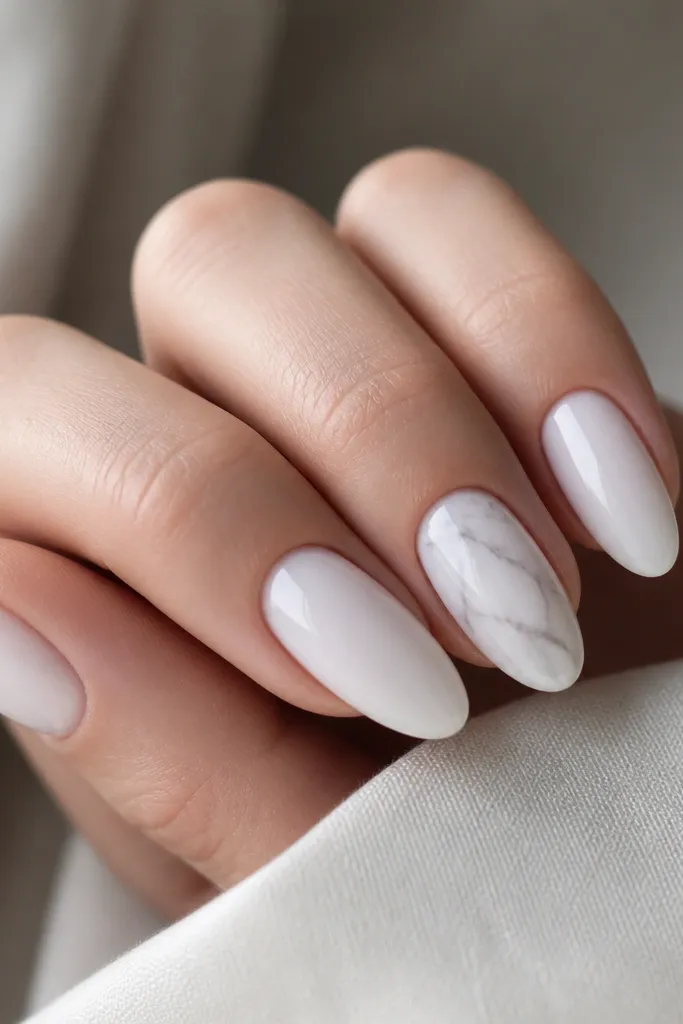
Marble works because it adds movement while staying in the milky family. The veins should be soft gray-white, not bold black. One marble accent nail keeps the set classy and stops it from looking like it came from a sticker sheet. Glossy top coat makes the veins look suspended in gel.
Do full milky white on all nails. On one accent nail, drag a thin brush with a slightly thicker milky gel mixed with a tiny amount of gray pigment. Add 2-3 vein lines that branch lightly, then feather the ends. Cure and top coat with a gel that levels well.
Pro tipPractice the vein pattern on a spoon or plastic nail tip first - marble is all about hand pressure.
Watch outDon't outline the veins heavily; thick borders ruin the marble effect.
11. Milky White Chrome Tip Fade
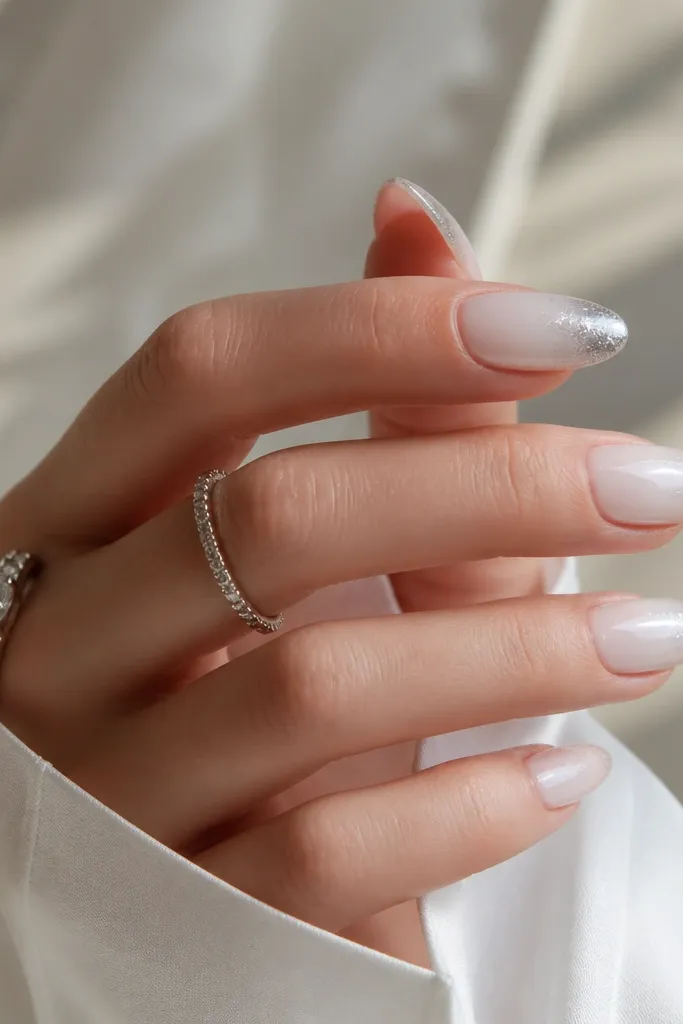
Chrome looks best on almond when it fades, not when it's a flat stripe. The milky base makes the silver look cooler and cleaner. A tip fade keeps the almond silhouette sharp and gives that "fresh manicure" shine. It reads modern for parties but still works for everyday if you keep chrome only on the top third.
Apply milky white base layers and cure. Apply chrome gel only to the top third, then use a chrome powder applicator to buff in a fade toward the center. Wipe off excess, cure, then seal with a glossy top coat that works with chrome (some top coats dull it, so test).
Pro tipUse a small amount of chrome powder and build it. Too much makes the fade look harsh.
Watch outDon't chrome the whole nail; full coverage makes it look metallic and less "milky white" aesthetic.
12. Milky White With Pearly Opal Dot Grid
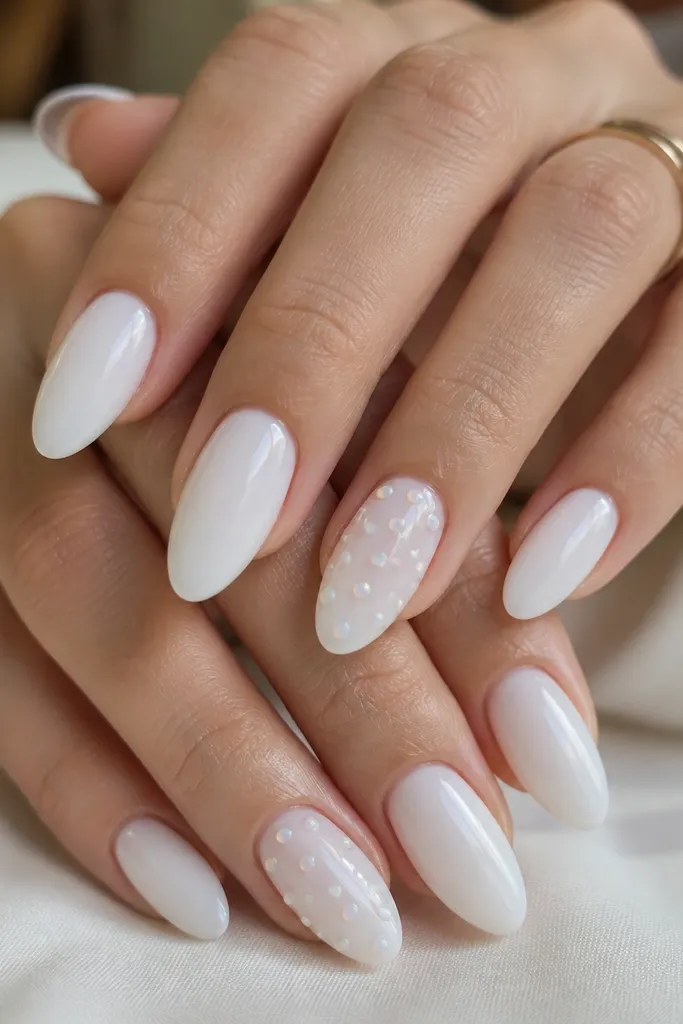
A dot grid looks intentional when the dots are tiny and spaced. Opal dots catch light with a soft rainbow shift, but on milky white they stay subtle. This design gives texture without looking heavy like rhinestones. It's a great option if you want something different but still wearable.
Base with milky white. Use a dotting tool to place 6-10 opal pearl dots on one or two nails, arranged in a diagonal grid pattern from mid to tip. Cure each dot if you're using gel pearls, then cap with clear top coat so the grid feels smooth.
Pro tipKeep the dots at least 1 mm away from the cuticle so the pattern doesn't look like an accident.
Watch outDon't pack the dots too close; tight clusters look like bumps.



