
1. Skin-Match Nude Pink Full Coverage with Wet-Look Shine
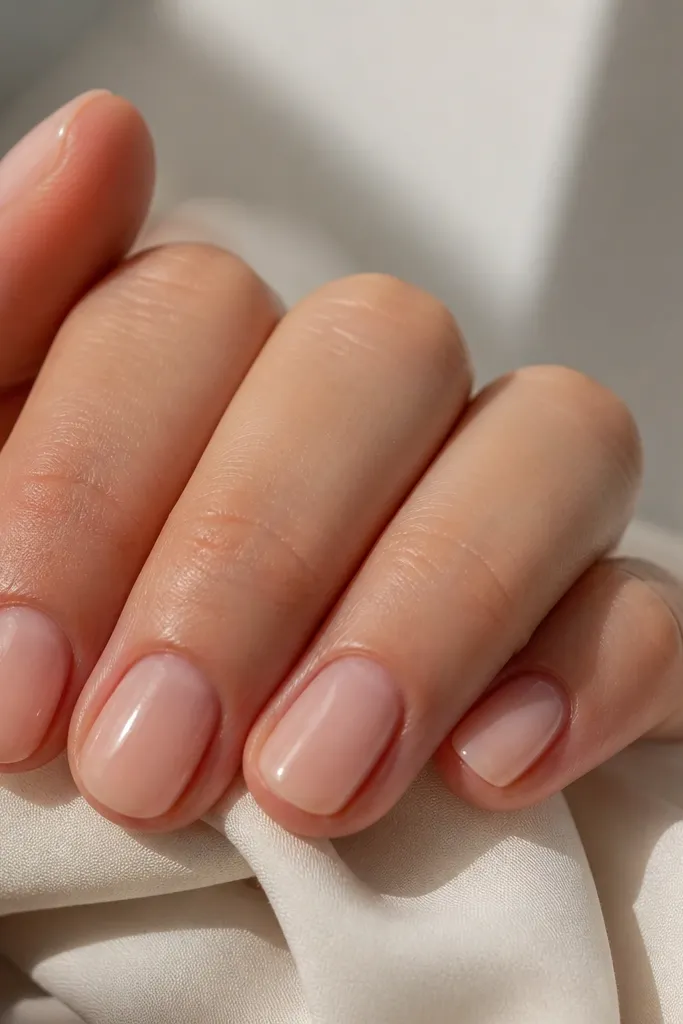
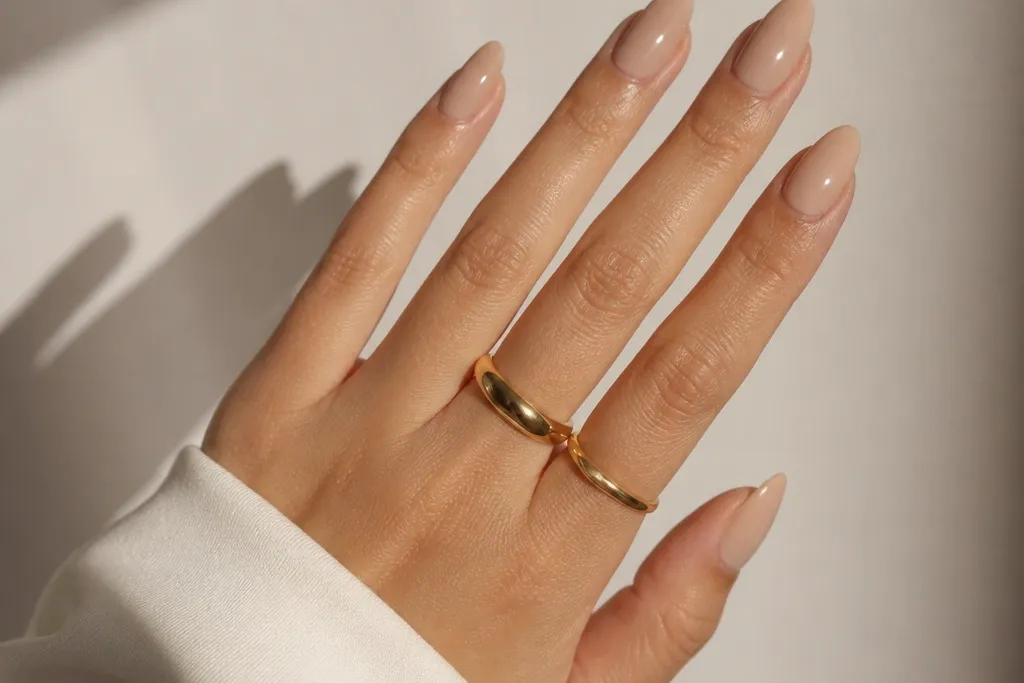
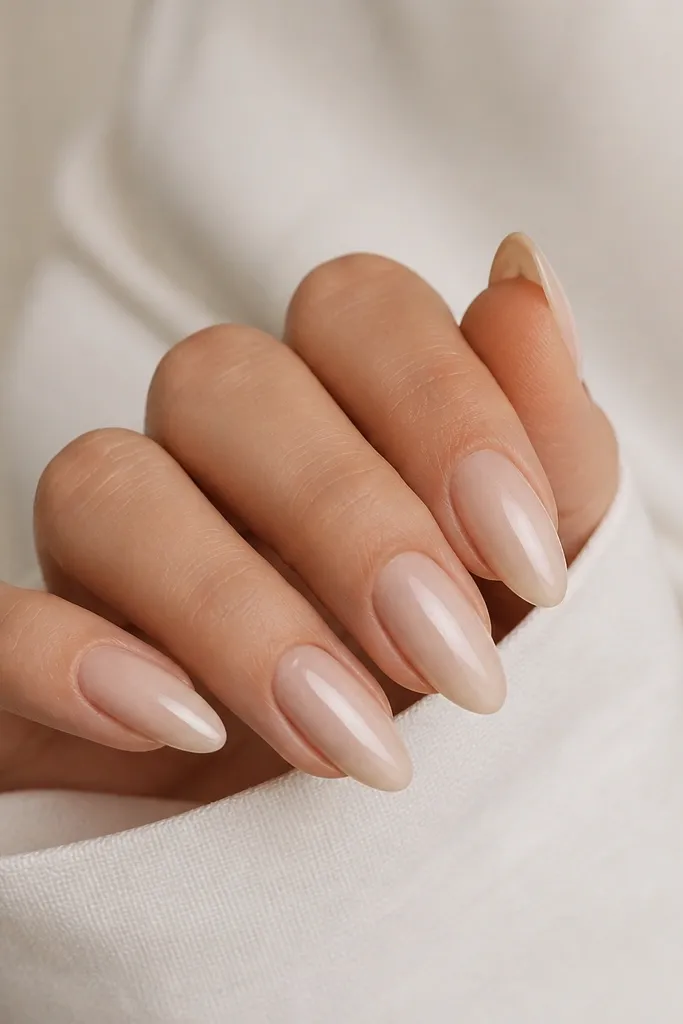
This is the base set I recommend when you want modern minimalist nude acrylic nails that look expensive with zero decoration. The nude pink is slightly warm, almost like your natural nail bed color with a soft rosy tint. Full coverage helps hide staining, but the key is that it still looks light at the cuticle, so your nails don't look heavy. The wet-look gloss makes the nude read clean and hydrated.
Use a nude pink acrylic that's semi-sheer, then build in thin layers: one light layer over the nail plate, a second for strength, and a final smoothing layer. File the surface to a soft glassy finish, then seal with a high-shine top coat. Keep the free edge short, around 1.5-2 mm, for that "minimal" feel.
Pro tipAfter filing, wipe with a lint-free pad and dehydrator - if you skip this, the gloss can look dull over nude.
Watch outAvoid a thick, opaque pink layer right at the cuticle; it looks chalky and grows out fast.
2. Micro French Nude Pink Line on Sheer Base
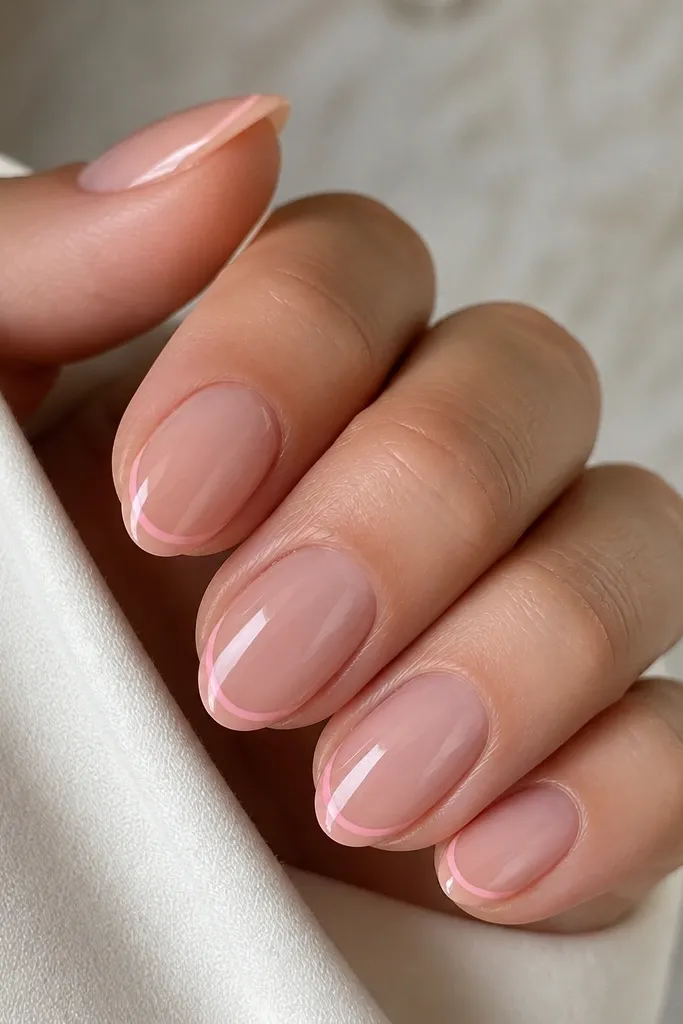
Micro French is minimalist nail art with structure. The sheer base keeps the nude soft, while the micro line gives the nail a tidy boundary so it looks longer without adding bulk. I like using a nude pink that's one shade deeper than the base so the line shows up but stays subtle. The result reads clean even when your nails grow.
Apply a sheer nude builder, then use a striping brush or a French guide to place the line only 1-2 mm tall. Keep the line centered and slightly rounded at the corners. Finish with a full gel-like top coat for a smooth edge feel.
Pro tipUse the brush tip to "drag and lift" for the last stroke - it avoids a thick blob at the corner.
Watch outDon't make the French line too wide; wide tips make nude sets look like press-ons.
3. Nude Pink Ombré from Cuticle to Tip
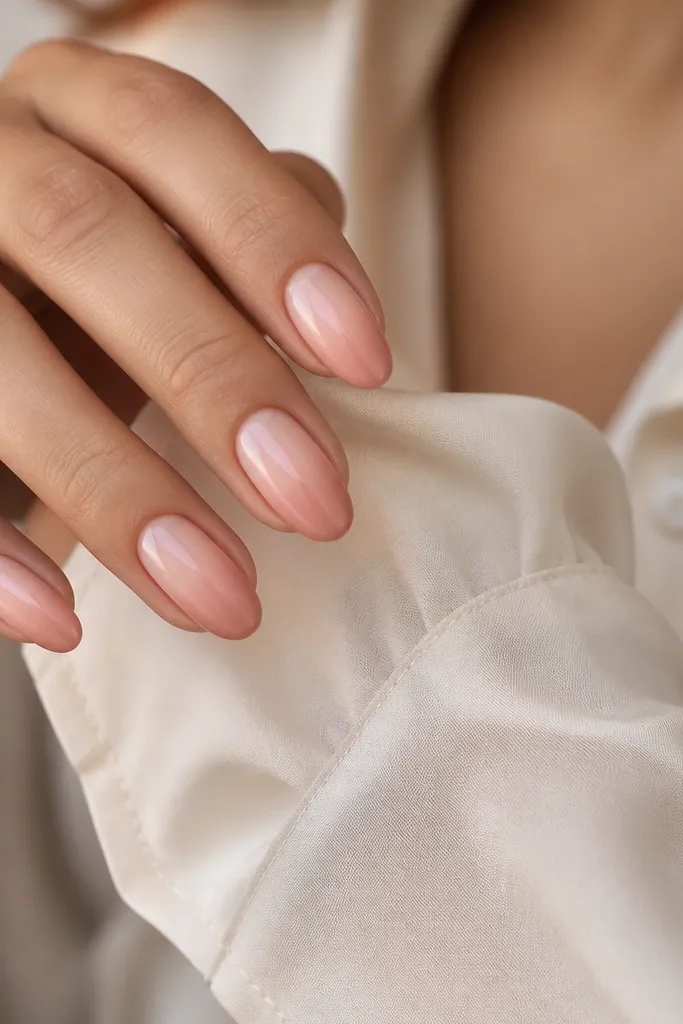
A nude ombré keeps the look modern because the color transition is smooth, not banded. The pale cuticle makes the nail bed look longer, and the tip deepening adds shape. I love ombré for hands that have ridges or uneven natural color - the gradient disguises it. It also hides grow-out better than full opaque color.
Start with a sheer nude base, then blend a slightly deeper nude pink acrylic powder at the tip area. Work in a few thin layers, then file to feather the gradient so there's no hard line. Top coat makes the blend look seamless and glassy.
Pro tipIf your ombré looks streaky, it's usually too thick a layer - file sooner between layers.
Watch outAvoid a harsh horizontal boundary; it turns into stripes instead of an ombré.
4. Half-Moon Nude Pink with Clear Center
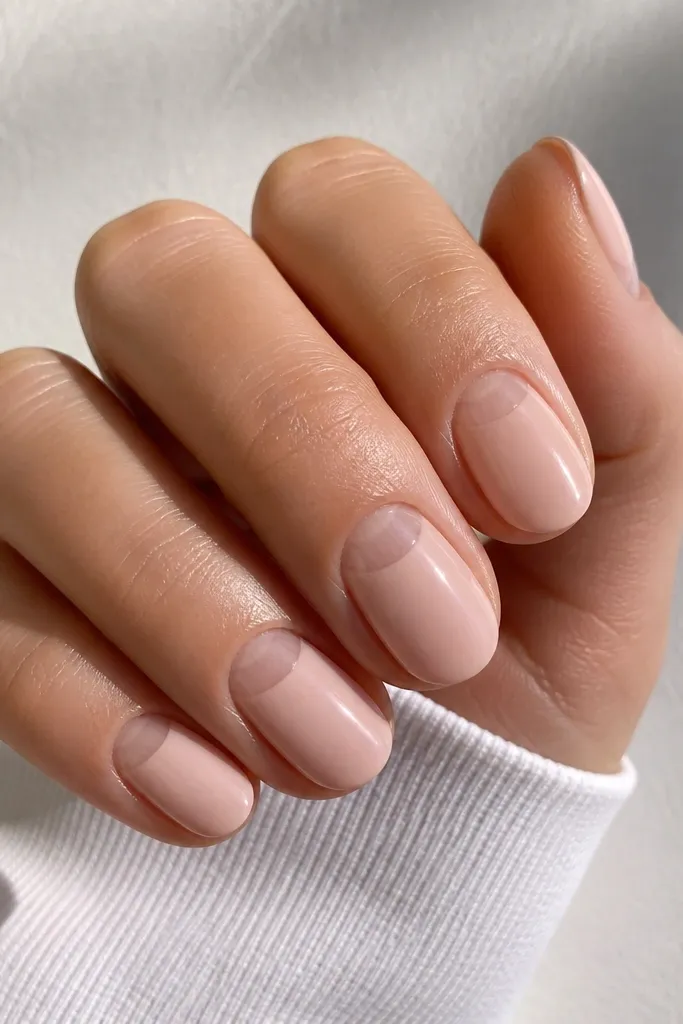
This design is minimalist but still reads "done." The nude half-moon frames the nail bed and makes the cuticle area look intentional. Keeping the center clearer makes the set look lighter and more airy. I use a nude pink that matches your natural nail bed - warm rose looks best against most skin tones.
Build a sheer base first, then place nude pink only along the cuticle curve. Use a small detail brush to trace the half-moon shape, then keep the edge soft by blending with a thin top layer of sheer acrylic. File the surface flat so the half-moon doesn't create a raised rim.
Pro tipTrace your natural half-moon shape lightly with a marker on a practice nail first, then copy it.
Watch outDon't overfill the center with pink; it stops looking like a half-moon and turns into a thick cuticle patch.
5. Nude Pink Glossy Builder with One Side Micro Stripe
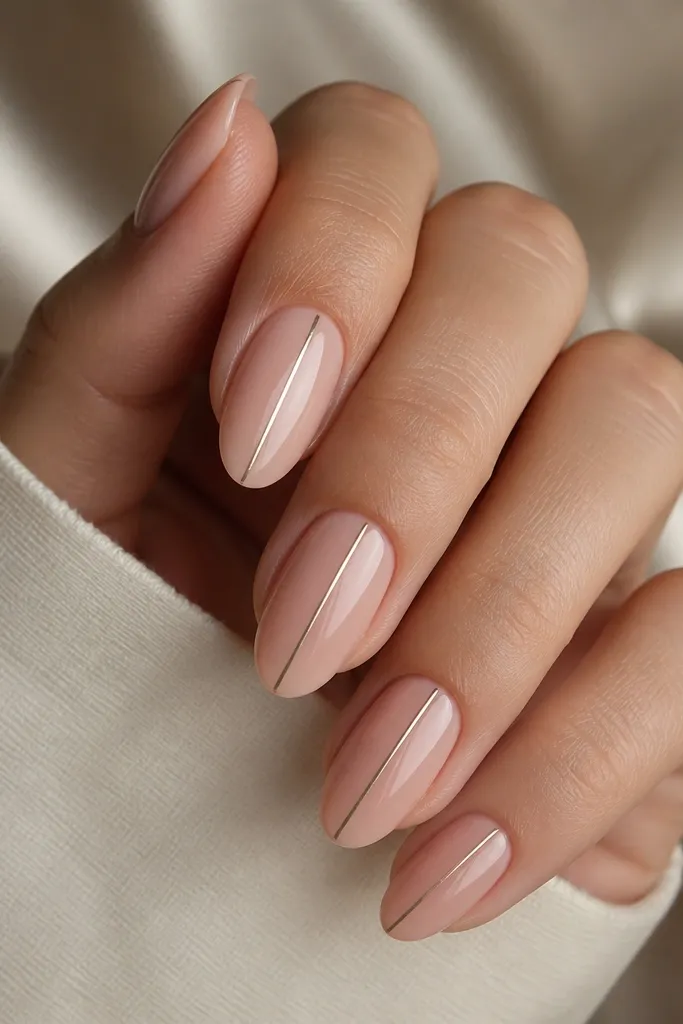
One micro stripe keeps modern minimalist nude acrylic nails from looking plain. The stripe gives a vertical line that makes nails look slimmer and longer without adding much color. I prefer a champagne-gold stripe over bright chrome because it stays soft. The nude base does the heavy lifting while the stripe just adds direction.
Use nude pink builder for the whole nail, then place a thin strip of gold foil tape or a metallic striping gel on one side. Keep it centered on the nail's sidewall, not in the middle. Seal with top coat, then cap the edges so the stripe doesn't snag.
Pro tipPress the stripe down with a flat tool for 3-5 seconds before top coat.
Watch outDon't put the stripe too close to the free edge; it catches and starts lifting.
6. Muted Rose Nude with Matte Cuticle and Gloss Tips
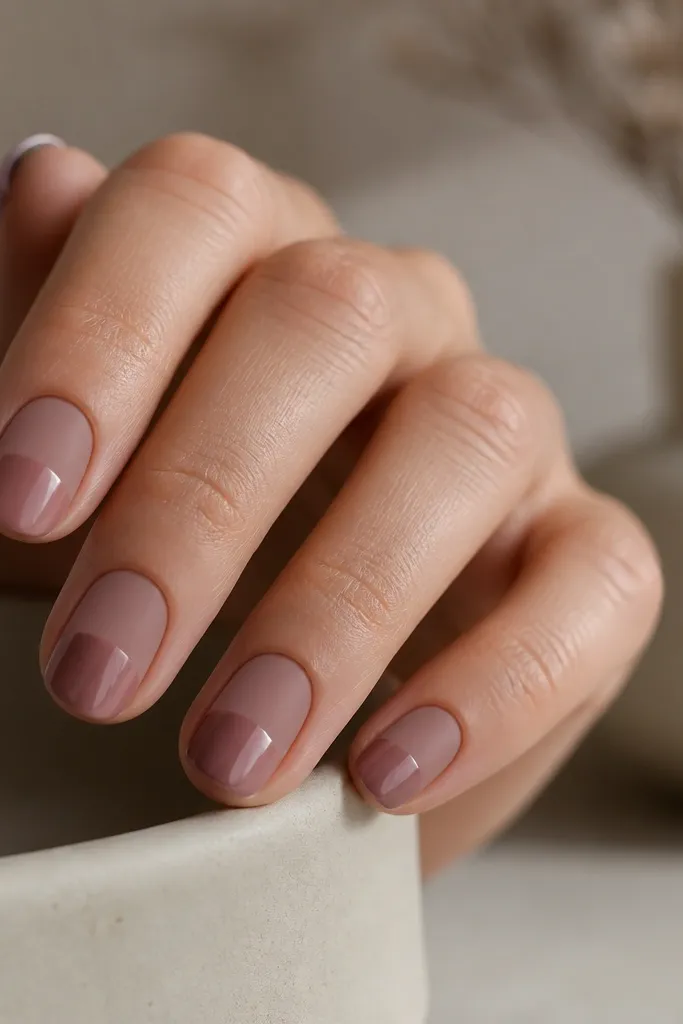
This is the minimalist "texture contrast" look that still feels soft. Matte at the cuticle hides tiny surface imperfections, and glossy at the tip keeps the set light and polished. The muted rose nude is less pink than you think - it looks natural rather than rosy candy. The split finish makes even a simple nude set look intentional.
Apply nude builder and top coat everywhere first, then cure. After curing, buff the cuticle half lightly and apply a matte top coat only on that section, leaving the tip glossy. Keep the split line diagonal or curved slightly so it doesn't look like a sticker edge.
Pro tipBuff lightly with a very fine file (or a soft buffer). Deep buffing makes matte look patchy.
Watch outAvoid matte over thick acrylic dust; it grabs and looks gray.
7. Dewy Nude Pink with Tiny Clear Jelly Dot at the Cuticle
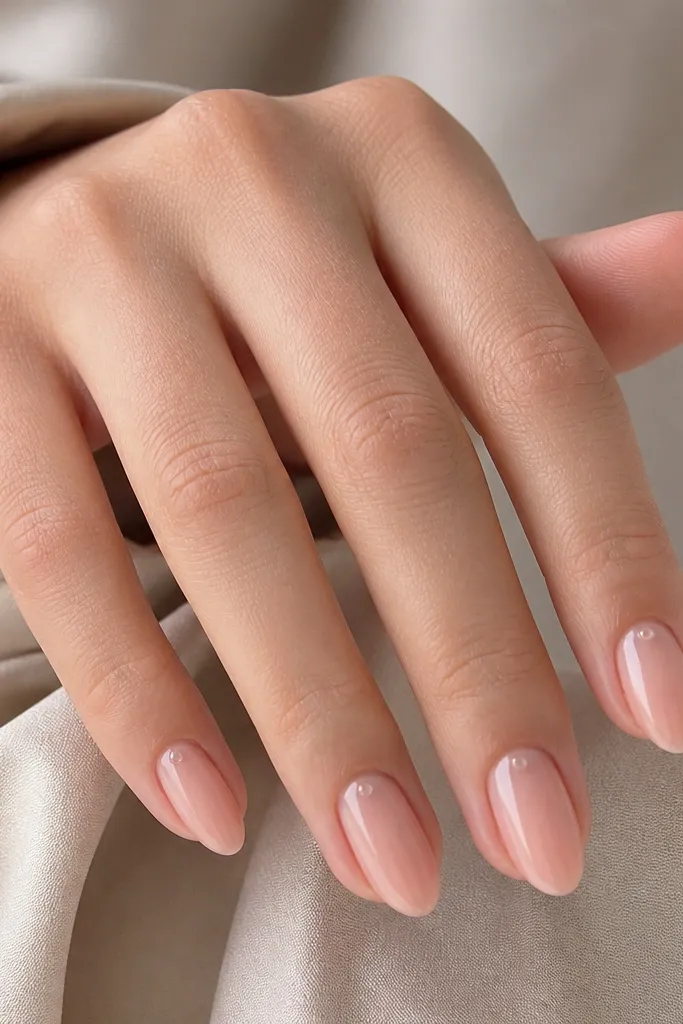
This is a cute minimalist trick: it adds a highlight spot without using glitter. The clear jelly dot looks like a dew drop and catches the light, so your nails look fresh even when they're grown out. I use clear builder gel or clear acrylic gel to make the dot domed and smooth. Nude pink stays the main color; the dot is just sparkle-by-light.
Build your nude pink acrylic, then place a micro-clear dot near the center of the cuticle. You want it small - about 0.5 mm - and domed so it reflects light. Cure fully, then top coat over it for a smooth surface.
Pro tipPlace the dot after your last filing so you don't sand it down.
Watch outAvoid dots that are too big; they read like random glue bubbles.
8. Nude Pink Acrylic with Barely-There Glitter in the Tip Arc
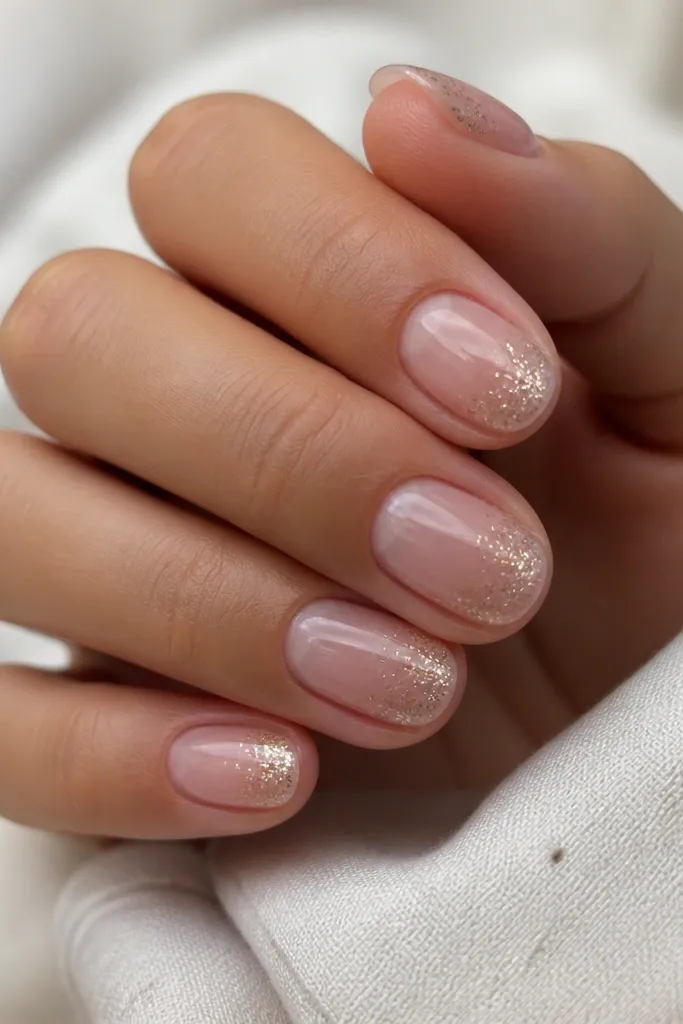
This looks like light catching fabric - not like full glitter nails. Concentrating glitter in a tip arc keeps it modern and reduces the "party" vibe. Use fine iridescent micro-glitter or a holographic dust that's almost transparent. The nude pink base keeps everything soft and wearable.
Apply nude pink builder first, then add a thin layer of clear acrylic gel at the tip arc area (about 1-3 mm from the free edge). Press micro-glitter into that area, then cap with clear acrylic gel so it's smooth. File lightly and top coat for mirror shine.
Pro tipUse a wax tool or silicone dotting tool to place glitter - it keeps fallout off the cuticle.
Watch outAvoid glitter all over the nail; it turns into gritty texture and looks messy.
9. Soft Nude Pink Skittle Nails with One Accent
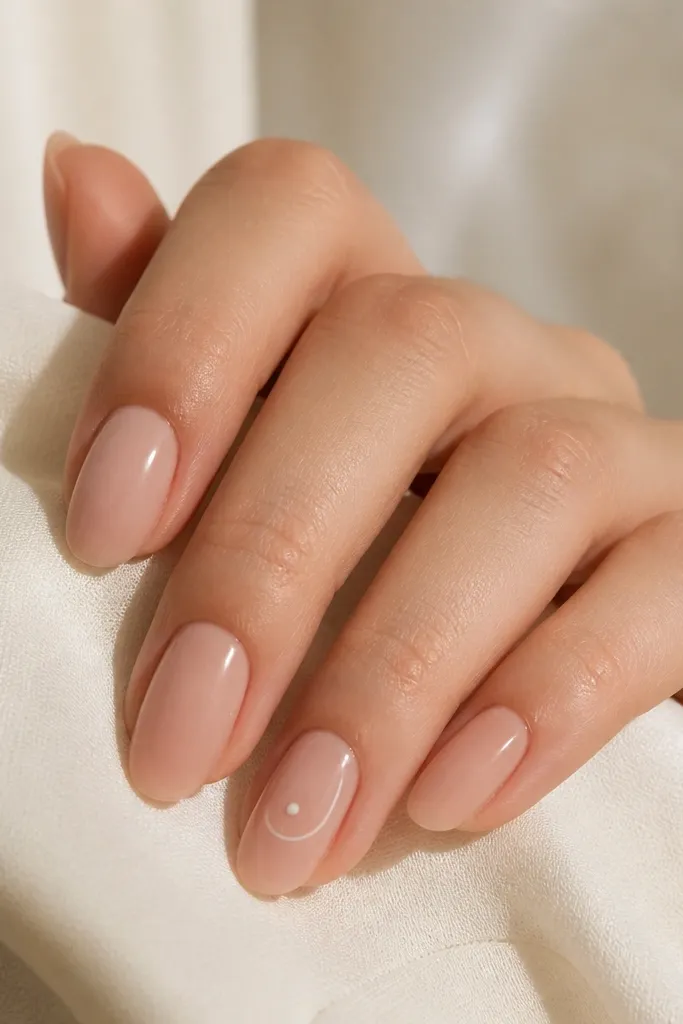
Skittle nails can still be minimalist if you change only one thing. I like doing four nails in the same nude pink and using the fifth as the accent, like a micro French line or one tiny dot. That keeps your hands from looking busy. The accent nail adds interest without breaking the clean nude theme.
Pick two nude pink powders: one slightly warmer, one slightly cooler. Use the warmer nude on four nails, then use the cooler nude on the accent nail and add a tiny micro detail. Keep the accent detail small enough that it fits within the nail bed width.
Pro tipMatch the accent shade to your undertone - warm skin loves warm rose nudes.
Watch outAvoid changing all five nails; that stops reading as modern minimalist.
10. Nude Pink Acrylic with Thin White Liner at the Tip Edge
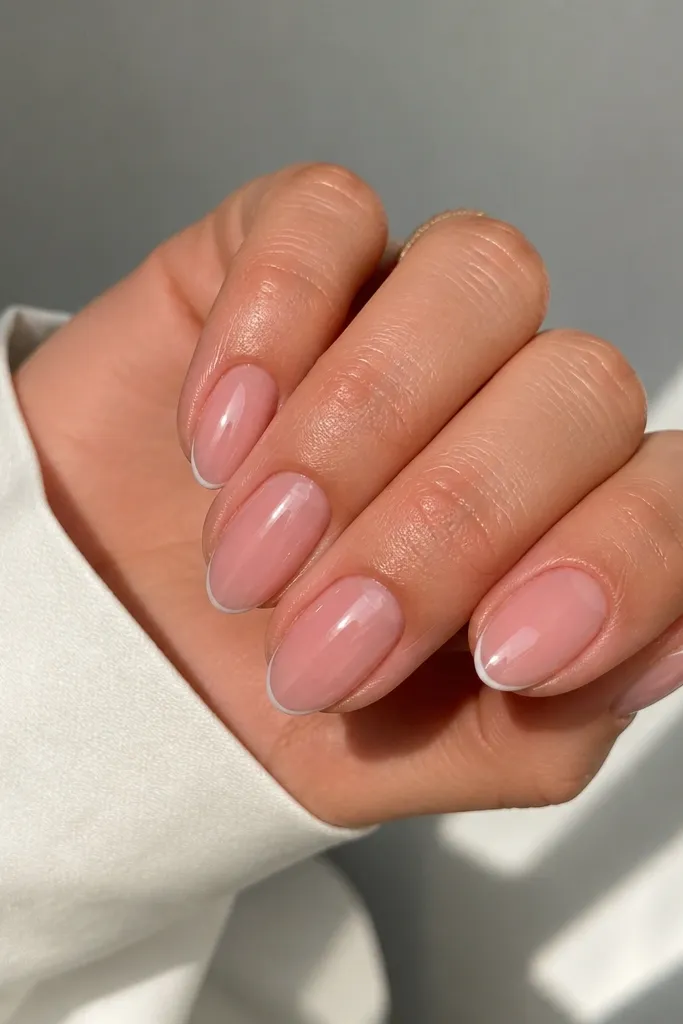
This is French's cleaner cousin. The thin white liner makes the tip look crisp without turning the whole nail white or opaque. It also photographs well because the white catches light sharply. Keep the line thin and close to the edge so it doesn't look like a sticker.
Build nude pink acrylic as usual, then use a fine liner brush to paint a white line 0.5-1 mm tall right at the tip edge. Cure if using liner gel, then cap with clear acrylic gel. File the top so the liner feels flat under your fingertip.
Pro tipUse a nail art pen with a tiny tip - it keeps the line even.
Watch outAvoid thick white; thick liner looks like nail glue and makes the nude look cheap.
11. Rose Nude Acrylic with Negative Space Side Cutouts
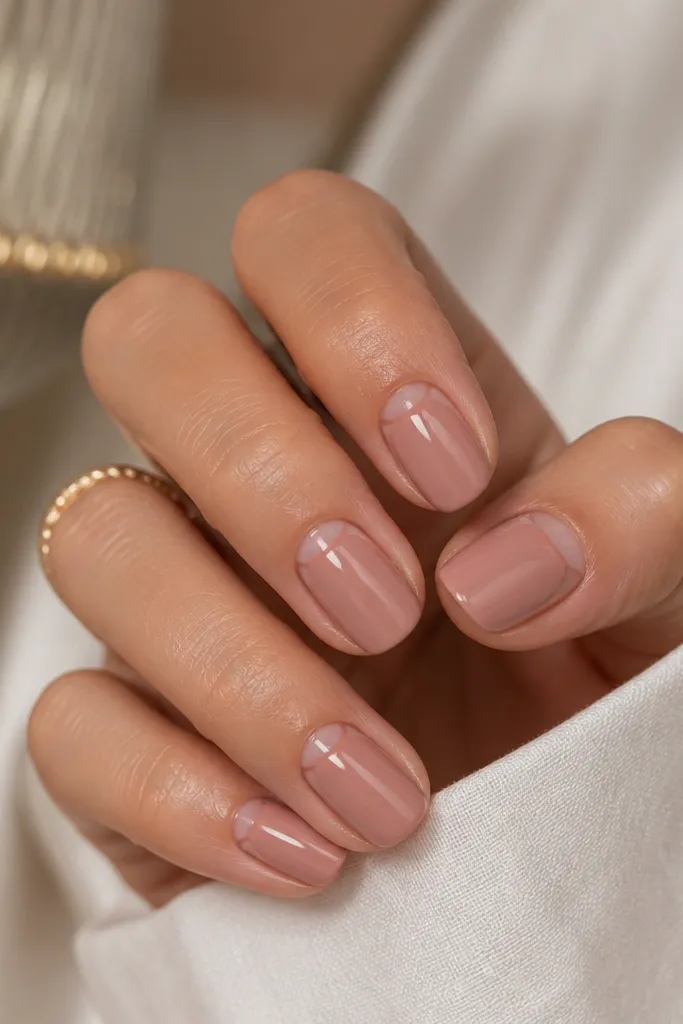
Negative space makes nude look modern because it breaks up the solid color. These side cutouts are subtle and make the nail bed appear slimmer. Use a rose nude that's not too bright, so the negative gaps look intentional, not like bare nail showing through. Glossy finish keeps the design smooth.
After you build the nude, use a detail brush to paint clear gel where you want the cutouts, or leave those small areas uncovered before capping. Keep each cutout narrow, around 1 mm wide, and place them slightly above the center. Cap with clear gel so the edges are smooth.
Pro tipUse tape as a guide when placing the cutout shapes - it keeps both sides even.
Watch outAvoid large cutouts; big gaps make it look like your acrylic lifted.
12. Nude Pink Acrylic with One Tiny Heart in Clear Gel
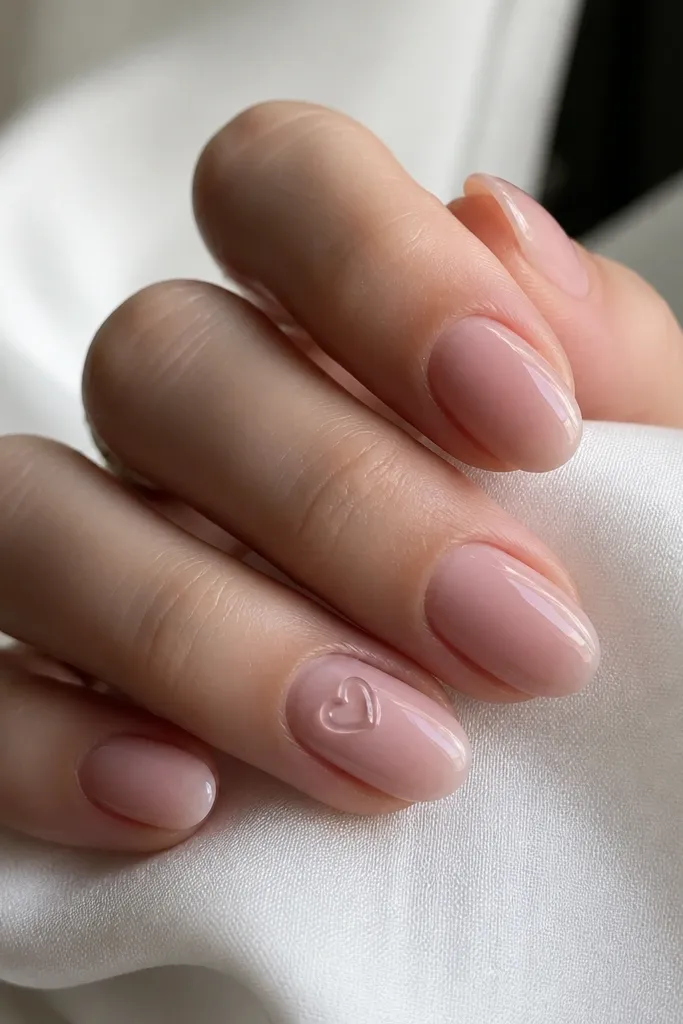
A single tiny heart keeps the set sweet without turning it into full cartoon nails. Because the heart is in clear gel, it looks like a raised highlight rather than a colored design. Nude pink stays the star, and the heart just adds charm when the light hits. It's subtle enough for work.
Do nude pink on all nails. On the accent nail, draw a mini heart outline with clear gel using a dotting tool, then fill it with clear gel and dome it slightly. Cure, then top coat over everything for a smooth finish.
Pro tipMake the heart small - about the size of a sesame seed - or it reads childish.
Watch outAvoid colored heart fill in bright red; it stops the minimalist vibe.



