
1. Peachy nude with a single gold foil tip
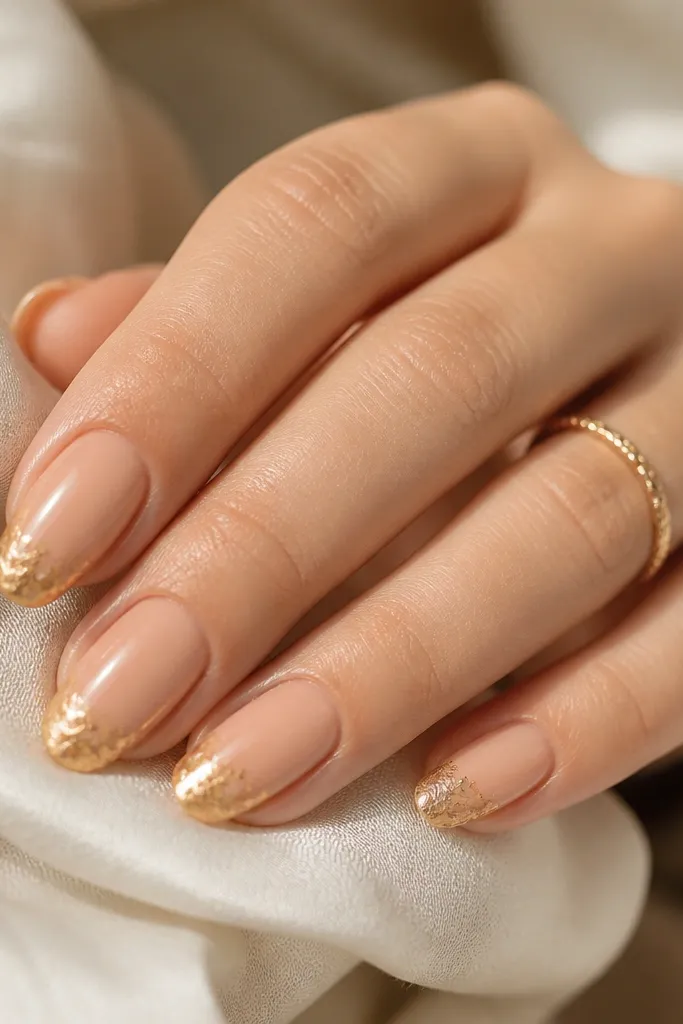
This one looks expensive because the foil catches light while the base stays quiet. The warm peach undertone keeps it flattering instead of washed-out. I also like how the foil placement is forgiving - you can break up the foil so it doesn't look like a straight stripe.
Ask your tech for a nude builder gel or acrylic in a peach-beige tone, then add gold foil only on the distal 2-3 mm of the nail. Keep the foil off the very center so it looks like natural sunlit shimmer. Finish with a high-gloss topcoat and cap the foil edges so it doesn't lift.
Pro tipIf your hands get dry, add a hydrating cuticle oil before the appointment - the warmth of the base looks even cleaner against moisturized skin.
Watch outAvoid a full gold foil layer across the entire tip; it can turn brassy and look heavy.
2. Cool mauve nude with micro French half-moons
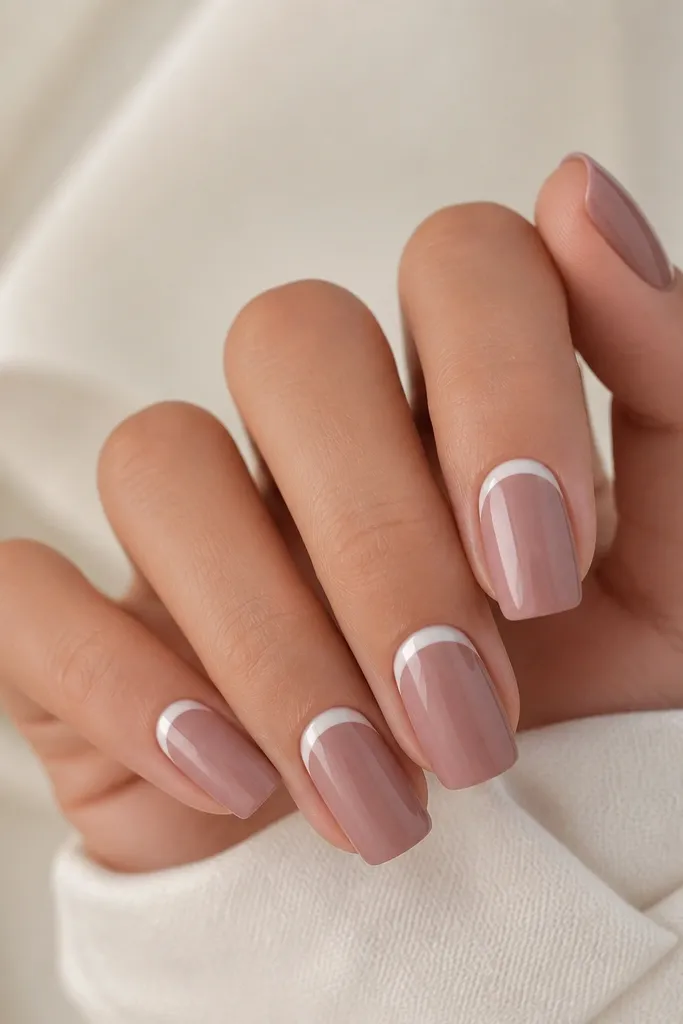
Micro half-moons give you that "French" vibe without the hard white band. The cool mauve keeps the design from looking yellow. Because the art sits near the cuticle, it also grows out better than tip art.
Use a cool mauve nude base (pink-beige with a slight gray). Paint or stamp micro arcs at the cuticle, about 1 mm tall, leaving a thin nude gap between arc and sidewalls. Seal with two coats of glossy topcoat.
Pro tipChoose a liner brush with a sharp tip and keep the arcs thin - thick half-moons look like stickers.
Watch outSkip chunky white - it makes cool nudes look stark and harsh.
3. Nude ballet base with one tiny pearl on the ring finger
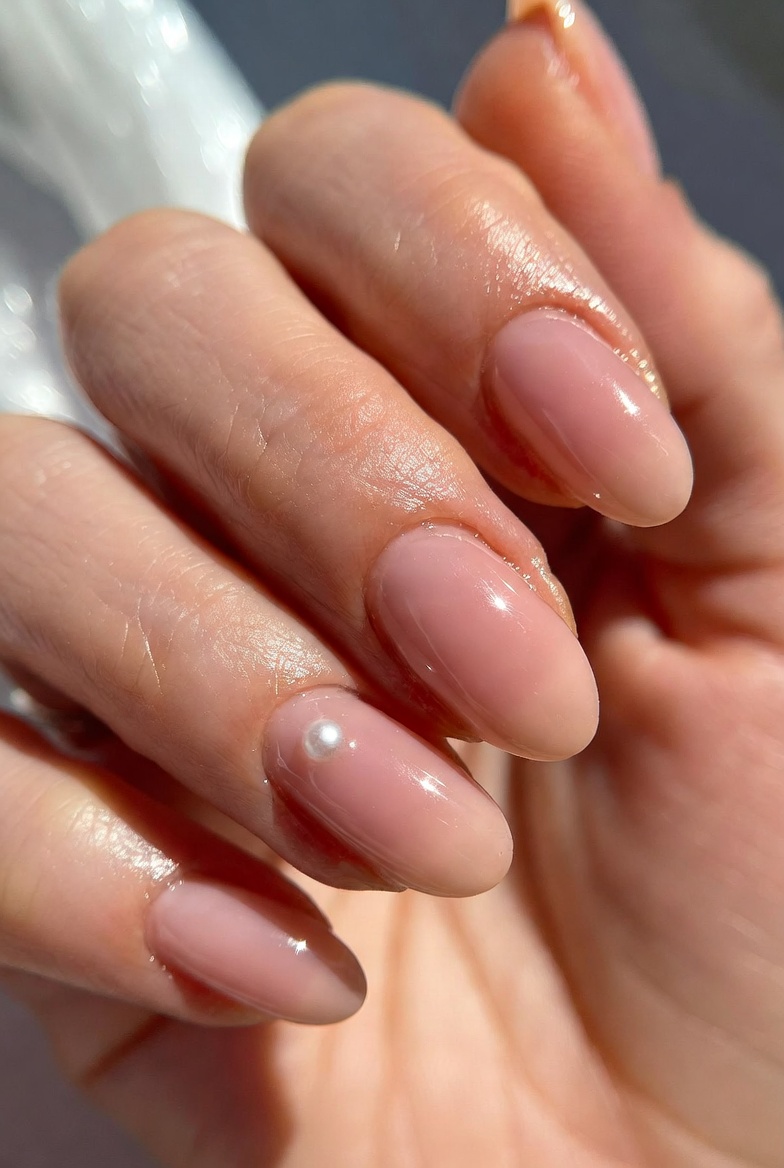
Sheer ballet nude makes your nail look like skin, then the pearl adds a focal point without covering the whole nail. The pearl placement at center near the cuticle looks balanced and flattering, especially on shorter lengths.
Ask for a sheer nude that's not opaque - you want visible nail bed tone through it. Place one 2 mm pearl on the ring finger, anchored with a tiny dot of clear acrylic or gel so it sits flat. Cap over the pearl lightly so the topcoat feels smooth.
Pro tipIf you're worried about snagging, go for a pearl that's flatter and smaller than you think - it stays smooth through chores.
Watch outAvoid big pearls on short nails; they can look like an afterthought.
4. Rosy nude with a thin rose-gold line down the center
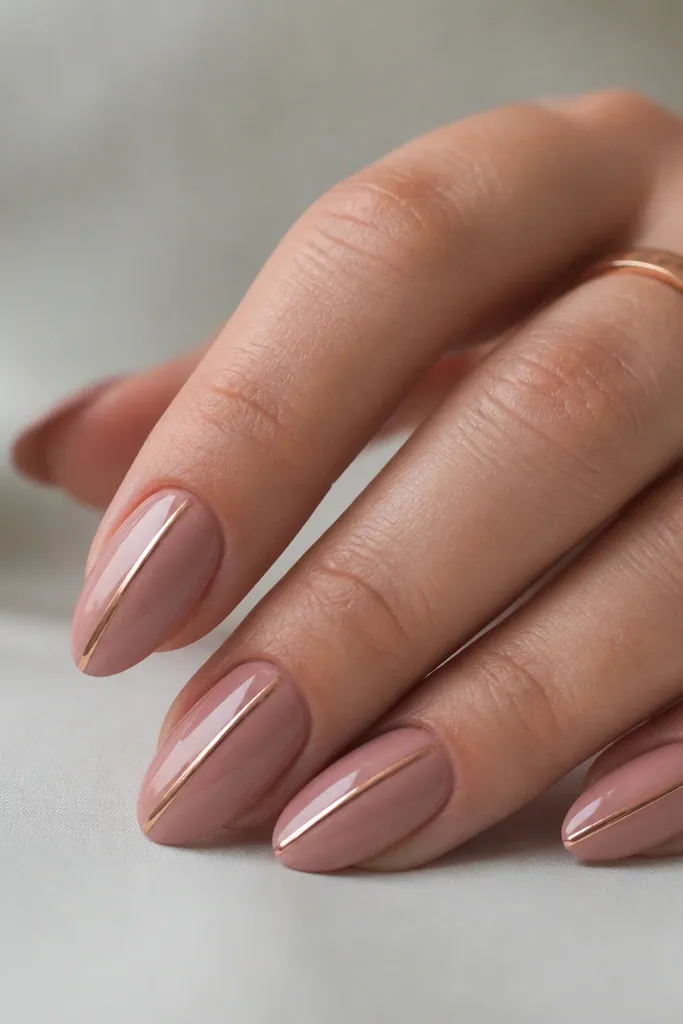
A center line elongates your hand and makes nude feel more "intentional." The rose-gold matches rosy undertones and looks softer than bright gold. Keep the line thin so it reads as design, not a mistake.
Use a rosy nude base (pink-beige). Apply a thin strip of rose-gold foil or paint a line with a liner brush - aim for about 0.5-0.7 mm width. Leave a 1 mm nude gap at the cuticle so the line doesn't look like it's bleeding.
Pro tipIf your nude looks too pale, add a slightly deeper nude layer under the line so the contrast pops.
Watch outAvoid a thick center stripe; it makes nude nails look like they have a seam.
5. Sand nude with glossy ombre fade (no harsh line)
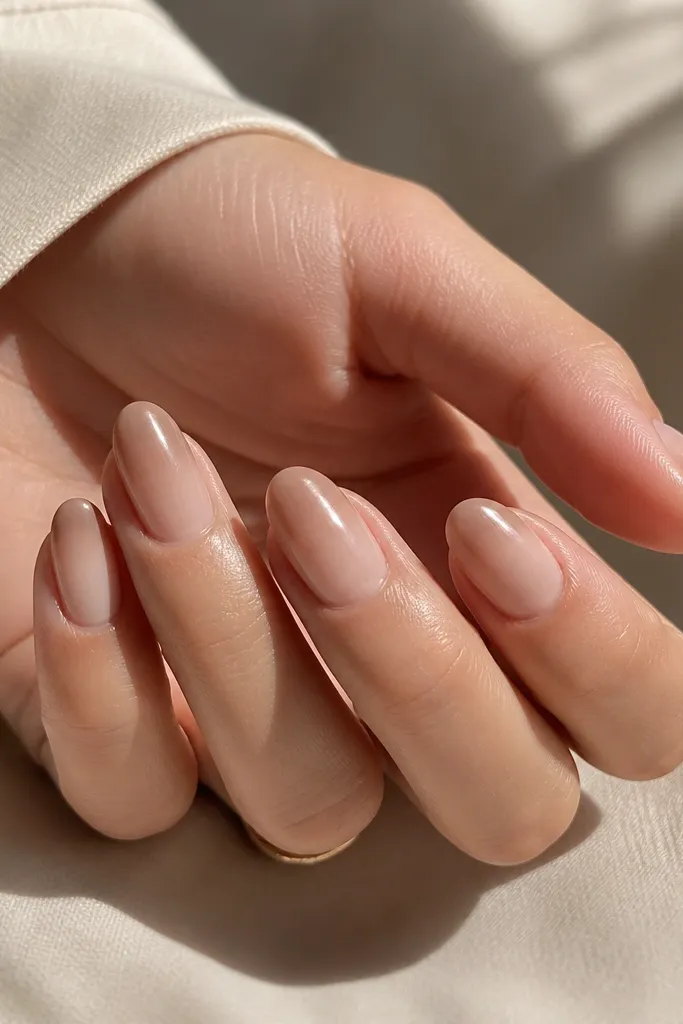
A true ombre fade looks natural because it mimics how nails lighten near the cuticle. Sand nude works on a wide range of skin tones because it's in the beige family, not too pink. The glossy finish keeps the gradient looking smooth even after a few days.
Build the nude base with a lighter sand shade, then blend a slightly darker sand or beige at the free edge. Use a makeup sponge or ombre brush and blend in small taps - stop before you see streaking. Cap with clear acrylic/gel and topcoat glossy.
Pro tipBlend by starting higher than you think (about 60% down the nail) so the fade doesn't look like a patch at first glance.
Watch outDon't paint from tip to cuticle in one swipe; it leaves visible bands.
6. Nude chrome dust on two nails only
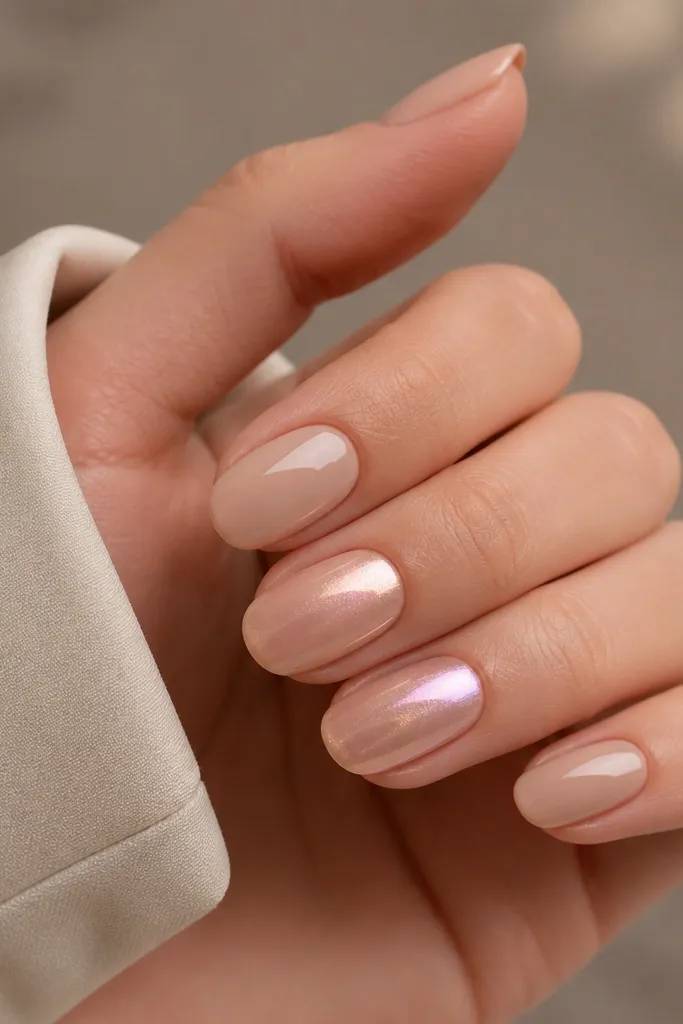
Chrome dust gives movement without needing a pattern. Limiting it to two nails keeps the set from looking like it's trying too hard. The nude chrome shade matters - champagne-pink reads clean, while silver chrome reads harsh on nude.
Use a neutral beige nude base. Apply chrome powder with a soft foam applicator only on the accent nails, keeping it concentrated on the center and fading out toward the sides. Seal with a topcoat that doesn't fully kill the reflective effect (ask for a chrome-safe topcoat).
Pro tipAngle a flashlight across the nail while you apply - you'll see instantly if it's patchy.
Watch outAvoid full coverage chrome on every nail; it turns "nude" into "bling distraction."
7. Taupe nude with tiny diagonal stud accents
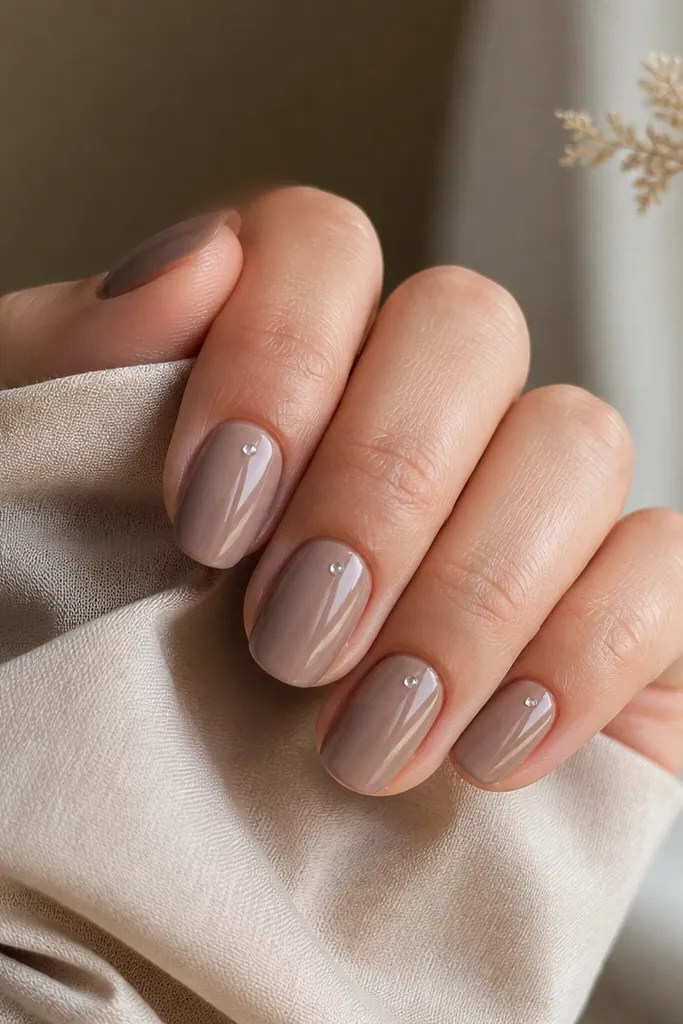
Taupe nude is the sneaky alternative to beige - it looks grown-up and doesn't show staining as fast. Diagonal studs add sparkle without covering much surface area. The studs also catch attention when your hands move.
Build a taupe nude base (beige-gray). Place one 1.0-1.3 mm clear stud per nail, set at about a 30-45 degree angle toward the sidewall. Keep studs the same size across the set so it looks intentional.
Pro tipCap around the stud carefully so there's no lip you can feel with your nail.
Watch outSkip oversized studs; they lift faster and snag on sweaters.
8. Sheer nude with black micro line art butterflies
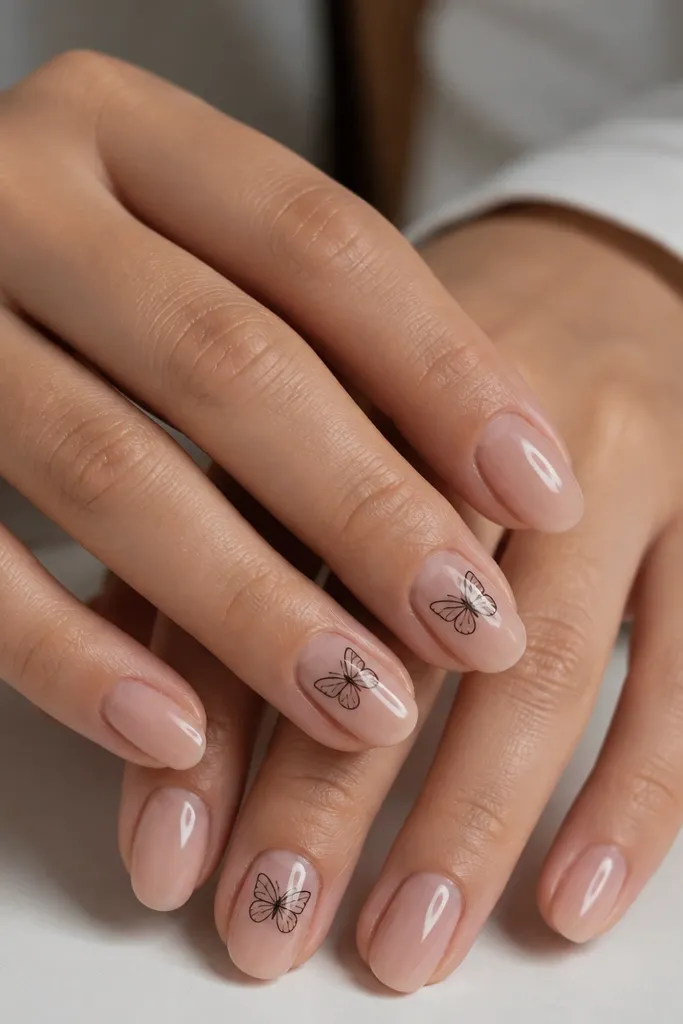
Line art on a sheer nude base looks crisp and airy. Black thin lines contrast well with nude without going loud. The butterfly shape is detailed enough to stand out but still light enough to grow out nicely.
Use a sheer nude that's close to your natural nail color. Add black micro line art using a fine liner pen or gel liner. Keep the butterfly about the size of a pea - small - and leave the rest of the nail nude.
Pro tipPractice on a paper swatch first: if your lines wobble there, they'll wobble on nails.
Watch outAvoid thick black outlines; they look like clip-art.
9. Nude rose base with matte cuticle dots
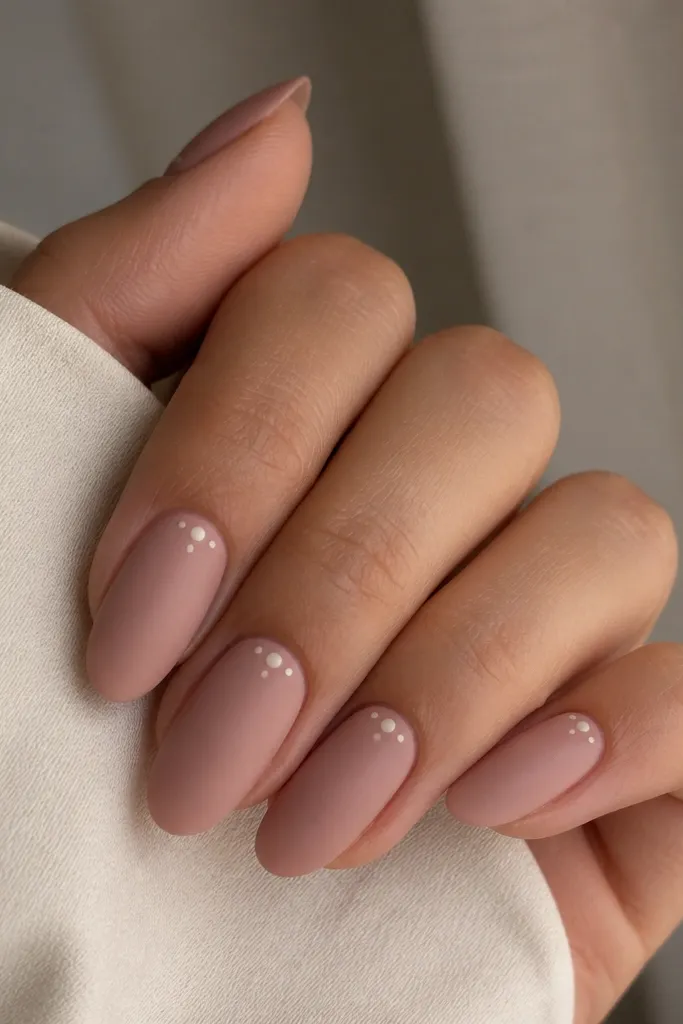
Matte makes nude look modern, and cuticle dots keep the design tight and intentional. The dots near the cuticle elongate visually because the cluster sits high. Matte also hides small surface imperfections, which is a win if your nails are slightly uneven.
Apply nude rose base, then use a matte topcoat on the entire nail. Add three tiny dots at the cuticle spaced like a small triangle - about 0.8-1 mm each. Seal with matte topcoat over the dots so the texture stays uniform.
Pro tipUse a dotting tool with a flat tip; round balls can smear on matte surfaces.
Watch outDon't add glossy spots on matte nails unless you're doing a deliberate accent.
10. Cream nude with tiny gold script initial
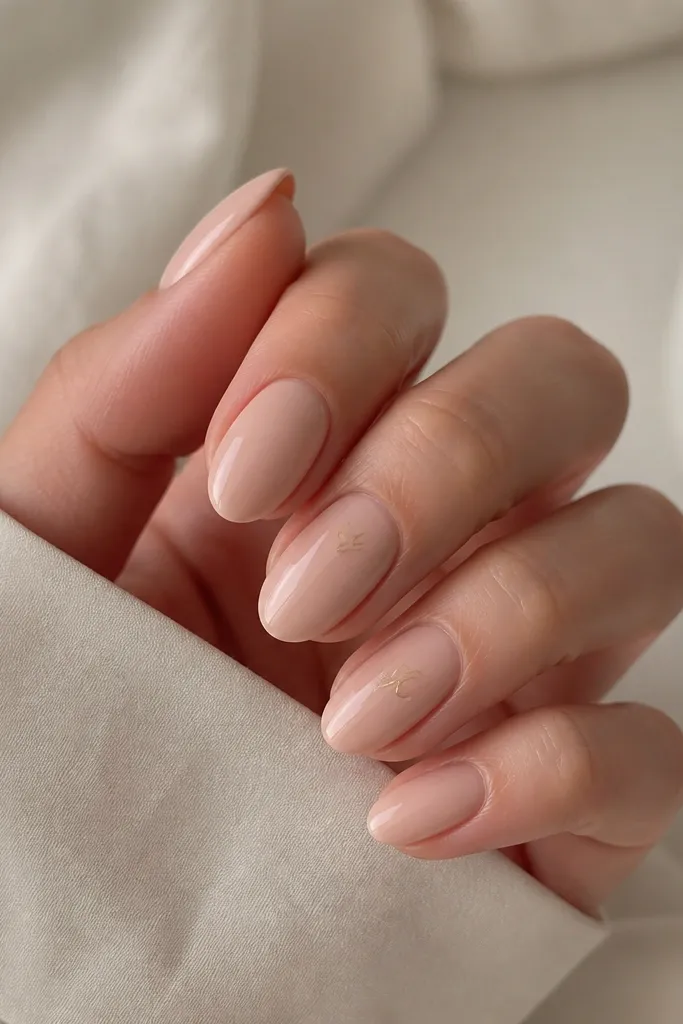
A tiny script initial looks personal but stays subtle because it's small and placed on the side. Cream nude is slightly brighter than beige, so the gold looks soft instead of harsh. This design also works great with short nails.
Choose a cream nude base (more ivory than pink). Paint the script with gold gel using a fine brush - keep the letter height around 2-3 mm. Place it near the sidewall, not dead center, so your nail still looks long.
Pro tipIf your handwriting isn't steady, use a nail stencil strip and trace with gel.
Watch outAvoid big initials - they overpower nude.
11. Neutral nude with negative space micro French
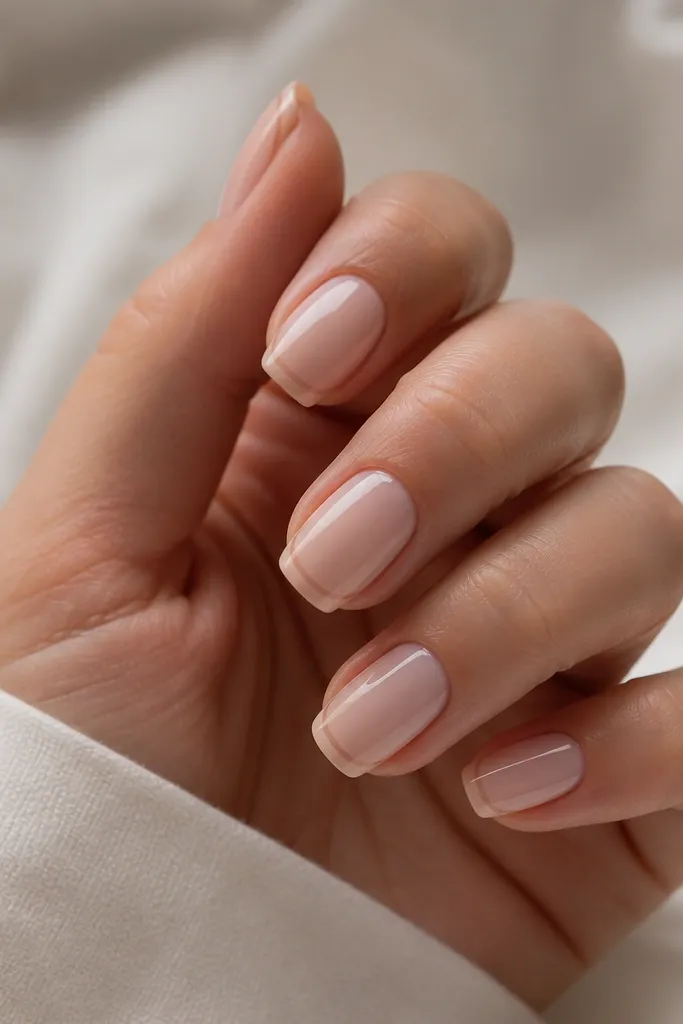
Negative space French makes nude look "clean room" modern. It avoids the chalky look that some white French gels get over time. This also hides small growth lines because the clear arc reads as intentional design.
Build the nude base and keep the tip area unfilled where you want the negative space. Shape a thin arc about 1-1.5 mm tall near the free edge. Seal with glossy topcoat so the clear section stays crisp.
Pro tipUse tape to mask the arc while you paint the nude - it keeps the negative line sharp.
Watch outDon't widen the negative arc; it starts looking like a gap instead of design.
12. Caramel nude with gold half-moon at the base
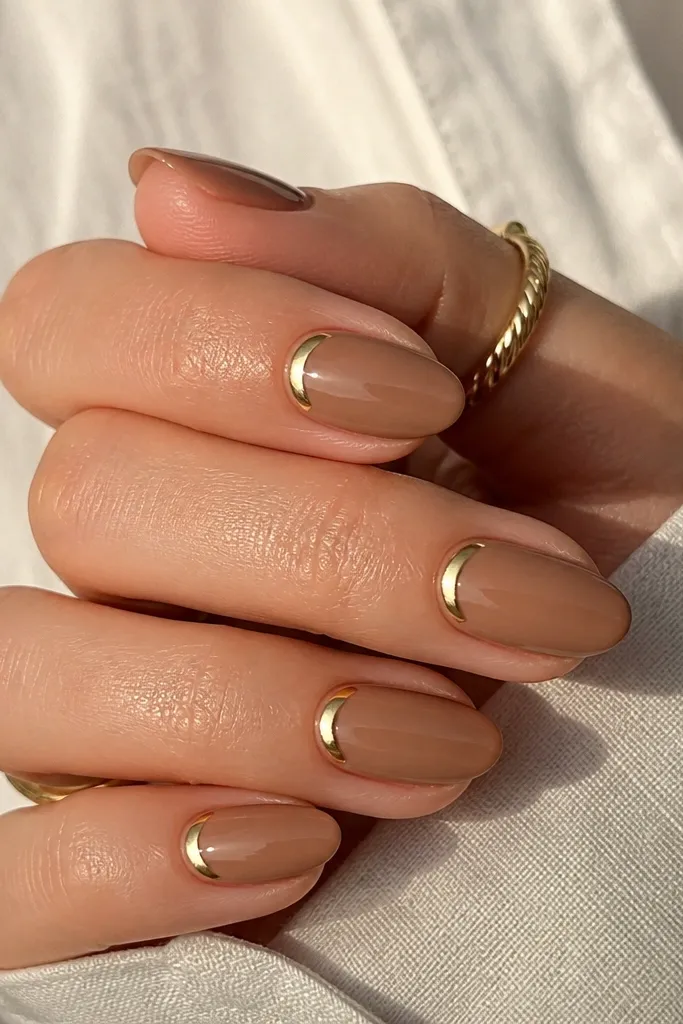
Caramel nude adds warmth and depth, so the gold half-moon looks like jewelry. The cuticle placement makes your hands look lifted. It's also a good option if you hate bright colors but want something that reads "special."
Use a caramel nude shade, not a light beige. Paint the half-moon at the cuticle with a gold gel or thin gold foil, keeping it about 1.5 mm tall. Keep the gold centered and avoid flooding the sidewalls.
Pro tipIf your skin is very warm-toned, choose a slightly darker caramel nude so the gold doesn't blend in.
Watch outAvoid a thick gold band; it can look like a cheap sticker edge.



