
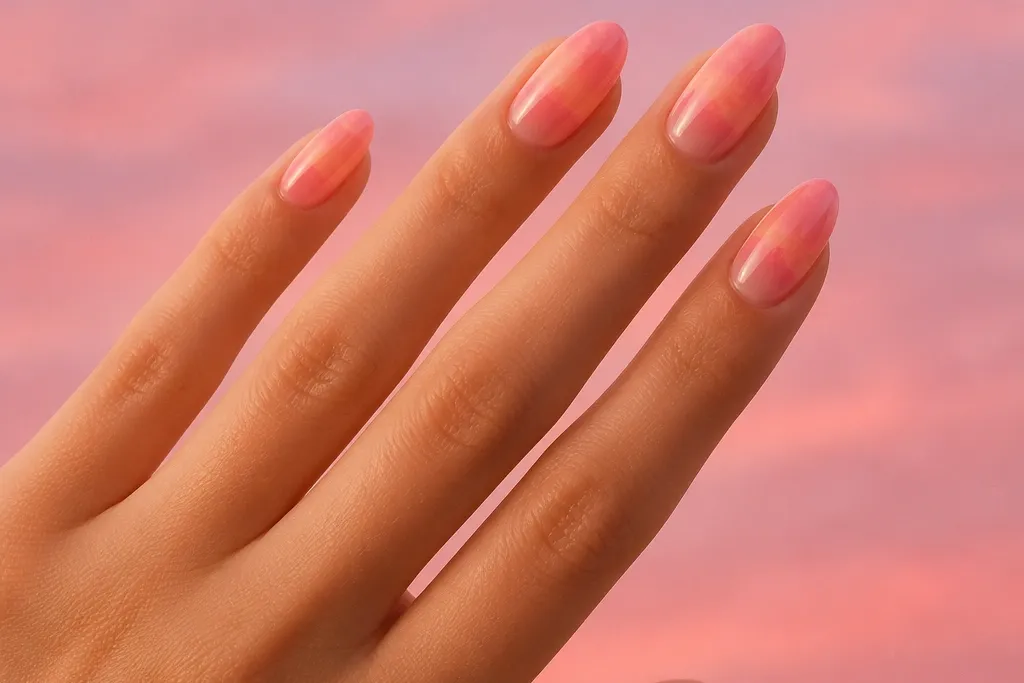
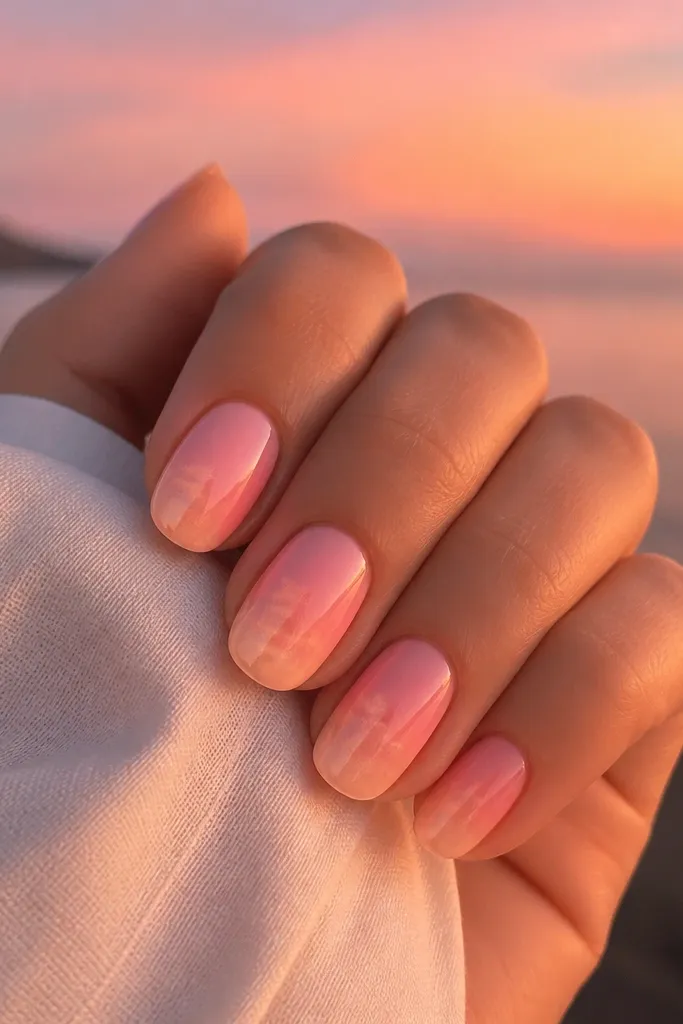
1. Blush-to-Peach Gradient with Milky White Cloud Line
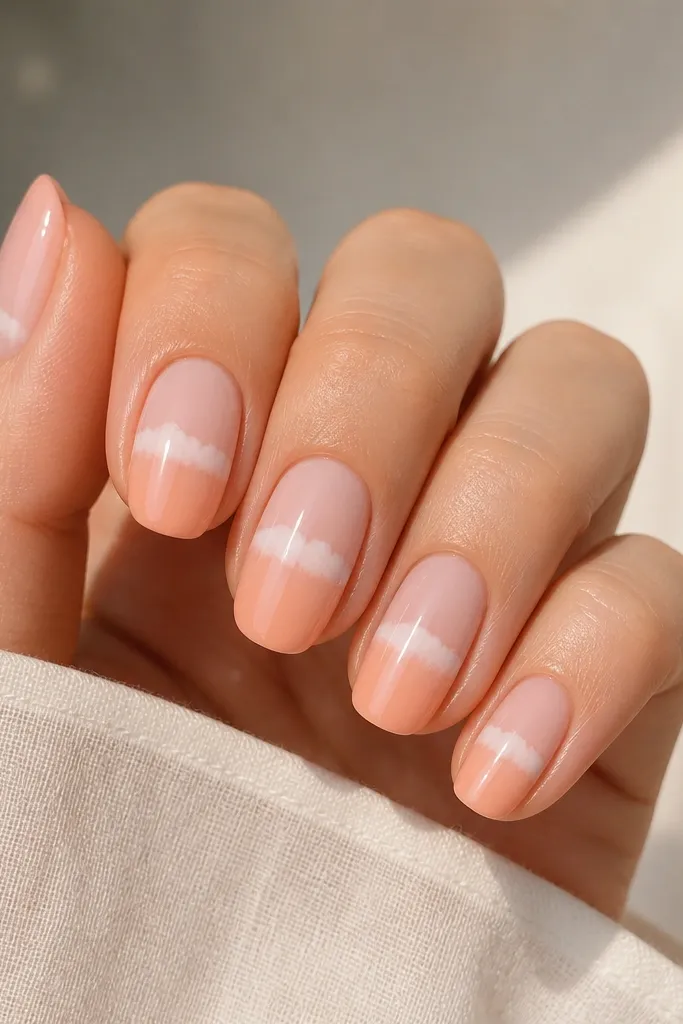
This is the easiest way to get pink sunset nails soft dreamy because the gradient does most of the work. The blush base stays translucent, so light looks like it's glowing through, and the peach end warms everything without turning orange. The cloud band is a single thin swipe in milky white, so it reads as atmosphere instead of a drawing. It looks like a sunset you'd see through a light curtain.
Start with a sheer blush gel polish on the base and sponge peach onto the top half, then blend down with a clean damp sponge tip. Cure fully. Use a detail brush and milky white gel thinned with a drop of gel cleanser to paint one horizontal cloud stroke. Seal with a glossy topcoat over everything.
Pro tipIf the cloud looks too bright, wipe the brush on a paper towel before touching the nail, then add a second ultra-light pass.
Watch outSkip opaque white coverage - it kills the dreamy haze and makes the set look like stickers.
2. Diagonal Sunset Fade with a Tiny Sun Spot
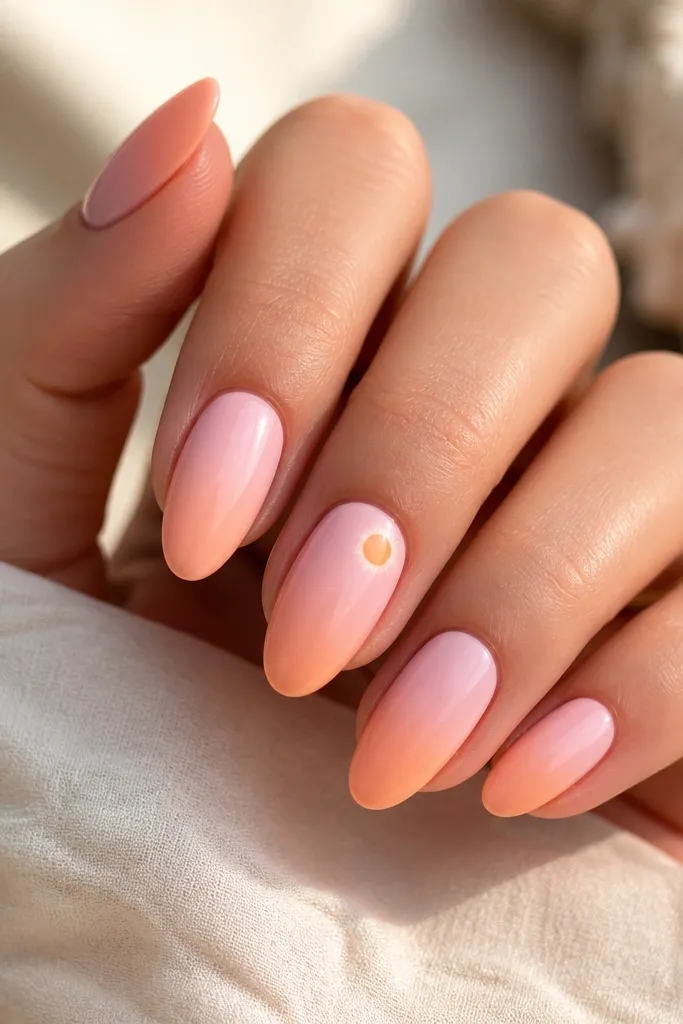
A diagonal fade feels softer than a straight ombré because your eye reads it as movement. The tiny sun spot adds that "sunset" cue without taking over the whole nail. I like using a warm peach or gold-beige dot for the sun so it stays gentle, not brassy. The halo is just a blurred edge from sponge - it makes the glow look real.
On each nail, sponge blush starting at the left cuticle edge and fade toward the right tip, then flip direction on alternating nails for a balanced look. Add a single accent nail with a dot of peach-gold gel at the cuticle center. Use a damp sponge edge to blur around the dot so it melts into the gradient.
Pro tipUse a dotting tool size 02 or 03 so the sun stays small and believable.
Watch outDon't draw a hard circle - sharp edges make it look like a stamp.
3. Half-Moon Glow at the Cuticle (Reverse Sunset)
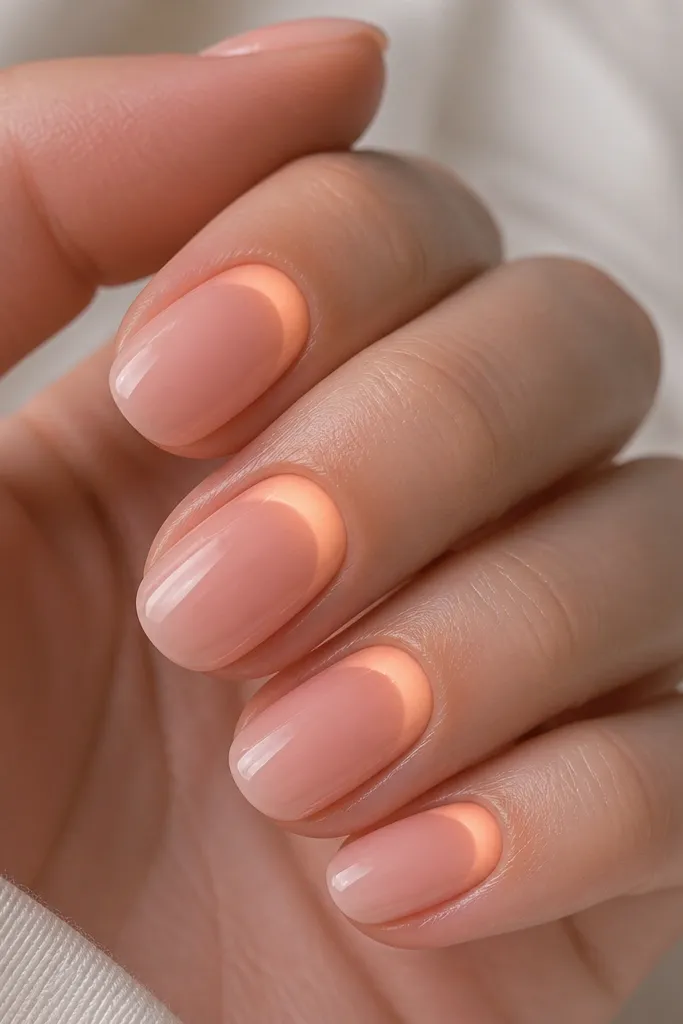
Reverse sunset nails look airy because the brightest color sits where light naturally hits. The half-moon glow gives you a "morning light" vibe that still reads sunset when the body fades blush to peach. The trick is keeping the half-moon soft-edged and slightly uneven, like light through cloud. No extra art is needed - the gradient placement is the design.
Tape a curved guide with a small piece of nail tape to form a half-moon at the cuticle, then sponge peach inside the guide and blend outward with a clean sponge. Remove tape carefully while gel is still workable (if using gel, do it before cure). Finish the rest of the nail with sheer blush and cap with topcoat.
Pro tipDo a thin layer first. Thick gel at the cuticle can shrink and make the half-moon look cratered.
Watch outDon't carry the peach too far down the nail or it turns into a blunt block of color.
4. Watercolor Sky with Blurred Pink Edges
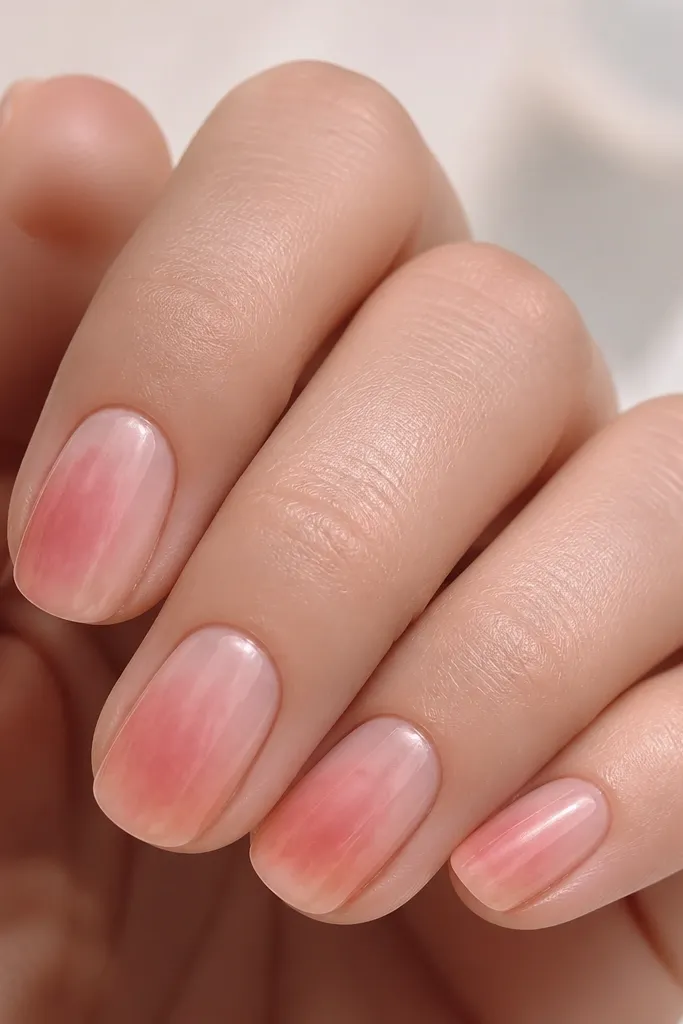
This one is pure dreamy because it avoids crisp boundaries. I use a milky pink as the main wash, then add peach in the middle so it looks like the sky is lit from behind. The blurred edges come from sponge and a light dab with a silicone tool. It reads like watercolor because the colors overlap without hard borders.
Apply a sheer base and then dab milky pink gel in the center using a makeup sponge, keeping the edges soft. Add a little peach gel around the lower center and blend with a clean sponge tip. Cure, then add a thin milky topcoat layer if you want more haze.
Pro tipPress the sponge for one count only. Too much pressure makes streaks that look like smudges.
Watch outSkip stripy gradients - if you see bands, blend again before curing.
5. Glossy Sunset Ombre with Matte Cloud Topcoat
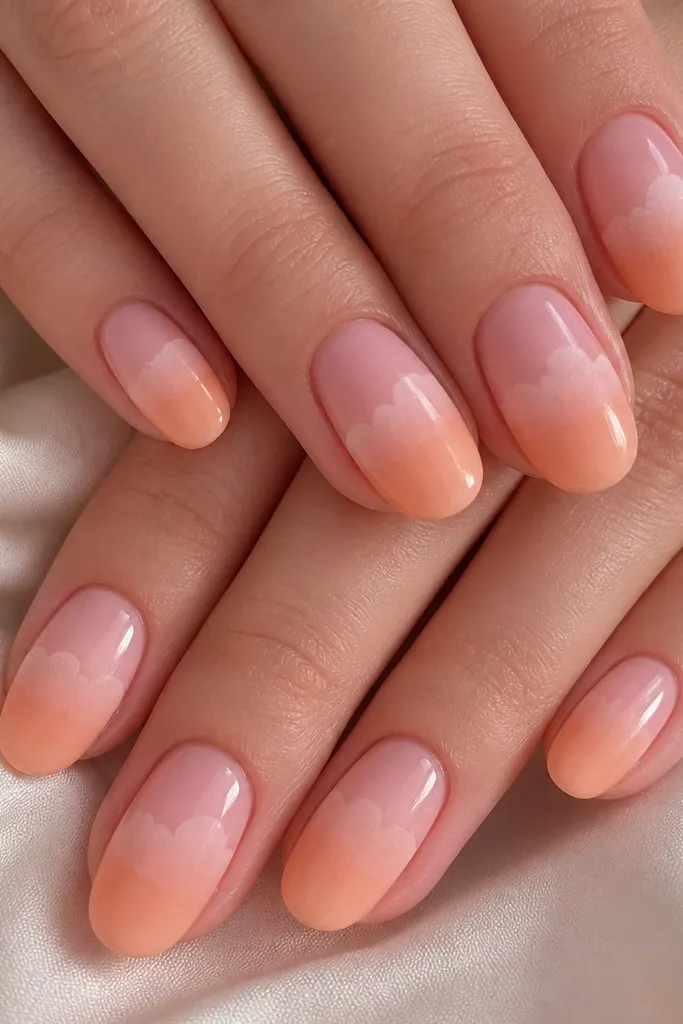
The contrast between glossy gradient and matte clouds makes the design feel deeper even with simple colors. The glossy part reflects light and looks like warm sunset glow. Matte clouds absorb light and look like actual fog. I've worn this set to dinners and got compliments because it looks intentional, not random.
Do your blush-to-peach ombré with sponge and cure. Paint cloud shapes in milky white gel on top. Cure again, then apply matte topcoat only over the cloud areas with a small brush, staying inside the cloud edges.
Pro tipUse a tiny fan brush to clean up matte edges so the cloud stays crisp.
Watch outDon't matte the whole nail if you want the glow. It flattens the sunset.
6. Pink Sunset French Tips with Peach Fade
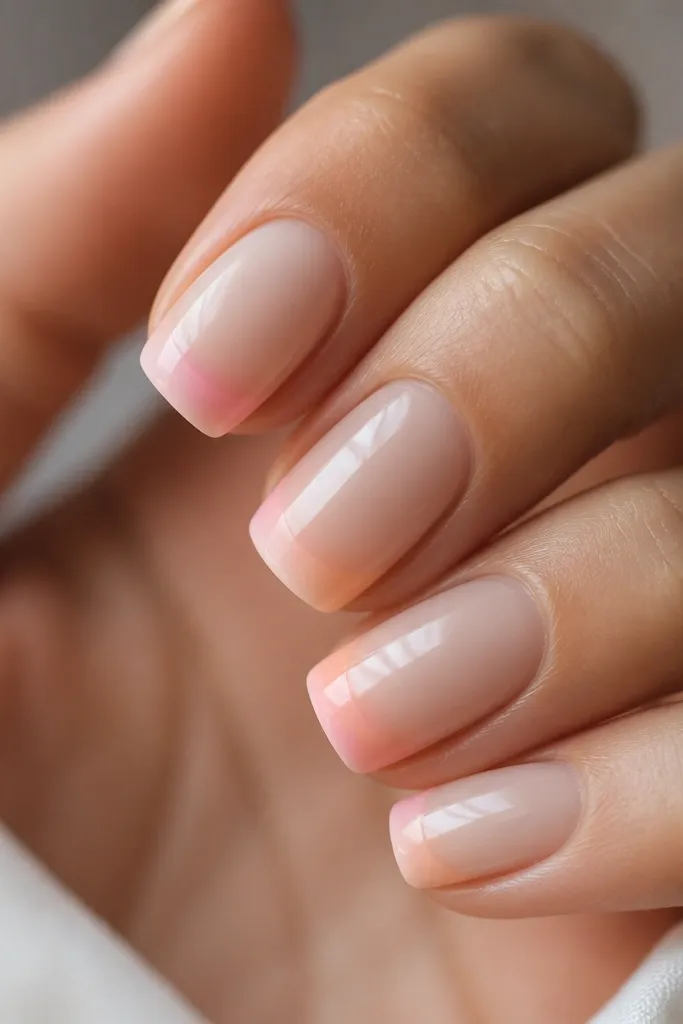
French tips look fancy fast, and this version keeps them soft by using a fade instead of a solid tip. The sheer base makes the colors look like light, not paint. The pink outer edge and peach inner edge creates a gentle sunset arc. It's still wearable because the art is only on the tip.
Use a French guide or nail tape to mark the tip area. Sponge pale pink along the outer free edge, then sponge peach closer to the smile line. Blend with a clean sponge edge and cure. Add a glossy topcoat over the whole nail for a smooth finish.
Pro tipKeep your tip line slightly thicker on the sides - it makes the fade look natural on curved nails.
Watch outAvoid thick tape lines. If you get a ridge, buff lightly before topcoat.
7. Sunset Half-Frame with Clear Negative Space
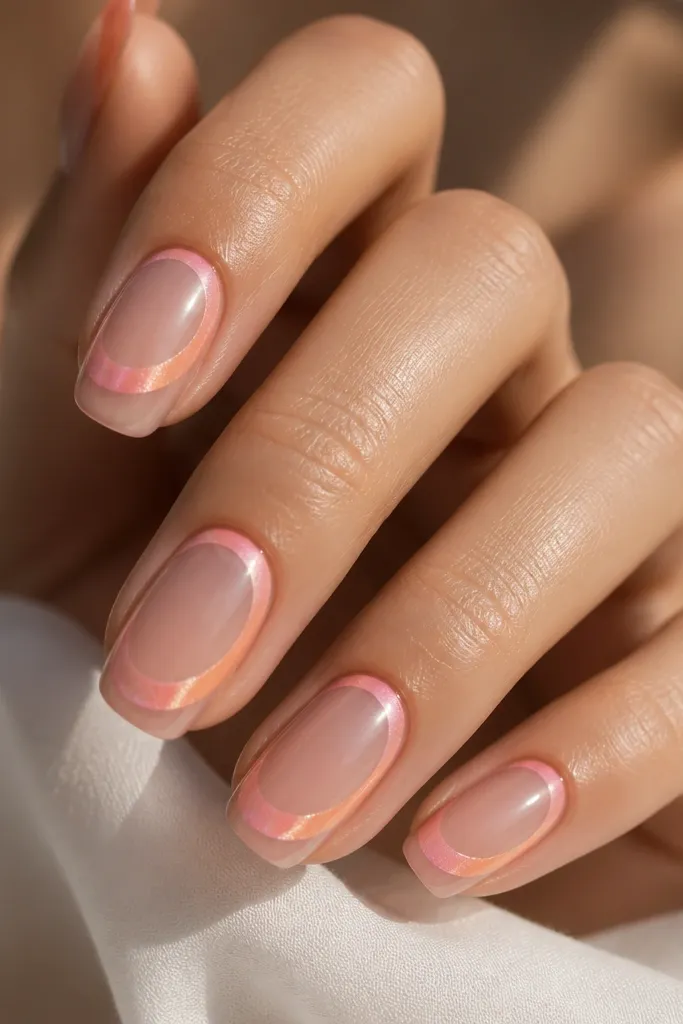
Negative space is what makes this feel modern and soft. The sunset glow sits like a halo across the nail, but the clear center keeps it airy. Pink-to-peach works because the gradient reads as light, and the clear area prevents the nails from feeling heavy. I like this layout on short to medium lengths because it looks clean without extra details.
Leave the center clear by covering it with a strip of tape or by painting around a clear guide. Sponge pink to peach along the curved "frame" area, then blur the edges with a clean sponge. Remove tape carefully and cure. Finish with a glossy topcoat to keep the negative-space glassy.
Pro tipIf you hate cleanup, use a thin strip of liquid latex around the center area before you sponge.
Watch outDon't cover the negative space with milky white. It makes it look cloudy instead of airy.
8. Chrome Peach Sun Glow on a Blush Base
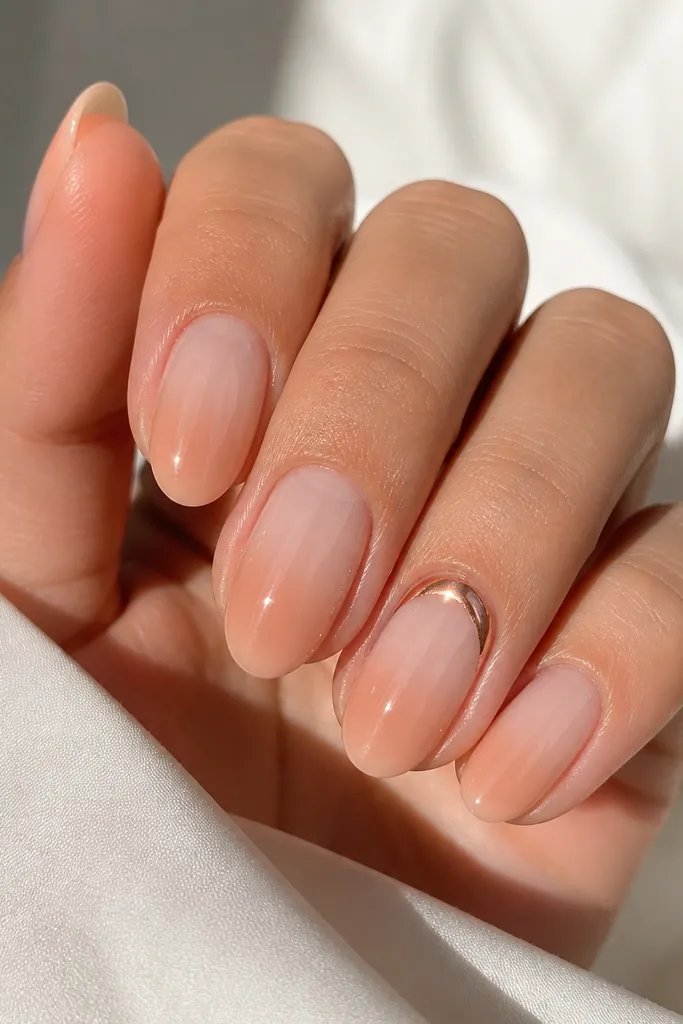
Chrome can look soft if you use it in a small area and keep the surrounding base sheer. This design uses a peachy chrome powder or chrome gel applied in an arc, then blended outward with a bit of matte haze around it. The arc reads like the sun breaking through clouds. It's dreamy because it's controlled, not full coverage.
Paint a sheer blush base and add a light blush-to-peach fade on the lower half. On accent nails, apply a thin line of chrome gel in an arc near the cuticle and add peach chrome powder. Use a makeup sponge to dab a whisper of milky pink around the arc, then topcoat.
Pro tipUse a protective topcoat made for chrome so you don't dull the shine too much.
Watch outDon't put chrome across the whole nail. It turns sunset into "party glitter."
9. Two-Tone Sunset Swoosh with Soft Clouds
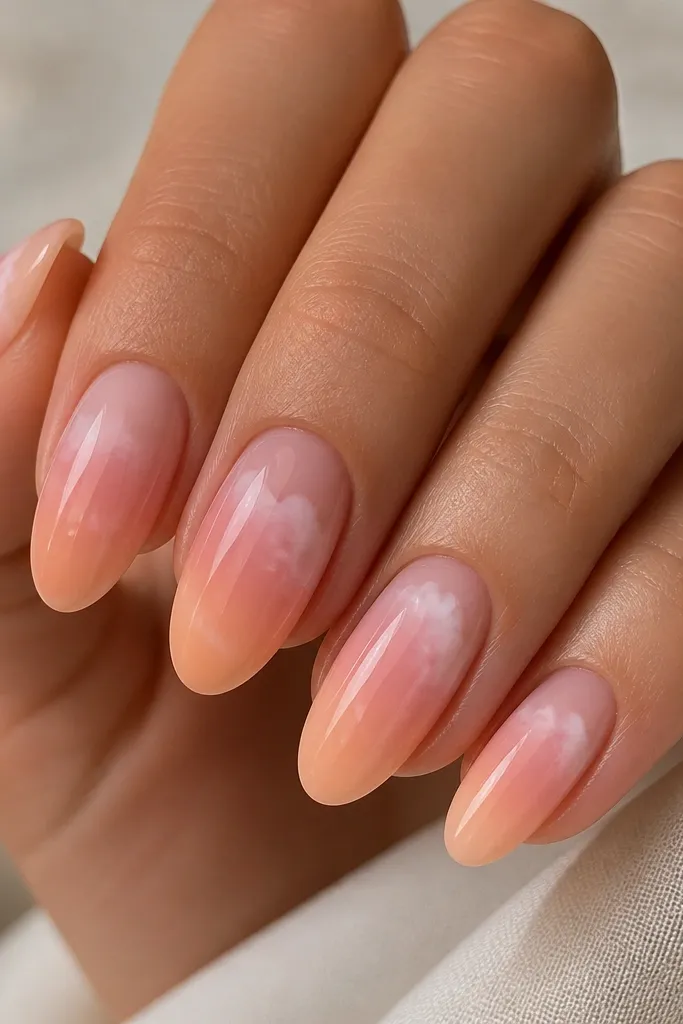
Swooshes look hand-painted and still soft if the edges are blurred. The blush-to-peach swoosh is like a ribbon of sunset light, and the tiny cloud smudges add movement. I like this for medium nails because the swoosh has room to curve naturally. It looks dreamy without needing stars.
Paint sheer base. Use a thin strip of nail art brush with blush gel to create a curved swoosh, then blend peach gel into the lower half while it's still tacky. Cure. Add milky white smudges with a stippling brush for cloud texture, then topcoat.
Pro tipWork one nail at a time so tack stays workable and your blend stays smooth.
Watch outDon't outline the swoosh with a darker pink - it makes it look like a sticker.
10. Soft Starry Sunset with Micro Dot Constellations
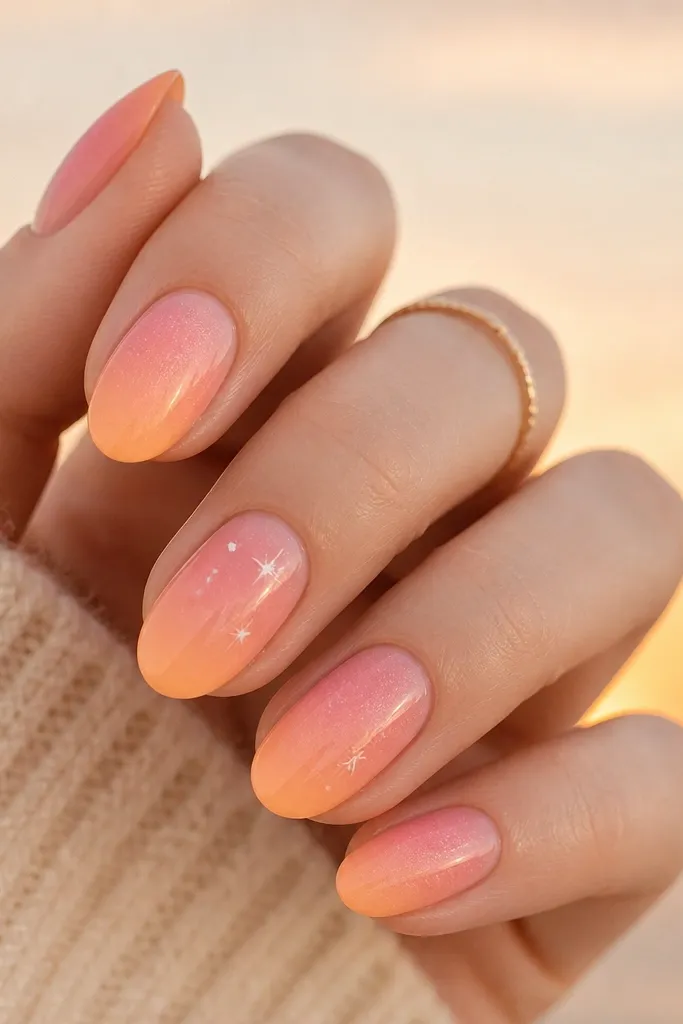
Stars make sunsets feel like nightfall, but you have to keep them tiny and low contrast. Pale silver micro dots look like distant lights instead of decoration. The gradient stays soft in pink and peach, so the stars don't steal attention. This is the set I wear when I want "pretty" without bold lines.
Do your ombré gradient first, then cure. On accent nails, use a dotting tool to place 6 to 10 micro dots in pale silver gel. Add one small star using a toothpick dipped in milky white gel. Cure and finish with glossy topcoat.
Pro tipCount your dots. If you go past 12, it stops looking like constellations and starts looking like glitter.
Watch outSkip chunky rhinestones. They reflect too much and ruin the soft-sky vibe.
11. Peach Sun Halo over Blush Sky (Center Glow)
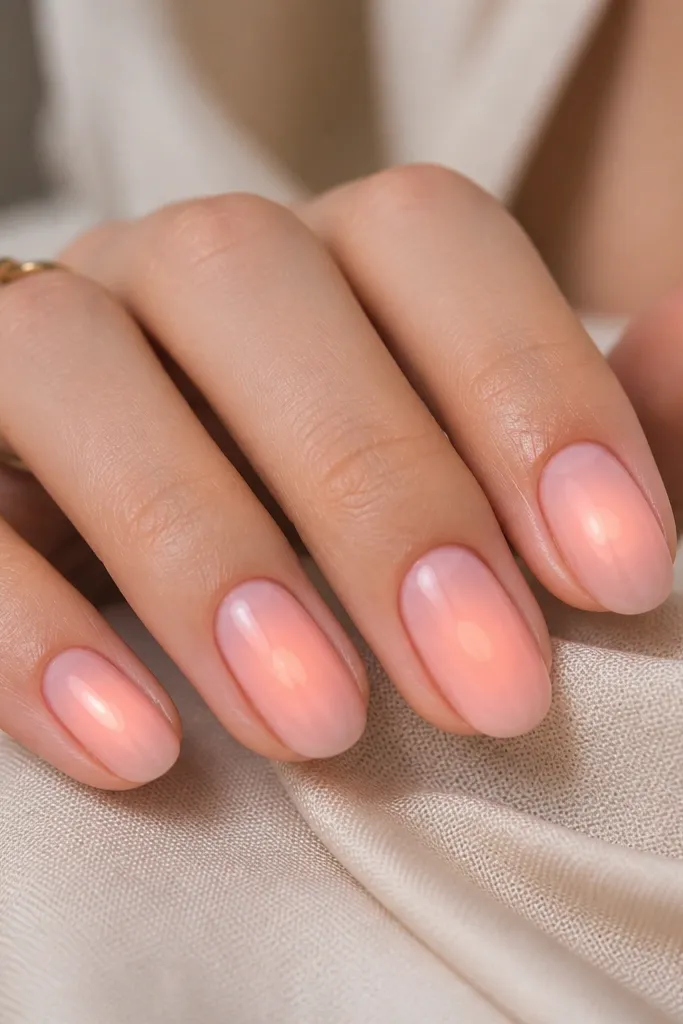
A center halo is dramatic but still dreamy because it's blurred. The peach glow sits in the middle of the nail, so it looks like the light comes toward you. Blush sky keeps everything gentle and wearable. I like this for date nights because it looks like a soft filter effect.
Paint sheer blush base. Sponge a small peach circle in the center, then blur outward with a clean sponge tip. Add a slightly lighter peach highlight on the top edge of the circle to create a sun flare. Cure and topcoat glossy.
Pro tipUse a stamping sponge or makeup sponge corner. Round sponges make more even halos.
Watch outDon't use orange. Orange makes halos look like traffic cones.
12. Pink Sunset Tie-Dye Swirls with Peach Melt
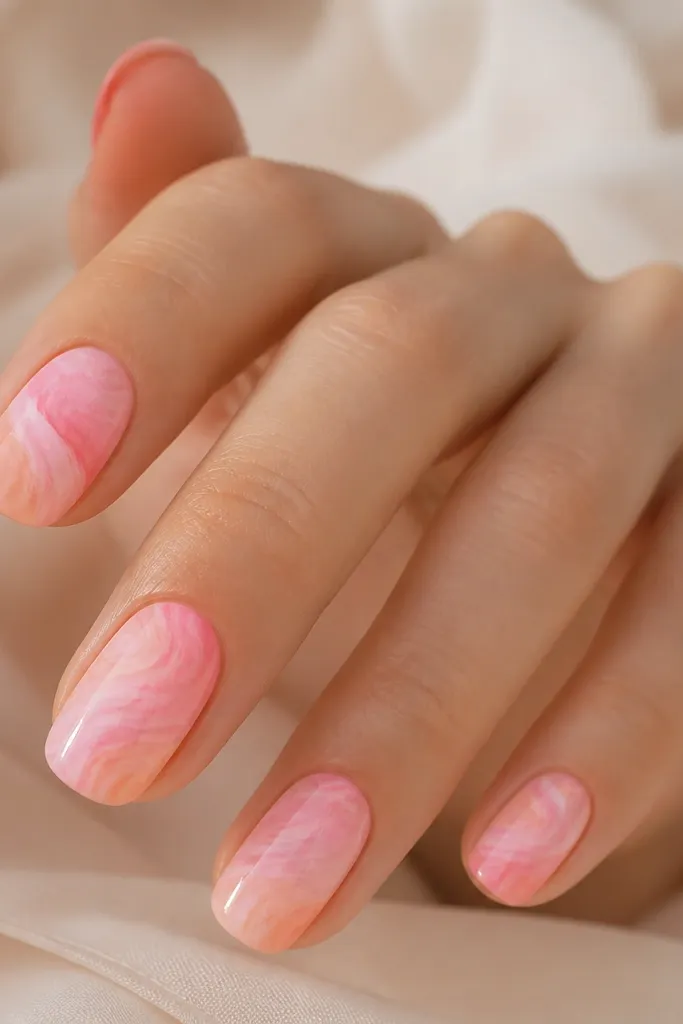
Tie-dye swirls look artsy, but you can keep them soft by using milky gels and blending while tacky. The pink ribbons create motion, and the peach melt adds warmth like sunset light bleeding into clouds. This set looks good on short nails because the swirls don't require a long horizon line. It's also forgiving if your lines aren't perfect.
Apply sheer base. Dab milky pink in two or three ribbon shapes using a silicone tool. While tacky, dab peach gel along the outer edges of the pink ribbons and drag slightly to blend. Cure, then apply a glossy topcoat to smooth the texture.
Pro tipIf you see hard streaks, buff lightly with a 240-grit block before topcoat.
Watch outAvoid gel that's too opaque. Opaque tie-dye looks like paint, not sky.



