
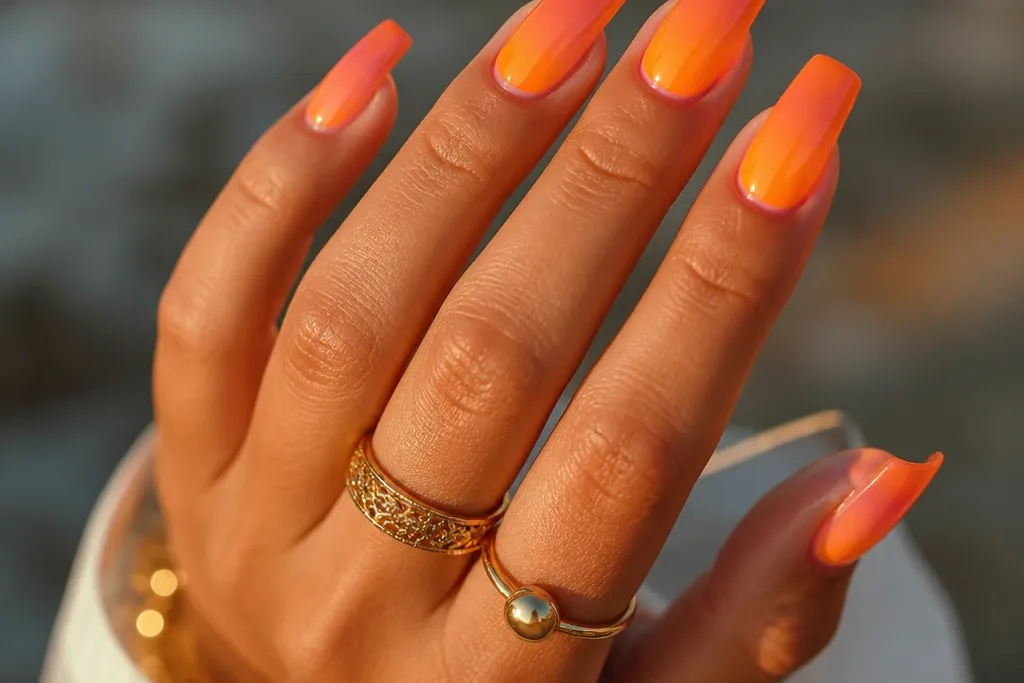
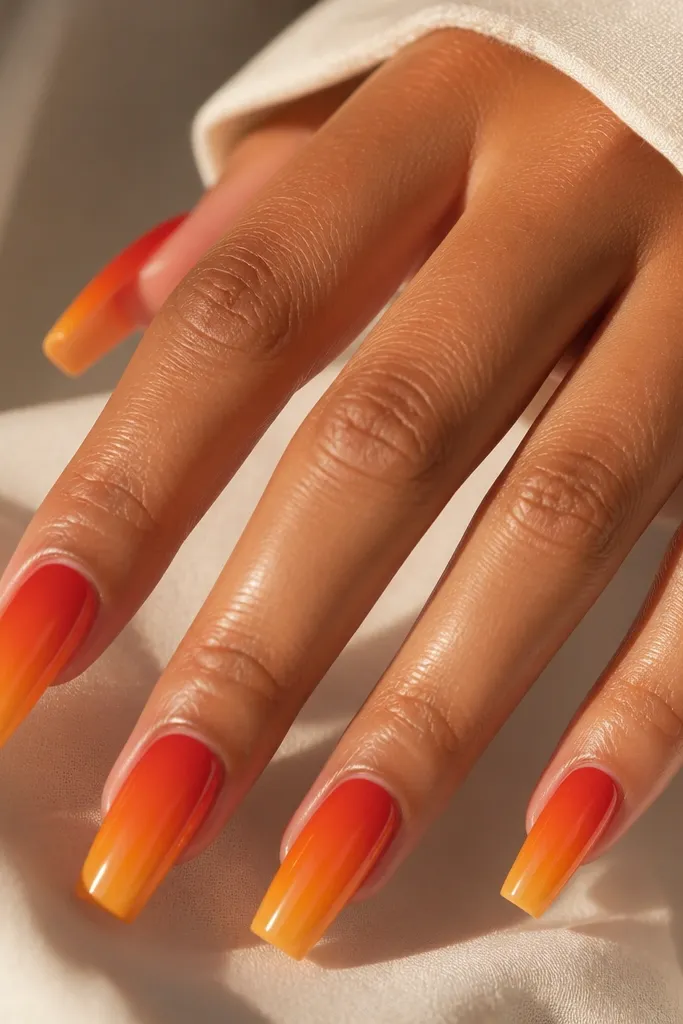
1. Tangerine-to-Magenta Ombre with Hot Pink Edge
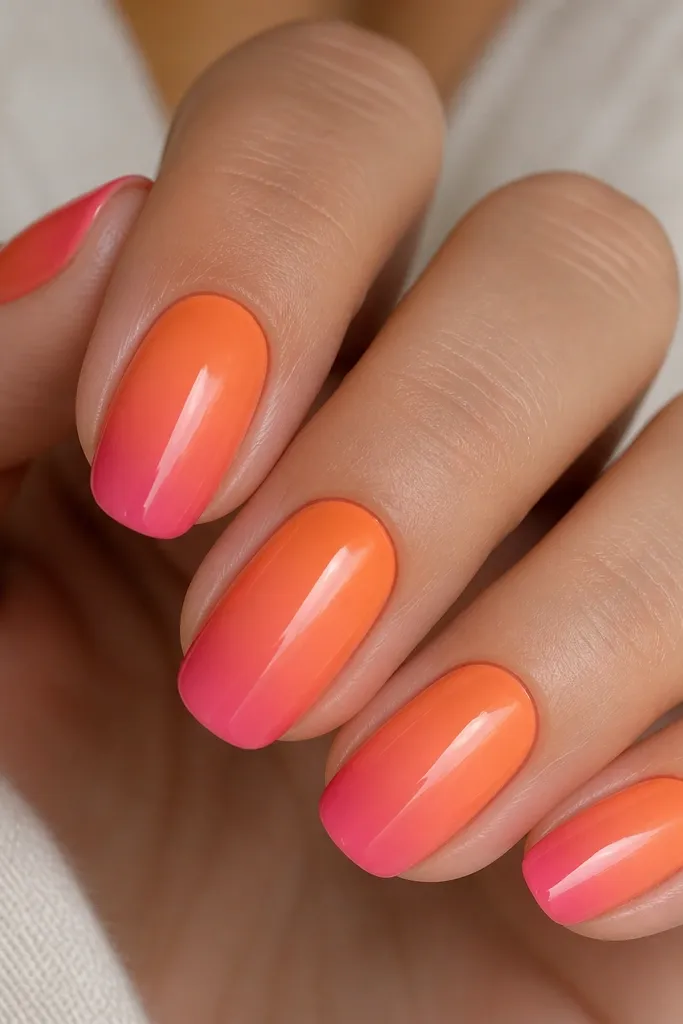
This one looks like the sunset glow you see right before dark - bright at the base, then it deepens fast at the tip. I use a thin sheer peach base so the gradient doesn't look painted on. The hot pink edge is painted last as a narrow band, then blended slightly into the coral so it looks intentional. Gloss makes it look like light is trapped inside the nail.
Build the gradient with a makeup sponge: dab tangerine first, then coral, then tap magenta only at the outer half of the free edge. Keep the darkest area about 1-2 mm thick so it doesn't overpower the nail. Seal with a high-gloss top coat and cap the free edge.
Pro tipAfter you sponge, wipe the brush with alcohol and lightly drag the blend line once - it sharpens the transition without streaks.
Watch outDon't paint the gradient with a thick brush stroke - it turns into stripes and looks cheap fast.
2. Peach Sky Sunset with White Horizon Line
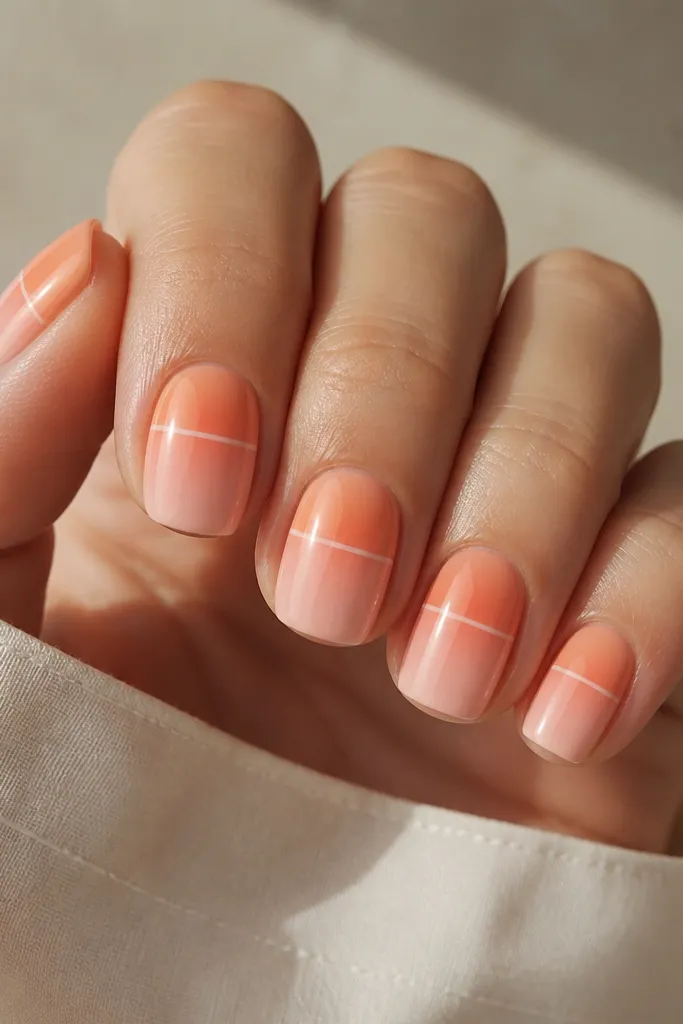
The white horizon line is what makes this feel like a real photo - you get a stop-and-stare moment because your eye reads it instantly. The gradient stays soft because the colors are warm and close in tone: peach, apricot, coral. The small darker orange glow above the horizon adds depth without needing glitter.
Use a sheer peach base coat, then sponge coral starting at the mid-nail downward. With a thin liner brush, pull a straight white line across the nail at about 40-50% from the cuticle. Add a small crescent of darker orange just above the line, then top coat.
Pro tipLet the gradient set for 3-5 minutes before drawing the horizon so the white line doesn't bleed.
Watch outSkip thick white paint - it looks opaque and sticker-like instead of crisp.
3. Sunset Chrome Half-Moon Glow
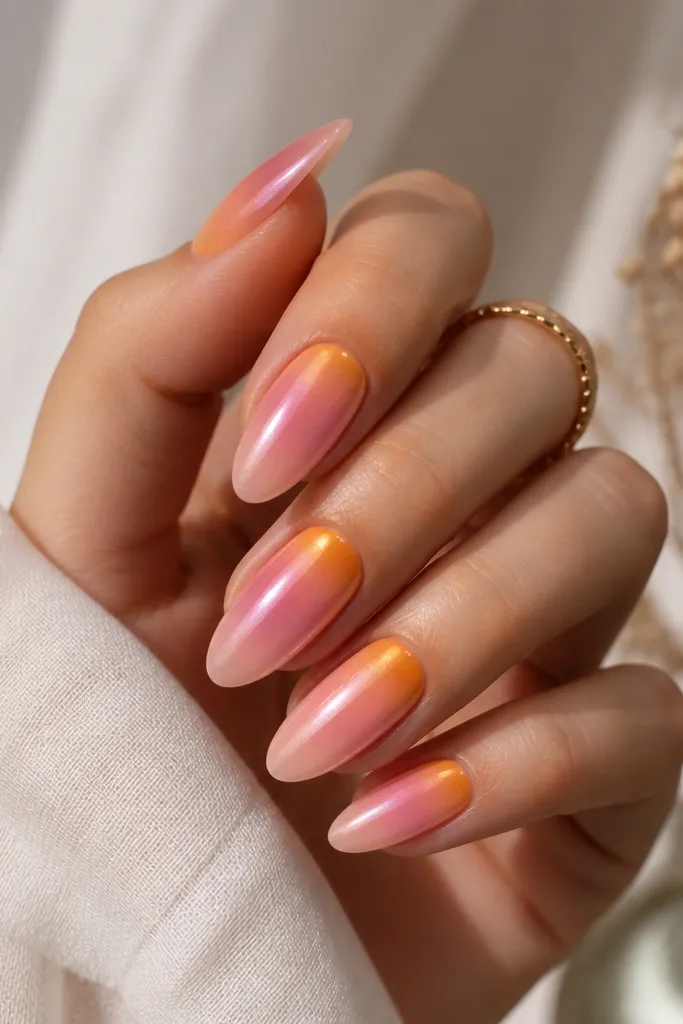
Chrome at the cuticle makes the whole set look like it's lit from within. I like warm orange chrome powder because it sits between gold and coral - it flatters every skin tone. The half-moon placement keeps it clean and wearable, while the faint gradient below gives it that sunset atmosphere. Gloss top coat keeps the chrome reflective instead of dull.
Paint a sheer nude base, then apply orange chrome only on the cuticle half-moon area using a small sponge or chrome applicator. Blend the edges with a light pink gel or polish so it fades. Finish with a glossy top coat, and seal the free edge so it doesn't lift.
Pro tipIf chrome looks patchy, press it in for 5-8 seconds with a firm fingertip pad before sealing.
Watch outDon't cover chrome completely with thick layers - it kills the shine.
4. Magenta Sunset Swirl with Thin Gold Veins
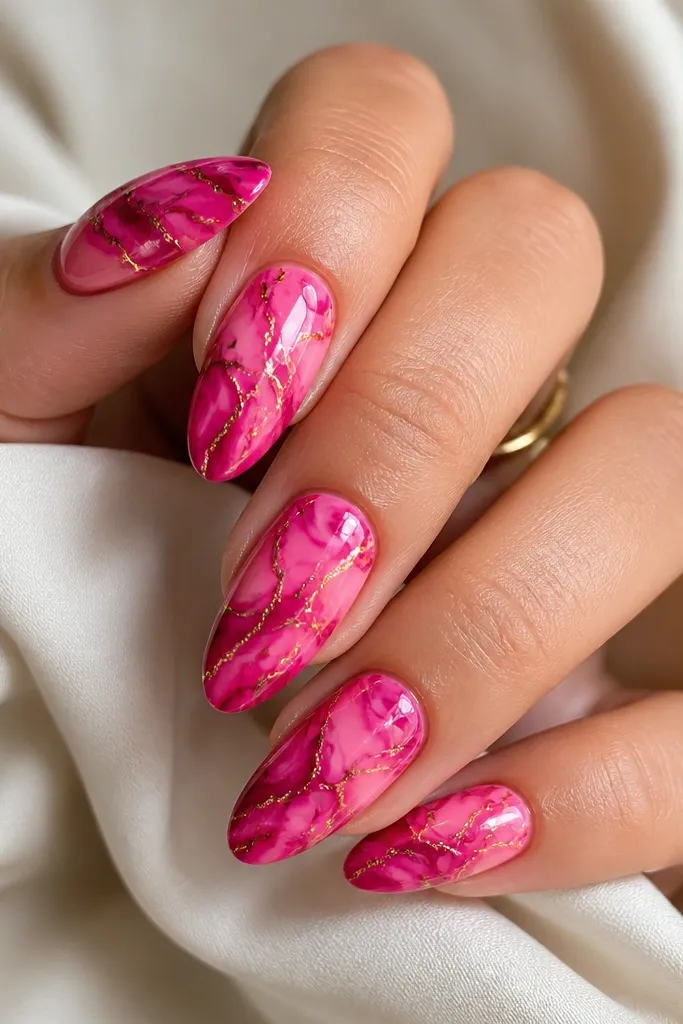
Swirls make the sunset feel artistic instead of basic ombre. The gold veins are the secret: they guide the eye and add that "glass" look without adding chunky glitter. Keep the gold lines hair-thin, and the gradient stays smooth - that's how it reads expensive. Gloss makes the swirls look layered.
Start with a warm pink base, then sponge magenta diagonally from outer edge toward center. Use a detail striping brush to draw two or three gold lines that follow the swirl direction. Add a second pass of warm pink over the gold lines lightly if you want a softer blend, then seal with gloss top coat.
Pro tipUse a striping brush that holds a point. If it fans out, you'll get thick lines and lose the glass effect.
Watch outDon't add big gold chunks - they look heavy on small nails.
5. Sunset Waterline with Tiny White Waves
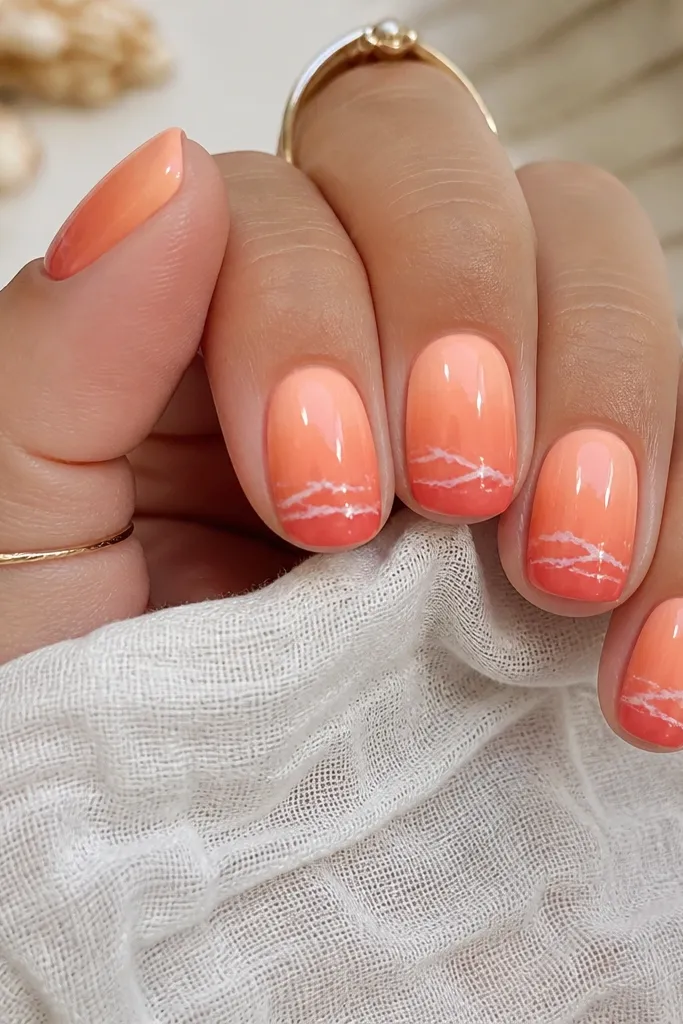
This design reads like ocean at sunset. The waterline band gives structure, and the tiny white waves add movement without clutter. I keep the waves small and spaced so they don't look like doodles. Gloss makes the gradient and band look wet, like real water light.
Sponge peach-to-coral across the nail, then paint a thin darker orange stripe around the lower third. With a dotting tool or microliner, add 3-5 tiny comma-shaped white marks just above the stripe. Seal carefully, especially over the wave marks so they don't catch.
Pro tipIf the waves feel messy, do them one nail at a time and stop after 3 marks - clean beats crowded.
Watch outDon't put the waterline too high. If it sits near the middle, it looks like a random band instead of a shoreline.
6. Sunset Confetti Fade (No Chunky Glitter)
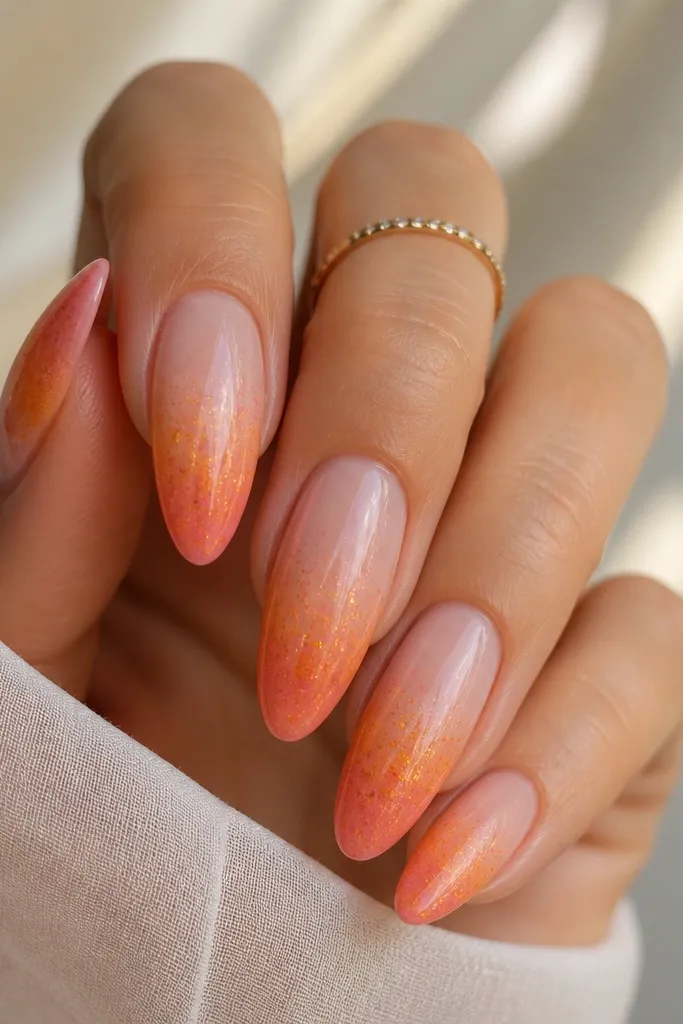
Micro-glitter gives you sparkle without turning into a gritty mess. This works because the glitter is concentrated where the gradient changes, so it feels like the sky is glowing. I use fine particles - the kind that look like sugar, not sequins. Gloss makes the sparkle look suspended.
Leave the cuticle area sheer and clean. Sponge the peach-coral-magenta gradient only at the free edge, then dab micro-glitter where the colors meet using a flat brush. Finish with a glossy top coat and cap the edges.
Pro tipTap off excess glitter on a paper towel before you apply - too much kills the subtle look.
Watch outSkip chunky glitter mixes - they catch on fabric and chip first.
7. Dual Sunset Half-and-Half (Orange Left, Pink Right)
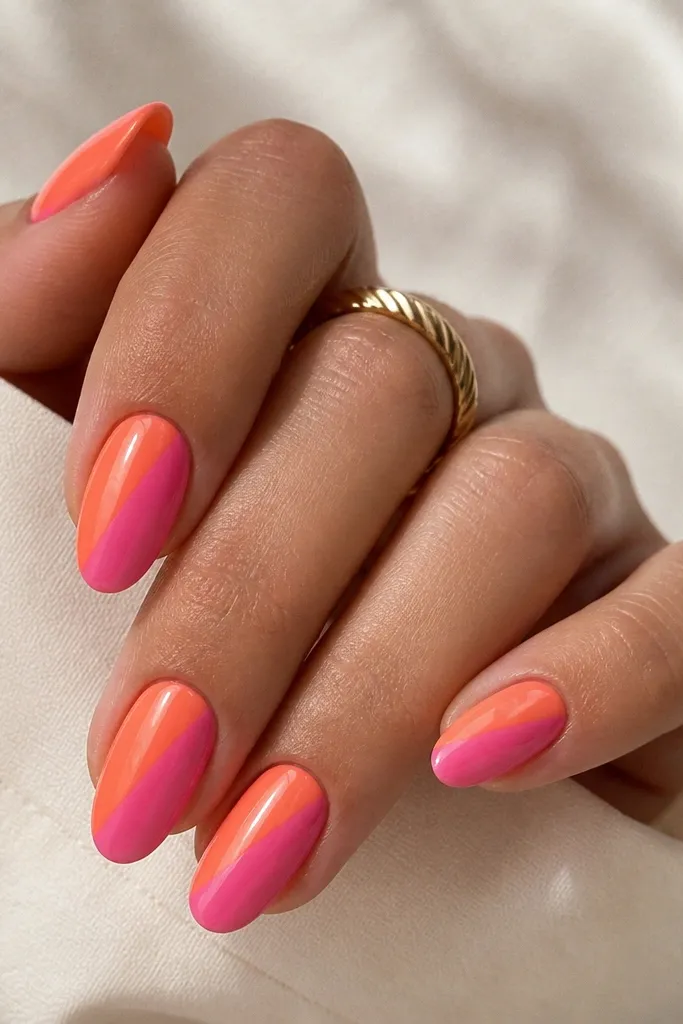
This is for when you want sunset color but with sharp graphic energy. The diagonal split makes your hands look longer and more styled than a typical ombre. Keeping the line clean makes it look like salon nail art, not a DIY accident. Gloss makes both sides look like liquid color.
Paint a sheer base first, then use two sponges or two gel colors on either side of a diagonal guide. Use a thin striping brush to sharpen the split line after the colors set. Seal with gloss top coat and make sure the diagonal edge is fully covered by top coat.
Pro tipUse a striping tape guide for one nail only, then freehand the rest while your eye learns the angle.
Watch outDon't blend the two colors too much. If they mix into brown, it stops reading as sunset.
8. Sheer Nude Sunset with Tiny Star Sprinkles
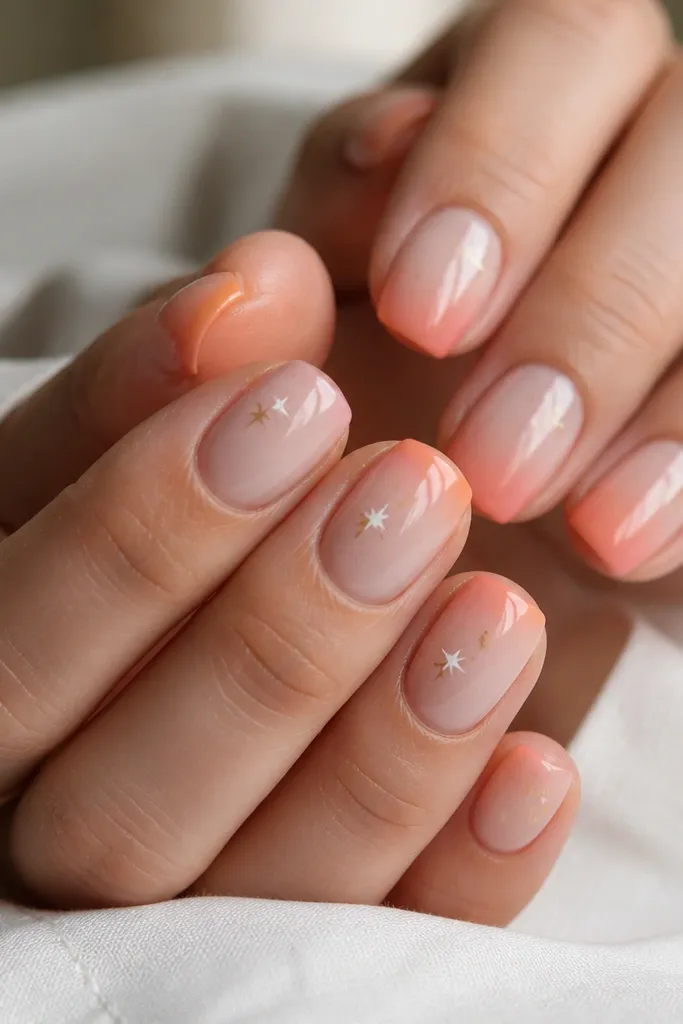
This one looks cute in daylight and still turns heads at night. The key is keeping the gradient faint so the stars feel like sky details, not glitter overload. I like tiny star charms or star decals that are flat enough to seal smoothly. Gloss keeps the nude base looking glassy.
Use a sheer nude base, then sponge a light peach-to-coral fade only in the top 25-35% of the nail. Add 2-4 tiny star accents per nail near the cuticle line, leaving space between them. Top coat in two thin layers so the stars don't lift.
Pro tipIf you're using decals, press them down with a clean silicone tool and seal around the edges first.
Watch outDon't place stars at the very center. It makes the nail look like random stickers.
9. Orange Ember Fade with Ember Glitter Tips
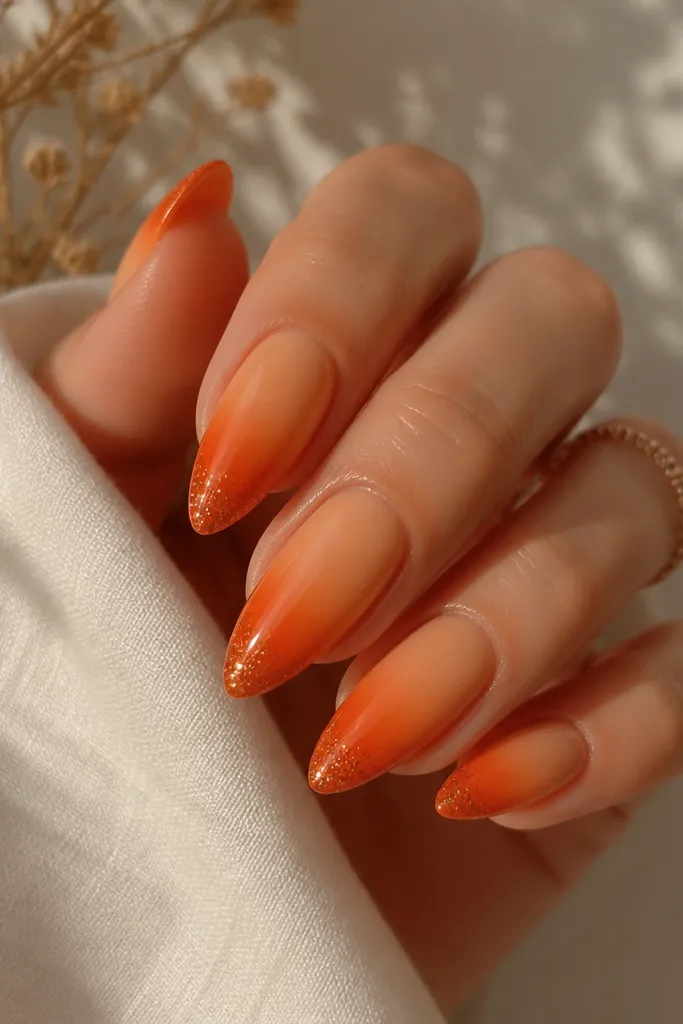
Ember tips look like the edge of the day - intense and warm. This design works because the glitter is only on the free edge, so the rest stays clean and wearable. The gradient is deeper than your average ombre, which makes the sunset feel dramatic. Gloss gives that hot, reflective ember look.
Sponge peach at the middle and blend into deep orange at the free edge. Then dab fine orange glitter at the very tips only, about 1-2 mm. Seal with gloss and cap the free edge so the glitter doesn't snag.
Pro tipUse a makeup sponge with a dry tap motion for the ember fade so you don't get streaks.
Watch outDon't glitter over the entire nail - you'll lose the ember effect and it gets heavy.
10. Pink Sunset with Black Palm Silhouette
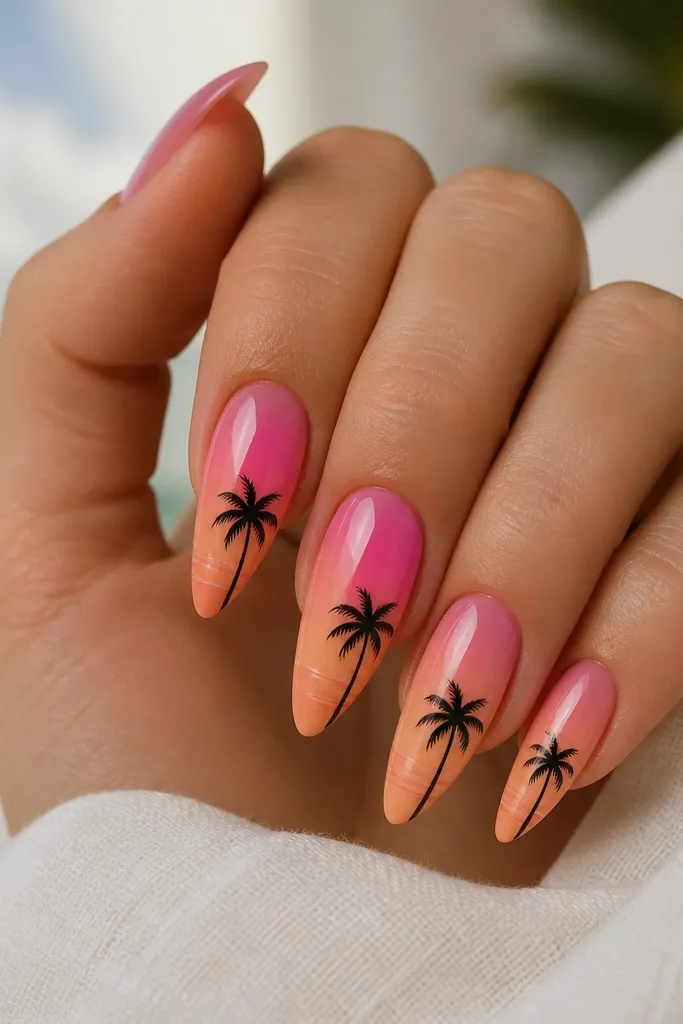
Silhouettes make sunset nails look cinematic. The black palm gives contrast, so your sunset colors pop instead of blending into each other. I keep the palm only on a few nails if I'm wearing this out - it looks intentional rather than theme-y. Gloss keeps the silhouette edges crisp and photo-ready.
Paint a soft pink-to-peach gradient across the nail, then draw the palm silhouette with a liner brush using black gel. Place it near the lower third so it sits above the free edge fade. Cure fully, then apply gloss top coat to smooth the surface.
Pro tipFor clean palm lines, load your brush with gel, then wipe the excess on the side of the palette before drawing.
Watch outSkip gray or thin black lines - they look washed out and don't read as silhouette.
11. Sunset Ombré French Tips with Peach Base
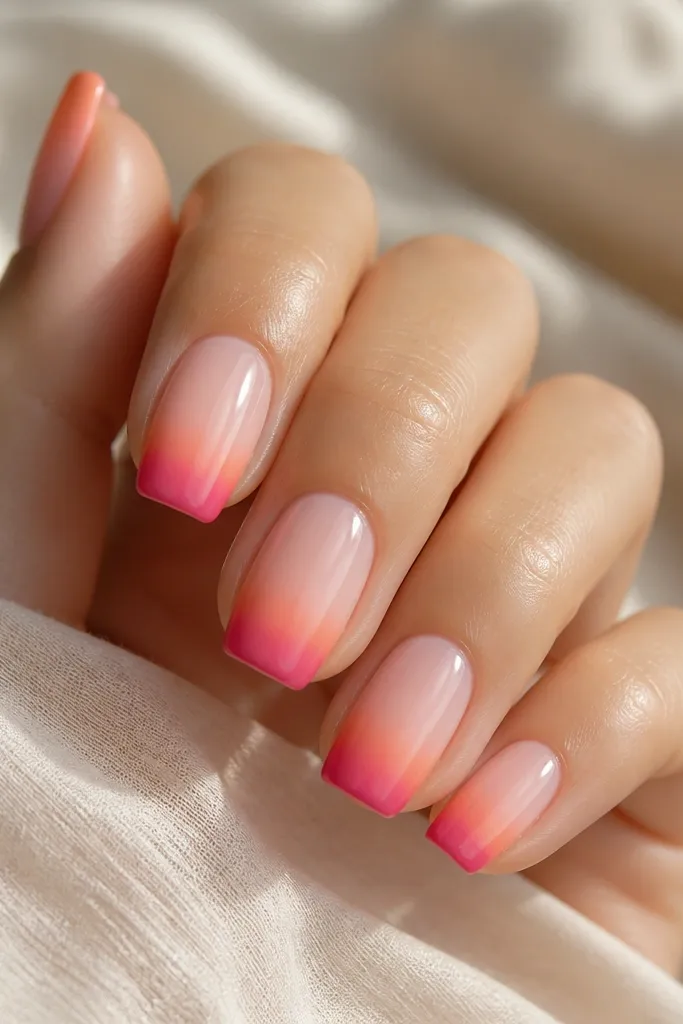
French tips are the easiest way to make sunset nails look polished. By putting the ombré only on the tip, you avoid messy cuticle blending. The sheer peach base keeps it wearable, and the ombré tip does the heavy lifting for color. Gloss makes the tip look like a glowing border.
Use a nude-peach base with a slightly glossy finish. Create the French ombré by sponge-painting gradient colors inside the tip area only. Use a striping brush to tidy the smile line so it stays crisp.
Pro tipMake the tip band slightly thicker on the outer corners - it makes the nail look more flattering.
Watch outDon't let the ombré reach the cuticle. If it does, it turns into a cloudy mess.
12. Warm Sunset Half-Glow Outline (No Fill)
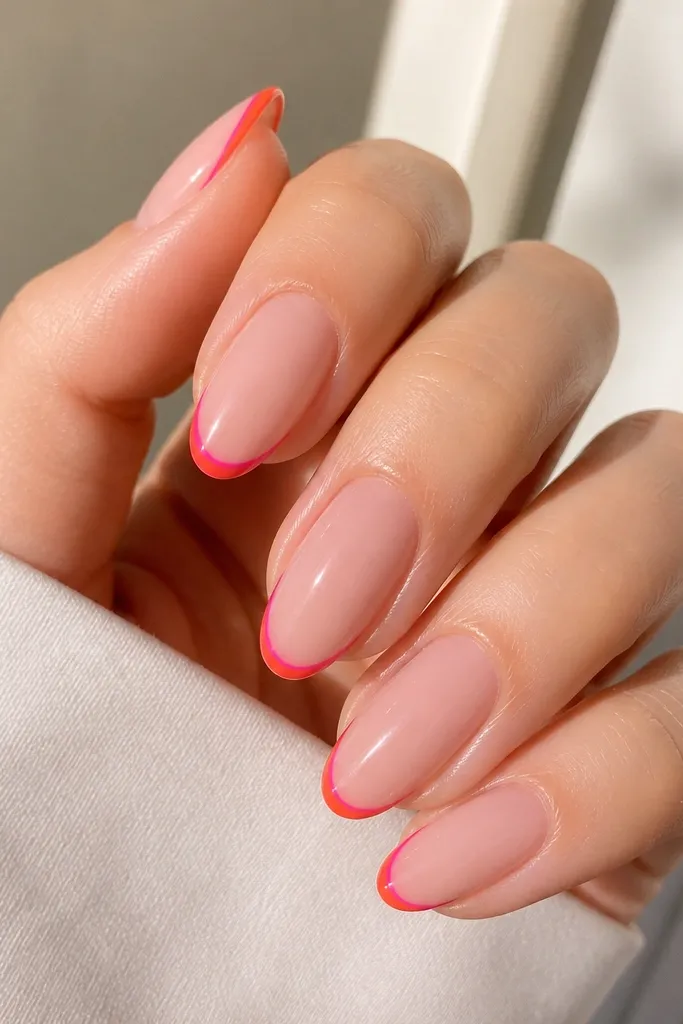
This is the "I want sunset but I'm not trying too hard" version. The thin outline gives you color impact without covering the whole nail. I like using two lines - coral on the outside edge and magenta just inside - so it looks like a glow. Gloss makes the lines look wet and bright.
Paint a sheer nude base. With a striping brush, draw a curved arc near the free edge following the nail shape, then add a second inner arc. Keep the arc height about 2-3 mm so it stays subtle. Top coat in two layers for smoothness.
Pro tipIf the arc wobbles, brace your finger on the table and move your wrist, not your hand.
Watch outAvoid thick outlines. They look like marker instead of nail art.



