
1. Cinnamon Micro-French on Sheer Nude
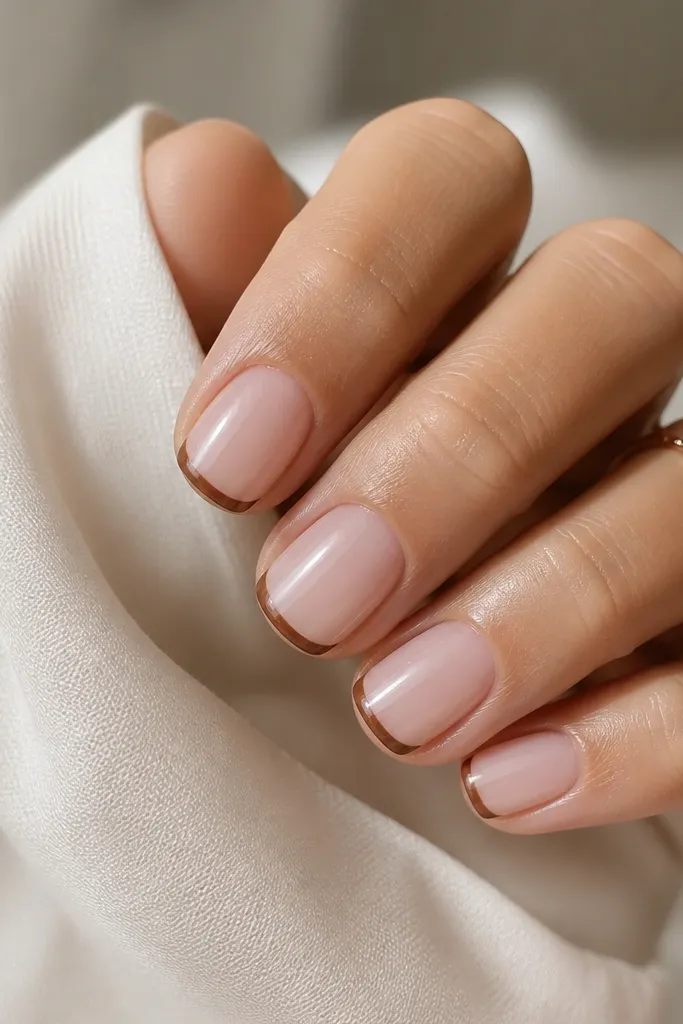
This one works because the nude does the heavy lifting, and the brown only draws a thin boundary at the tip. Cinnamon looks warm and skin-like on short nails, so you get contrast without a harsh stripe. The micro size keeps the nail bed visually longer, especially if your nails have small free edges.
Ask for a sheer nude layer at medium opacity, then keep the French line between 0.5-1 mm thick. Shape matters here - squoval reads neat and the French line stays crisp; soft almond also works but keep the curve subtle.
Pro tipUse a liner brush (fine tip, not a wide striping brush) and clean the line with a tiny brush dipped in acetone after curing.
Watch outAvoid a thick French tip on short nails - it shortens the whole nail.
2. Mocha Cuticle Crescent
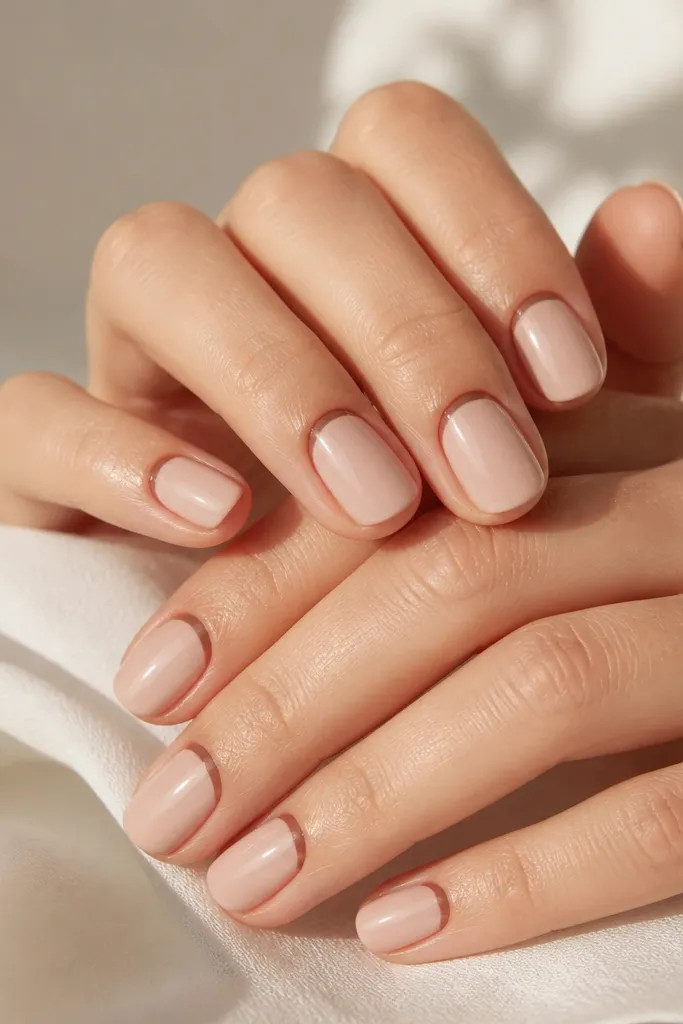
A cuticle crescent makes the nail look fuller at the base, which balances short length. Mocha brown has depth without turning gray, so it looks expensive even with minimal art. Because the accent stays small, it doesn't crowd the nail bed.
Paint the nude base first, then place a half-moon of mocha near the cuticle - about 1/3 of the nail width. Keep it thin at the edges and slightly thicker in the center for a natural arc.
Pro tipIf your cuticle area is dry, push the accent a millimeter away from the skin so it doesn't lift.
Watch outDon't let the crescent touch your skin - it chips faster and looks messy.
3. Beige-Tan Nude with One Chocolate Side Stripe
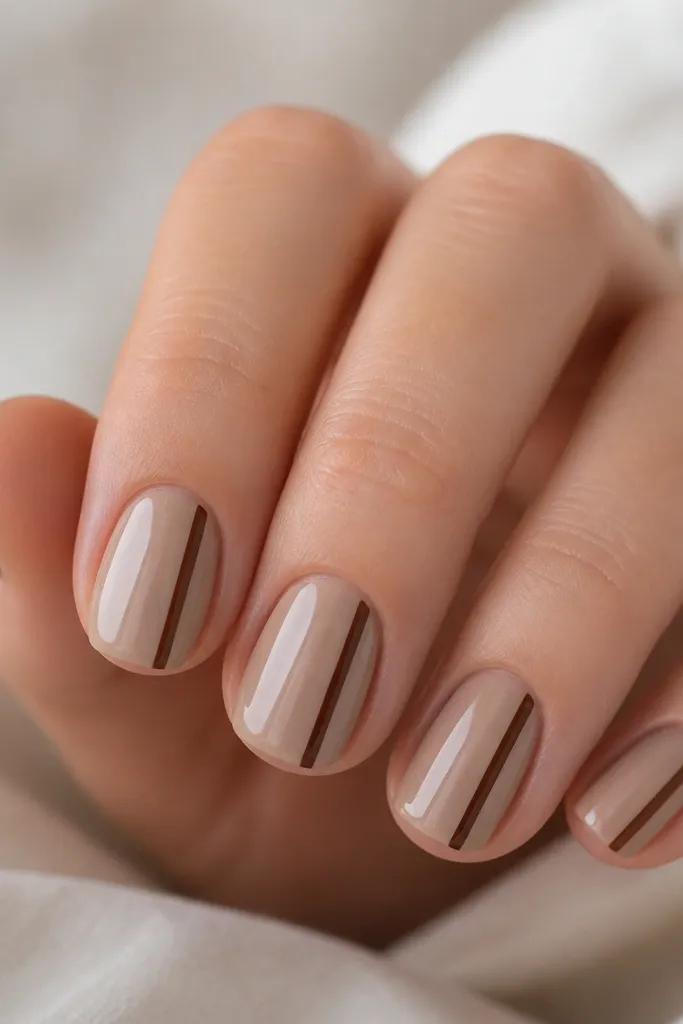
A single vertical stripe narrows the visual width and makes your nails look longer. The beige-tan nude keeps everything grounded and realistic, while chocolate adds a strong but controlled contrast. On small space nude acrylic nails, one stripe looks intentional, not busy.
Use a beige-tan nude opaque enough to cover evenly in one to two layers. Stripe width should be around 0.5 mm; place it slightly off-center so the nail still looks balanced.
Pro tipSeal the stripe with two thin top coat passes - one right after you place the art, then a second after it fully dries or cures.
Watch outAvoid multiple stripes or thicker lines - they widen the nail bed.
4. Caramel Sheer Base with Top-Third Brown Fade
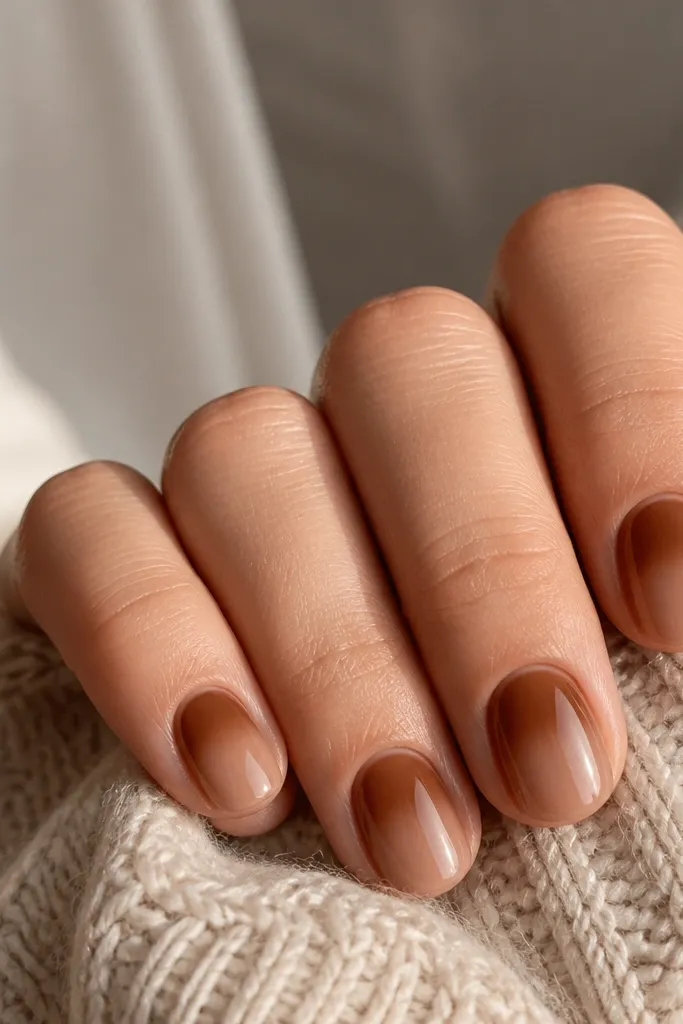
The fade creates a natural "highlight" at the center and shifts attention upward. Caramel sheer keeps the nude looking like your nail bed, not like opaque paint. Warm brown fading reads softer than a solid tip, which is flattering on shorter nails.
Start with a sheer caramel base. Add brown only from the top third downward, then blend with a sponge using light taps until the transition disappears. Keep the fade about 2-3 mm tall on short nails.
Pro tipPractice blending on a clear nail tip first so you can nail the height of the fade.
Watch outDon't blend too low - if the brown reaches the middle, the nail looks shorter.
5. Rose-Beige Nude with Tiny Earthy Specks
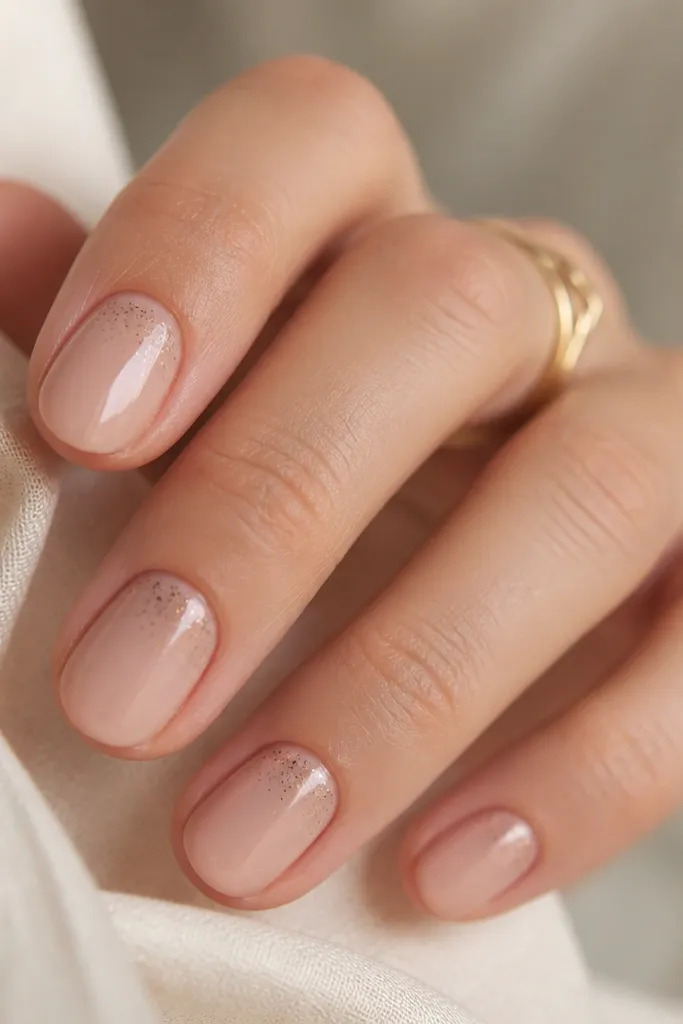
Micro specks mimic natural nail texture and look cute without taking up space. Rose-beige nude keeps the set soft, and warm specks add interest that doesn't overpower. This is the design I reach for when I want "pretty nude" but still not boring.
Use a rose-beige nude that's not too milky. With a dotting tool, place 3-6 tiny specks per nail, mostly near the cuticle line. Leave the center mostly clean so the nude still looks dominant.
Pro tipMake specks smaller than you think - tiny dots look intentional; big dots look like paint mistakes.
Watch outAvoid covering the whole nail with specks - it turns into brown confetti.
6. Soft Almond Nude with Chocolate Dot French
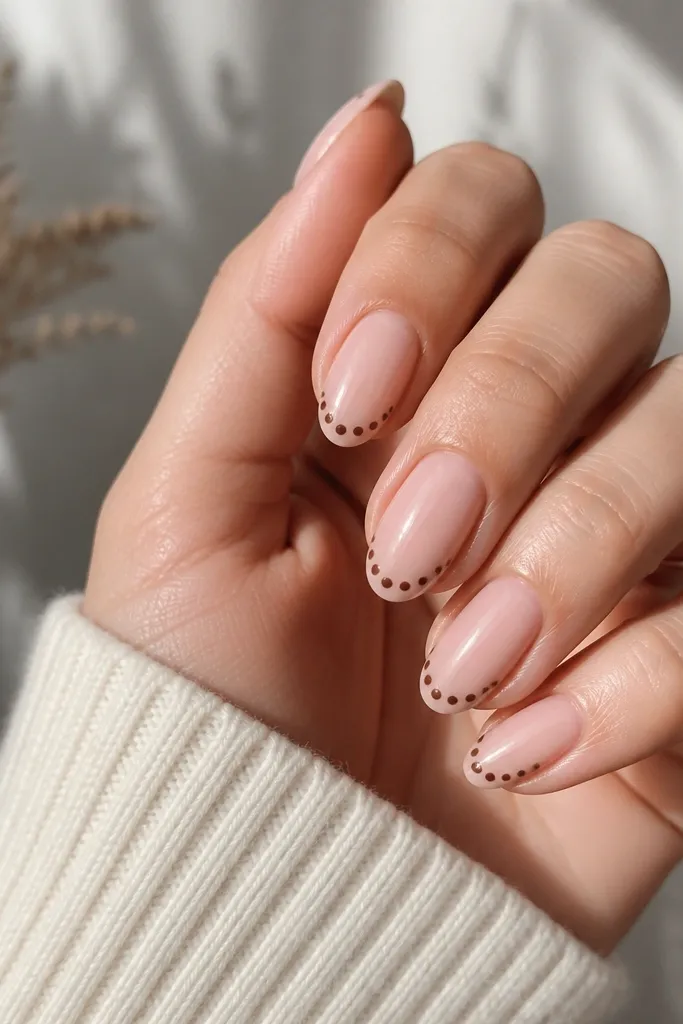
Dot French gives you the French look without the heavy line that can shrink short nails. Chocolate dots create crisp contrast while the dotted shape keeps the tip airy. On small space nude acrylic nails, this stays cute instead of chunky.
Choose a sheer nude base with medium coverage. Place 6-9 dots across the tip, curving them slightly upward in the center. Keep the dot size around a pinhead so the tip feels light.
Pro tipAfter you cure, add a tiny top coat over the dots to smooth the texture so they don't catch on hair and fabric.
Watch outDon't use large dots - they make the tip look thick.
7. Warm Nude Base with One Thin Brown Chevron
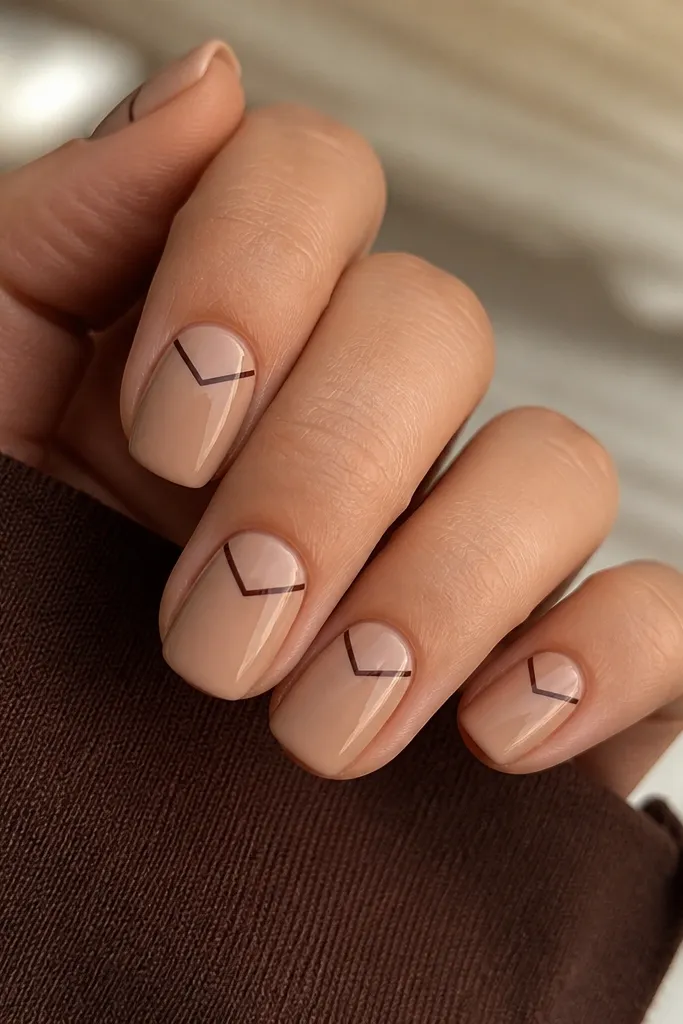
A chevron that's small and placed high makes the nail look longer because the V shape pulls the eye upward. Warm nude keeps the design grounded, and a thin chocolate line reads sharp without needing extra colors. This is a great choice when you want something graphic but still "nude."
Paint warm nude as your base. Draw a chevron using a liner brush: one diagonal line on each side, meeting near the center of the top third. Keep it narrow - about 1/3 of the nail width.
Pro tipIf your lines wobble, clean the edges with a brush dipped in acetone, then re-cure or re-seal.
Watch outAvoid a full chevron across the nail - it looks busy on short length.
8. Cocoa Marble Swipe on Nude
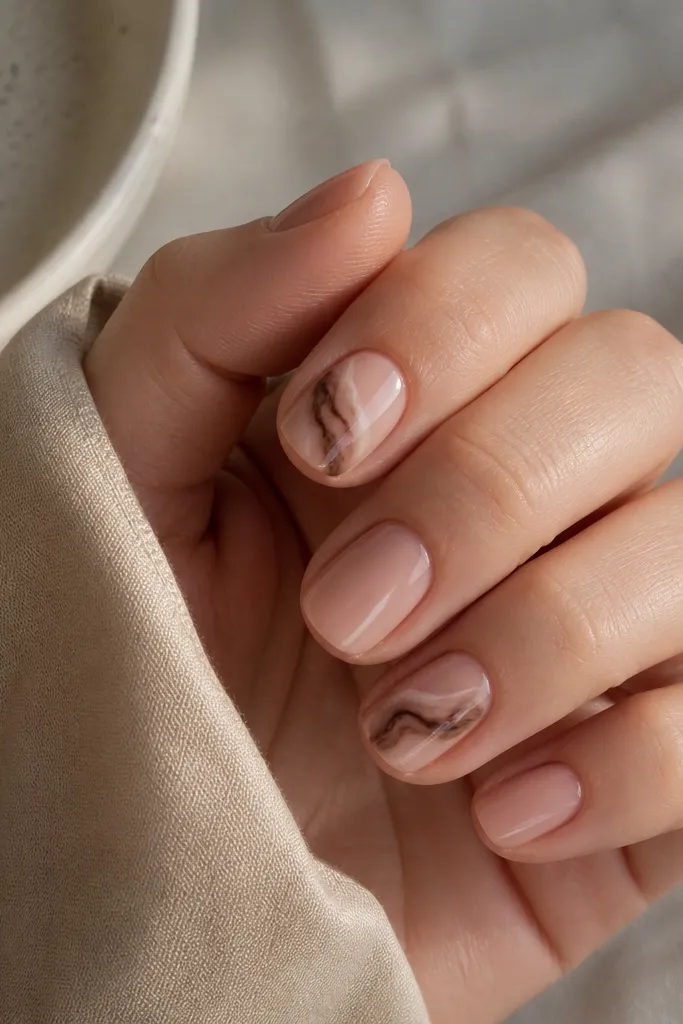
Marble works best on short nails when it's controlled - one swipe, not a whole nail. Cocoa brown gives that warm, coffee tone that looks expensive on nude. Keeping it to two accent nails keeps your set clean and wearable.
Use a nude base that matches your skin undertone. For marble, drag a thin cocoa gel or paint line diagonally, then lightly smear with a clean brush tip to create veining. Aim for 1-2 swipes per accent nail.
Pro tipMake the marble lines thinner than you think; fat lines look like smudges on small nails.
Watch outDon't marble every nail - it overwhelms the nude and makes the set look heavy.
9. Caramel Outline Around a Clear Center
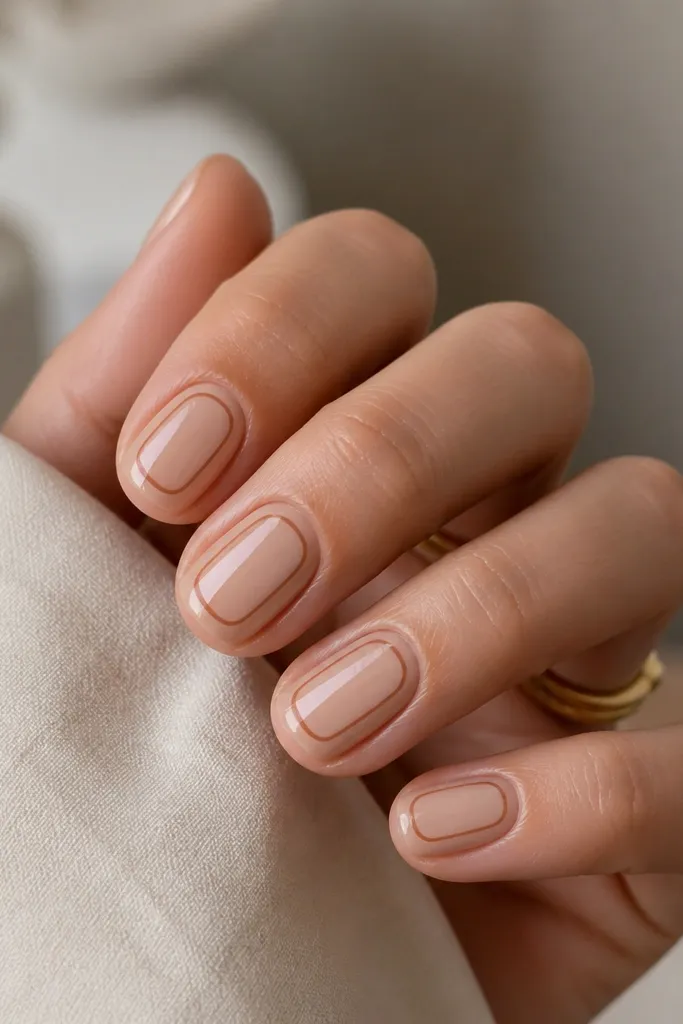
This design creates a negative-space illusion without leaving your nail bare. The caramel outline defines the nail shape, while the clearer center keeps the middle light and airy. It's one of the few nude designs that still looks "designed" on very short length.
Start with sheer nude so it blends. Create a clear center by wiping a small area slightly less opaque, then outline it with caramel-brown using a liner brush. Outline should be thin and follow the nail's natural curve.
Pro tipIf you're doing this at home, use a steady hand and do one nail at a time so the outline stays crisp before you move on.
Watch outAvoid thick outlines - they make the center look smaller.
10. Mocha Half-Moon at Sidewall
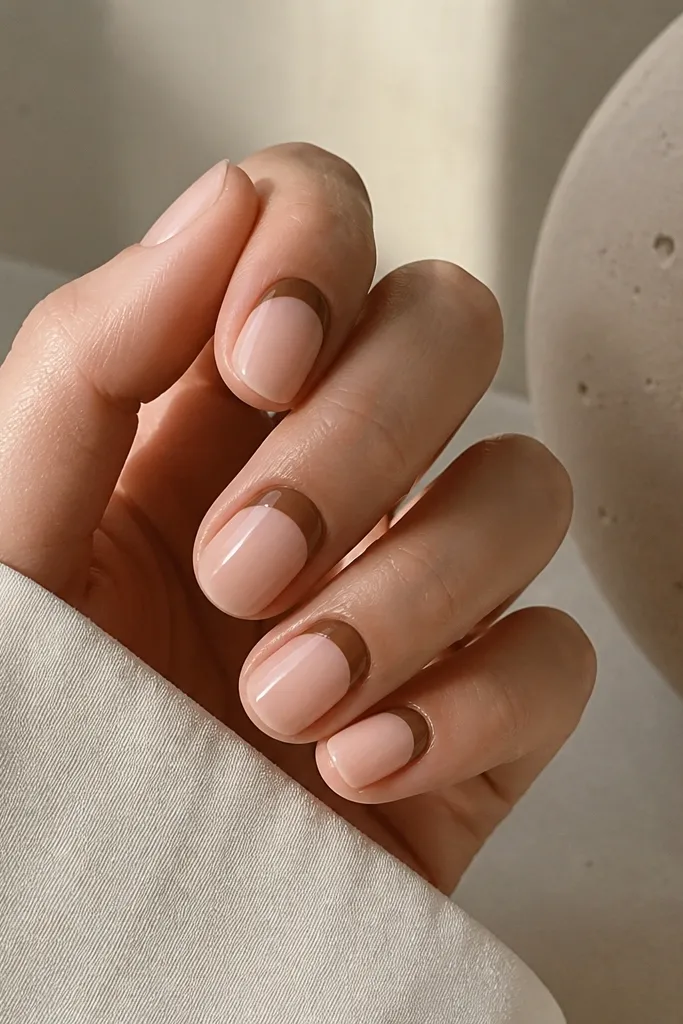
Sidewall accents are underrated because they look like jewelry for your nails. The half-moon shape adds structure near the cuticle, and mocha gives that warm depth without going too dark. It's a flattering option if you like subtle asymmetry.
Paint a nude base, then place the half-moon on one side of the cuticle area - about 1/4 of the nail width. Keep the curve tight and stop the shape before the middle of the nail.
Pro tipUse a small makeup sponge to lightly blur the edge of the half-moon so it doesn't look like a sticker line.
Watch outAvoid placing the half-moon too low - it looks like a chip.
11. Chocolate Micro-Studs at the Tip
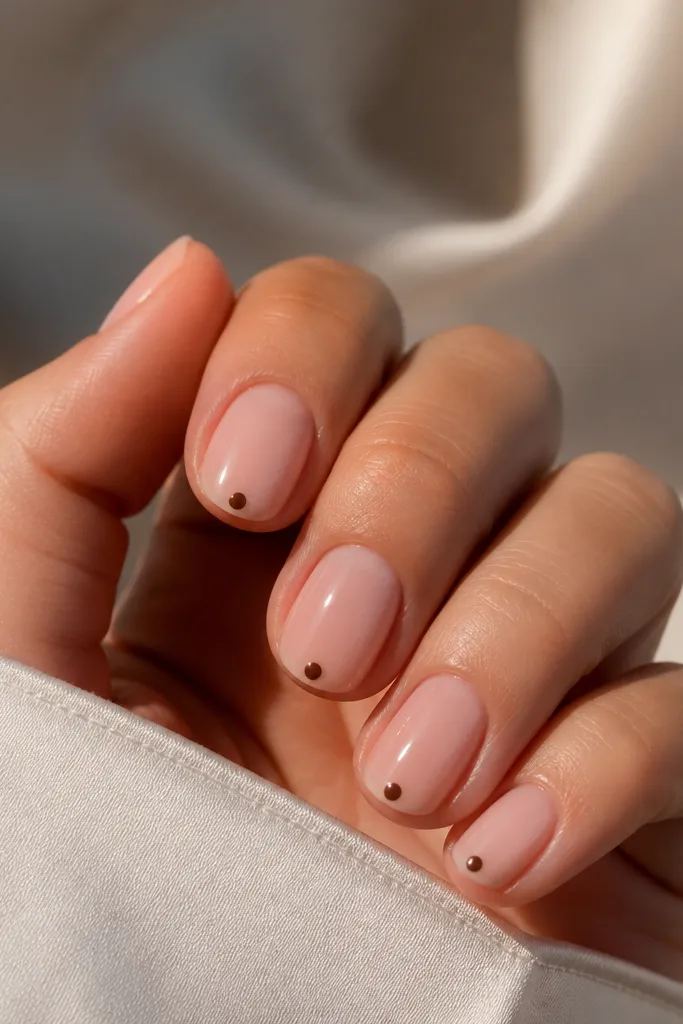
Micro studs give you texture and sparkle without changing the nude vibe. Chocolate studs look softer than black and don't scream "party." On small space nude acrylic nails, one stud per nail looks balanced and intentional.
Use a sheer-to-medium nude base. Place one micro stud at the tip center, pressing lightly so the acrylic around it stays smooth. Seal with top coat so the stud edges feel smooth to the touch.
Pro tipIf you catch your nails on sweaters, file the stud area lightly after sealing so it doesn't snag.
Watch outAvoid large studs - they make short nails look bulky.
12. Warm Nude with Brown "Nail Pinstripe" Curve
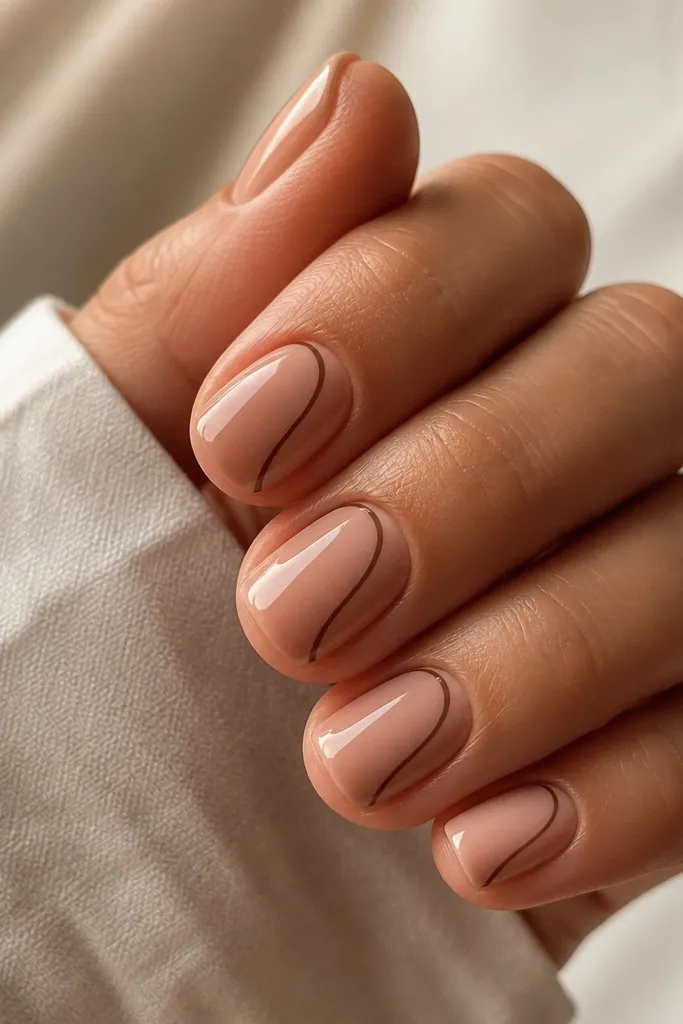
A single curved pinstripe gives movement and keeps the eye traveling upward. Warm nude makes the stripe look like part of the nail, not an added sticker. This is the design that makes small nails look styled even when you keep everything else plain.
Paint warm nude with a smooth finish. Draw a curve using a liner brush: start near the cuticle but not touching, then curve toward one side around the top third. Keep line thickness under 1 mm.
Pro tipSteady your hand on a table and angle your wrist slightly so your brush tip stays consistent.
Watch outAvoid straight lines across the nail - they can make short nails look blocky.



