
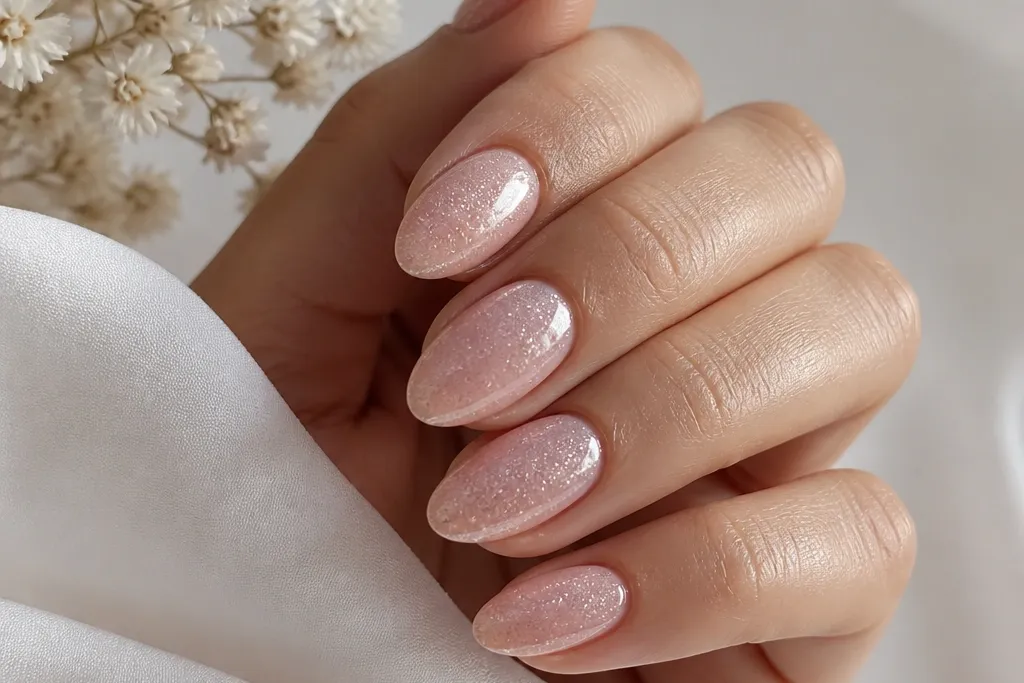
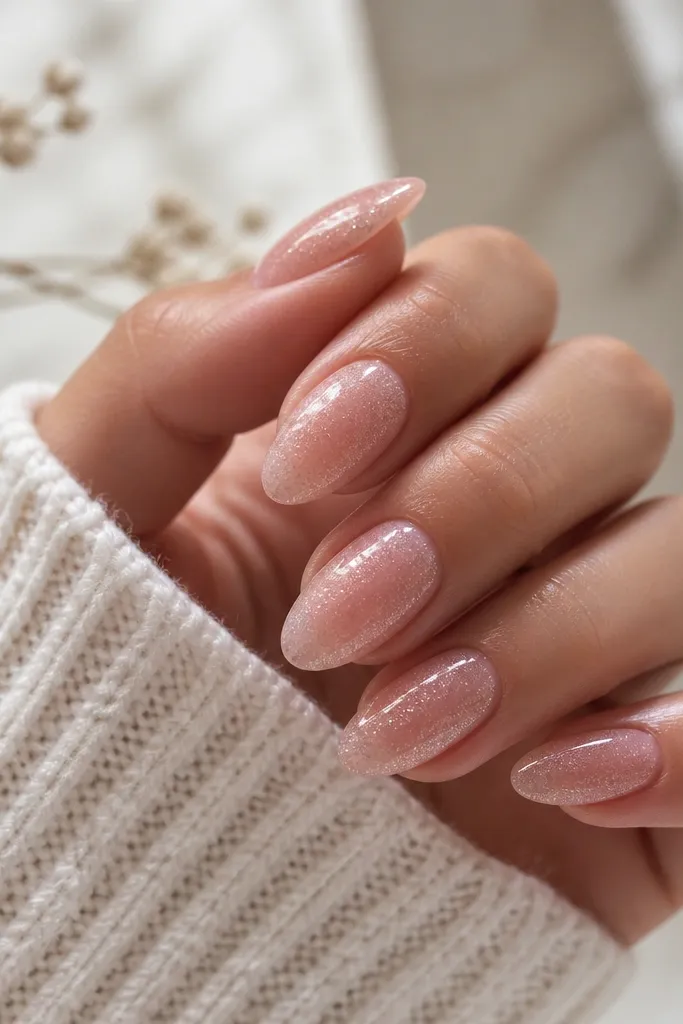
1. Blush almond with crystal half-moons
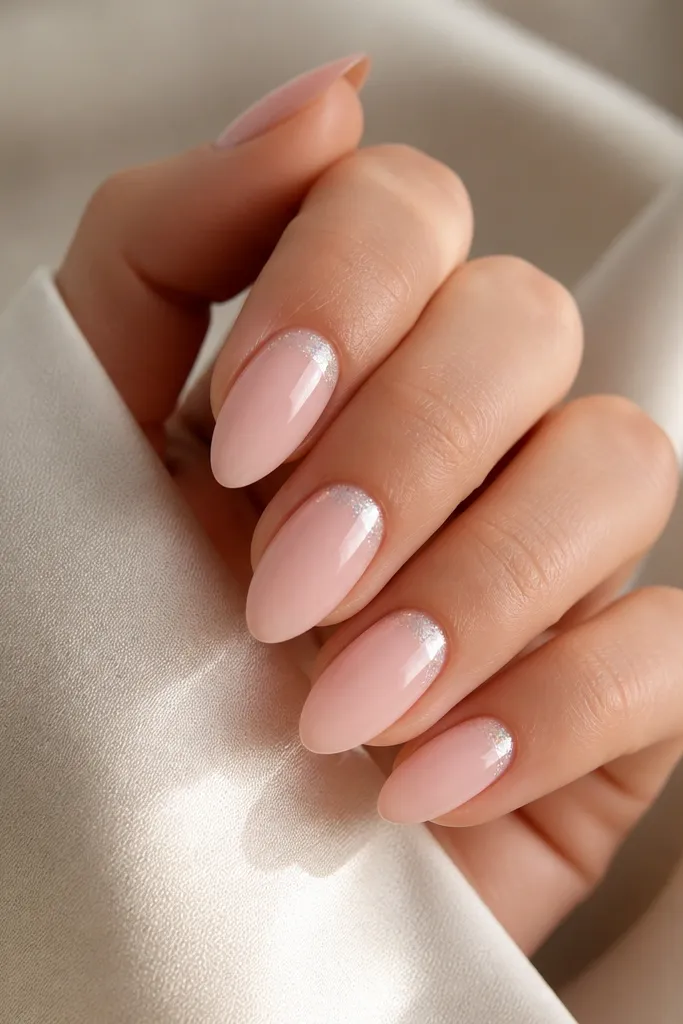
This is my go-to when someone wants "pretty but not loud." The sheer blush keeps the look soft, and the half-moon glitter reads like jewelry at the base. Fine crystal micro-glitter stays delicate and won't feel gritty. The half-moon also makes the nail look longer, because the glitter visually lifts the cuticle line.
Apply two thin coats of sheer blush gel, curing fully between coats. Use a small gel brush to place the glitter in a curved half-moon shape about 1/8 inch wide. Keep the glitter edge crisp - no smudging past the natural cuticle curve. Finish with glossy top coat and cap the free edge on every nail.
Pro tipPaint the half-moon slightly higher on the ring finger so it catches light when you gesture.
Watch outDon't spread glitter all the way to the sidewalls or it can look uneven and messy.
2. Soft pink gradient with fingertip sparkle fade
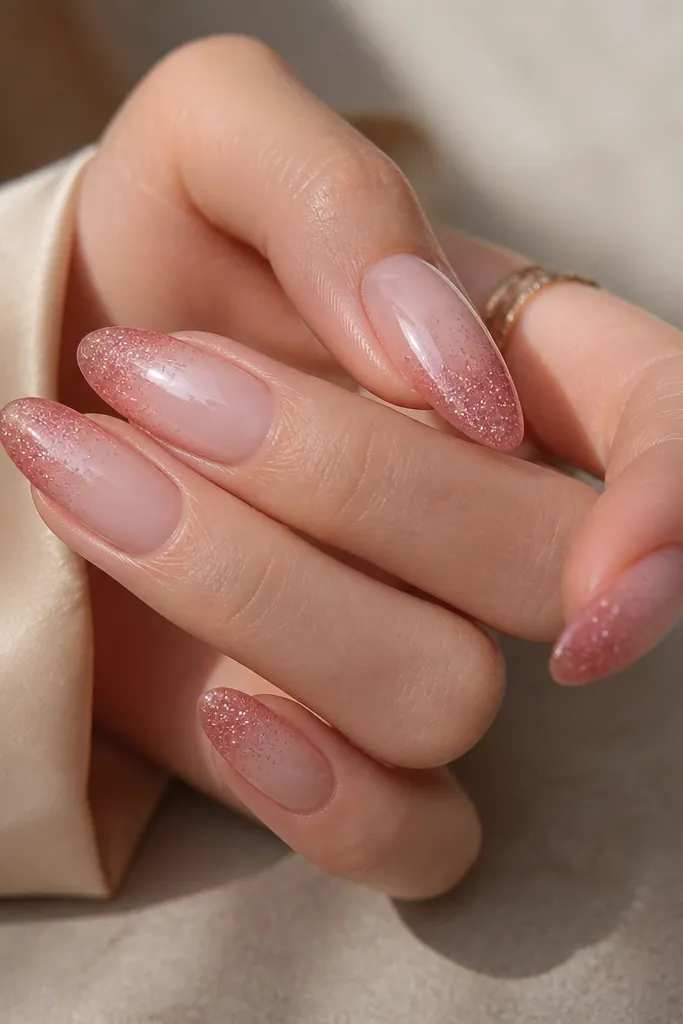
A gradient keeps the design dimensional without adding bulk. The fingertip sparkle makes it feel special, but because it fades, it still looks wearable for everyday. Fine glitter concentrated near the tip visually balances the almond shape. This one also photographs beautifully because the glitter catches the light only where your nail curves.
Start with a sheer base and sponge a slightly deeper blush only in the top third. Then dab glitter gel lightly on the top third and brush it downward a few millimeters to create the fade. Keep the side edges clearer so the fade looks intentional. Seal with two coats of top coat, curing thoroughly.
Pro tipUse a makeup sponge for the blush blend; brush-only blending leaves hard lines.
Watch outAvoid chunky glitter - it creates a ridge that catches on hair and clothes.
3. One nail accent: blush with micro-snowflake glitter
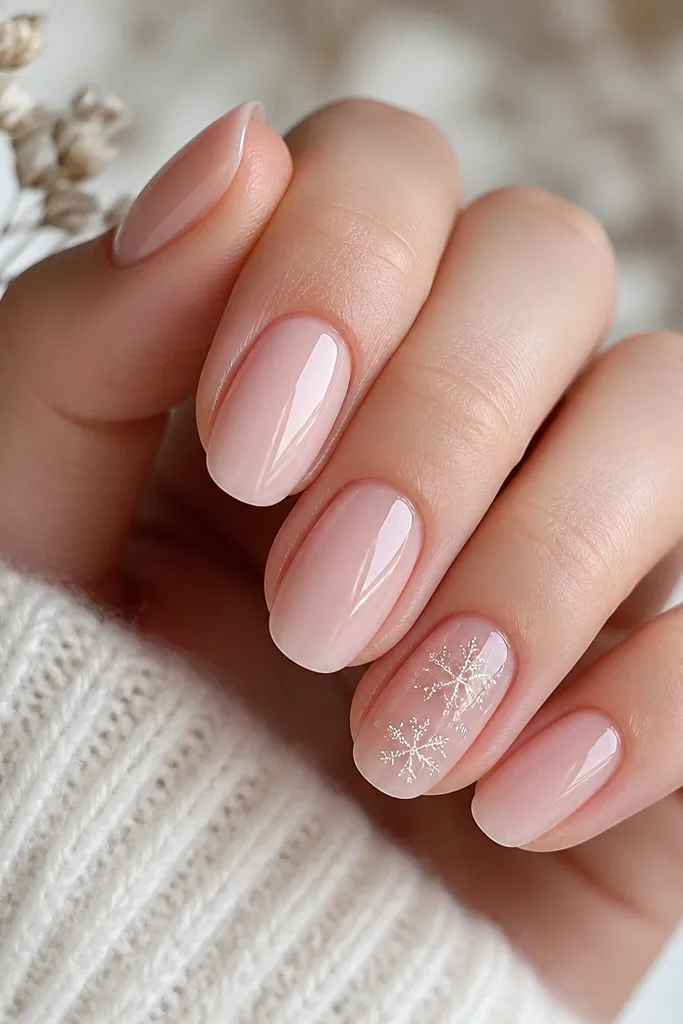
This design gives you sparkle without making every nail compete. The tiny snowflake pattern looks airy over a clean pink base. Because the glitter isn't covering the whole nail, it stays light and year-round. It's also easy to wear to work because most nails are just soft blush.
Paint all nails in two sheer blush coats. On the accent nail, use a dotting tool to place micro-glitter in small clusters, then connect each cluster with a couple of tiny strokes using a thin liner brush. Leave at least a 1-2 mm clear border around the cuticle and sidewalls. Finish with glossy top coat to lock the pattern in.
Pro tipIf you don't have snowflake glitter, use fine hex glitter and place it in star-like clusters with the dotting tool.
Watch outDon't cover the whole accent nail; full coverage turns it into holiday-only.
4. Rose milk base with scattered holographic confetti
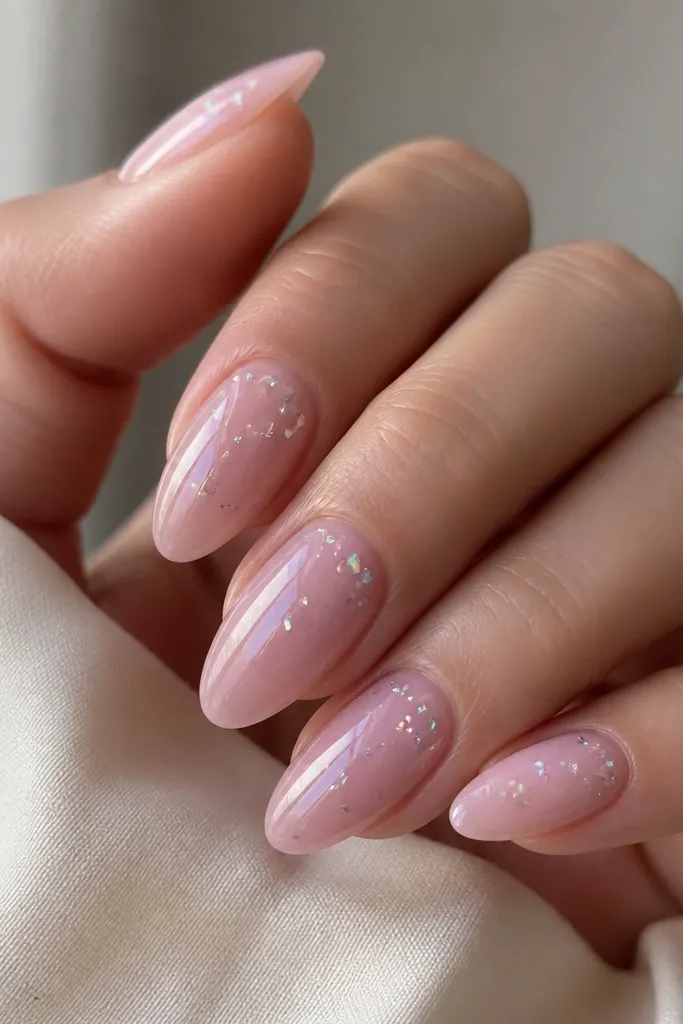
Rose milk pink looks soft and modern, and holographic confetti adds a clean "glint" instead of heavy glitter. The sparse scatter keeps it from looking like glitter bomb. I like this when the weather shifts because it reads fresh even in cold months. The holographic pieces add color flashes without changing the base color.
Use a milky rose gel, not a fully opaque pink, so you still see a gentle glow. Dab a thin layer of clear gel on the upper half only, then sprinkle or press micro confetti into it. Use a clean brush to remove loose bits so you don't get stray glitter on the cuticle. Top coat twice for a glassy finish.
Pro tipScatter more on the index and ring fingers; leave middle and pinky slightly calmer.
Watch outDon't press confetti too deep - it can sink and look dull after curing.
5. Blush chrome dust on top of glitter tips
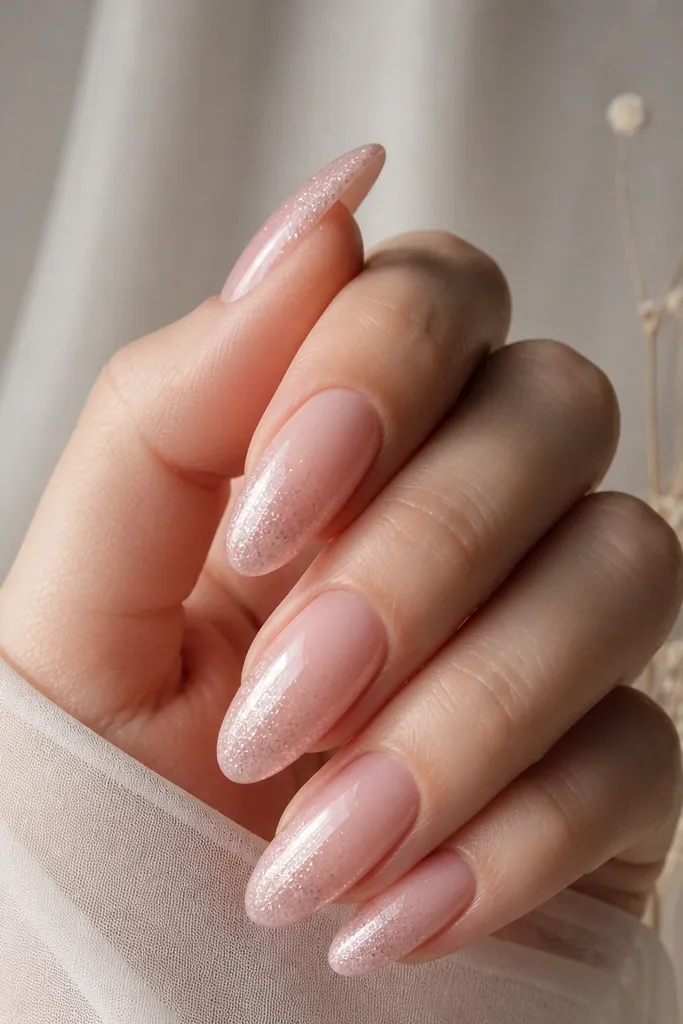
This one is for when you want sparkle that looks expensive. The glitter tip gives you the shimmer, and the chrome dust makes it look smooth and reflective. Chrome over glitter hides uneven glitter placement because the haze blends it. The result is a "pearl sparkle" effect that works year-round.
Do a sheer blush base, then apply fine glitter gel only on the top third. After curing, rub a blush chrome powder very lightly over the glitter using an applicator sponge. Cure again if your system requires it, then seal with a thick top coat. Keep the chrome haze off the cuticle so it doesn't look smoky.
Pro tipUse a light hand with chrome; you should barely see it until top coat.
Watch outAvoid heavy chrome - it can turn the design flat and streaky.
6. Soft pink ombre with a single line of glitter
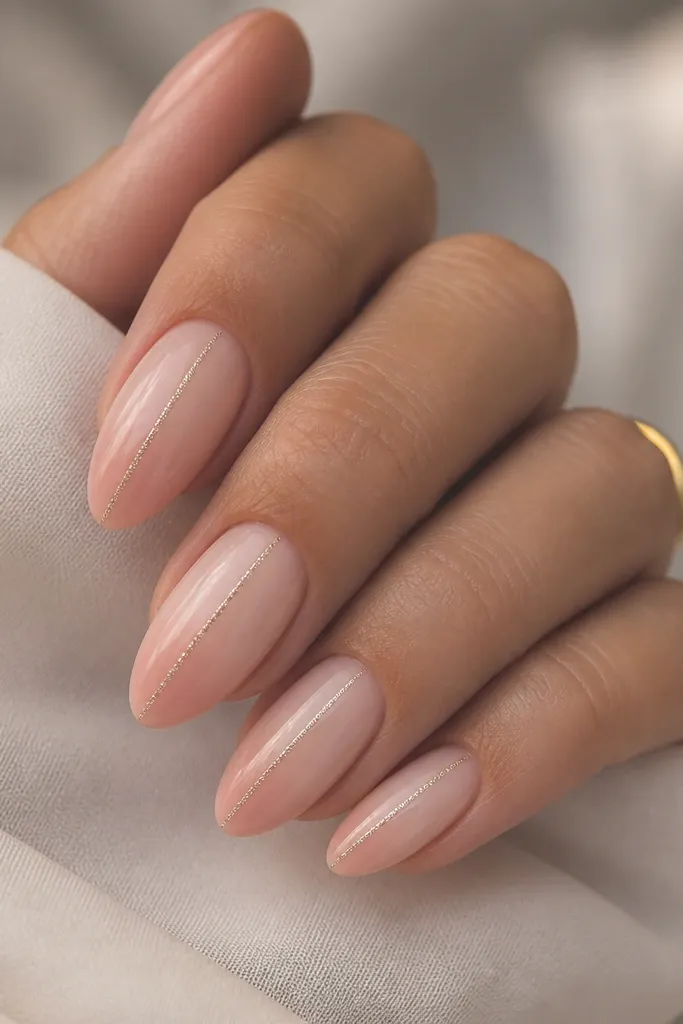
A center line makes the nail look longer and clean. The ombre gives softness, while the single line adds structure. Because it's only one strip of glitter, it stays wearable for everyday. This is also a great option if you want sparkle but hate the look of full glitter coverage.
Create your ombre with a sponge: sheer blush at the cuticle, a slightly richer blush at the tip. For the glitter line, load a fine liner brush with glitter gel and draw a straight stripe down the center, stopping just above the tip edge. Cure carefully so the line doesn't flood sideways. Top coat and cap the free edge.
Pro tipMark the center lightly with a dot before you paint the line, so it stays straight.
Watch outDon't use too-thick glitter gel for the line or it will look raised.
7. Dusty rose base with tiny dot glitter confetti
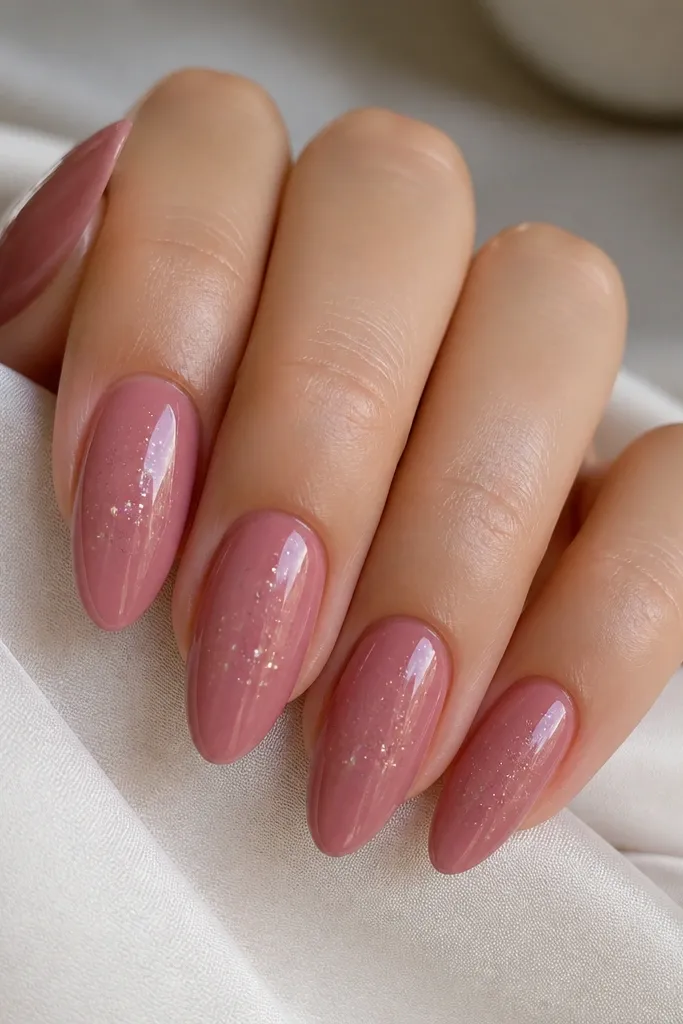
Tiny dot confetti looks playful without looking messy. The dusty rose soft pink has enough pigment to make the glitter visible, but not so much that it turns into a solid color. This design is forgiving if your application isn't perfect because the dots hide small brush strokes. It also looks great in low light - the dots catch attention only when your hand moves.
Paint two coats of dusty rose. Add a thin layer of clear gel in the zones you want sparkle, then place micro glitter dots using a dotting tool (or the tip of a toothpick). Leave bigger gaps so the pattern feels intentional. Seal with glossy top coat, paying attention to the dot edges.
Pro tipUse fewer dots on thumb nails; they can look crowded fast.
Watch outAvoid large glitter chunks in the dots or you'll feel them snag.
8. Soft pink nail with glitter cuticle frame
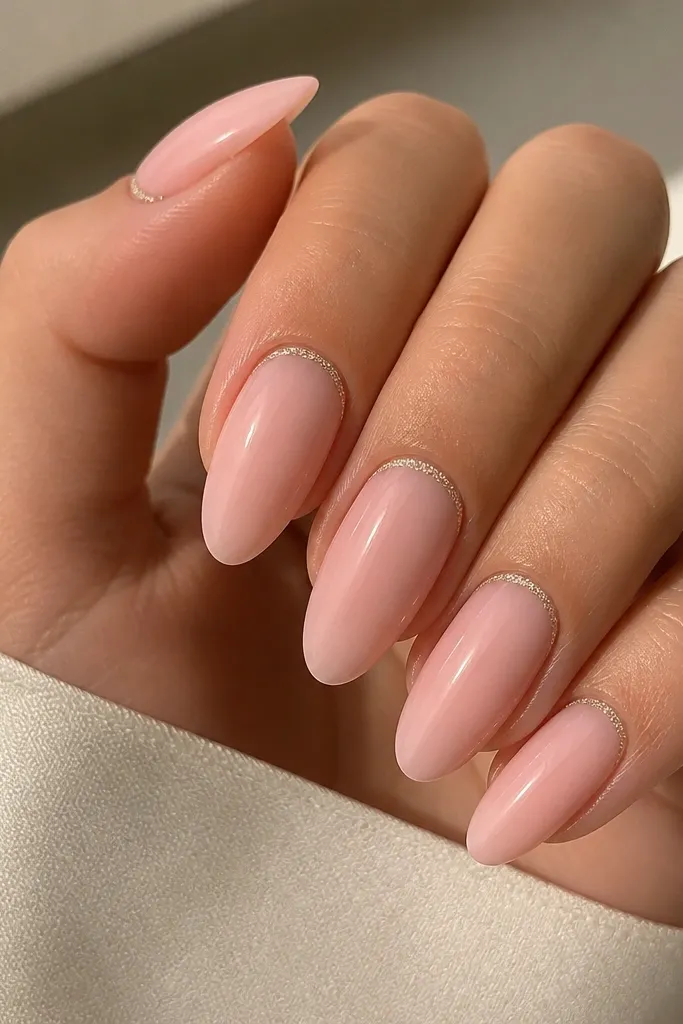
A glitter frame makes the nail look finished and tidy. It's a cleaner alternative to half-moons when you want the sparkle to hug the nail shape. Because it stays near the cuticle, it doesn't overwhelm your whole nail. This is also a great design for short-to-medium almond lengths because the sparkle stays contained.
Apply sheer soft pink in two thin coats. With a striping brush, draw a thin glitter outline along the cuticle curve and slightly up the side edges, leaving the center plain. Cure, then add top coat. If you get glitter on the skin, remove it with a small brush dipped in gel cleanser before curing.
Pro tipUse a striping brush with a fine tip; thick brushes make the frame look fuzzy.
Watch outDon't let glitter touch the skin - it ruins the crisp frame.
9. Blush pink with diagonal glitter sash
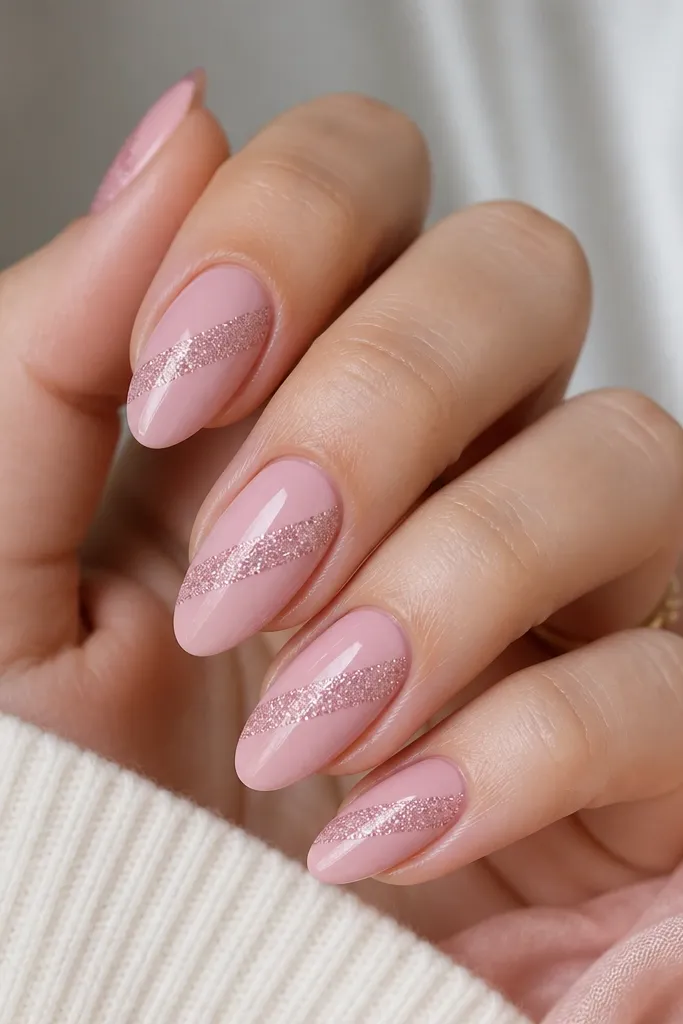
Diagonal placement looks modern and makes the nail look slimmer. The glitter sash gives movement without needing full coverage. Fine glitter keeps it airy, and the soft pink base keeps it wearable. This is the one I reach for when someone wants something "different" but still classy.
Paint your sheer blush base. Place the diagonal sash with glitter gel using a striping brush, keeping the band about 1.5-2 mm wide. Stop the band 2-3 mm before the tip and keep it off the cuticle so it doesn't look crowded. Cure and seal with a thick top coat to smooth the glitter.
Pro tipUse tape as a guide for the first nail; then match the angle on the rest.
Watch outAvoid uneven band width - it reads sloppy in close-up photos.
10. Soft pink marble with glitter veins
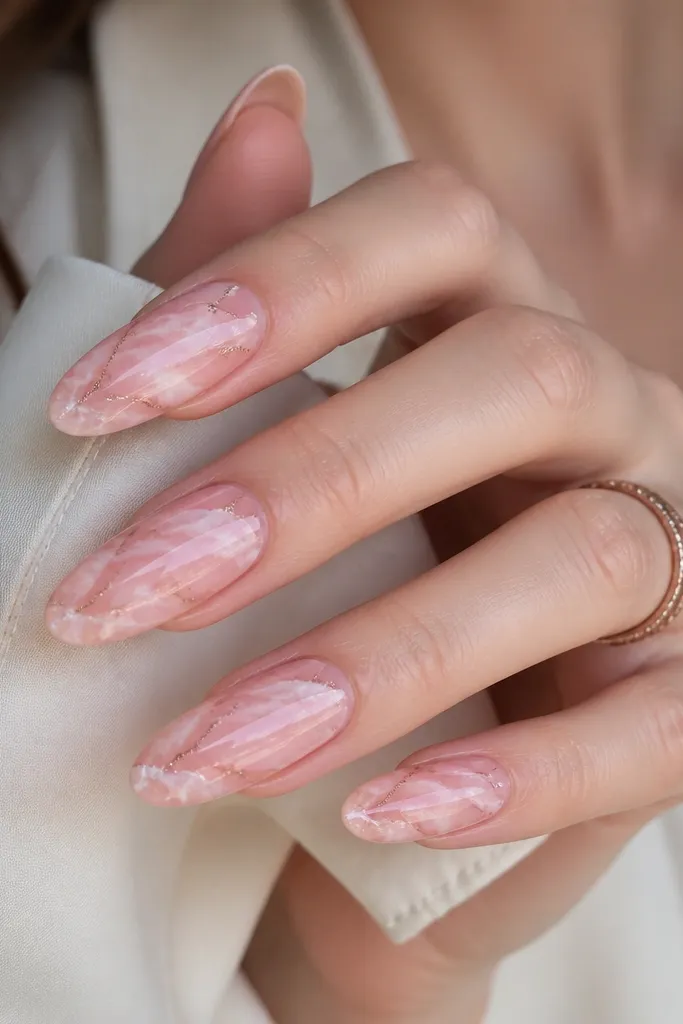
Marble hides imperfections and makes soft pink feel more interesting. Glitter veins add sparkle only where the marble lines are, so it looks intentional. This design looks high-end because it's not just "glitter on top" - it's integrated into the pattern. It's also forgiving for people who get bored of plain pink.
Base coat with sheer soft pink. Add marble lines using a slightly thicker gel in pale pink and a touch of white, then drag with a thin brush to create swirls. After curing, trace select swirls with glitter gel and micro glitter. Keep glitter off the strongest swirls near the cuticle so it doesn't look heavy.
Pro tipUse a thin brush and pull the marble lines in one direction per nail for cleaner flow.
Watch outDon't overload the marble with too many colors or the glitter looks random.
11. Blush ombre with chunky-free tip sparkle dust
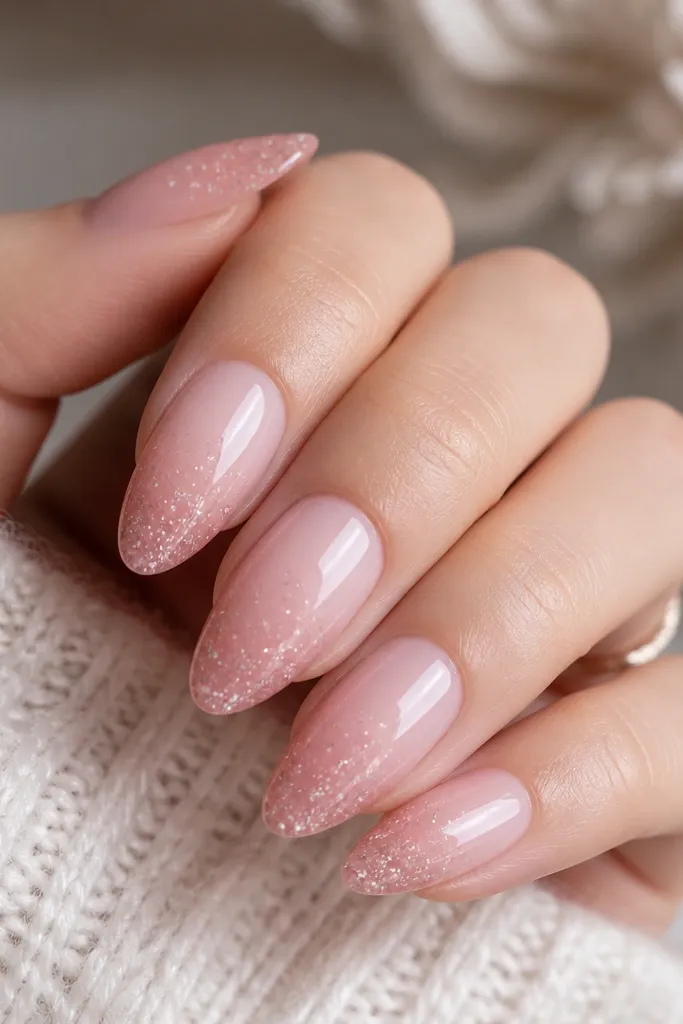
This is how you get sparkle that looks natural. The tip dusting gives texture, but because it's fine and not a thick layer, it stays comfortable and smooth. The ombre makes it look like the glitter is part of the color transition. I like this for everyday because it doesn't feel like you're wearing a separate glitter layer.
Do a blush ombre with sponge. Then apply a very thin layer of clear gel on the last 2-3 mm of the nail and press fine glitter into it lightly. Tap off excess glitter so it doesn't build up. Top coat thickly to smooth everything and cap the tip.
Pro tipIf you see glitter clumps, brush them out before curing.
Watch outAvoid a solid glitter cap - it chips faster and feels rough.
12. Soft pink with glittery French smile
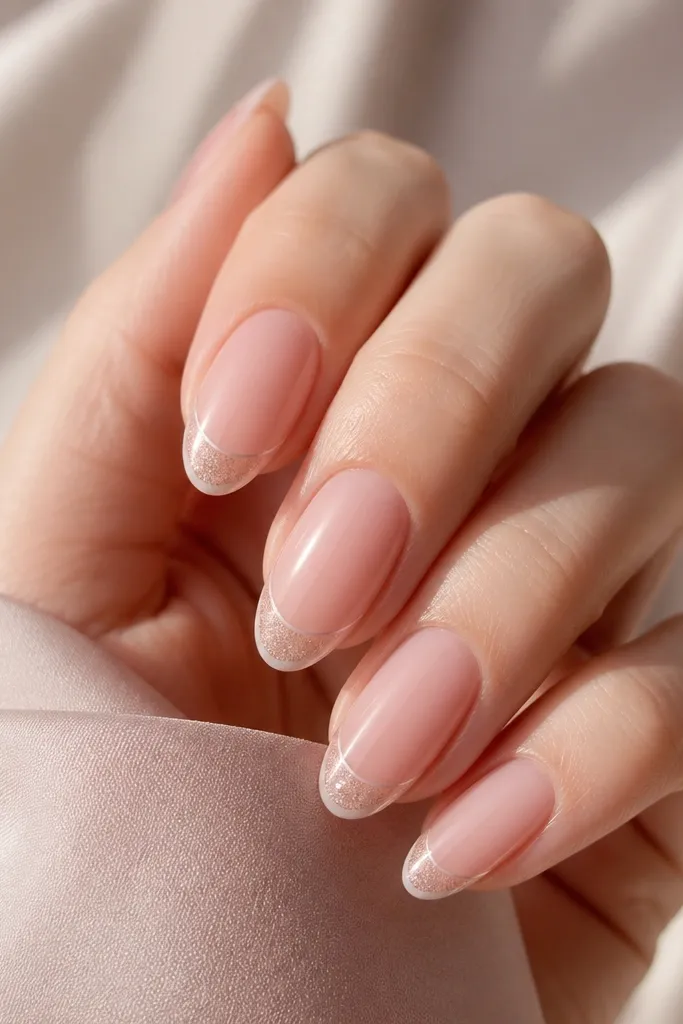
A French smile keeps the look classic, and glitter makes it playful. The key is keeping the base sheer so the tip line looks crisp. Fine glitter in a smile curve looks like jewelry catching light. It also works on all almond lengths because the smile line follows the natural contour of the tip.
Use sheer pink as the base. Paint a thin curved smile line near the tip edge with glitter gel, then add micro glitter to the line only. Leave a 1 mm clear gap between the smile and the base so it looks like a true French. Seal with top coat and cure fully.
Pro tipUse a French guide strip for the first nail so your smile curve matches across fingers.
Watch outDon't widen the French line too much or the almond tip starts to look short.



