
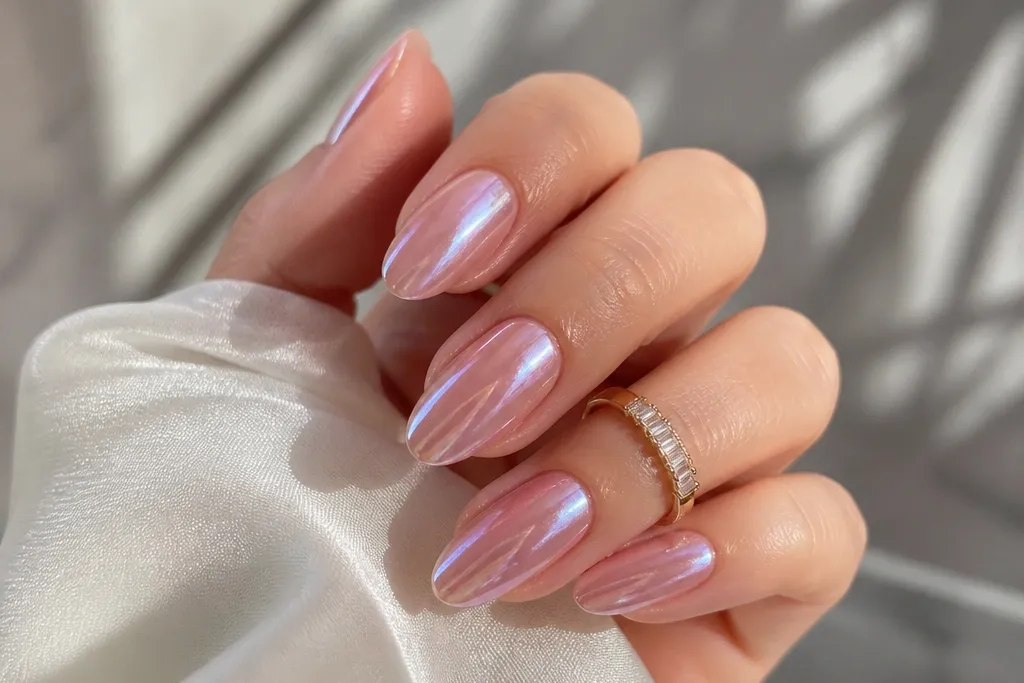
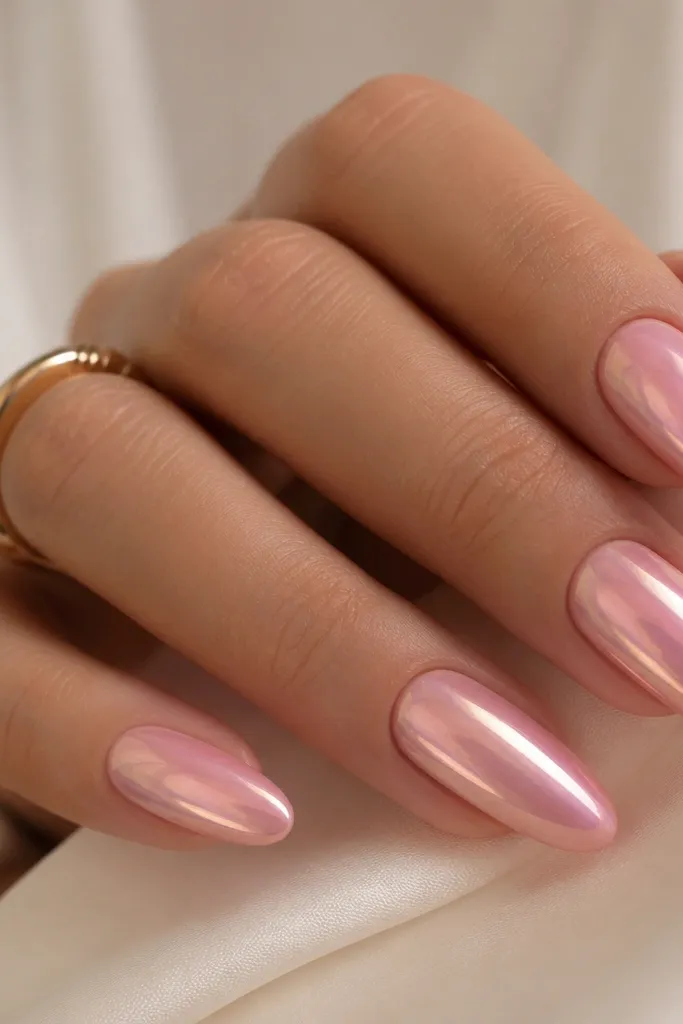
1. Blush Milk Glass Mirror
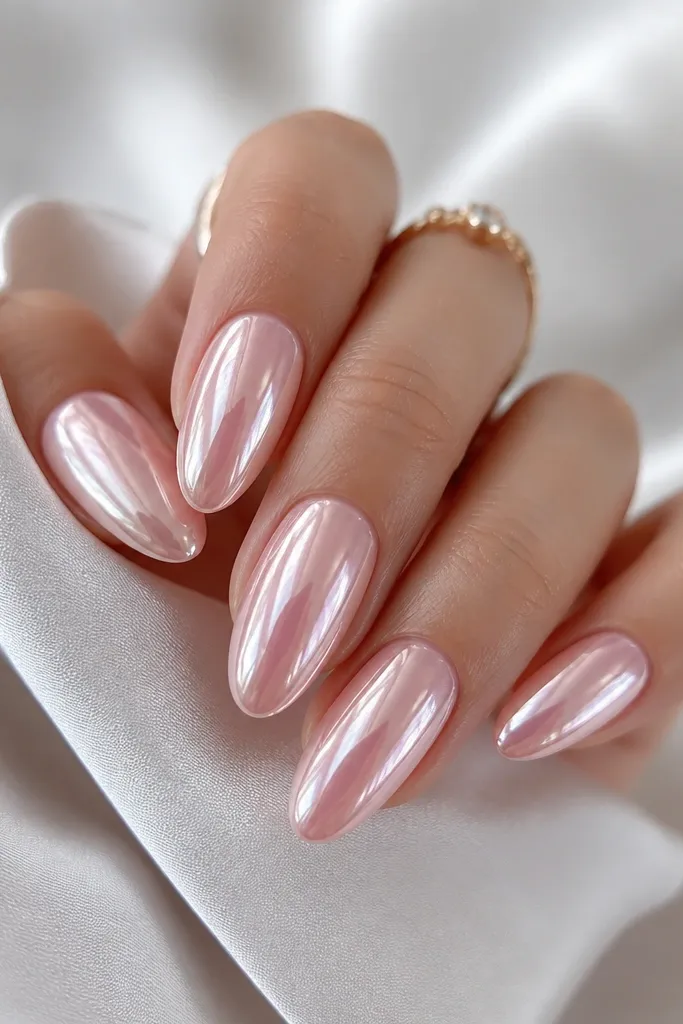
This is the soft pink chrome look that makes people ask where you got your nails done. The base is a milky blush (not opaque pink), then chrome goes over the whole nail for a true mirror reflection. Because the pink is sheer, chrome stays bright and doesn't turn dull gray. It looks expensive because the shine is uniform - no glitter texture and no patchy coverage.
File to a medium almond with a slightly tapered tip, then buff the nail surface to a satin finish before you apply base color. Use a thin coat of milky blush acrylic or gel, then chrome on top and seal with a high-gloss top coat. This one looks best on hands with short to medium nail beds because it visually lengthens.
Pro tipWhen you buff before chrome, stop as soon as the surface loses shine. Too much buffing makes chrome grab unevenly.
Watch outAvoid a thick, opaque pink base - it kills the mirror effect and makes the chrome look dirty.
2. Soft Pink Chrome French Edge
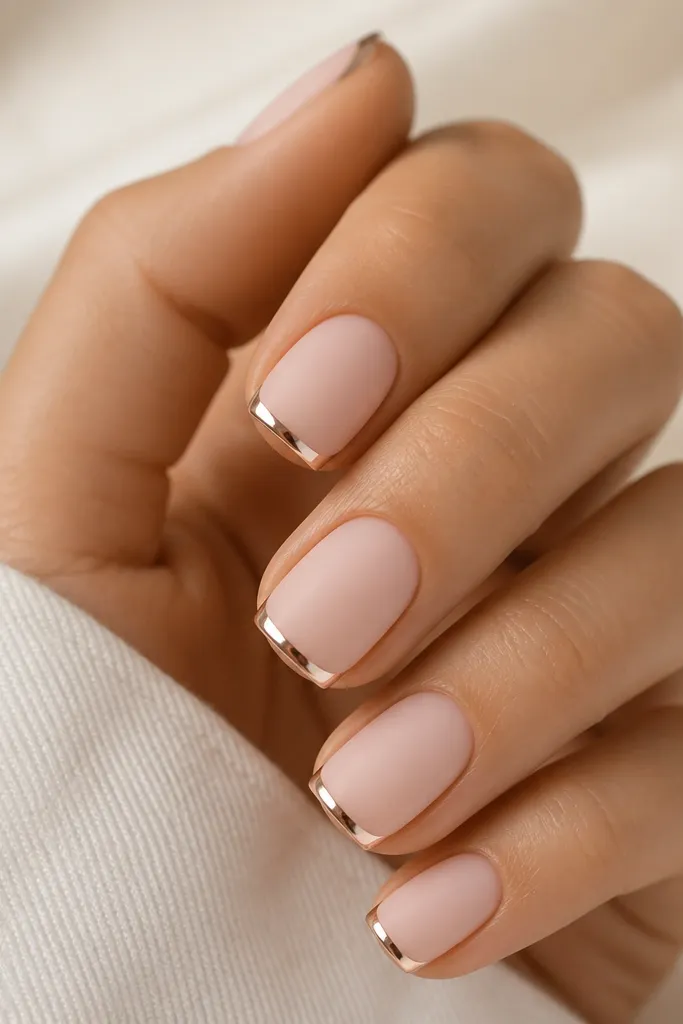
This design gives you that "luxe manicure" vibe without full mirror everywhere. The chrome is concentrated at the tip, so even if your cuticle grows out, the shine still looks intentional. The base stays soft and airy, and the chrome edge creates crisp contrast. It reads high-end because the line is controlled - thin, even, and centered.
Keep the chrome band about 1.5 to 2 mm thick at the free edge. Use a sheer pink builder base first, then paint a micro "smile line" at the tip before chrome powder/gel. Seal carefully so the top coat doesn't flood the line and turn it cloudy.
Pro tipUse a liner brush to define the chrome edge before you add the powder - it keeps the line sharp.
Watch outSkip a wide chrome tip - it starts looking like cheap foil instead of a refined French.
3. Rose Quartz Chrome Ombré
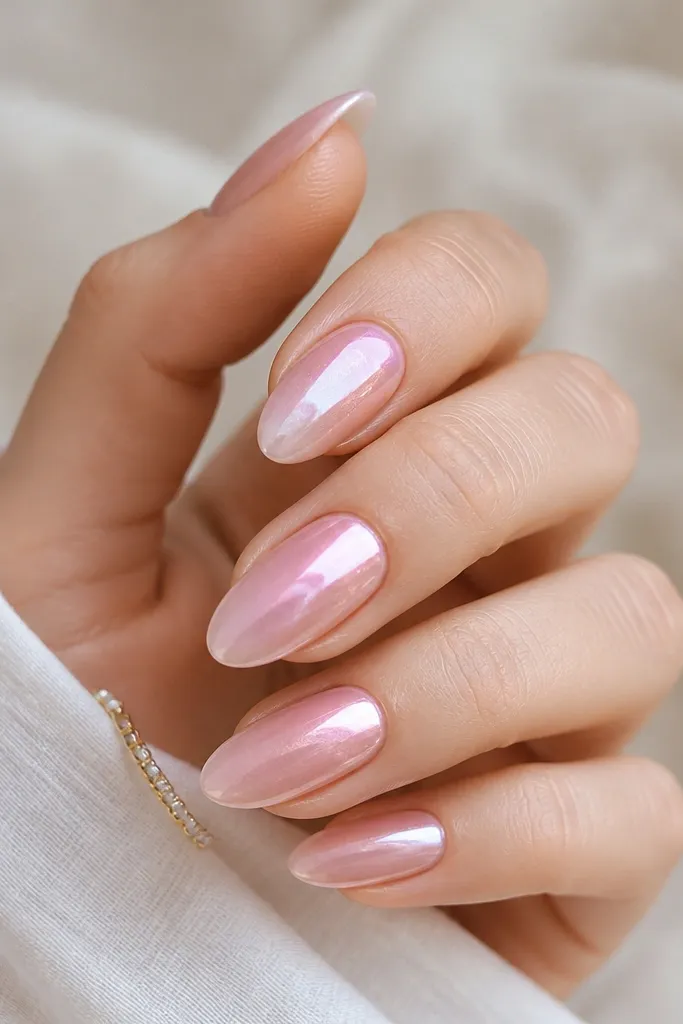
Ombré chrome looks expensive because it mimics natural stone. You're not slapping chrome on one flat layer; you're controlling intensity so the nail looks dimensional. The rose quartz effect comes from stronger warmth near the center and a softer, airy finish at the ends. It catches light like a glow rather than a mirror sticker.
Blend your pink base with a slightly deeper rose at the middle of the nail. Apply chrome starting at the sidewalls and center first, then feather outward toward the tip so it thins. This works best on medium almond or long squoval so you have room to fade.
Pro tipFeather chrome with a small sponge, not a brush - it keeps the fade soft instead of streaky.
Watch outDon't overwork the chrome once it's set. Repeated rubbing makes it look scratched.
4. Pearl Blush Chrome with Micro Shimmer Veil
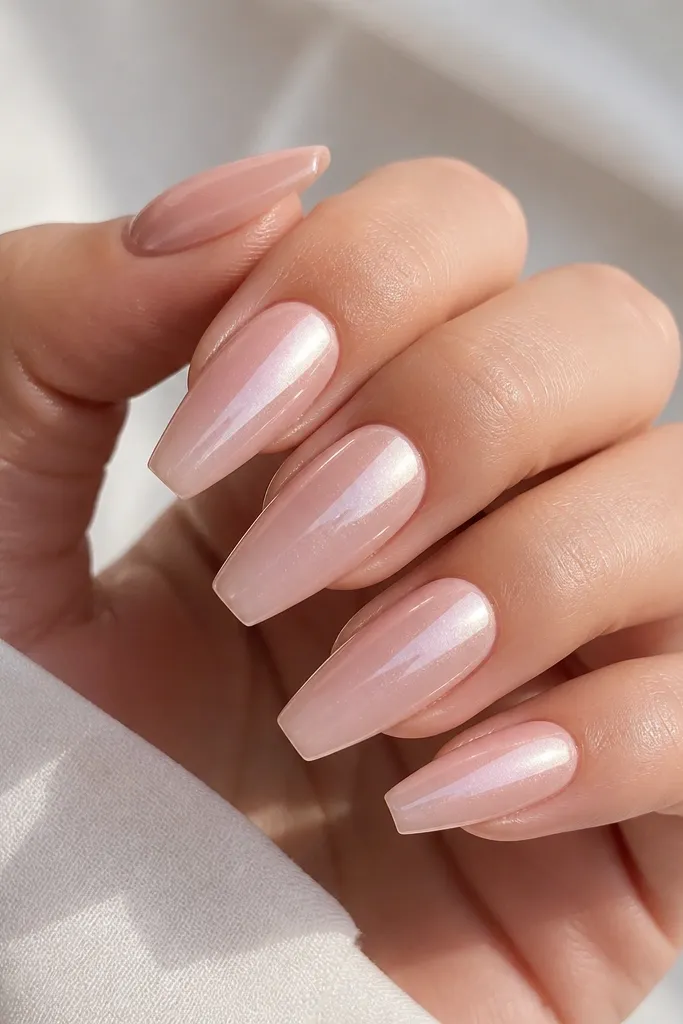
If you want luxe but not mirror-loud, this is the one. The base has a pearl-pink tint and the chrome reads smoother, like satin glass. A micro shimmer veil keeps it from looking flat while still staying subtle. It looks expensive because the sparkle is tiny and uniform, not chunky and not glittery.
Use a pearl milky pink base (think pale peachy-pink pearl, not glitter). Apply chrome lightly (a thinner layer) so it looks like a sheen rather than full mirror. Seal with a thick, glossy top coat so the shimmer sits under the shine.
Pro tipChoose a micro shimmer that's fine as talc. If you can feel it with a brush, it'll look gritty.
Watch outAvoid adding rhinestones to this look - the pearl veil already does the job.
5. Blush Chrome Scallop Cuticle Glow
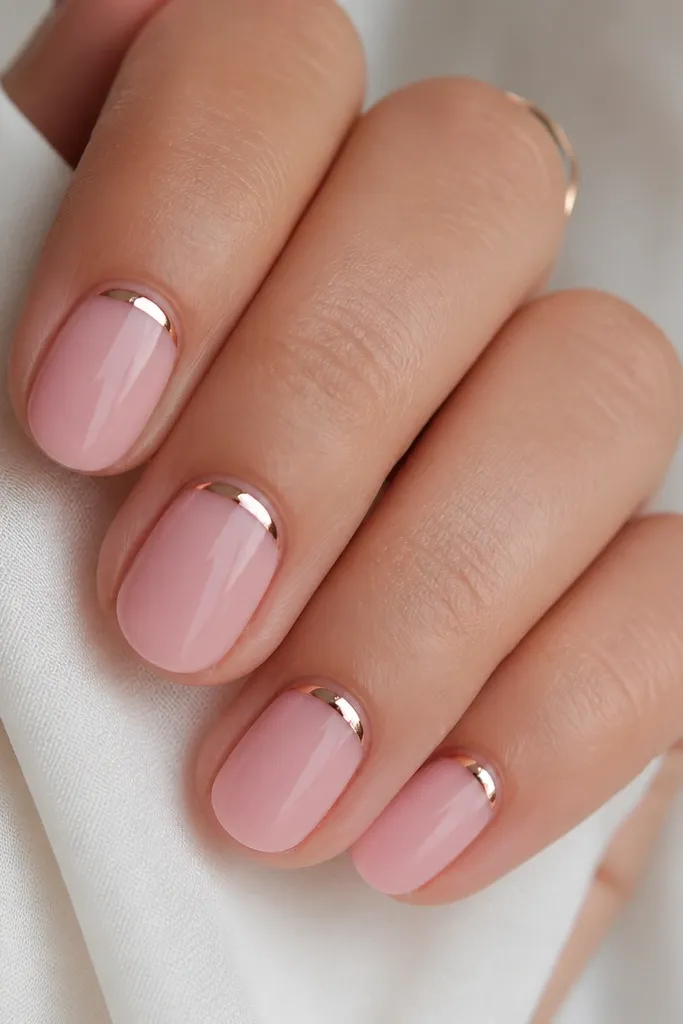
This is the "expensive detail" look because it concentrates the chrome where the eye naturally starts. The scallop arc makes your nails look professionally designed instead of just coated. It also hides tiny cuticle imperfections because the chrome line sits cleanly above the skin. The overall vibe is soft but still high-impact.
Create a thin chrome arc about 1 mm away from the cuticle skin. Use a small curved stencil or freehand with a liner brush. Keep the rest of the nail a glossy milky blush so the chrome arc is the star. Almond or squoval works best because the arc stays crisp.
Pro tipIf you're doing it at home, practice the arc on a spare nail tip first. A steady curve matters more than you think.
Watch outDon't let chrome touch the skin - it will lift and look messy fast.
6. Champagne Pink Chrome Shift (Color-Shift Finish)
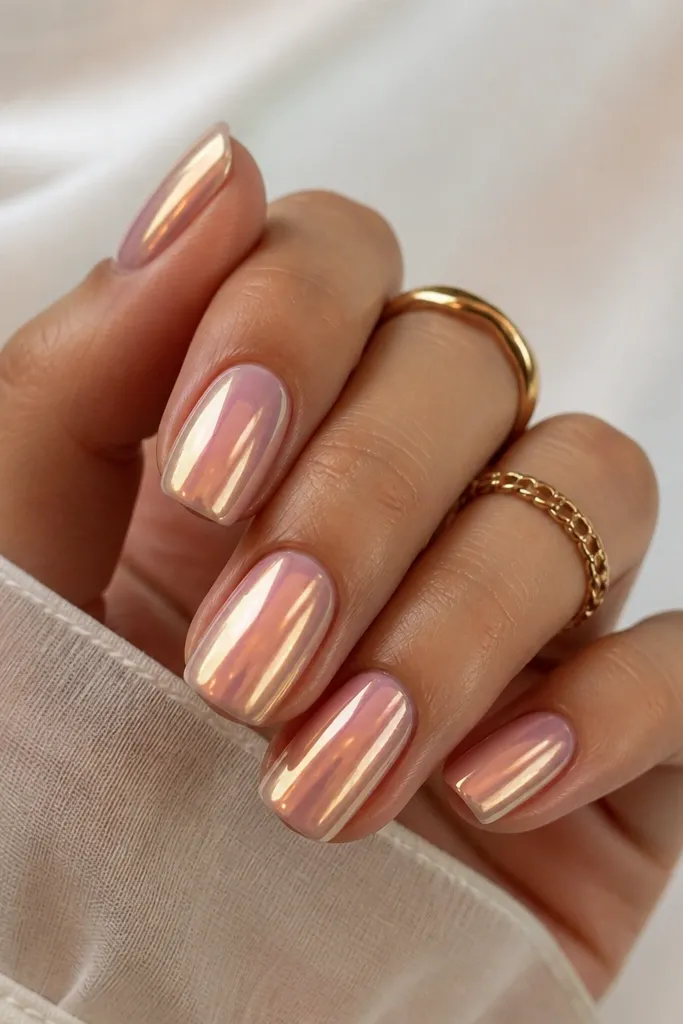
Warm-shift chrome makes soft pink look richer without turning yellow. At one angle it reads blush, at another it flashes champagne. That angle change is why it feels luxe - it's movement without adding designs. Keep the base pink sheer so the shift reads intentional, not like a filter.
Use a milky soft pink base, then apply a chrome powder that has a slight warm tone (not pure silver). Seal with a glossy top coat that doesn't dull the shift. This one looks amazing on long coffin or medium almond because the light has room to travel.
Pro tipTake a photo from straight above and then from the side. If the shift is strong in both, you picked the right powder.
Watch outAvoid cool-toned silver chrome if you want the champagne shift - it'll look flat.
7. Soft Pink Chrome Aura Center Dot
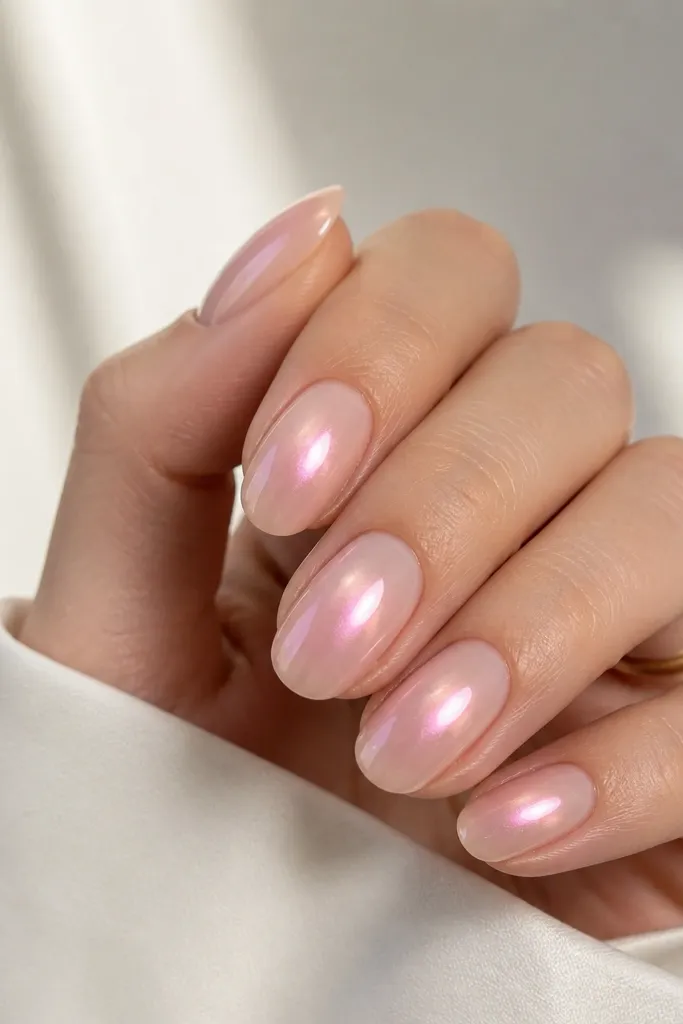
Aura designs look high-end when the glow is controlled, not smoky. The chrome center dot catches light like a tiny spotlight, then fades to a softer sheen. It's a clean way to add interest while still keeping the nails wearable. The soft pink base keeps it from looking harsh.
Start with a glossy sheer pink base. Add chrome at the center using a small sponge, then feather the edges with a clean dry sponge. Keep the aura about the size of a small pea on each nail. Oval or almond makes the glow look balanced.
Pro tipUse tape to mask the sides while you build the center glow for cleaner edges.
Watch outDon't make the aura too wide - it turns into a messy patch instead of a glow.
8. Glazed Soft Pink Chrome Half-Moon
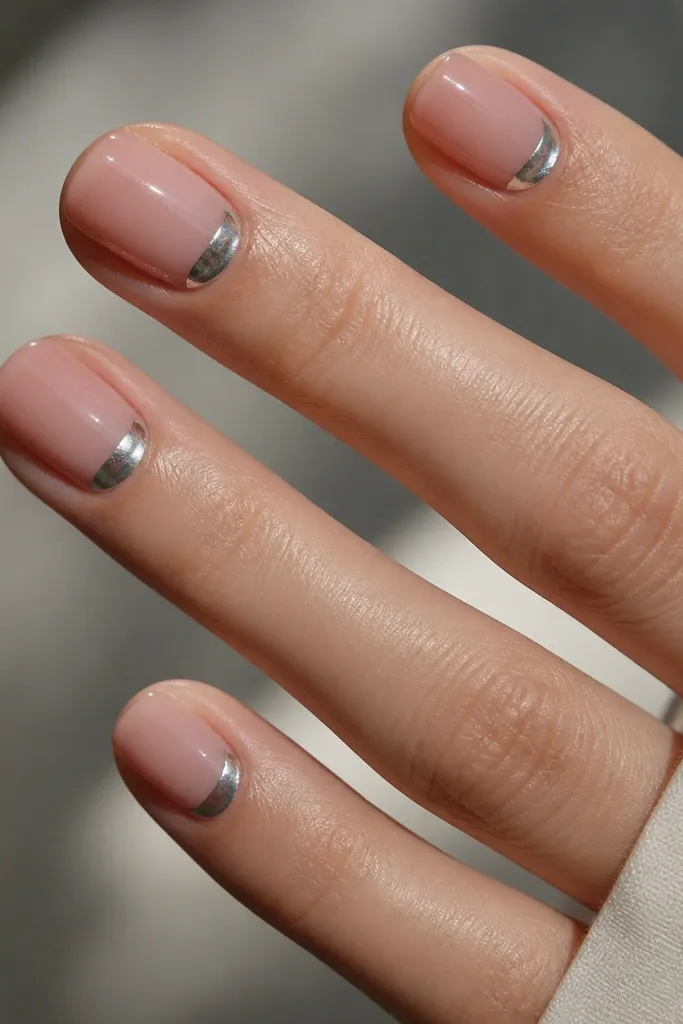
Half-moons feel retro-cute, but chrome makes them look current and expensive. The shape frames the nail bed and makes your nails look fuller. Because the chrome is only at the base, you get shine without the whole nail looking too loud. Soft pink keeps the half-moon from looking silver and stark.
Create a half-moon using a small crescent brush or a pre-made stencil. Apply chrome over that crescent area only, then top coat everything. Keep the half-moon height around 2 mm so it looks intentional. This design works great on short nails where full chrome can feel too much.
Pro tipIf your half-moon edges are shaky, use a thin layer of clear builder first so the chrome has a smooth surface to grab.
Watch outAvoid over-thick chrome at the base - it lifts and feels rough.
9. Soft Pink Chrome Marble Vein (No Glitter)
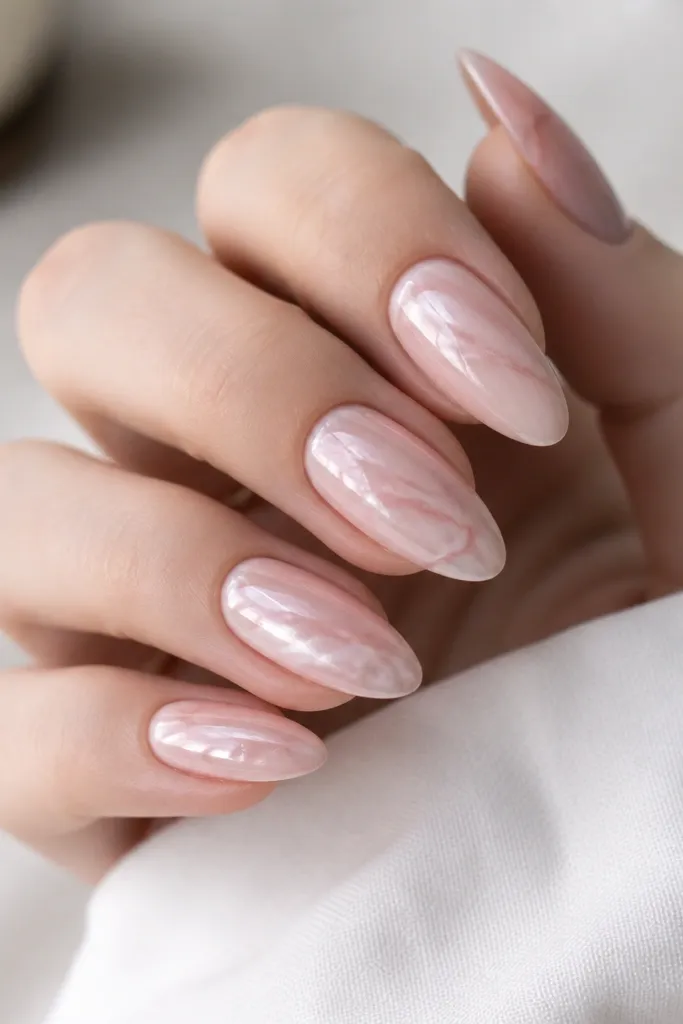
Marble with chrome looks luxe when the veins are thin and translucent. You're not drawing thick lines; you're dragging a diluted gel so the vein looks like it's under glass. The chrome then makes the marble look like it has depth rather than sitting on top. This reads expensive because it looks like natural stone, not a sticker.
Use a sheer pink base, then add marble veins with diluted milky rose and a touch of cool gray. Keep the veins sparse - 2-4 lines per nail is enough. Apply chrome over the whole nail or just over the vein area for a softer marble reveal.
Pro tipMarble looks better when your lines break slightly. Perfect straight lines look fake.
Watch outSkip chunky marble powders. They make the nail feel bumpy and kill the glass look.
10. Soft Pink Chrome Negative Space Cuticle Arch
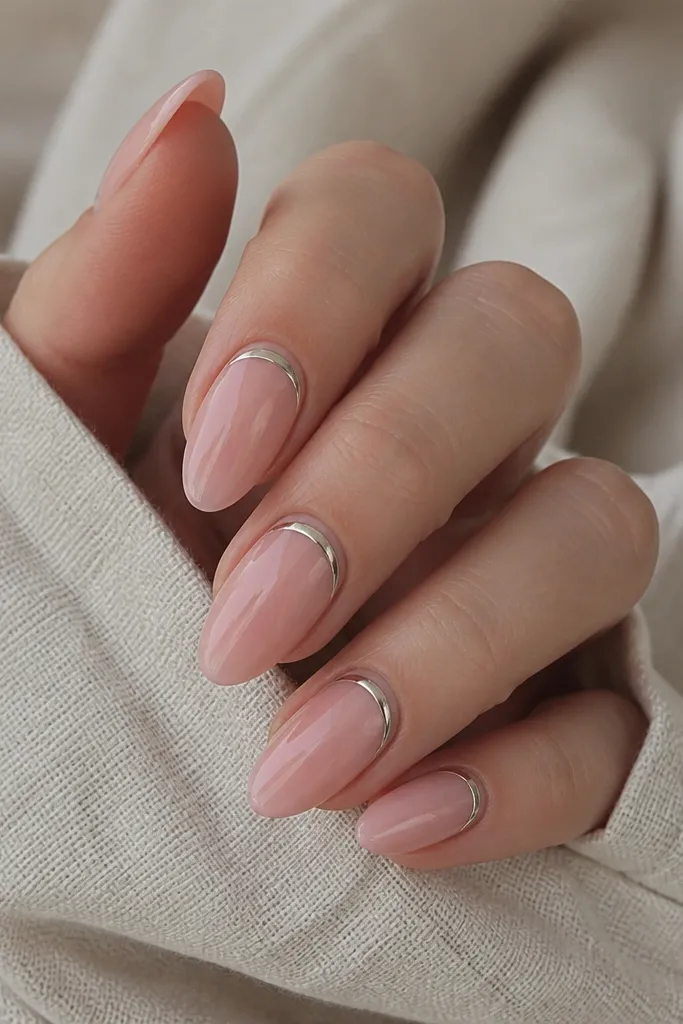
Negative space makes the design feel fresh and expensive because it shows clean structure. The chrome arch gives you the shine, while the clear area keeps it from looking heavy. This is also a great choice if you hate thick cuticle coverage. The soft pink overlay should be sheer enough that the nail still looks airy.
Leave a small clear window at the cuticle area during base building. Build the soft pink layer around it, then add chrome to the arch area. The arch should sit centered and follow your nail curve. Squoval and almond both work; almond makes it look longer.
Pro tipSeal the edges of the negative space with a thin clear layer so water doesn't creep under.
Watch outDon't make the negative space too big or you'll lose the luxe balance and it'll look unfinished.
11. Soft Pink Chrome Velvet Dust (Satin + Mirror Mix)
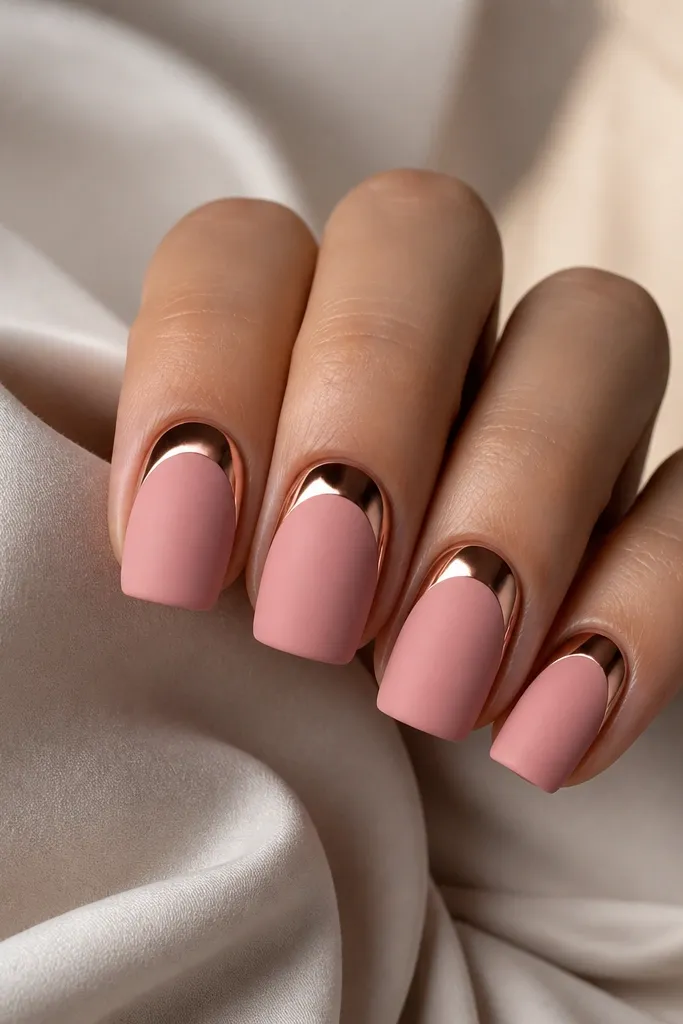
This look is luxe because it mixes textures on purpose. A satin or velvet base softens the pink so it looks plush, then chrome hits like a highlight. The curved band looks custom, like a lighting effect. It's also forgiving on small surface imperfections because the velvet finish hides them.
Build your nail in a sheer soft pink, then apply a matte or velvet powder finish over the whole nail. Add a curved chrome band on the upper half and seal with a glossy top coat over the chrome only. Keep the chrome band thickness around 2-3 mm.
Pro tipDo the matte/velvet step before chrome so the chrome doesn't pick up dust.
Watch outAvoid sealing the entire nail with glossy top coat - it ruins the velvet contrast.
12. Blush Chrome Topcoat Only (High Gloss Bubble-Free)
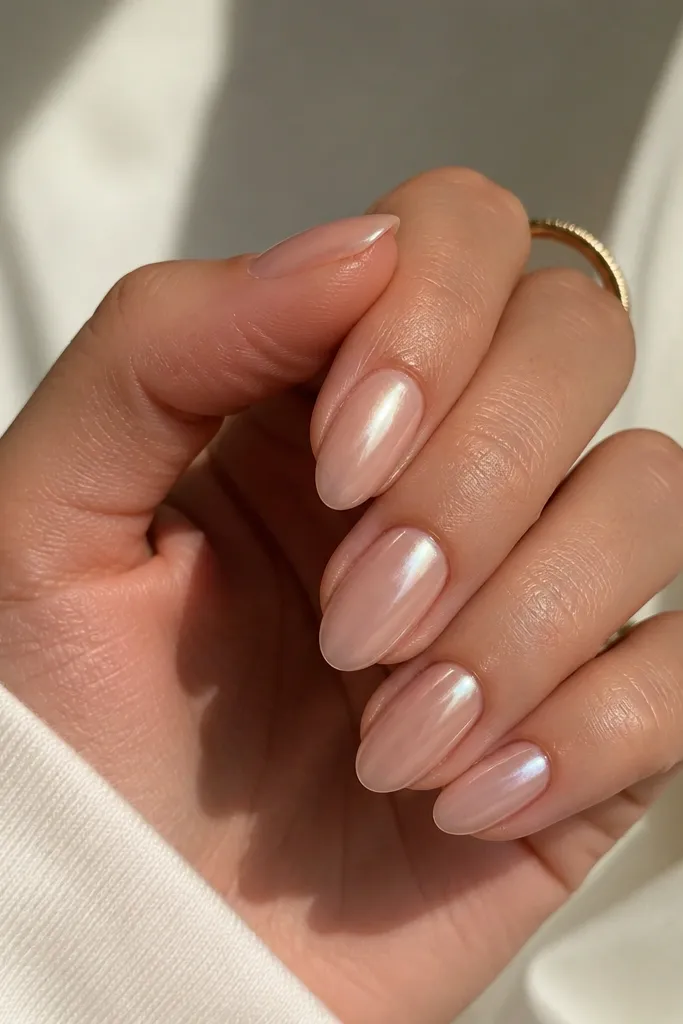
If you want "expensive but quiet," this is it. Instead of full mirror, you get a fine chrome mist that looks like pearly light on glass. The nails still look smooth and clean, and the shine doesn't scream under indoor lighting. This is also the easiest to wear daily.
Use a glossy sheer blush base, then apply a thin layer of chrome powder (or chrome gel) and buff off lightly so it doesn't go fully mirrored. Seal with a top coat that stays clear and high-gloss. Short almond looks best because the subtle shine reads like a natural glow.
Pro tipApply chrome in two thin passes. One thick pass is how you get patchy texture.
Watch outDon't over-buff after chrome - it can strip the shine and leave dull spots.



