
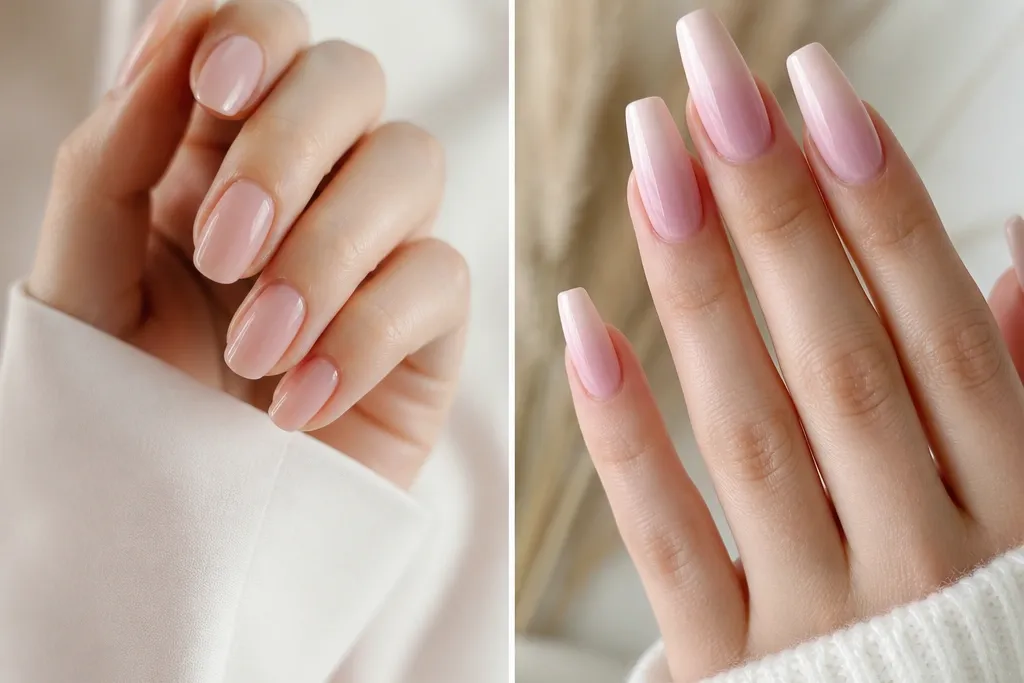
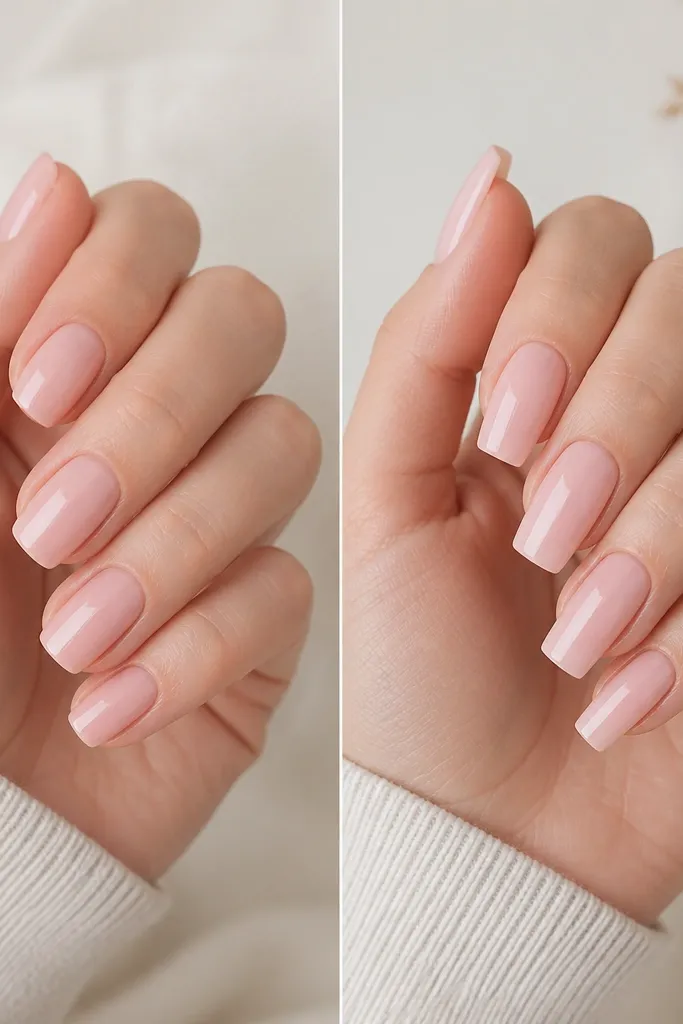
1. Milky Blush Square With Glassy Gel Finish
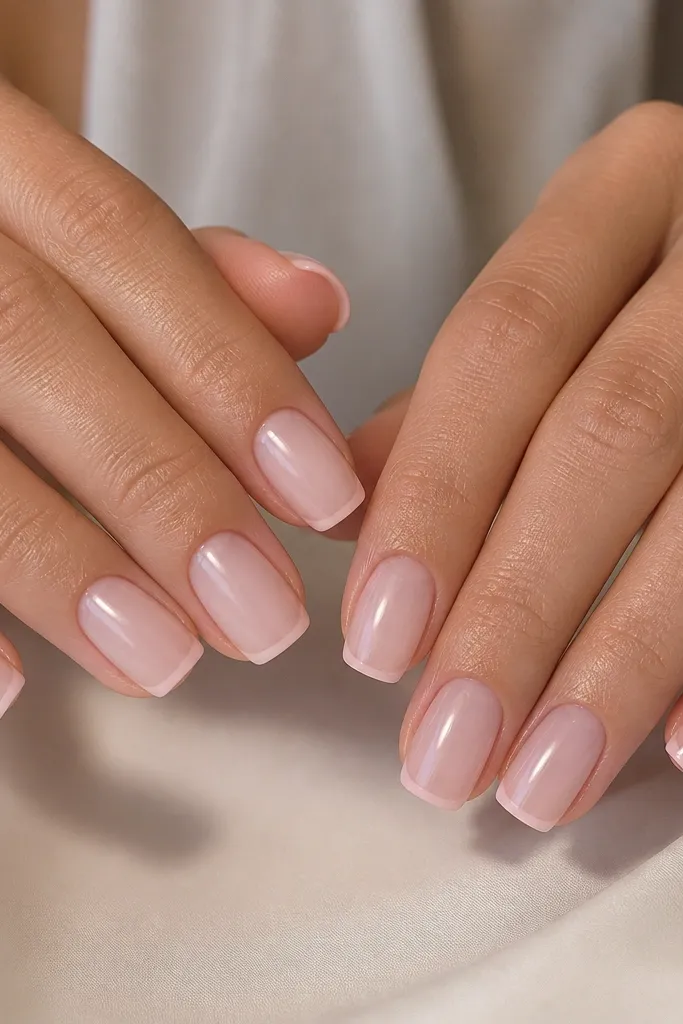
This is the "always works" soft pink because the base is sheer enough to blend any tiny imperfections. I use a milky blush gel that shows the natural nail tone through, then I build a second thin layer for even coverage. The glossy top coat makes the surface look like glass, which is what makes square nails feel clean instead of blocky. The subtle brighter edge at the tip gives length without needing a full French stripe.
Build it in three thin coats: base coat, milky blush gel (thin), then a second thin milky blush layer. Cure each layer fully. Shape the square by keeping the free edge straight and stopping the sidewalls before they pinch inward. Works best on short squares or medium squares with a 1.5-2 mm free edge.
Pro tipAfter the final top coat, wipe the tacky layer with a lint-free wipe only if your gel line requires it, then cure again for extra hardness on the free edge.
Watch outAvoid thick first layers - thick gel at the cuticle makes soft pink look cloudy and lifts faster.
2. Soft Pink French With a 1mm Rose Smile Line
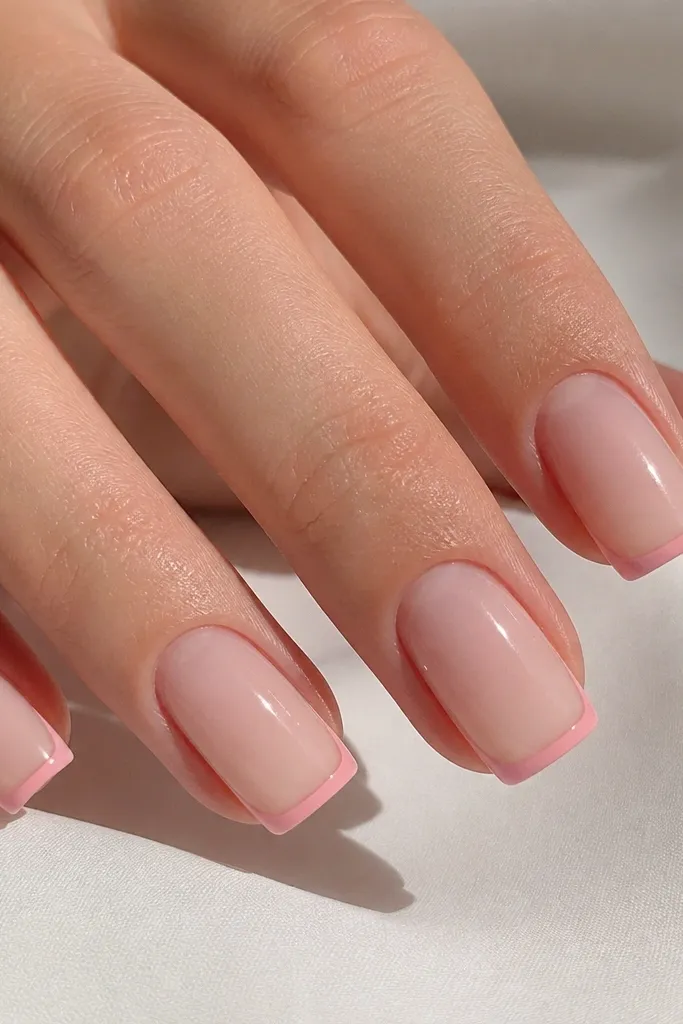
A micro French line keeps square nails looking sharp without adding bulk. I paint the tip smile line first, then I fill only the strip - that's what keeps it crisp instead of chunky. The base stays sheer nude pink so the soft rose stands out cleanly. This design looks great for work because it reads polished even when the nails grow.
Use a sheer nude gel as the base, then a rose-pink gel for the French strip. Place the smile line so it sits about 0.5-1 mm back from the very edge, then fill the strip with a thin brush. Cure well, then apply a medium-viscosity top coat to self-level.
Pro tipUse a dotting tool to place two tiny guide points where the strip should start and end, then connect them with the brush.
Watch outSkip painting the whole tip in one heavy stroke - it floods the corners and makes the French line look uneven.
3. Blush Gradient Ombre Over Square Tips
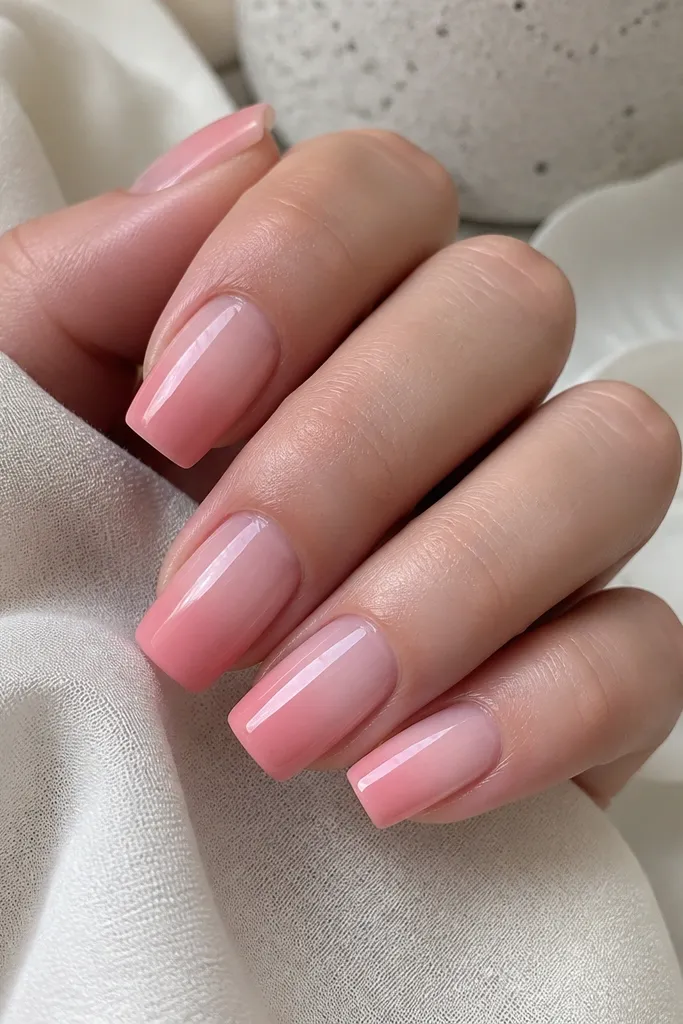
Gradient ombre looks expensive because it hides growth. I like blush gradients that deepen only at the last third of the nail, so the square shape stays clean. The trick is blending while the gel is workable and keeping the cuticle area light. Soft pink gradients also look flattering on hands because they elongate without needing extra length.
Start with a sheer milky pink base. Sponge on a deeper blush gel at the free edge using a makeup sponge cut into a small triangle. Blend downward in thin passes, then seal the surface with a thin clear gel layer before top coat. Keep the darkest area within the final 30-35% of the nail length.
Pro tipWipe the brush often and use short tap strokes for blending - dragging makes ombre streaky on square tips.
Watch outDon't make the gradient too dark near the cuticle - it turns into a muddy wash.
4. Sheer Pink With Tiny Star Confetti (Flat)
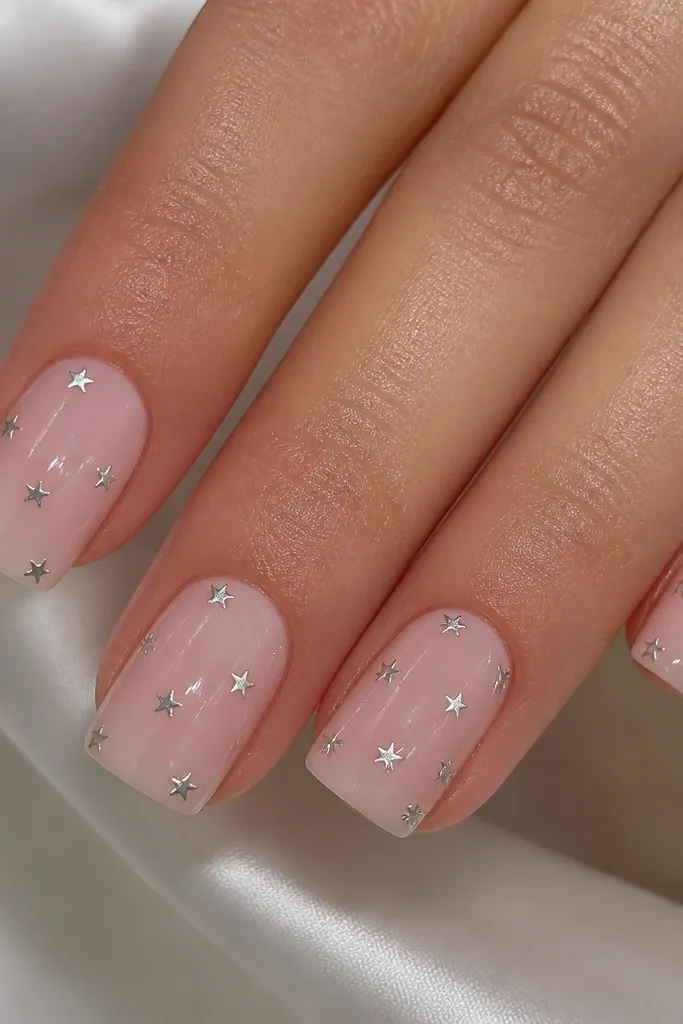
Tiny star confetti adds sparkle without the raised "catch on everything" feeling. I keep the stars small (think micro glitter pieces) and embed them into a clear gel layer so they sit flush. Soft pink makes the silver look cool and clean instead of harsh. This design holds up well because the glitter is flat and the base is sheer.
Apply a sheer pink gel base, then dab clear gel where you want stars. Place 5-9 tiny star pieces per nail with a dotting tool. Cure, then cap with a thin clear gel over the top so nothing sticks out.
Pro tipUse fewer pieces than you think. One extra star looks fine on the first nail and too busy on the rest.
Watch outAvoid chunky glitter - it makes square nails feel rough and causes early lifting at the edges.
5. Soft Pink Marble Vein Over Clear Base
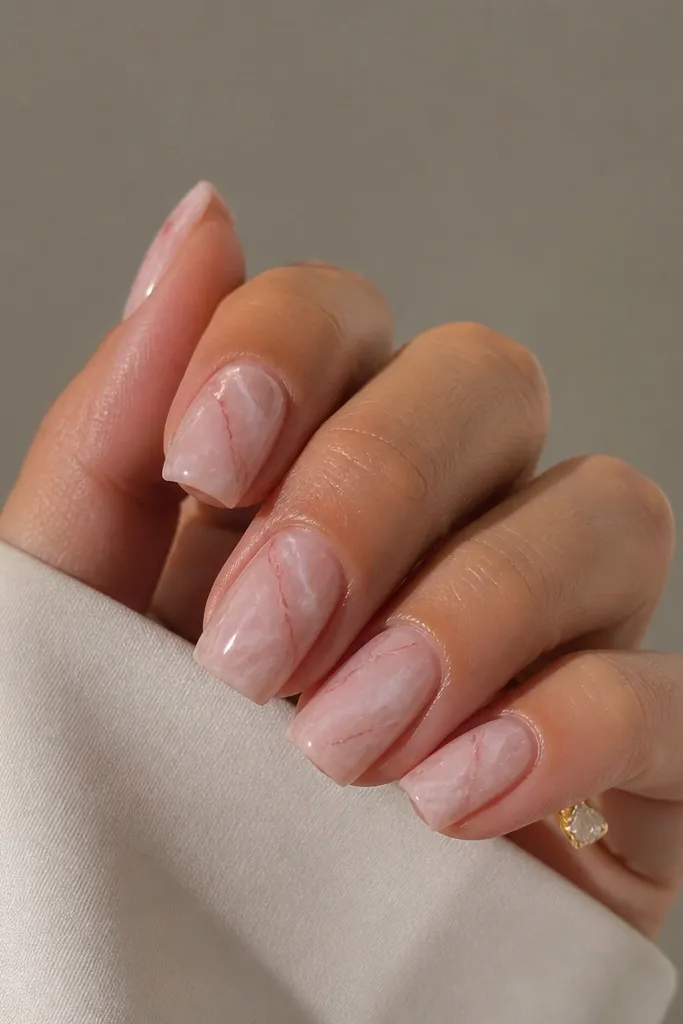
Marble looks best when it's subtle. I paint a clear or super-sheer pink base, then add thin veining lines that look like they're drifting rather than carved. Soft pink marble doesn't overwhelm square nails - it gives movement while staying wearable. The glossy top coat seals the veining so it doesn't snag.
Use a clear gel or sheer pink as the base. With a fine striping brush, drag tiny lines of pale rose and white, then soften edges with a clean brush dampened with gel solution (if your brand allows). Cure, then apply a thin clear capping gel layer before top coat.
Pro tipPractice on a nail tip first. Marble lines need uneven spacing to look natural.
Watch outDon't draw thick veins - thick marble in soft pink turns into a sticker look.
6. Rose Milk With Micro Chrome Edge
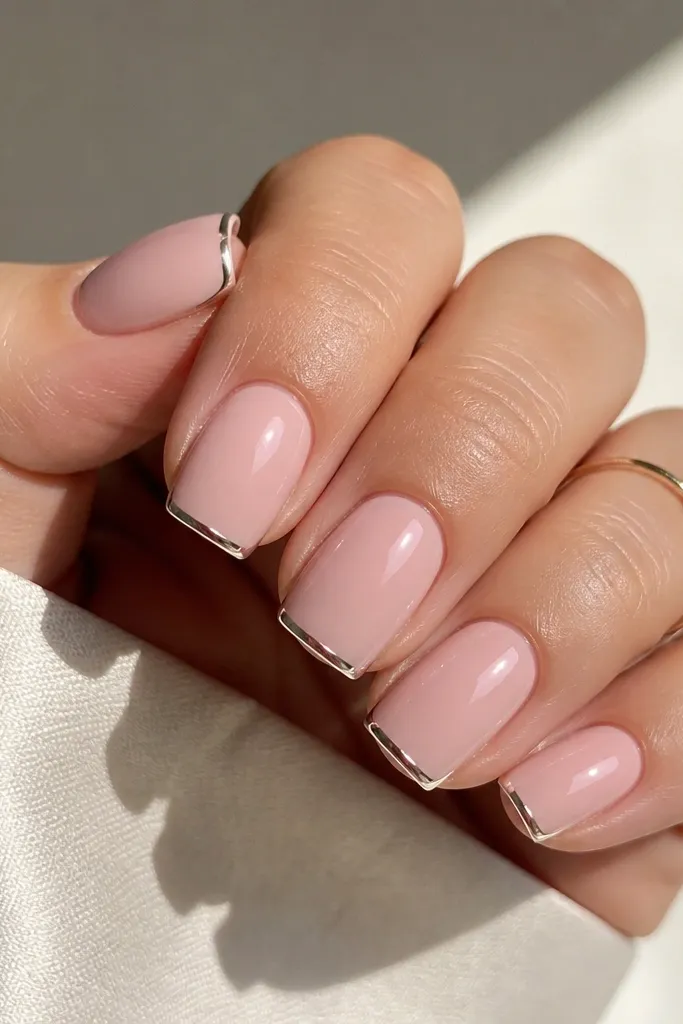
This is my "date night but still soft" design. The rose milk base stays calm, while the micro chrome edge catches light when you move your hands. I keep the chrome line thin so it doesn't look like a thick border. It also helps the nail look longer because the reflection sits at the free edge.
Apply rose milk pink gel as a base. Use a striping brush or nail art pen to place a tiny band of tacky gel at the free edge, then apply chrome powder rub-in with a small sponge. Seal with a top coat that is compatible with chrome so it doesn't dull.
Pro tipIf the chrome looks too dark, thin it by wiping gently with a dry makeup sponge before sealing.
Watch outAvoid dragging chrome across the whole surface - it makes the pink look gray.
7. Blush Bloom Dots (Matte Top Coat)
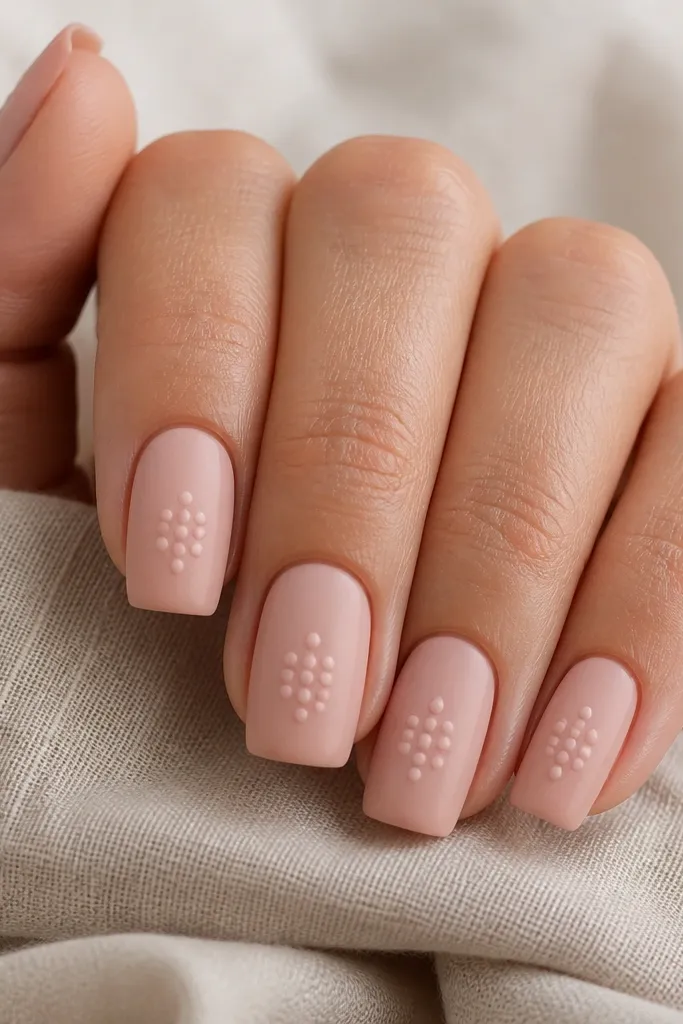
Matte turns soft pink from "pretty" to "fashion." I do a matte blush base, then add dot clusters using a slightly lighter pink gel so the dots catch light only at their edges. The dot placement is key: I keep them near the center, not at the cuticle. It looks like blooms without needing full flowers.
Paint blush pink gel and cure. Top with a matte top coat (or matte gel top coat) and cure. For dots, use a dotting tool with a lighter pink gel, place 2-4 dots per nail, cure, then apply a thin matte top coat over just the area so the dots stay flat.
Pro tipUse a toothpick for the tiniest dots. A chunky dotting tool makes them look like blobs.
Watch outSkip glossy top coat over matte designs - it kills the soft, velvety effect.
8. Soft Pink Aura Center Glow
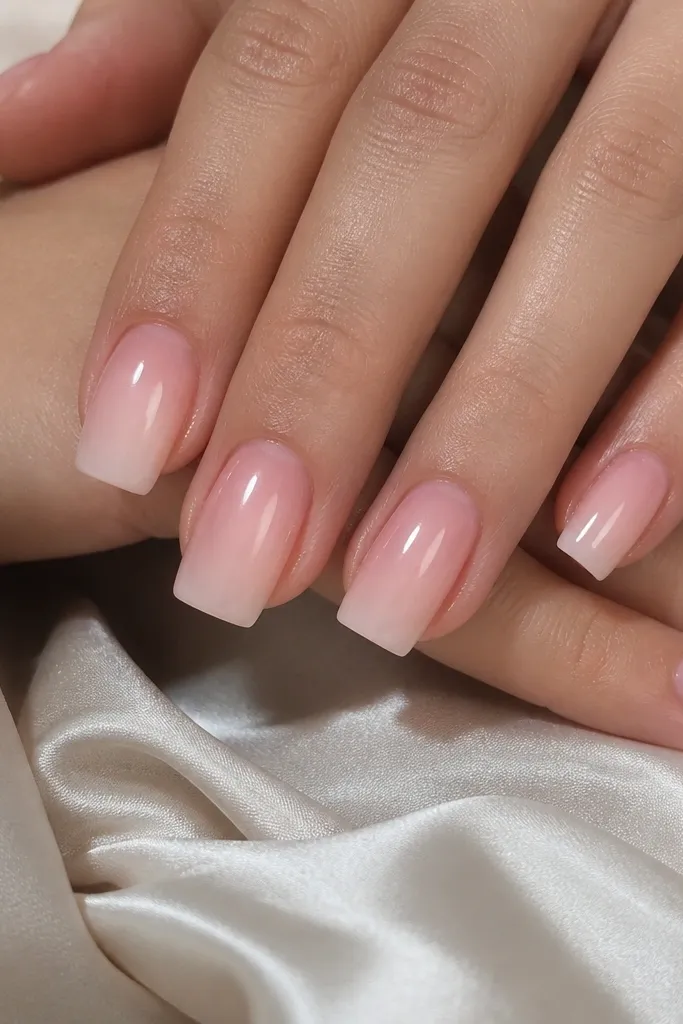
Aura designs make short square nails look brighter and more intentional. You place the brightest pink in the center and fade it out toward the sides and cuticle. On soft pink, the glow reads subtle instead of neon. I like this when I'm growing nails out because it hides uneven thickness near the center.
Start with sheer milky pink. Sponge a slightly deeper pink in the center only, then gently blend outward with a clean sponge. Keep the aura tight - about 2-3 mm wide. Seal with a clear layer and top coat.
Pro tipIf you over-blend, stop and wipe the surface. Fresh sponge blending over cured gel creates streaks.
Watch outDon't put the aura too close to the cuticle - it makes the nail look like it has a stain.
9. Nude Pink Base With Soft Rose Side Lines
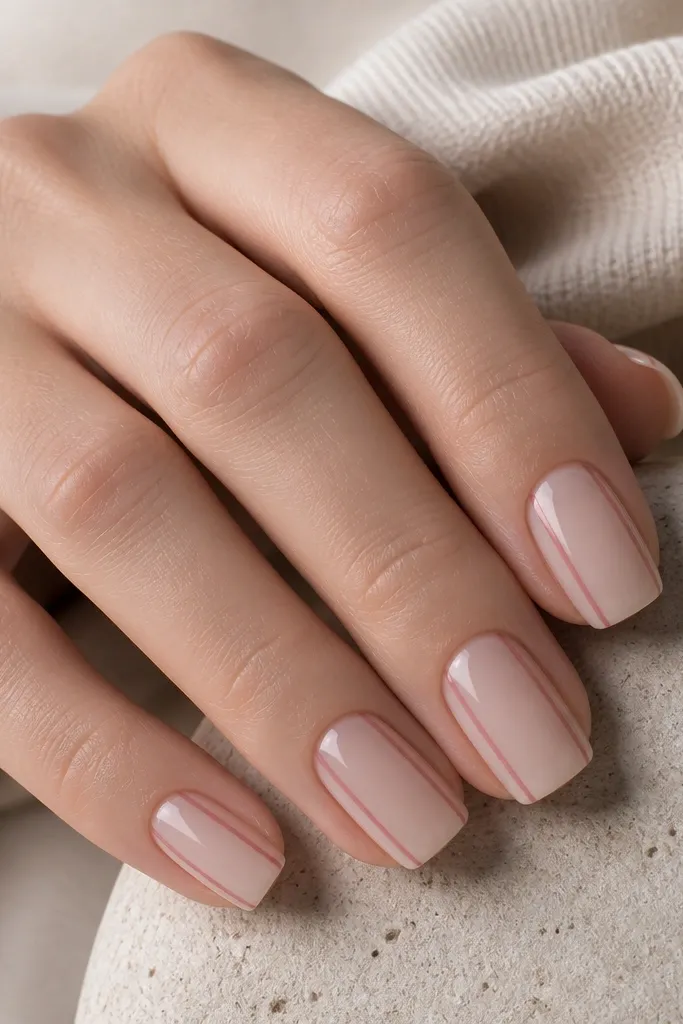
Vertical side lines make square nails look slimmer. I use two thin rose lines close to the sidewalls but not touching them, leaving a narrow strip of nude base in the middle. The effect is flattering and also hides tiny growth inconsistencies because the lines draw the eye outward.
Paint a nude-pink base gel. With a striping brush, draw one line along the left sidewall and one along the right, each about 0.5 mm wide. Cure, then apply top coat and cap the edges so the lines don't peel.
Pro tipUse guide dots at the middle of the nail to keep both lines the same height.
Watch outDon't make the lines too thick - thick side stripes make the nail look wider.
10. Soft Pink Glazed Donut Tips
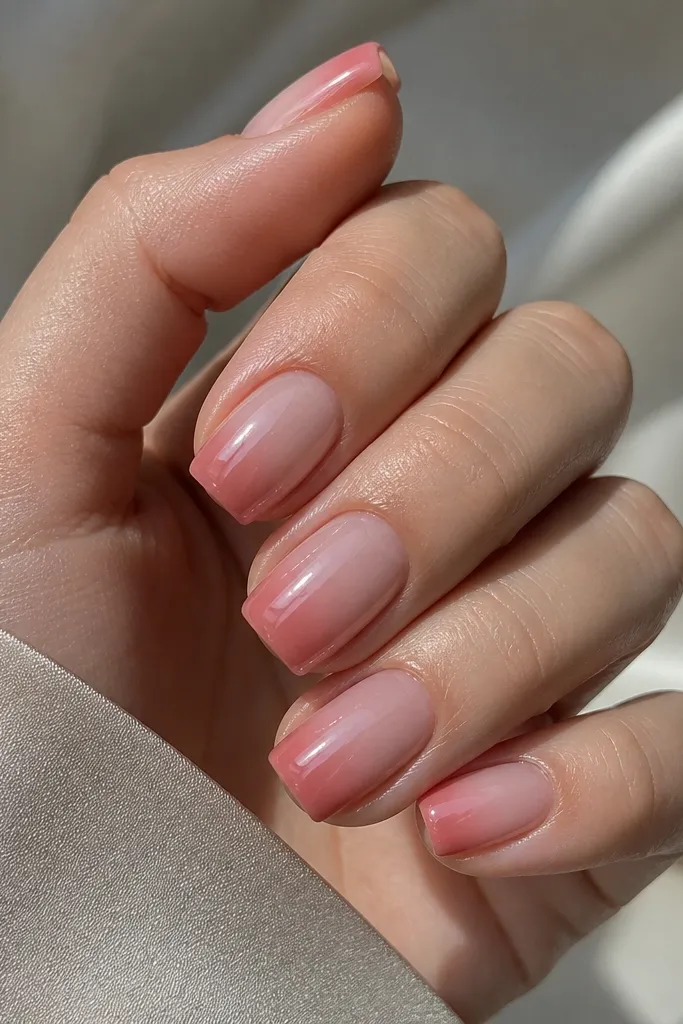
This "glazed" look makes soft pink feel trendy without adding tacky details. The ring effect comes from a slightly deeper pink placed in a thin band at the tip, then blended just enough to look like a halo. It's super flattering on square because the free edge is already straight, so the ring looks intentional.
Use sheer milky pink as the base. Apply a deeper pink gel band at the free edge and blend downward only 1-2 mm. After curing, top coat should be thick enough to create a smooth reflection, not a runny coat.
Pro tipIf the ring looks flat, add a micro thin layer of clear gel over the band before top coat.
Watch outAvoid leaving a hard line at the blend - it reads like a sticker edge.
11. Blush Half-Moon Negative Space
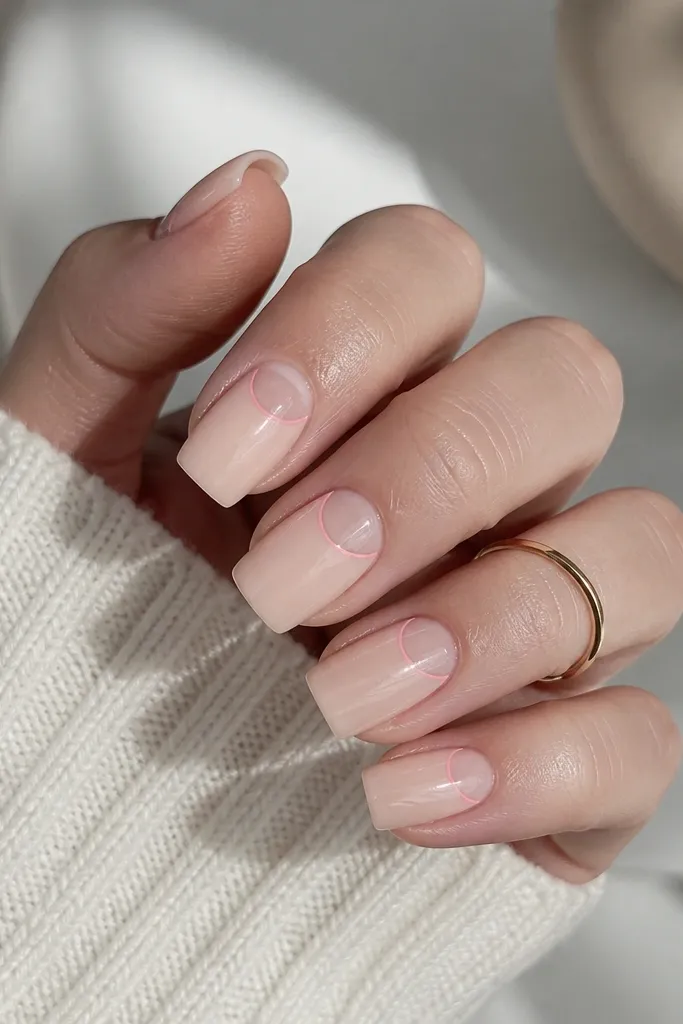
Half-moons are clean and graphic, and negative space helps the nail look lighter. I keep the blush outline thin and let the center stay sheer. Soft pink outlines look more natural than white because they blend with skin tone. This design also grows out better because the negative space stays at the cuticle line.
Start with a sheer nude-pink base. Add a thin blush outline around the cuticle half-moon using a small angled brush. Leave the half-moon area completely clear - no pink fill. Cure and top coat, making sure the outline is sealed.
Pro tipIf your cuticle line is uneven, use a small piece of tape as a guide, then peel it right after outlining.
Watch outDon't cover the negative space with top coat too thickly - it can haze and blur the cuticle shape.
12. Soft Pink Jelly With Embedded Pearl Dust
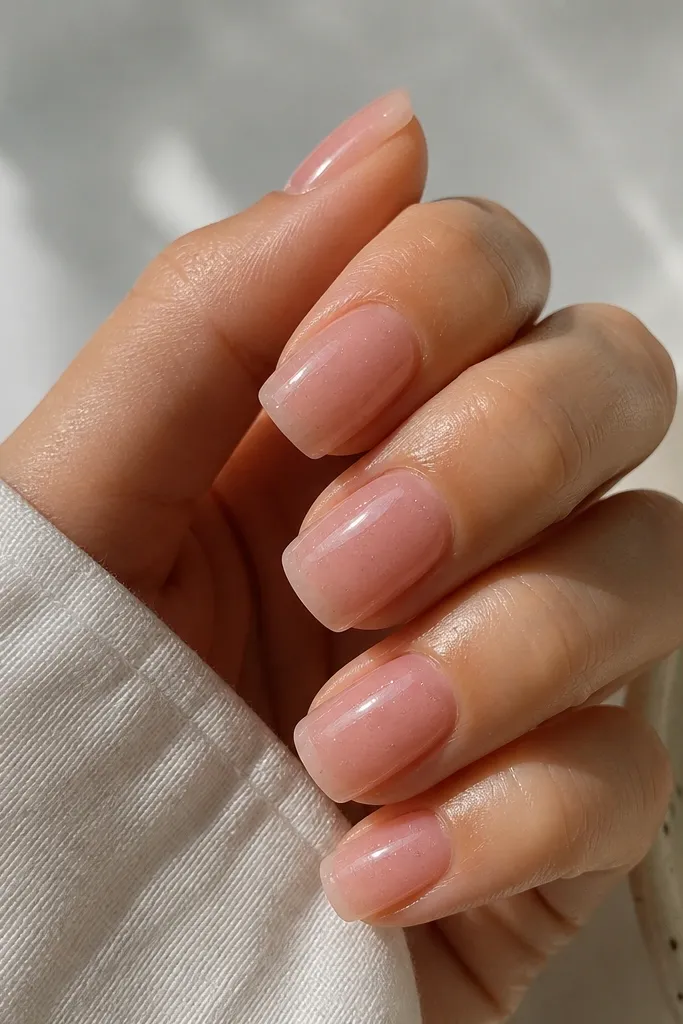
Jelly pink is my favorite for a soft pink that still looks "full." The embedded pearl dust makes it glow without needing glitter texture. I keep the pearl dust fine so it stays suspended and smooth, like light through glass. On square nails, jelly builds a clean volume that doesn't look thick.
Use a jelly builder gel in a soft pink tone. Mix in a tiny amount of fine pearl powder (or use a jelly that already has pearl) and apply in two thin layers. Cure between layers and cap with a clear top coat to lock the surface.
Pro tipIf the jelly looks too see-through, add a second thin layer instead of thickening one layer.
Watch outAvoid adding too much pearl dust - it turns gritty and catches on fabric.



