
1. Glass Blush With Micro-Glow Tips
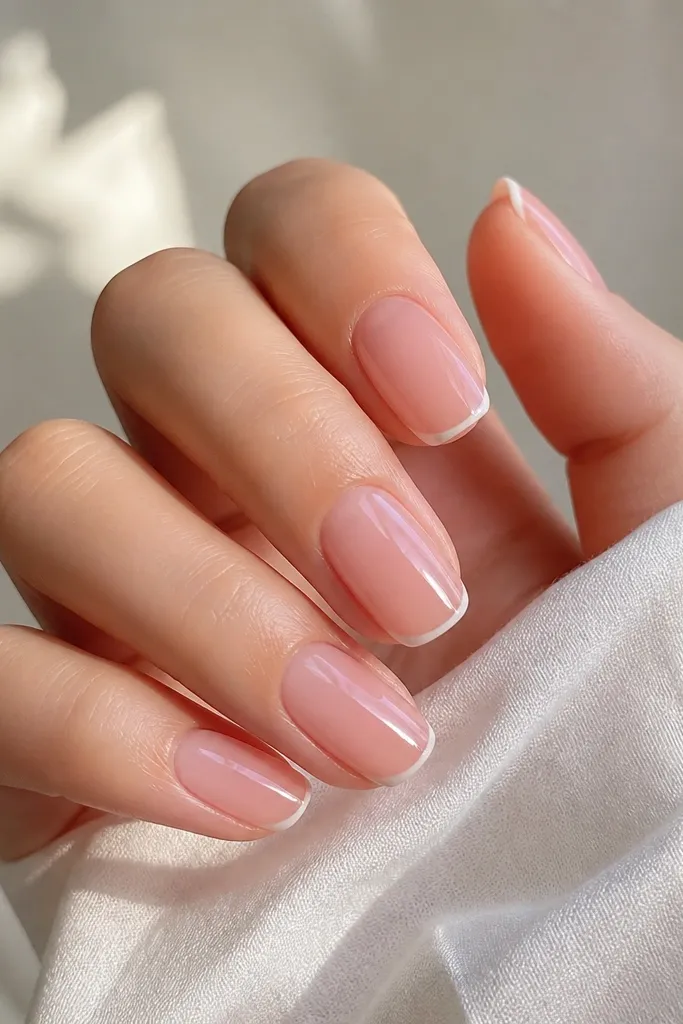
This look is about that "clean light" effect. The sheer blush base is see-through enough to mimic your nail bed, and the micro tip line is narrow so it doesn't look like a French manicure from 2012. When you cure under a ring light, the highlight makes the top coat look extra even, which is why it photographs well.
Use a sheer blush gel (or sheer polish) as your first layer, then cure. For the tip, use a fine liner brush and a milky white gel - keep the line about 0.5 mm thick and stop short of the sidewalls. Finish with a high-gloss top coat and cure fully.
Pro tipTurn on your ring light and tilt your hand side to side while the top coat is still glossy - you'll spot any streaks instantly.
Watch outDon't make the tip wide; thick tips on soft pink look bulky and cheap.
2. Soft Pink Half-Moon With Clear Jelly Center
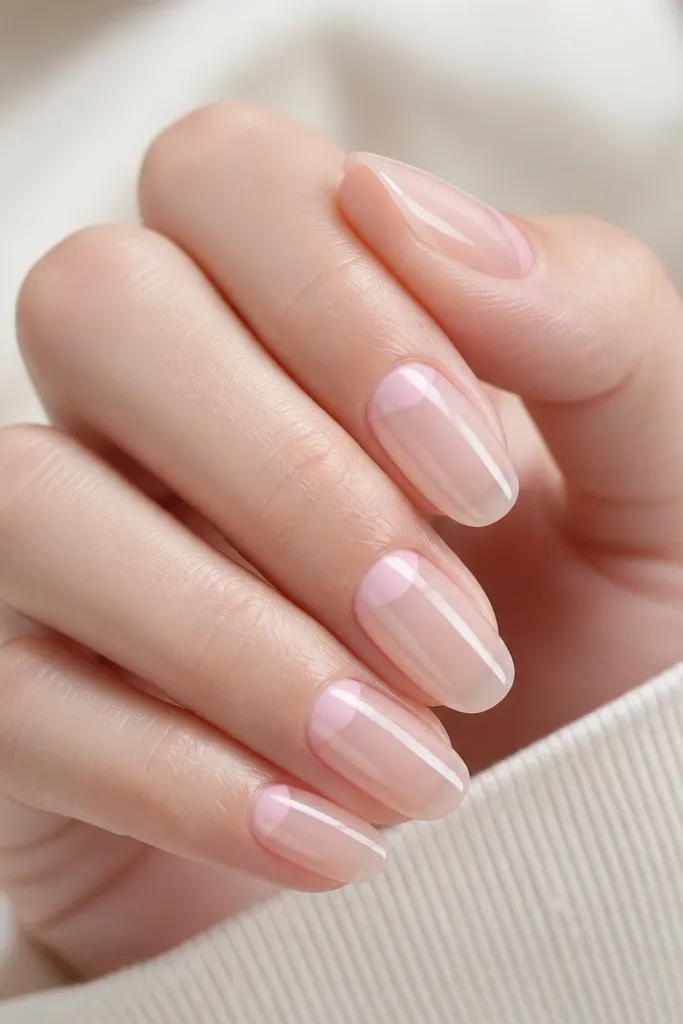
Half-moons read elegant when the negative space is intentional. The clear jelly center keeps the design light, and the soft pink half-moon gives structure without covering the whole nail. Under lights, the jelly catches highlights and makes your nails look thicker and healthier.
Apply a sheer base first. Use a half-moon stencil or a curved brush to place soft pink gel at the cuticle area, then cap the design with a clear jelly layer in the middle. Cure each nail long enough that the jelly looks smooth, not bumpy.
Pro tipIf you're hand-painting the half-moon, sketch it lightly with a dotting tool pressed once - then fill the curve with gel.
Watch outSkip chunky gel near the cuticle; it lifts faster and looks messy.
3. Blush Marble in One Direction
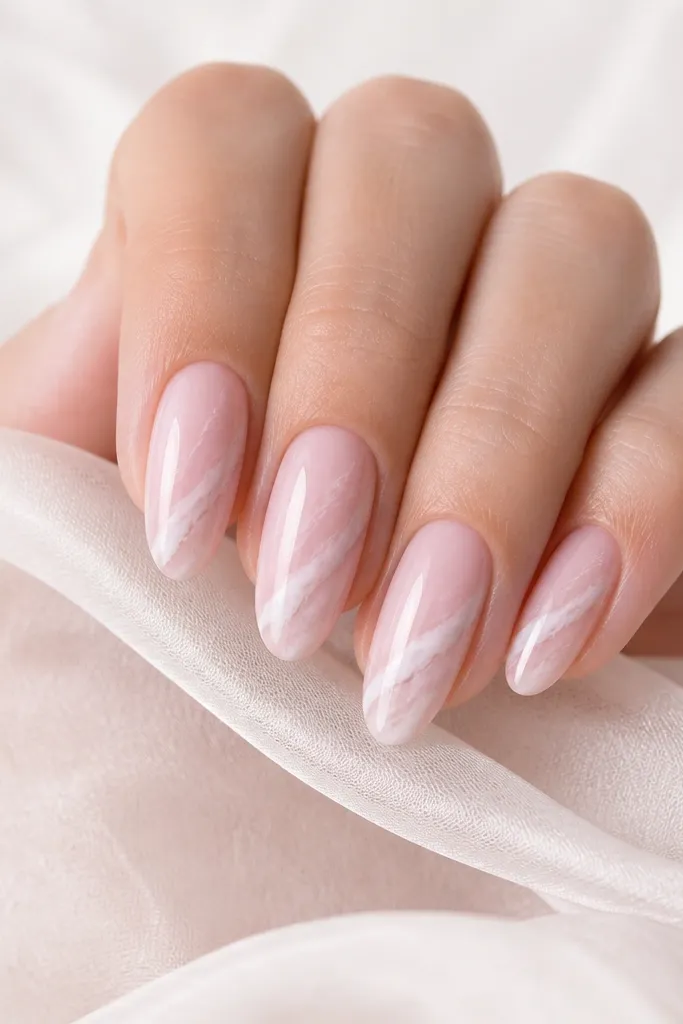
Marble can look classy or messy depending on control. This version uses micro-veins - thin lines that stay in one direction - so the nails feel airy. Soft pink under marble also makes the white veining look like natural stone, not highlighter ink.
Start with milky soft pink for opacity. Add one thin swipe of white gel on a corner area, then drag it with a toothpick or thin liner brush using light pressure. Keep the veining sparse on each nail so you don't end up with a full blob.
Pro tipWork with gel that's slightly tacky, not fully cured, for cleaner marble movement.
Watch outDon't over-blend; too much swirling turns marble into muddy pink.
4. Soft Pink Cable Knit Accent
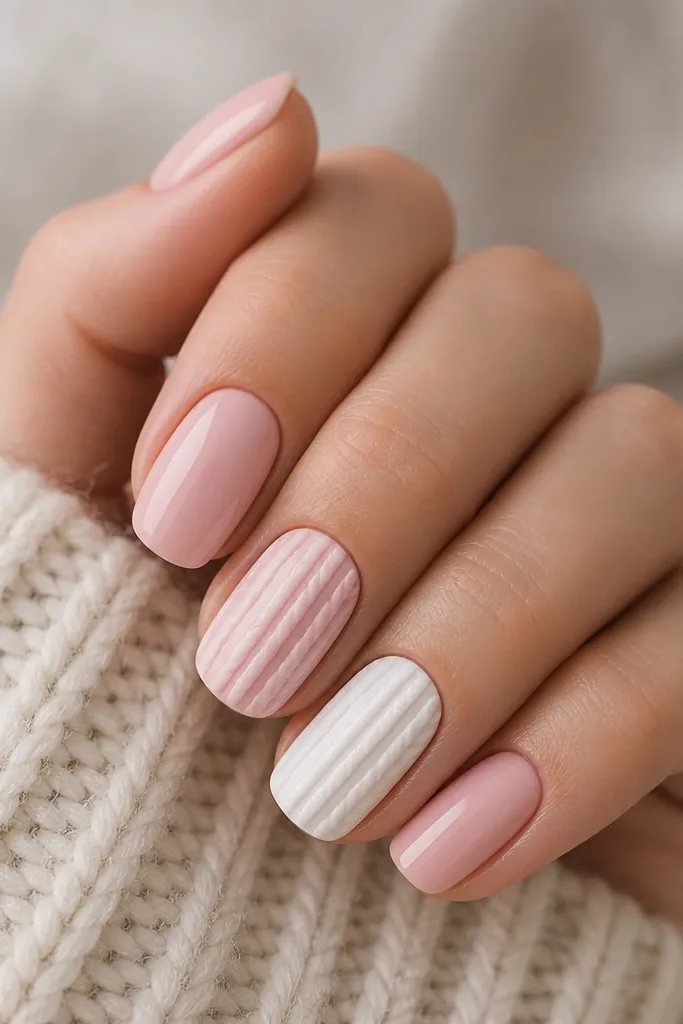
Cable knit looks cozy, but you can keep it elegant by limiting it to one or two nails. The raised lines create texture that shows up beautifully under a light source, and the color stays in the blush family so it doesn't look costume-y. It's a great "winter but still feminine" set.
Paint all nails with soft pink gel in two thin coats. On accent nails, use a striping gel (or thick gel) to draw parallel lines, then add the crossover lines to form the knit pattern. Cure longer for the raised gel so it doesn't stay soft.
Pro tipUse a nail art brush with a flat edge for crisp cable lines.
Watch outDon't put cable knit on every nail; the texture becomes distracting.
5. Milky Pink Ombré With Clear Edge Fade
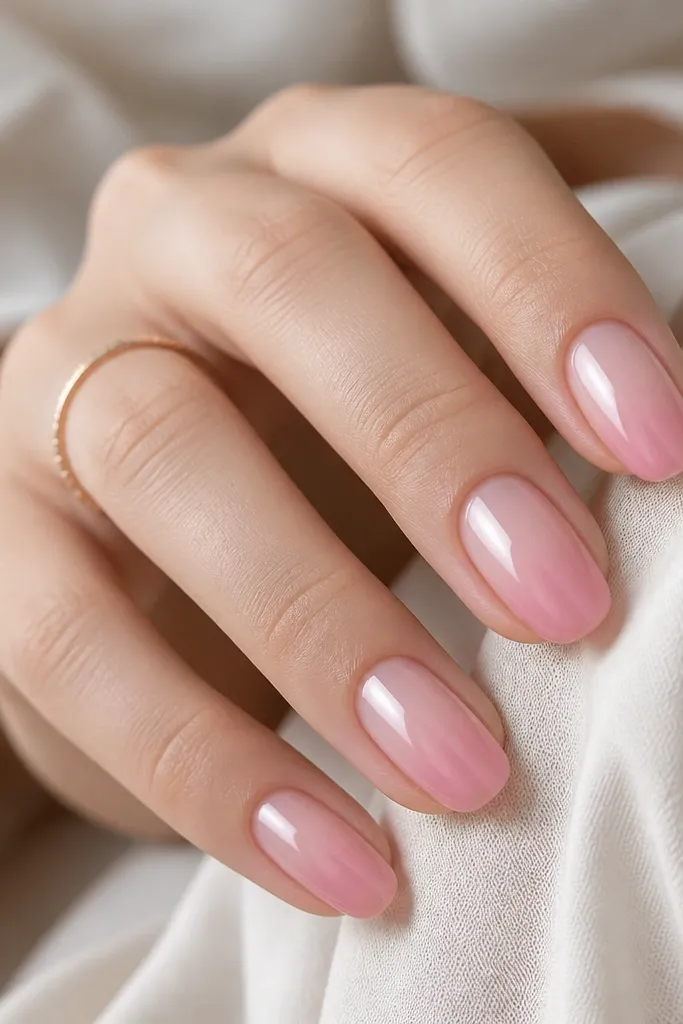
Ombré looks elegant when it fades to near-clear, not straight white. The clear edge makes the nail feel longer, and the milky middle keeps it soft and flattering. Under lights, the gradient looks like it's lit from within.
Use a milky pink gel on the lower half of the nail, then blend upward with a makeup sponge. Keep the free edge almost bare - you're fading, not painting. Finish with a glossy top coat to smooth the sponge texture.
Pro tipBlend on a palette first to control pigment load, then sponge lightly.
Watch outDon't skip top coat; sponge ombré without it looks grainy.
6. Rose Quartz Crystals on Blush Base
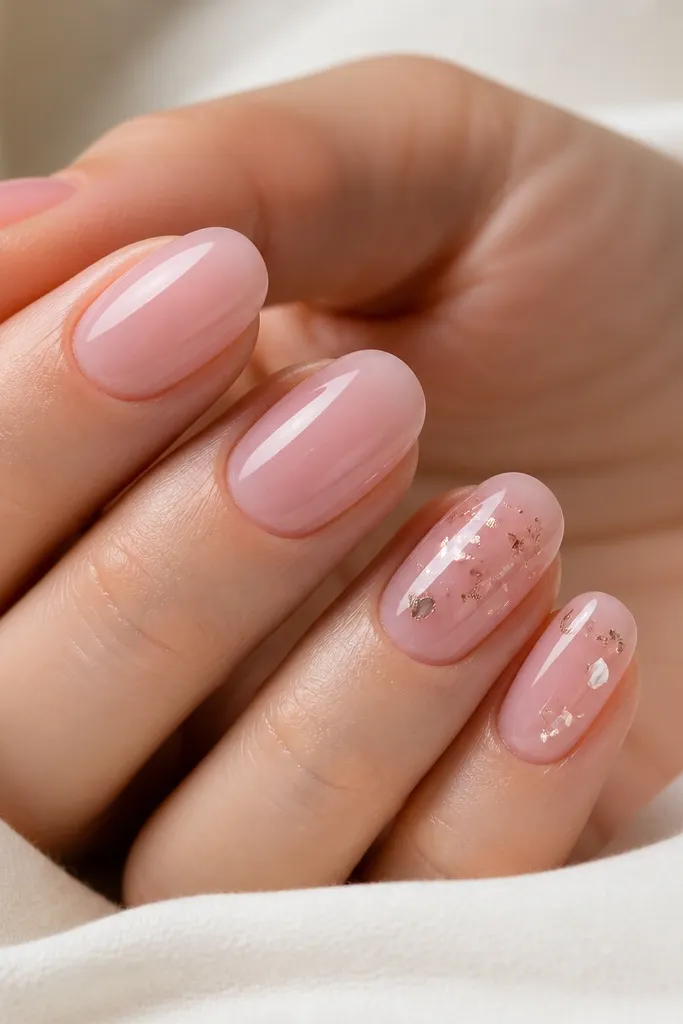
This is the "pretty detail" version of crystal nails. Soft pink keeps it romantic, rose-gold foil adds warmth, and a few tiny studs catch the light without looking heavy. It's perfect when you want something special but still wearable.
Paint all nails with a glossy soft pink base. Add a thin layer of clear gel where you want crystals, place 2-4 small studs per accent nail, and add foil flakes sparingly around them. Cure and seal with a thicker top coat so edges don't snag.
Pro tipPress studs in with a silicone pusher right after you place them so they sit flat.
Watch outDon't bury crystals under thin top coat; they pop up and snag.
7. Soft Pink French With Peachy Side Wings
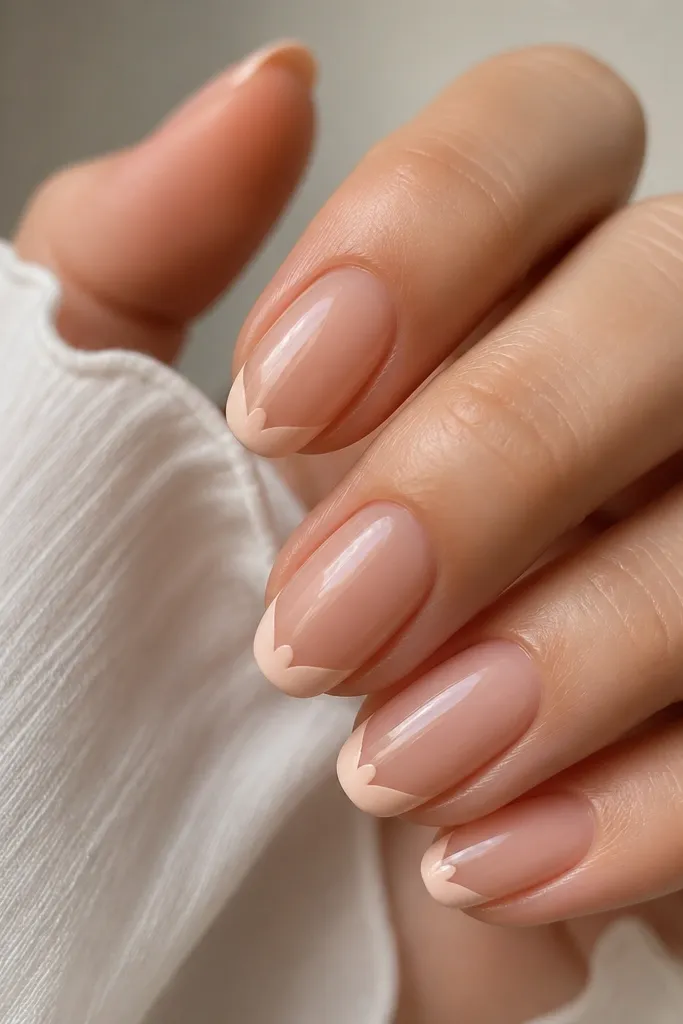
French tips look elegant when they're slightly softened. This one keeps the base sheer and adds a peach wing detail that frames the nail - it looks delicate under lighting and draws attention to the natural curve. It's still "classic," but with a modern twist.
Use a sheer blush base in two thin coats. For the tip, paint a slim French line in milky white or pale cream. Then add peach gel wings at the corners of the tip, keeping them under 2 mm wide.
Pro tipUse striping tape to mask the tip line, then remove while the gel is still tacky for clean edges.
Watch outDon't make the wings symmetrical by guesswork; measure with your tape placement.
8. Soft Pink Dot Confetti on Negative Space
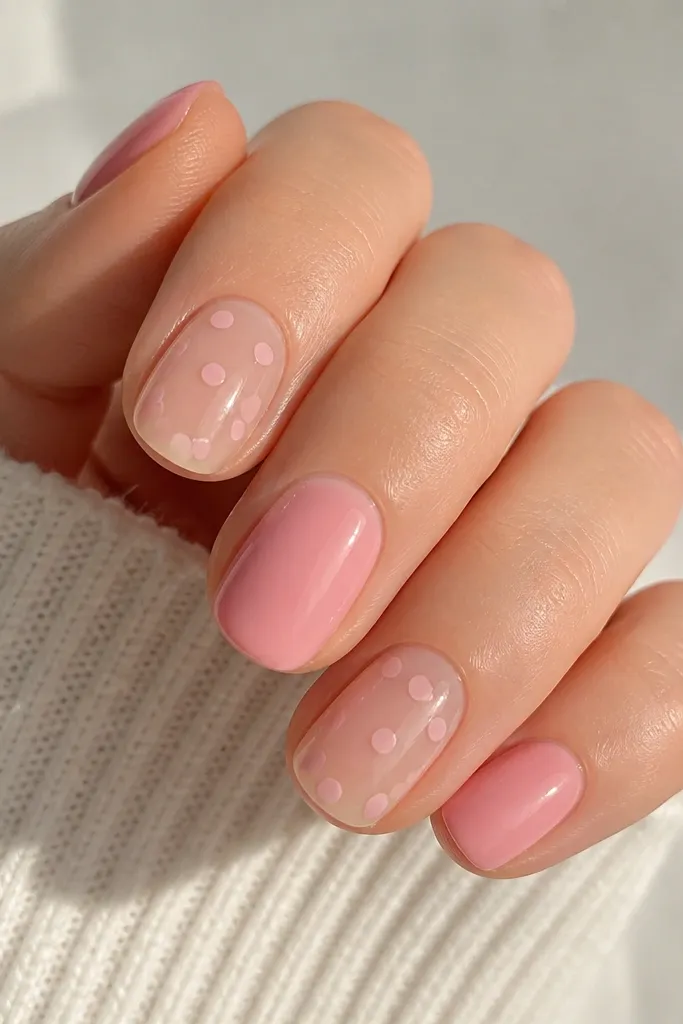
Negative space makes dot art look intentional instead of random. The soft pink dots are tiny, so they read like confetti, not decals. Under a ring light, the glossy clear area reflects and makes the dots pop.
Pick 2-3 nails for the negative space look. Leave the nail base clear or apply a sheer base, then stamp or dot soft pink gel in 4-8 tiny circles per nail. Cure carefully and seal with top coat.
Pro tipFor perfect dots, use a dotting tool size that matches your nail - too big will look messy.
Watch outSkip big dots; large circles on soft pink look childish.
9. Blush Gradient With Tiny Gold Line Bar
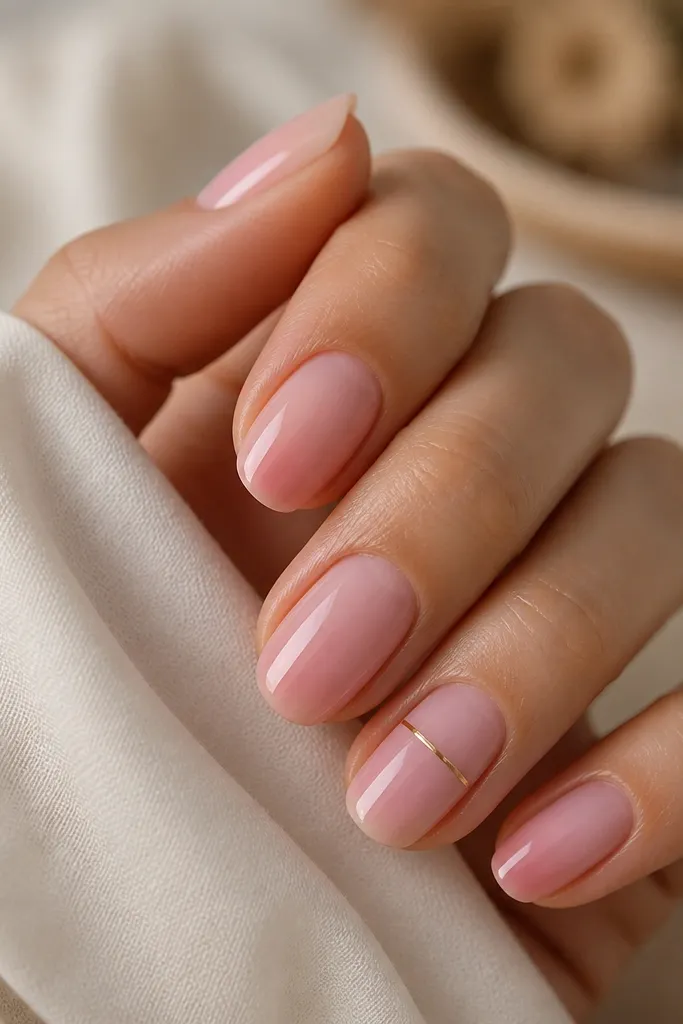
A single gold line makes soft pink feel styled. The gradient adds depth without looking harsh, and the bar line gives a "clean graphic" feel. Gold also reflects light, so with storage lights or a ring lamp, it looks crisp instead of dull.
Blend a slightly deeper blush into the middle of the nail using a sponge or brush technique. On the accent nail, draw a thin gold line using striping gel or fine gold foil adhesive. Keep the bar narrow - about 1-2 mm tall.
Pro tipUse painter's tape to place the gold line, then remove immediately after applying the gel.
Watch outDon't stack multiple lines; one bar is what keeps it elegant.
10. Soft Pink Cat-Eye With Clear Top Glow
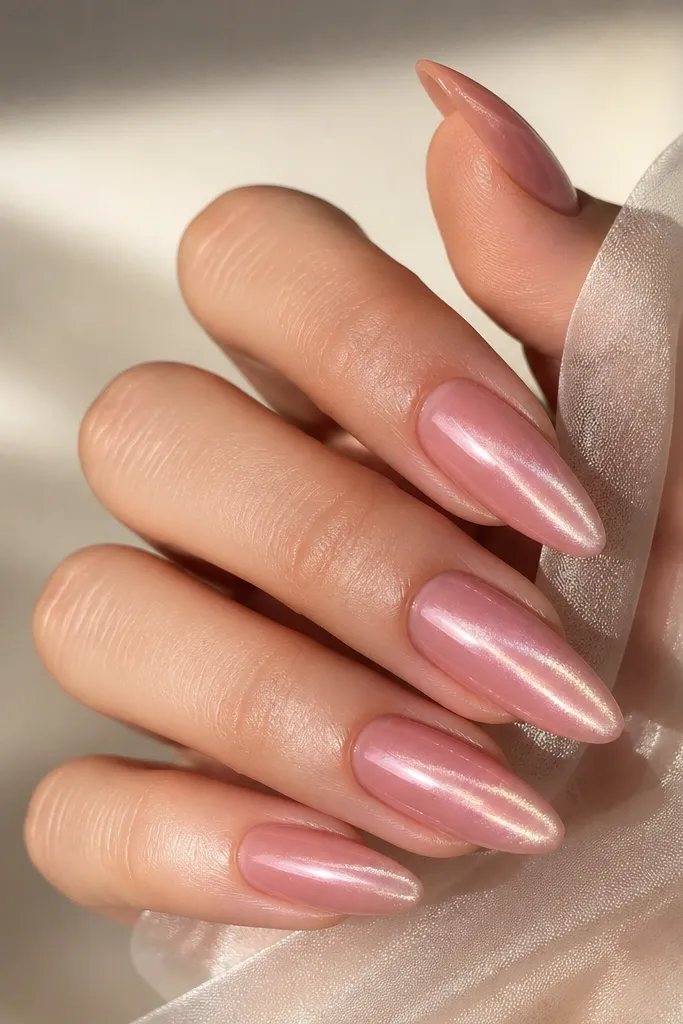
Cat-eye works when the base is soft, not neon. The central glow line adds movement, and the effect looks more expensive when the pink is sheer-milky. Under a light source, the magnetic stripe sits perfectly and gives that salon look.
Apply soft pink cat-eye gel in one smooth coat, then magnet it for the stripe. Use a second coat only if you need opacity, and cure each layer. Finish with a clear top coat that smooths the surface and amplifies shine.
Pro tipMove the magnet slowly and keep it centered; rushing makes the stripe wander.
Watch outDon't magnet over flooded cuticles; it pulls product sideways.
11. Soft Pink Lace Outline on One Accent Nail
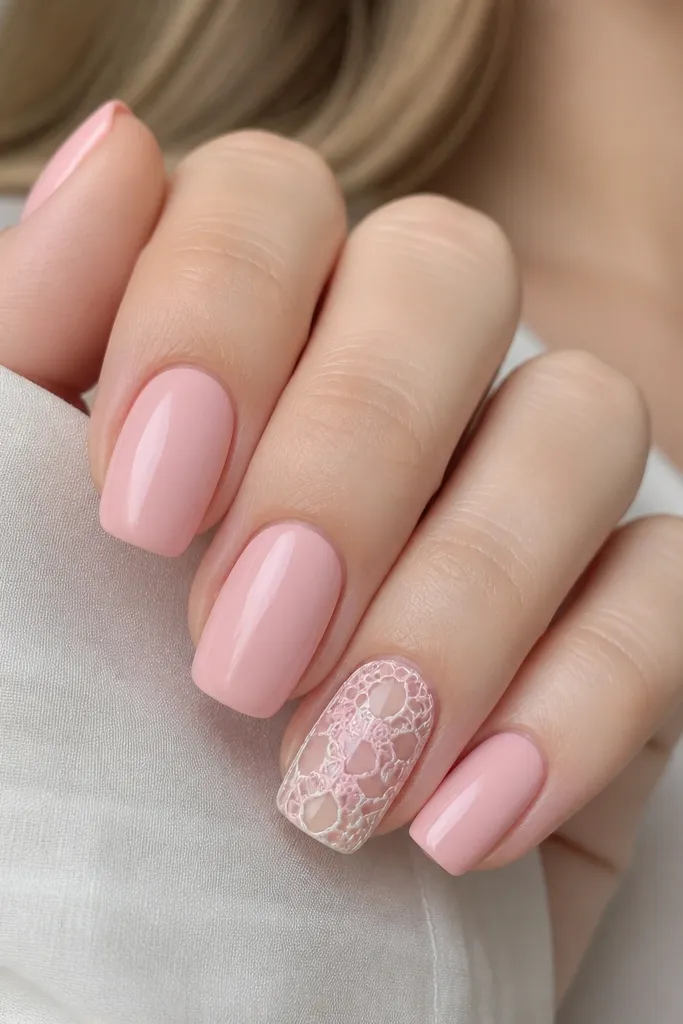
Lace outline is elegant because it uses line work, not full coverage. You get detail without heavy texture, and soft pink keeps the white lines from looking stark. The open loops catch light, especially when you cure under a lamp with a bright internal light.
Paint all nails with soft pink base and cure. On one accent nail, use a fine liner brush to draw lace loops: small arcs, then connect them with tiny lines. Add a second thin pass if the lines are too faint.
Pro tipPractice the lace pattern on a fake nail tip first so you don't hesitate mid-set.
Watch outDon't fill the lace with thick gel; outline only looks clean.
12. Blush Aura Nails With Soft Halo
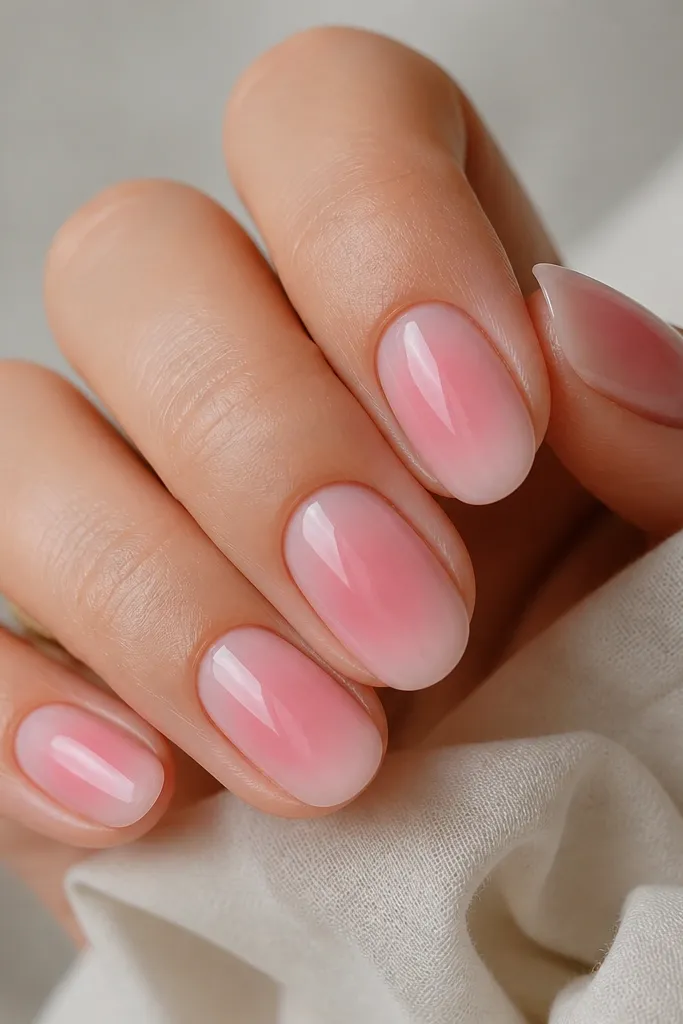
Aura nails are elegant when the halo is subtle. The lighter ring around the center makes soft pink look dimensional, and it flatters every nail shape because the eye is drawn to the middle. Under lights, the halo looks like it's glowing from within.
Start with a sheer blush base. Sponge a slightly lighter pink only in the center around where the aura sits, then feather outward. Add a thin outline of deeper blush around the halo if you want extra definition, then top coat.
Pro tipUse a small blending sponge and keep your halo 2-3 mm wide for a refined look.
Watch outDon't make the halo too wide; that turns aura into a blob.



