
1. Peach-to-Orange Sunset French with One Tiny Fern
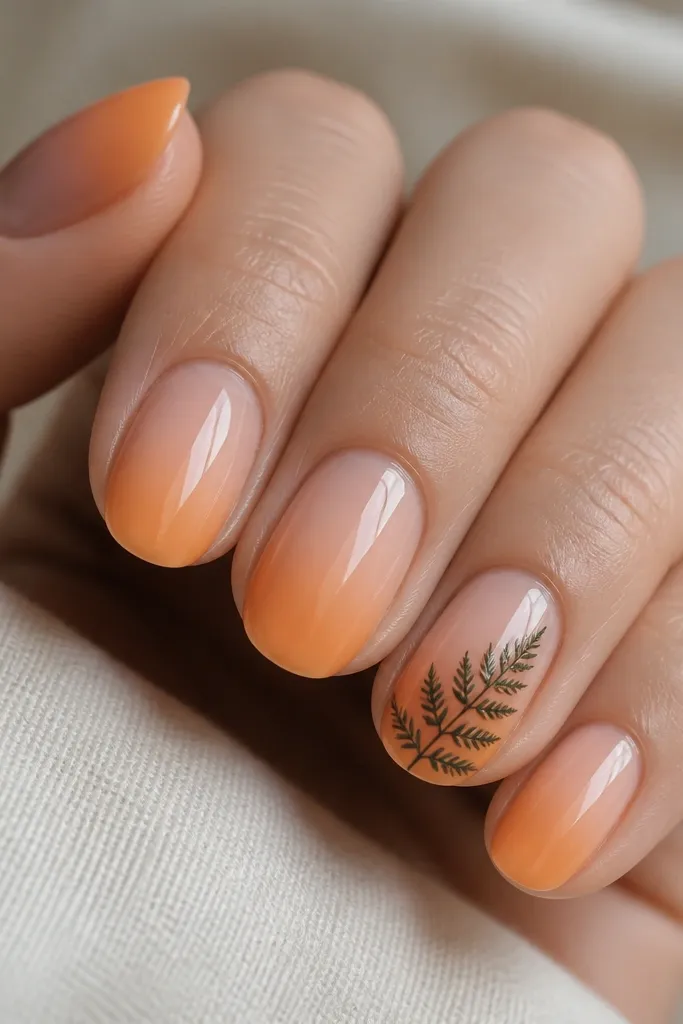
This one works because the fern lines sit on top of a warm gradient, so the green looks like it belongs in the scene. I keep the fern tiny - about the width of a pencil eraser - so it doesn't overpower the horizon. The sunset colors are peach nude to orange-red, with no bright yellow, which makes it feel like late afternoon instead of candy. Glossy top coat makes the gradient look like it's glowing.
Shape: short almond or soft squoval. French tip height: 3-4 mm from the free edge, then blend back 1-2 mm toward the nail. Fern color: deep green gel with a tiny dot of brown mixed in. Draw one stem upward from the side of the tip, then add small leaf flicks on both sides.
Pro tipUse a detail brush (the kind that's under 1 mm at the tip) and drag each leaf flick from a single starting point - you get consistent leaf size fast.
Watch outDon't make the fern too tall; if it reaches past the gradient midpoint, it turns into a tangled mess.
2. Coral Sunset French with Mini Succulent Pair
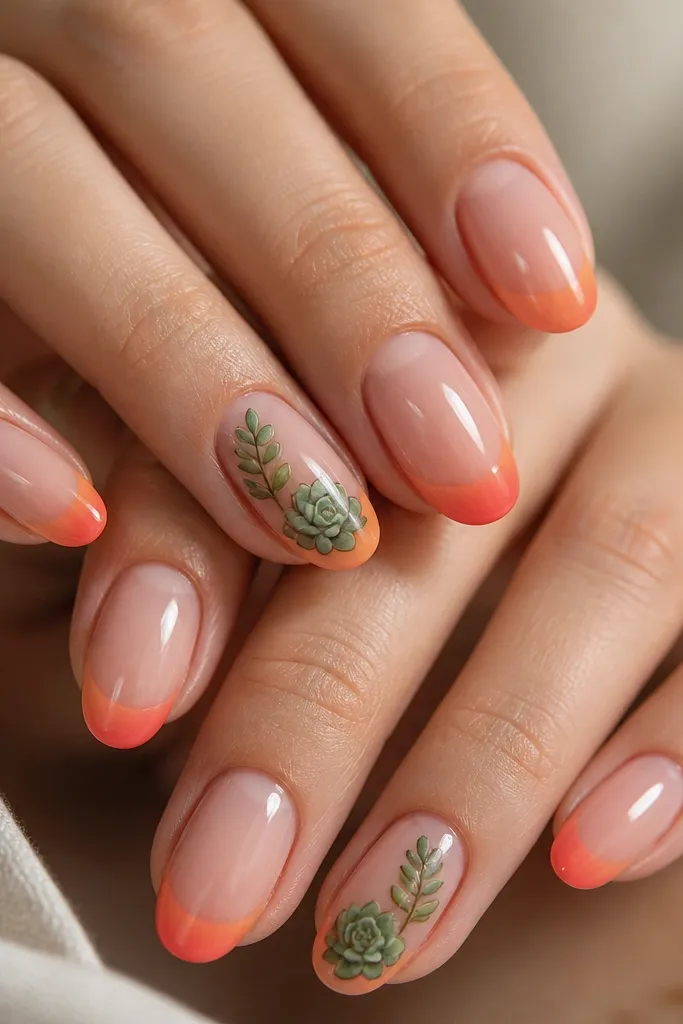
Succulents look good on sunset nails because their rosette shape echoes the rounded curve of a French tip. I use muted olive-green with a slightly dusty look so it doesn't clash with warm coral. The white highlight lines are the difference between flat stickers and something that looks dimensional. Keep the succulents small and spaced so the sunset still reads first.
Base: sheer pink. Tip gradient: coral at the outer corner, orange at the center, then fade into the base. Succulent design: rosette lines drawn with a thin green gel, then add 3-5 tiny white strokes for "light" on the leaves. Place the pair toward the side of the tip, not centered.
Pro tipDot the centers with a gel dotting tool, then pull leaf lines outward in short strokes so the rosette stays round.
Watch outSkip neon green; it clashes with coral and makes the whole set look like a costume.
3. Sunset French with Watercolor Palm Leaf Wash
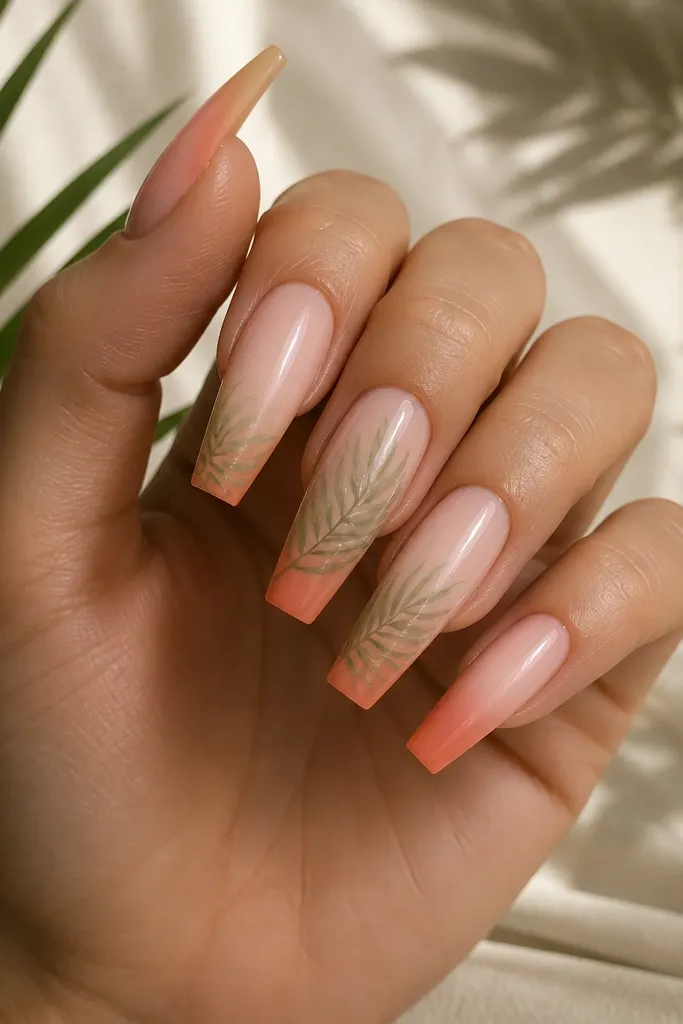
This look is all about softness. A watercolor-style palm leaf wash lets the sunset colors show through, so the plants feel like part of the sky instead of sitting on top. I use a semi-sheer green mixed with a little clear gel to keep the leaf edges feathered. The rust-orange tip color makes the translucent green pop without looking harsh.
Tip height: 4-5 mm on long nails. Apply the sunset gradient with a makeup sponge for the soft watercolor feel - tap, don't swipe. For the palm leaves, drag a diluted green gel from base outward, then use a clean brush to blur one edge. Cure in short bursts so the dilution doesn't pool.
Pro tipWork on matte paper first: test your diluted green ratio so it stays see-through before you paint the nail.
Watch outDon't outline the palm leaf in dark green; outlines kill the watercolor effect and make it look sticker-like.
4. Golden Hour French with Black-Eyed Plant Silhouettes
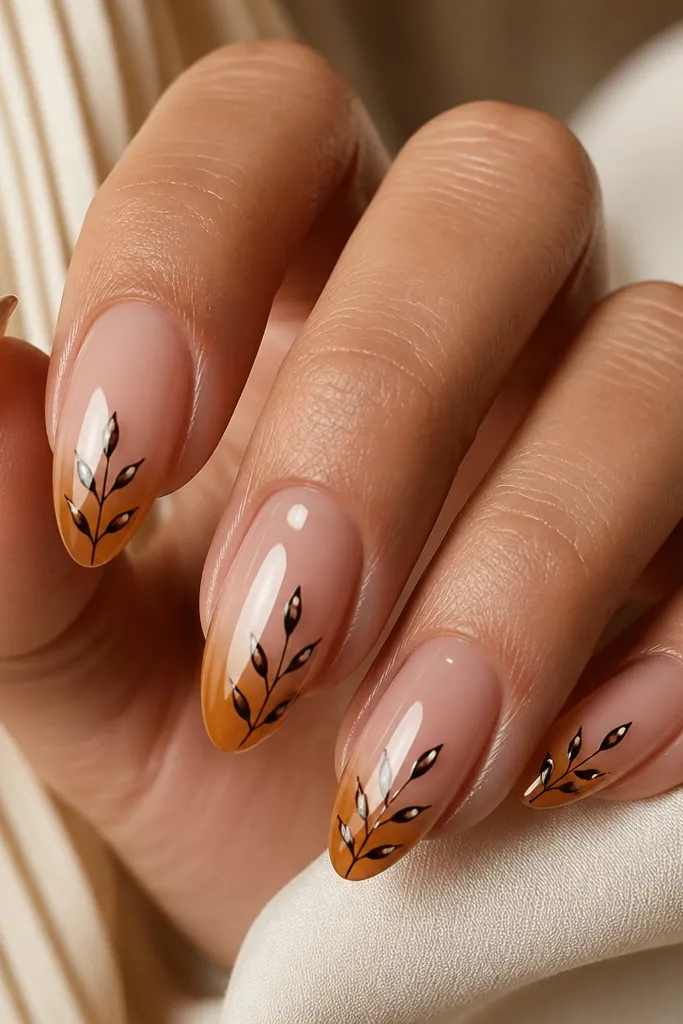
Silhouettes make sunset nails look graphic and clean. Because the plants are dark, the gradient reads even more like sunset light. I keep the silhouettes thin and airy, with negative space between leaves so the nail still breathes. The tiny white dot highlights give the design a "cut glass" look under flash photos.
Base: sheer nude. Tip gradient: add a warm yellow-orange only at the center, then blend into peach and fade back. Plant: near-black gel, drawn as one stem with 4-6 small leaf shapes branching off. Add one micro white dot on 2-3 leaves only.
Pro tipUse striping tape to keep the French tip edge crisp, then peel it after the gradient is placed but before you cure.
Watch outDon't fill every leaf area; solid shapes make the whole nail look heavy.
5. Sunset French with White Linework Vines
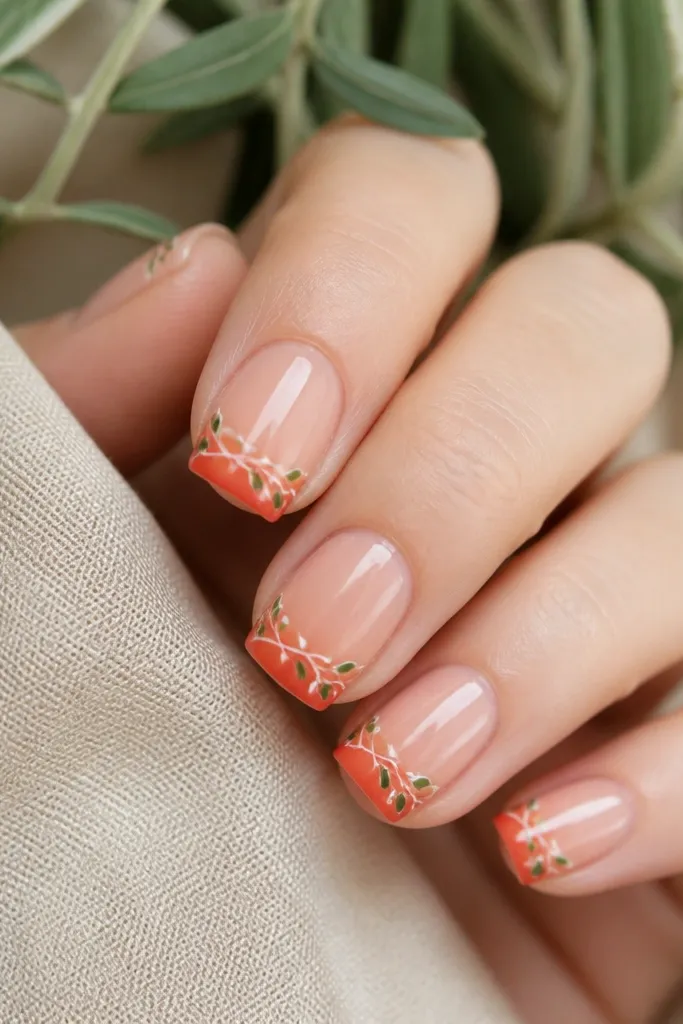
White linework is the fastest way to make plants look intentional instead of random. The vines create movement, and the tiny green dots keep the design from turning into just a white scribble. This works because the sunset gradient is warm and forgiving; white lines pop without needing dark outlines on every leaf. It also looks great on short nails where big plant clusters would feel crowded.
Tip gradient: keep it simple - peach to orange-red with a soft blend. Draw one vine starting near the outer edge of the tip and curve it toward the center. Add tiny leaf dots (just a small teardrop shape) in muted green along the vine. Seal with a thicker top coat pass so the linework stays smooth.
Pro tipIf your white gel is streaky, thin it with a clear gel drop so it lays like ink.
Watch outAvoid thick white lines; they catch light weirdly and make the manicure look bumpy.
6. Pink Sunset French with Tiny Flower Buds and Fern Tips
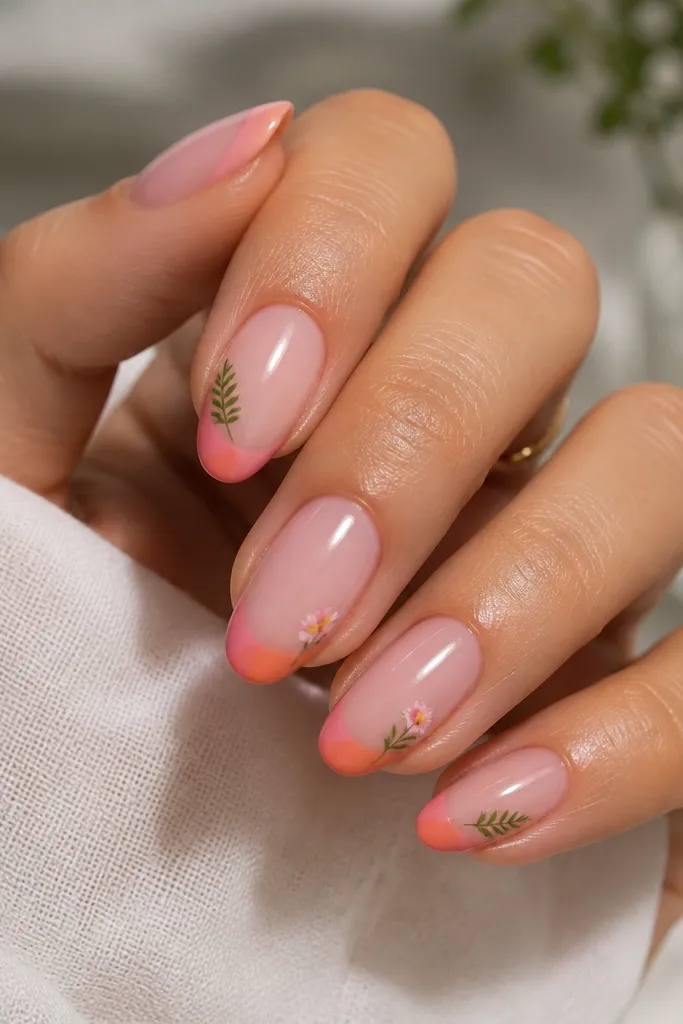
This is the "garden at dusk" look. The fern gives you that plant texture, while the micro flower buds add a soft pop that still matches the pink sunset. I keep flower buds tiny - about the size of a grain of rice - so they read as buds, not blobs. The yellow centers add warmth and make the whole set feel like it's lit from the horizon.
Pick a pink base that's sheer, like milky blush. Sunset tip: pink at the outer edge, coral through the center, fade back. Fern: deep green, one corner placement. Flower buds: 2-3 micro ovals in soft pink, then a dot of pale yellow in the center.
Pro tipUse a toothpick tip to place yellow centers; it keeps the dot round and prevents dragging.
Watch outDon't add too many flowers across every nail; the look gets busy fast.
7. Terracotta Sunset French with Leaf Shadowing (2-Tone Green)
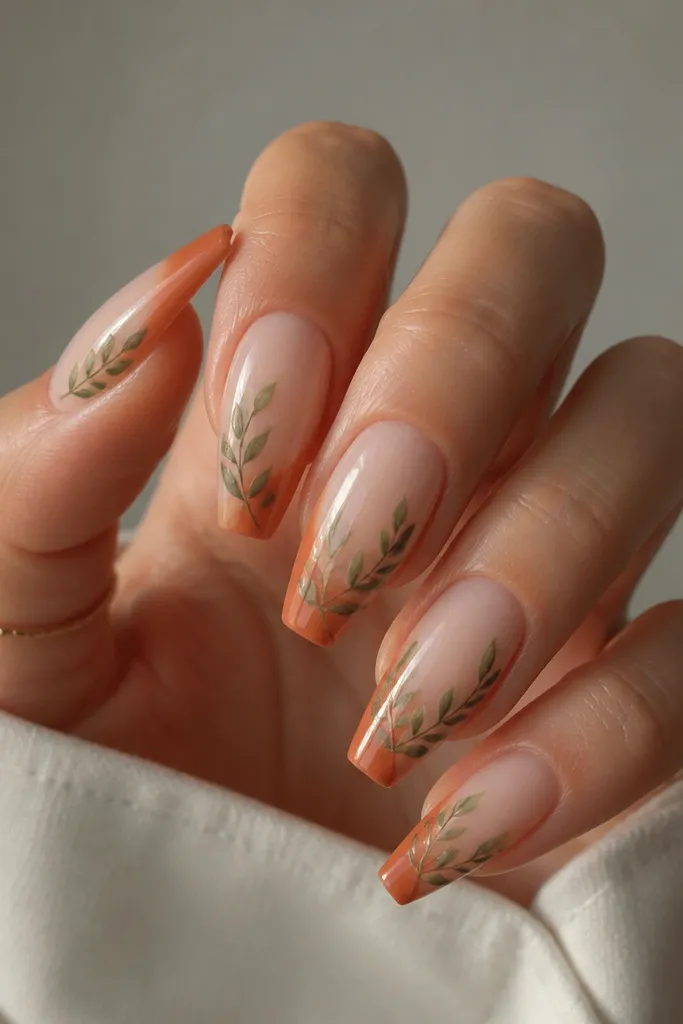
Leaf shadowing makes plants look painted, not stamped. I use two greens - olive for the main leaf and darker green along the lower edge - so each leaf has a natural "depth." Terracotta sunset is the right background because it's warm and slightly dusty, which makes greens look more realistic. This set also photographs really well because the shadows catch the light.
French tip height: 4 mm. Blend the terracotta into the base with a sponge so it stays soft. For leaves, paint the olive leaf first, then add darker green only along the bottom edge like a thin underline. Place 3-4 leaves in a vertical line along one side of the tip.
Pro tipLet the olive leaf cure fully before adding shadow green; rushing makes the colors muddy.
Watch outAvoid blending green colors together on the nail; sharp edges create the illusion of shadow.
8. Matte Desert Sunset French with Dry-Leaf Silhouettes
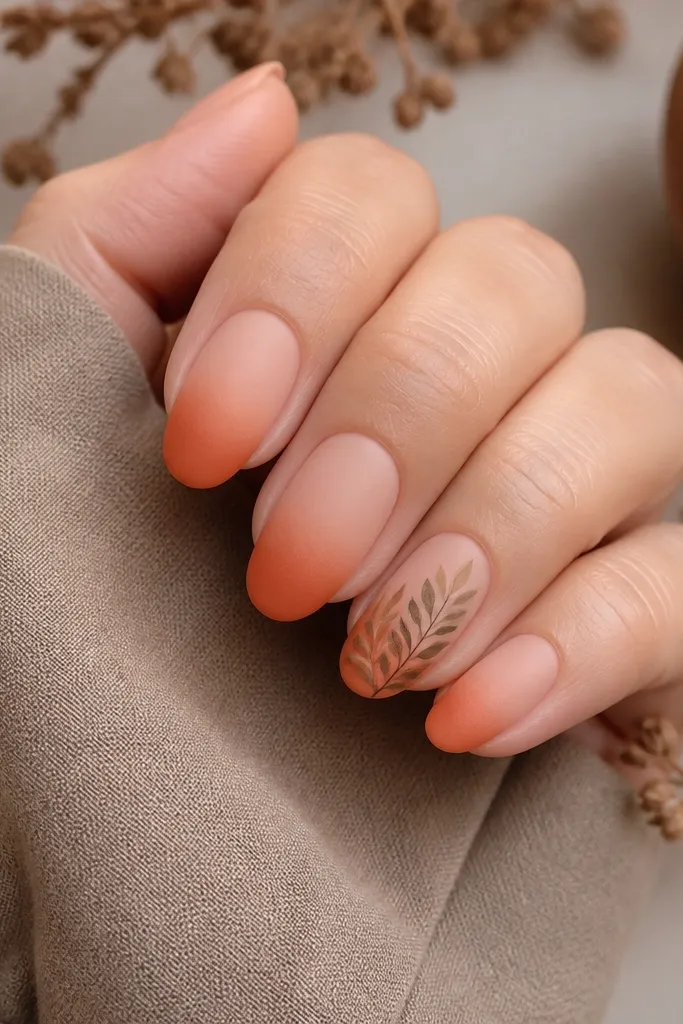
Matte top coat changes everything. It turns the sunset into "desert sky" instead of glossy gel, and dry-leaf silhouettes look intentional against that texture. I keep plant colors desaturated - olive, tan, and a little brown - so they look sun-faded. The matte finish also hides tiny brush texture that would show on glossy nails.
Do your full gradient and plant work in glossy gel, then cap with matte top coat at the end. Keep the leaf cluster small on one nail only, and leave the other nails clean. Use a thin liner brush for silhouettes so the shapes stay crisp.
Pro tipIf your matte top makes the gradient look dull in a bad way, apply a glossy top only on the sunset area and keep plants matte.
Watch outDon't matte the entire nail if your gradient is patchy; matte makes uneven application more obvious.
9. Gradient French with Floating Leaf Stickers (Gel Seal Method)
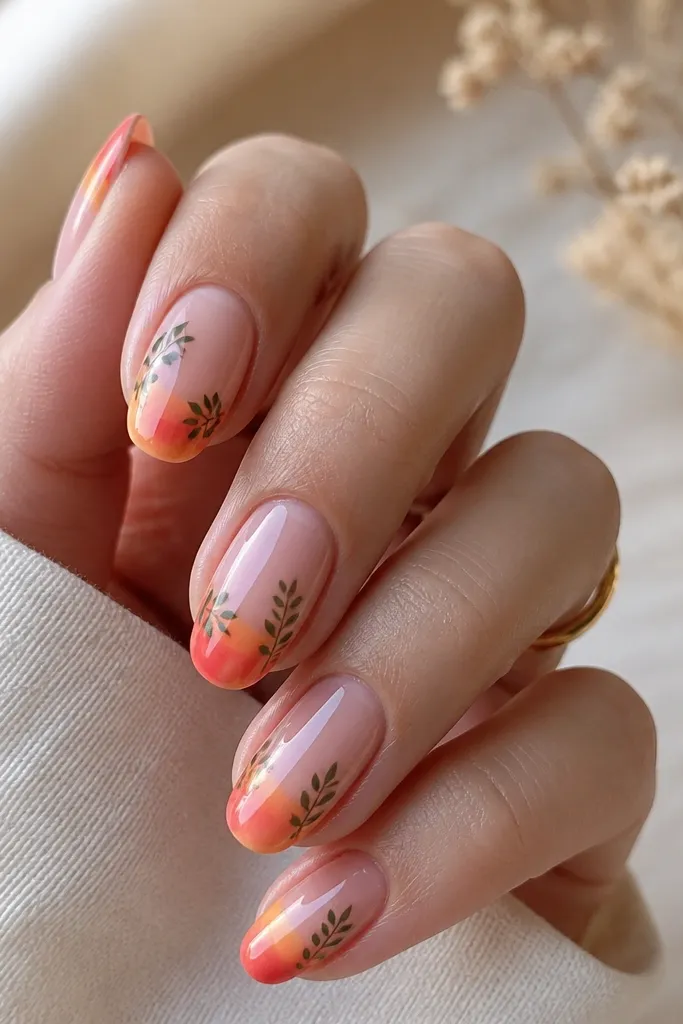
Floating stickers look expensive when you seal them correctly. The key is using a gel "sandwich" so the edges disappear under top coat. The sunset gradient underneath shows through the transparent sticker backing, which makes the leaves look like they're in the scene. This is the quickest way to get clean plant detail without freehanding tiny leaves.
Apply your gradient first and cure. Place the leaf sticker on the wet-but-cured surface, then brush a thin layer of clear gel over it and cure. Repeat one more thin clear gel layer so the sticker edges fully level out. Finish with a glossy top coat.
Pro tipTrim sticker pieces with small nail scissors so the edges don't create a ridge under gel.
Watch outSkip thick gel over sticker edges; thick layers stay bumpy and catch lint.
10. Sunset French with Glassy Leaf Veins (Clear Gel Overpainting)
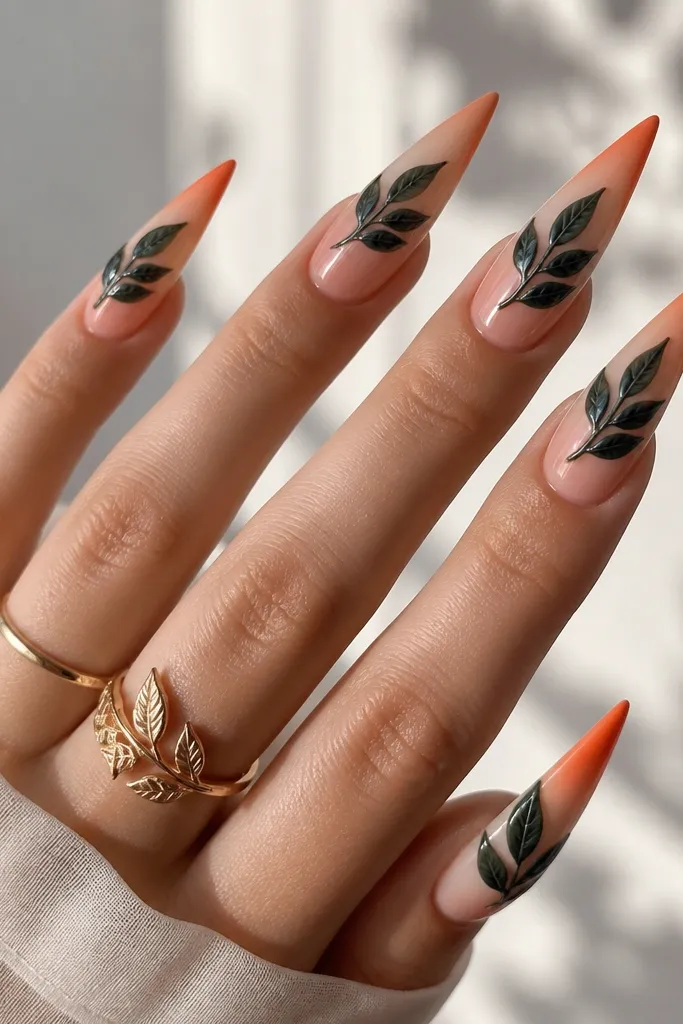
Glassy veins make plants feel like they're under a dome. I paint leaves first in deep green, then add thin clear gel lines for veins. That clear gel catches light and makes the veins look like they have depth. It's extra pretty on stiletto nails because the light travels along the nail and highlights the veins.
Keep the leaf shape simple: one main leaf plus two smaller ones. Add veins with a tiny striping brush using clear gel, not white paint. Cure carefully in small bursts so clear gel doesn't flood and blur the edges.
Pro tipIf clear gel domes too much, lightly wipe the brush on a lint-free pad before drawing veins.
Watch outDon't add clear gel before the green leaf cures; it smears and turns into a green haze.
11. Sunset French with Leaf Confetti Tips (Micro Dotting)
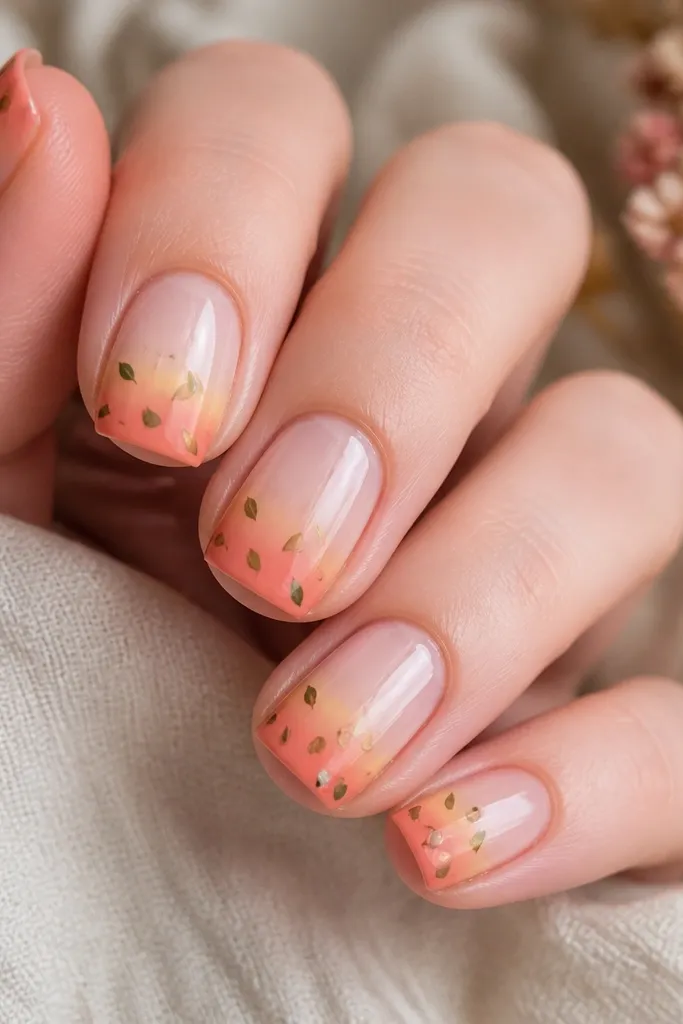
Confetti leaves look playful while still feeling clean. You're not drawing full plants - you're placing tiny shapes that read as foliage. The sunset gradient acts like the sky, and the tiny leaves act like foreground texture. This is a good option when you want a plant theme but you don't want to freehand stems.
Gradient: keep it smooth and fade back 1-2 mm. Leaf confetti: use a dotting tool to place tiny teardrop leaves, then add a mini line in the center with a detail brush. Place them along the tip only, leaving the base clear.
Pro tipPlan leaf placement by tapping a few dots first, then connect with the leaf shape. It prevents clumping.
Watch outAvoid placing leaves too close to the free edge; they can catch on fabric and lift.
12. Sunset French with Branch Curve and Bud Dots
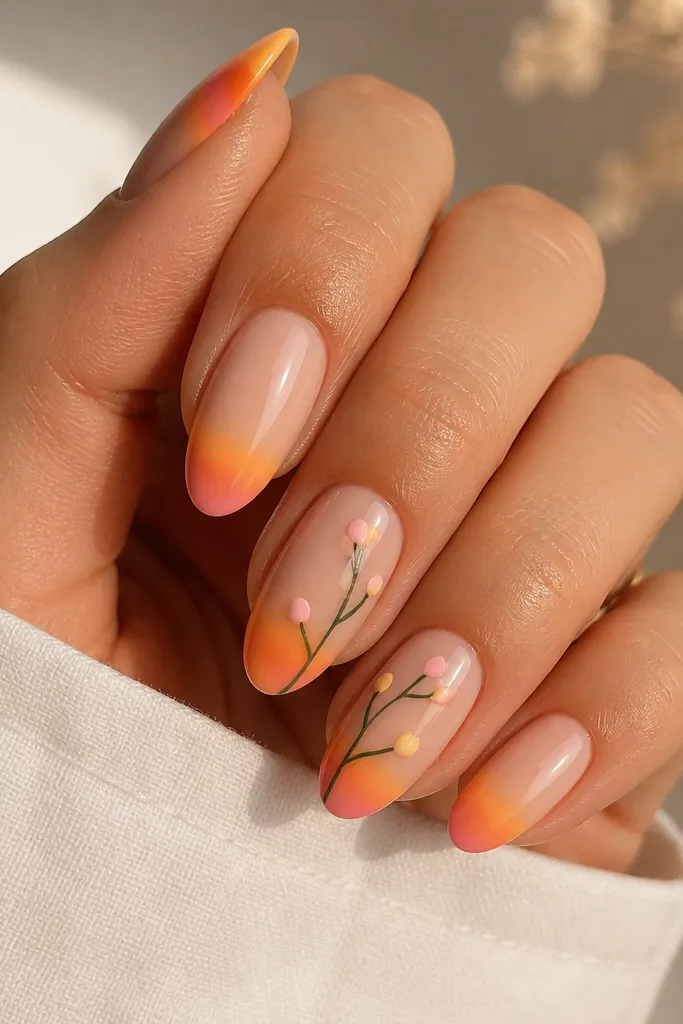
A single curved branch line makes the design look intentional even when you keep it minimal. Bud dots add interest without needing detailed petals. I like this because it works on both short and medium nails; the curve follows the nail shape and doesn't fight your smile line. Use creamy yellow and pale pink for buds so they tie into the sunset colors.
Draw one branch curve from near the outer corner toward the center of the tip. Add bud dots along the curve: alternate pale pink and creamy yellow, keep each dot tiny. Add a single tiny leaf flick near one bud so it feels botanical, not just dots.
Pro tipUse a thin brush to draw the branch, then switch to a dotting tool for buds so dot size stays consistent.
Watch outDon't thicken the branch too much; a chunky line makes the whole nail look heavy.



