
1. Milky White Almond with Clear Edge Window
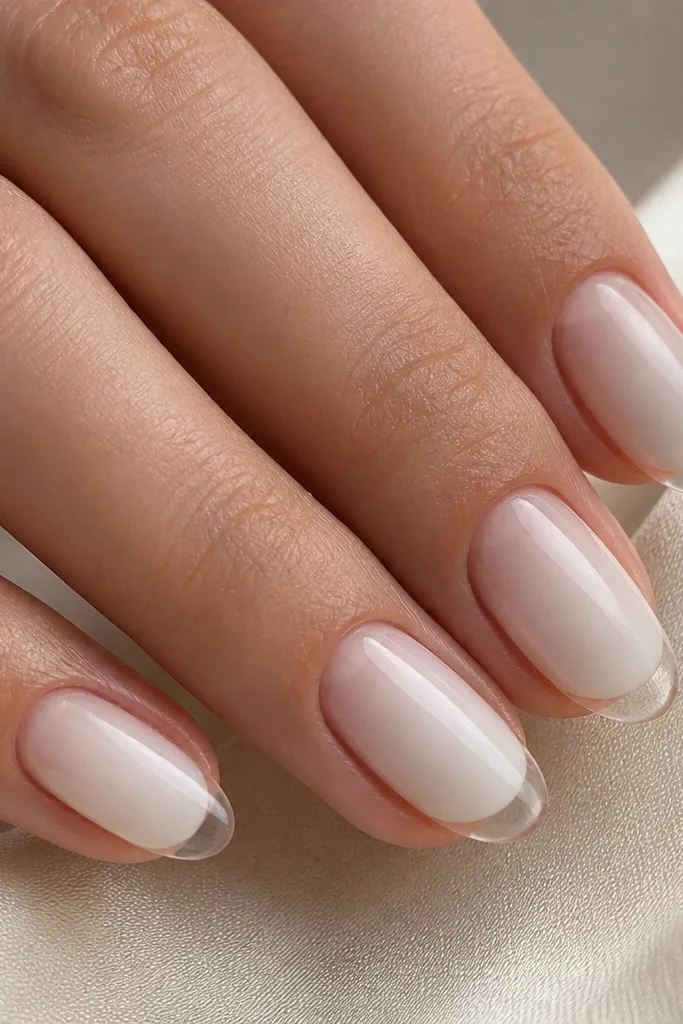
This design works because milky white spreads light and makes the nail bed look smoother, while the clear edge window keeps the almond from feeling "boxed in." I like it for small space nails because it adds length perception without increasing actual length. The fade toward the sides also helps if your nail plate is wider - the white doesn't hug the edges. It looks clean in daylight and still bright under indoor lighting.
File the almond so it stays short and symmetrical. Apply a sheer pink or clear base, then sponge or airbrush milky white onto the center and blend toward the sides. Leave the last 1-2 mm of the tip clear before curing. Finish with a high-gloss top coat to lock the fade.
Pro tipIf your white turns chalky, thin the milky white gel slightly with a gel medium or use fewer layers and cap the center only.
Watch outAvoid full-coverage opaque white from cuticle to tip - it makes short nails look shorter.
2. Micro French Arc with Sheer Nude Base
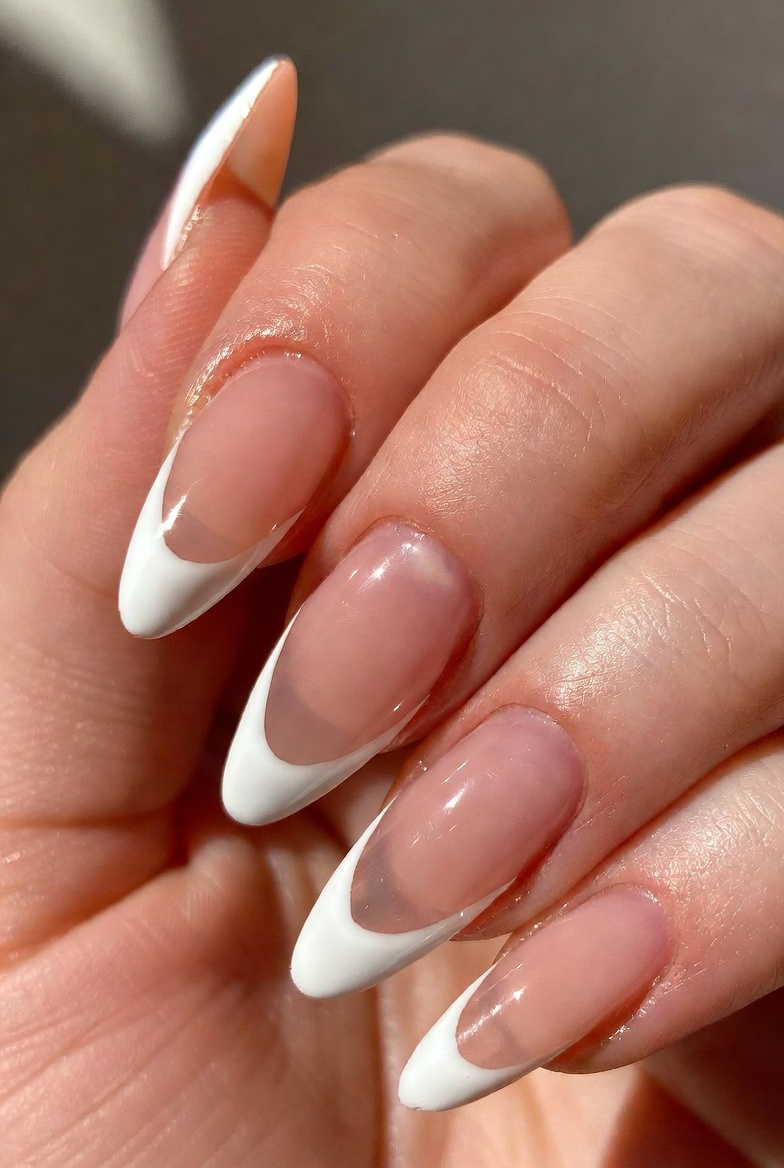
A micro French arc is the fastest way to make almond nails look longer in a small space. The sheer nude base keeps your natural nail color visible, so the white only adds a frame at the tip. I've found that thin arcs (not thick "smile lines") flatter short almond shapes because they don't overpower the nail bed. It also hides small imperfections since your base tone evens everything.
Use a sheer nude gel or a nude builder gel. With a striping brush, paint a white arc that's about 1 mm thick at the center. Keep the arc height low - around 1/6 of the nail length. Clean up the sides with a brush dipped in gel cleanser, then cure and top coat.
Pro tipUse a French guide sticker only as a placement reference, not as a stamp - remove it before you cure so the arc stays crisp.
Watch outDon't make the French arc too tall; tall arcs shrink short nails visually.
3. White-to-Clear Ombre on a Short Almond
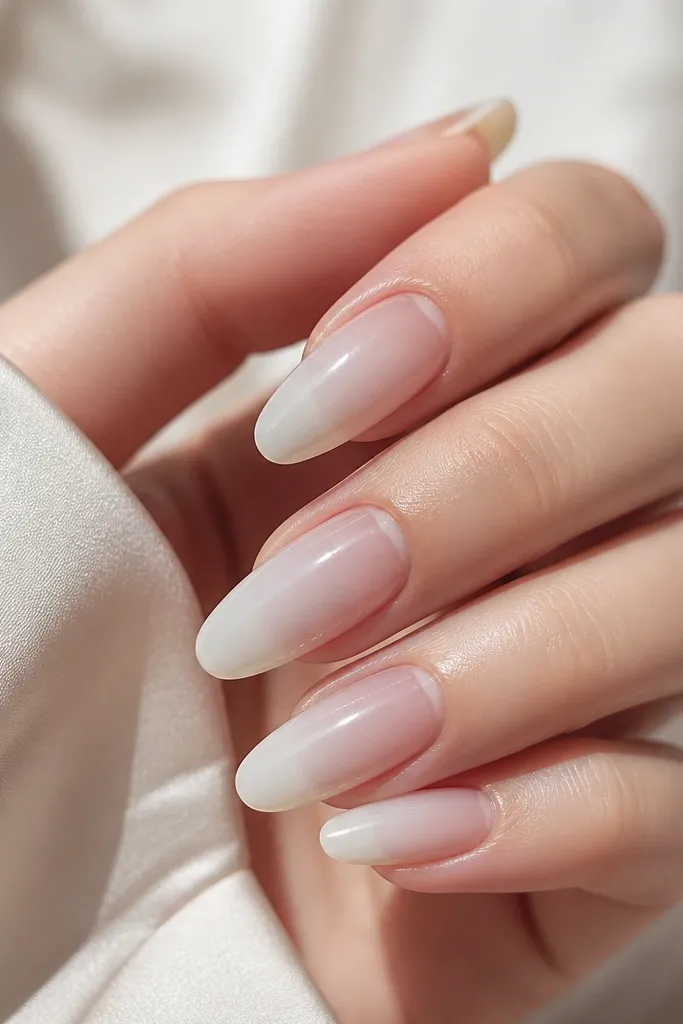
Ombre makes short almond nails look like they're stretching, because the white isn't a single shape - it's a transition. Clear at the cuticle prevents the nail from looking top-heavy. This one is forgiving when your nail surface has tiny texture since the gradient visually smooths it. It also stays classy for work without looking bare.
Start with a thin clear or sheer base. Sponge milky white from the center toward the tip, then pull a little of it down slightly so the gradient isn't a hard line. Leave the very cuticle area clear (about 1 mm) and cure in thin layers. Cap the free edge lightly so the tip doesn't catch on fabric.
Pro tipUse a small makeup sponge cut down to a tiny wedge so the gradient stays tight on small nails.
Watch outAvoid overloading white at the cuticle - it makes the nail look thicker and shorter.
4. Negative Space Almond Half-Moon
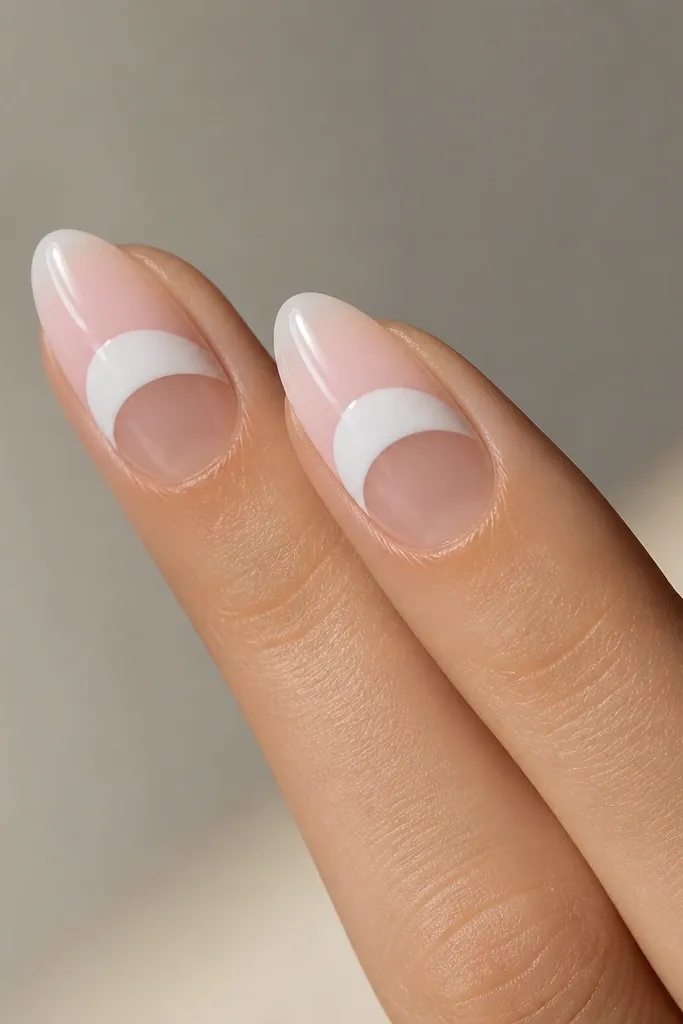
This design is a cheat code for small spaces: the negative space is doing half the work. The white half-moon reads like a highlight, while the clear lower area keeps the nail from looking crowded. I like it on almond shapes because the half-moon curve naturally matches the tip. It also looks modern compared to a full white manicure.
Apply a sheer base. Use a small stencil or freehand with a liner brush to place the white half-moon in the upper half of the nail, leaving the bottom 40-50% clear. Keep the half-moon width narrower than the nail - about 70% of nail width. Cure, then top coat with a thick glossy layer.
Pro tipIf your half-moon looks uneven, clean the border with a brush dipped in acetone-free remover before curing.
Watch outAvoid filling the whole nail with white and then trying to "save" it with negative space - the shape needs real breathing room.
5. White Marble Vein on Clear Almond
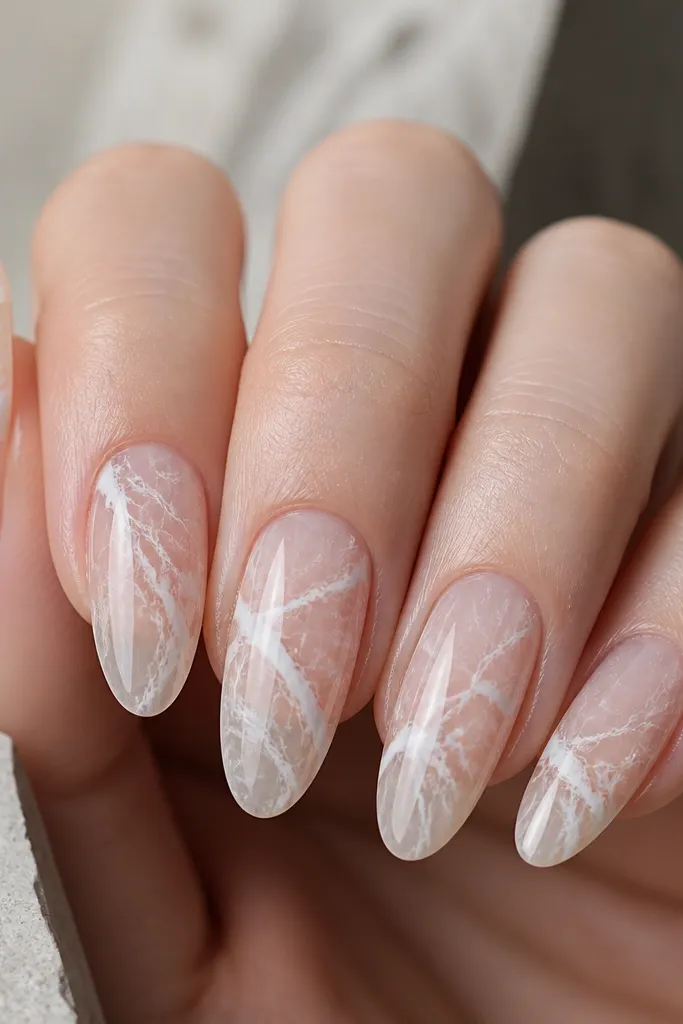
Marble looks fancy, but it's actually perfect for tiny nail beds because it uses fine lines instead of big solid blocks. White veins on clear keep the nail looking long and airy. I've done this with builder gel and it stays dimensional without turning chunky. The key is keeping the veins thin and letting the clear base do the brightness.
Start with clear builder gel or a clear soak-off gel base. Add off-white gel to create one main vein, then pull a few thinner branches using a detail liner brush. Keep the branching mostly centered and stop before the sidewalls. Cure, then top coat thick enough to smooth the lines.
Pro tipWipe your liner brush on a lint-free pad so the line starts fine and stays controlled.
Watch outAvoid chunky marble where the veins are the same thickness everywhere - it looks like sticker art.
6. Matte Milky White with Glossy Tip
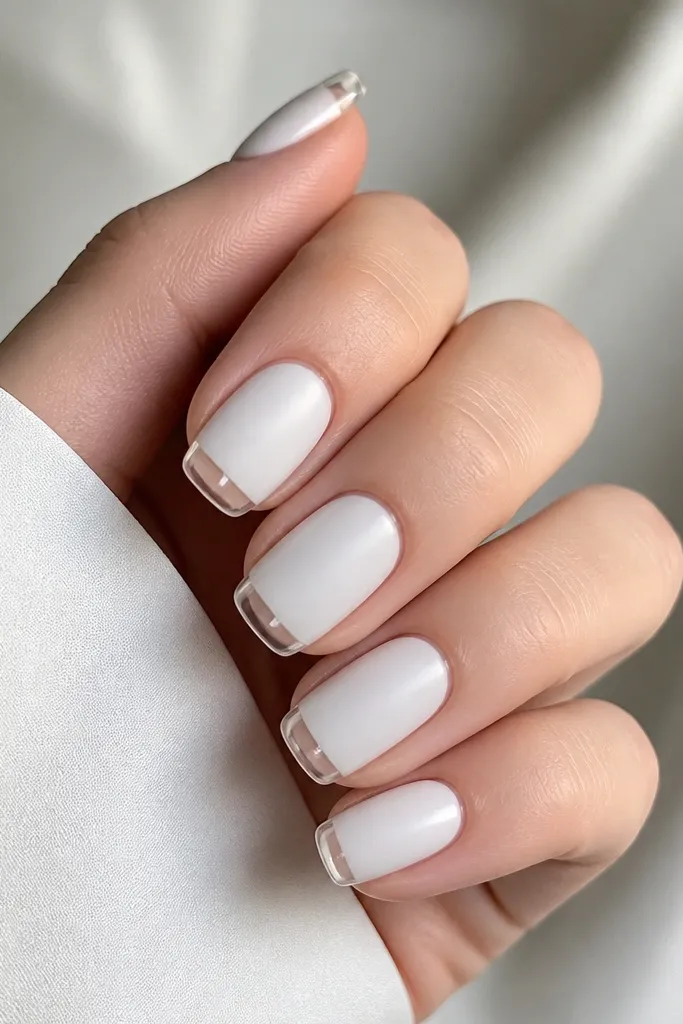
This combo looks expensive because it plays with texture instead of adding more color. Matte milky white hides tiny surface imperfections, while the glossy tip makes the almond point look sharper. On short nails, glossy at the tip adds a visual "length hit." It also photographs really well because the matte body doesn't glare.
Build a milky white layer and cure. Seal the nail with a matte top coat over the whole nail, then tape off the last 1-2 mm of the tip and apply glossy top coat only there. Cure again. Remove tape carefully and clean the underside of the tip.
Pro tipUse a matte top coat that dries fully before you touch the tips - smearing ruins the contrast.
Watch outAvoid putting matte over the whole nail and forgetting the glossy tip - you lose the length effect.
7. White Lace Dot Fade (Center-Only)
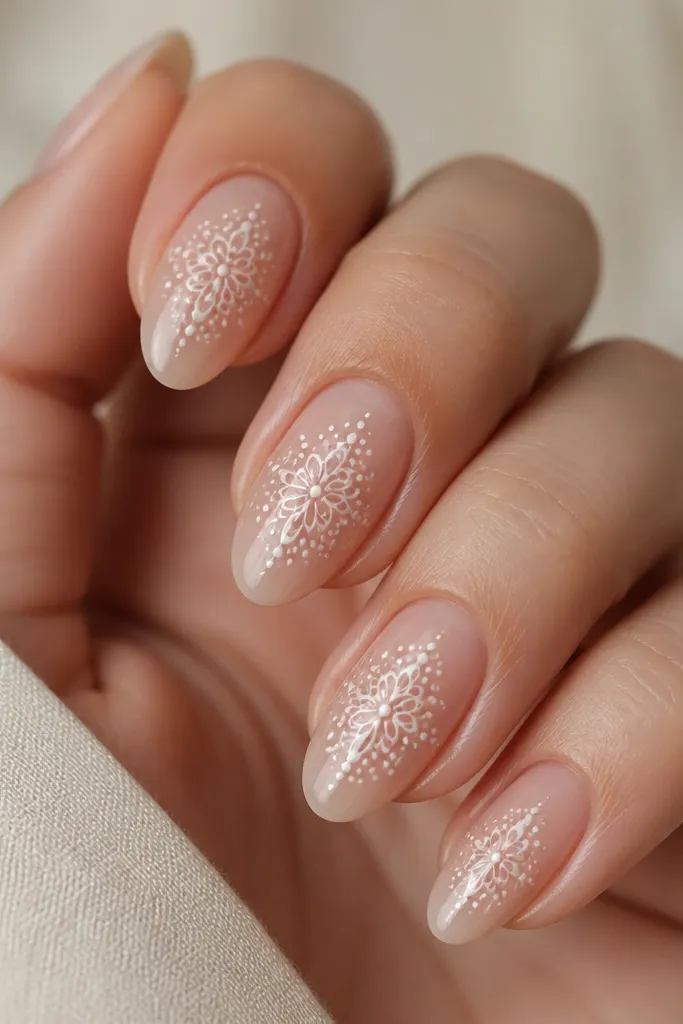
Lace patterns can overwhelm small nails, but the center-only version keeps it airy. White dots create a "texture light" effect that makes the nail look fuller without adding bulk. I like this when my nails have slight uneven tone - the dots pull attention away from the base. The fade keeps the nail from looking like it's wearing a doily.
Start with a sheer pink or clear base. Use a dotting tool to place a cluster of tiny dots in the center, then connect a few with micro lines using a detail brush. Keep the design within the center 60-65% of the nail width. Fade it out with fewer dots toward the sides, cure, then top coat.
Pro tipUse two dot sizes: one for the main clusters and a smaller one for the lace gaps so it looks intentional.
Watch outAvoid lace that reaches the sidewalls - it makes short almond nails look narrow and crowded.
8. White Glitter Frost Fade
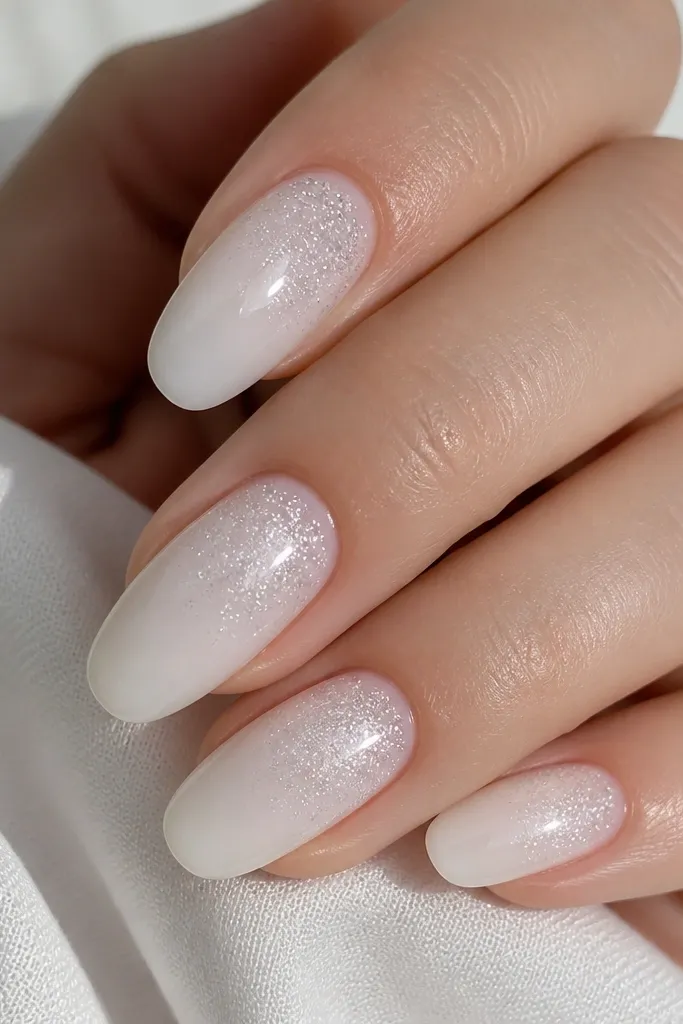
Glitter works for small spaces when it's placed like a gradient, not sprinkled everywhere. The frost at the tip adds sparkle that reads like extra length. Milky base keeps the glitter from looking patchy. I've worn this for winter events and it never looked too heavy because the cuticle stays mostly clean.
Apply a milky white base in 1-2 thin layers. Add white micro-glitter mix with a gel and press it lightly near the tip, then feather downward with a dry brush. Keep the glitter start point around mid-nail. Cure and seal with a glossy top coat so the surface feels smooth.
Pro tipIf glitter catches on your sweater, cap the free edge with plain milky gel before the top coat.
Watch outAvoid full glitter coverage - it looks dated fast and feels rough.
9. White Bow Accent on Nude Almond
This is my go-to for small spaces when you want something cute without painting the whole nail white. The nude base keeps length looking natural, and the bow gives a focal point. A white bow also brightens your hand because it sits near the lightest area (the cuticle). Keep the bow small so it doesn't fight the almond shape.
Use a sheer nude or nude builder gel base. On the accent nail, paint a tiny bow with white gel: two curved loops and a small center dot. Place it about 2-3 mm below the cuticle line. Cure, then top coat carefully around the bow to keep the edges smooth.
Pro tipMake the bow slightly higher on the nail than you think so it looks proportionate on short almonds.
Watch outAvoid oversized bows - they make short nails look like they have a sticker stuck on.
10. White Slim Line Art on Sidewalls
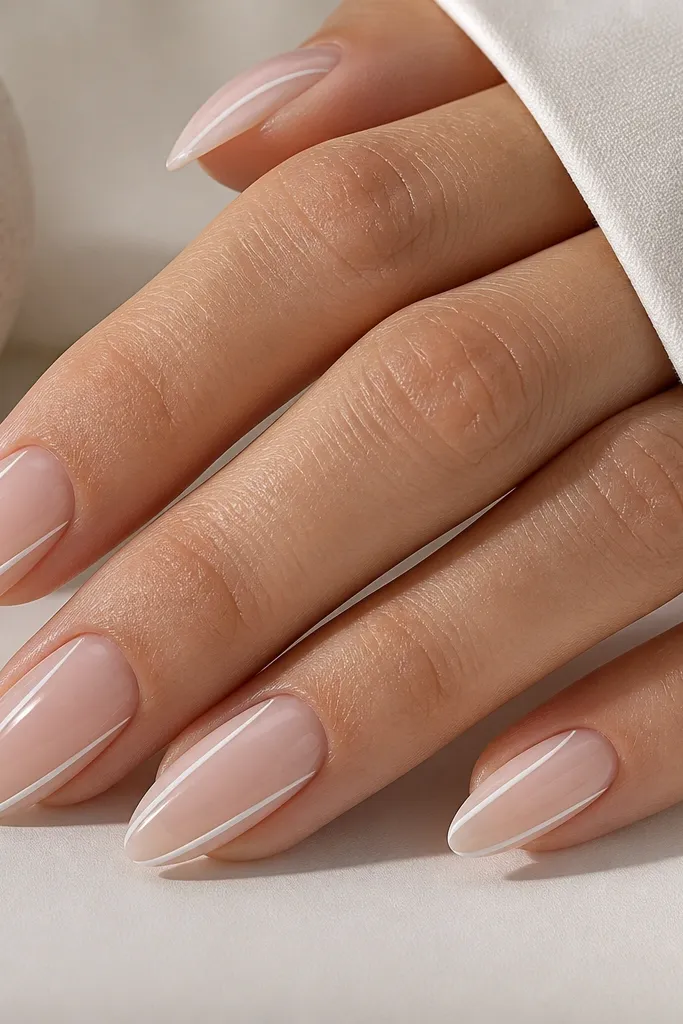
Sidewall line art is a simple trick for making almond nails look more defined. The lines create a frame that guides the eye toward the tip, which matters when you don't have much length to work with. Keep the lines slim so they don't thicken your nail silhouette. I like this on short almond nails because it reads sleek, not childish.
Apply a sheer nude base and cure. With a liner brush, paint one slim line on the left side from mid-nail to near the tip, then repeat on the right. Leave a gap between lines and sidewalls so the nail still looks airy. Cure and top coat with a smooth gel top coat.
Pro tipUse a brush with a sharp point and wipe it on a paper towel first so the line starts thin.
Watch outAvoid thick lines - they make the nail look wider and shorter.
11. White Galaxy Dot Cluster (Tiny Stars)
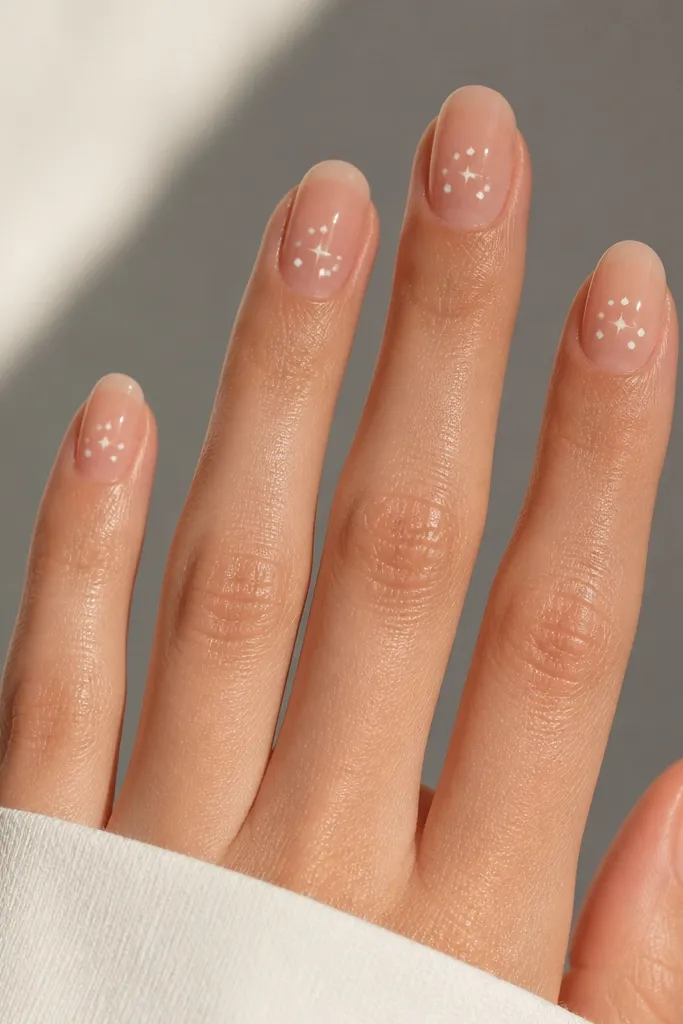
Galaxy dots are cute and still work on small space nails because the pattern is controlled. Tiny stars add sparkle without needing glitter that can feel gritty. White on nude looks bright and clean, and the center clustering keeps the nail from feeling busy. I've used this for spring parties and it still feels light.
Start with a sheer nude gel base. Use a dotting tool to place 5-8 tiny white dots in the center area, then add 1-2 starbursts using a detail brush for short lines. Stop the pattern before it reaches the edges. Cure and top coat.
Pro tipKeep dot sizes varied - 2-3 sizes makes it look like stars instead of a random sprinkle.
Watch outAvoid covering the whole nail with dots - it turns into a speckle mess.
12. White Checker Micro Accent on Tip
Checker patterns can go chunky fast, but a micro checker tip band looks crisp on short almond shapes. The thin band adds interest where the eye expects detail - the free edge. White squares on nude keep the nail from looking flat. It's playful without being loud.
Apply a sheer nude base. Use striping tape or a nail guide to create a narrow band across the tip, leaving about 1-2 mm of free edge visible. Paint alternating tiny squares in white, remove tape before curing, then add top coat.
Pro tipUse a nail art brush for the squares - a dotting tool can make them too round and messy.
Watch outAvoid a wide checker band - it overwhelms the nail bed.



