
1. Thin Forest Green Vine French
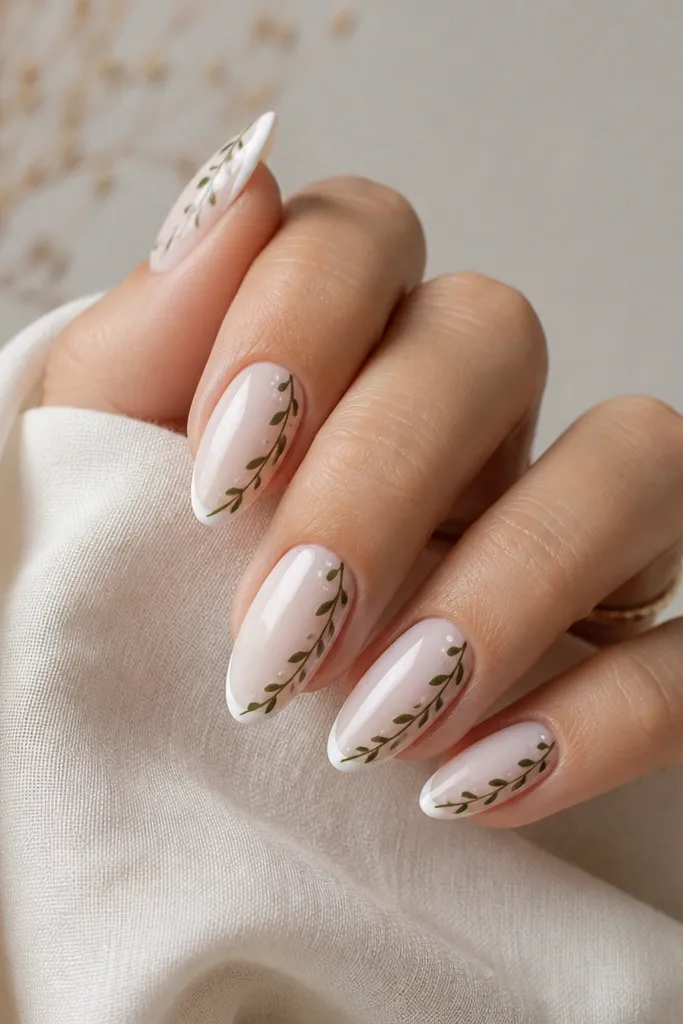
This one looks fresh because the French stays crisp and the vine gives movement without covering the whole nail. The forest green is deep enough to show up on white, so you don't need heavy shading. Tiny leaf pairs keep the design light, which matters on almond shape where a wide pattern can look heavy. The overall feel is clean-garden, not cartoon.
Paint the French line first with milky white, then let it cure. Use a liner brush to draw one vine starting about 2 mm from the cuticle and aim it diagonally toward the center of the tip. Add two small leaves per nail - keep them under 1 mm each. Tie it together with one tiny dot bud at the curve apex.
Pro tipCure in short bursts (10-20 seconds) after the vine line if your gel floods or drags.
Watch outDon't turn the leaves into blobs - if a leaf is wider than 1.5 mm, it starts looking like a sticker.
2. Sage Micro-Leaf Negative Space
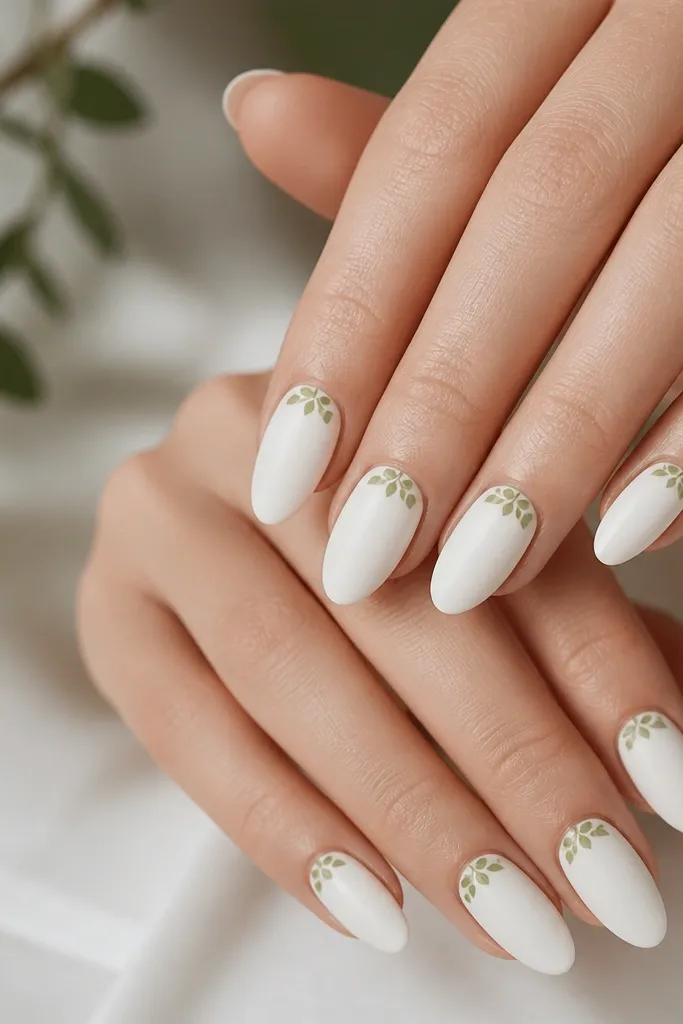
Negative space is the secret sauce here. The white base stays bright, and the sage leaves look airy because there's no heavy fill. Sage is softer than forest green, so it feels more spring and less bold. This design also hides small chips because there's no dense art at the tip.
Start with a smooth milky white full cover. With a dotting tool or thin brush, place a cluster at the cuticle - keep the leaves pointing outward. Use sage green as flat color and add a single highlight stroke on one side of each leaf. Finish with a glossy top coat to make the leaves look crisp under light.
Pro tipIf your leaves look flat, add a 1 mm curved highlight line using a lighter sage mixed with white.
Watch outSkip full coverage leaf patterns on every nail - they make the set look crowded.
3. Terracotta Daisy Accent on Ring Finger
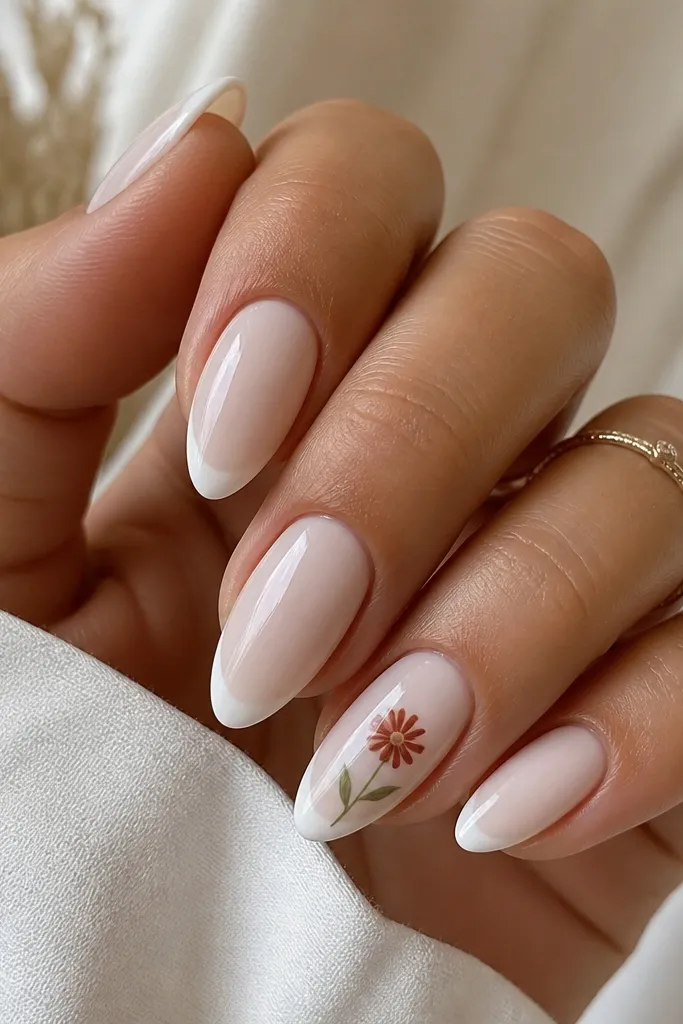
This is the "one statement nail" look that always gets compliments. The terracotta center adds warmth against the white, so the design doesn't feel cold. By placing the bloom near the cuticle, it stays readable even as the nail grows out. The rest of the nails keep it calm with a simple French, so the botanical detail feels intentional.
Do a classic white French on all nails. On the ring finger, draw a short stem line from 2 mm below the cuticle edge, then place a tiny five-petal daisy. Use deep green for the two leaves and terracotta for the center dot. Add a thin off-white highlight on each petal edge so it looks dimensional.
Pro tipUse a stamping plate or a dotting technique for the daisy petals if freehand feels shaky.
Watch outDon't add a full flower wreath on every nail - it turns into a craft project fast.
4. White French + Olive Split-Leaf Tips
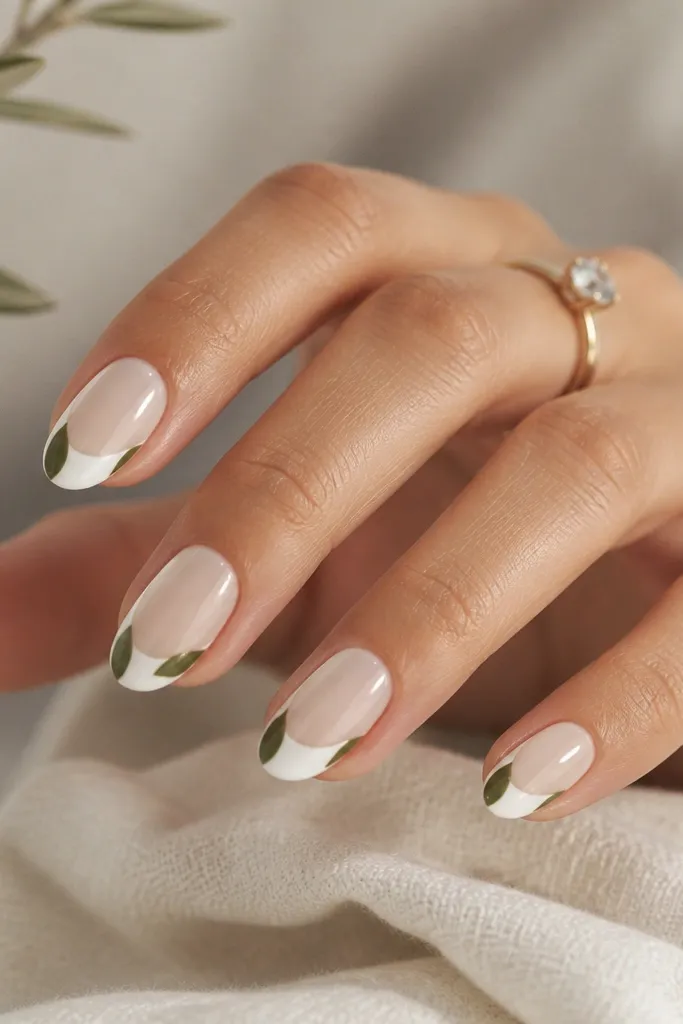
Split-leaf tips look graphic because they sit right where the eye already focuses - the French edge. Olive green gives an earthy tone without going too dark. The pattern is symmetrical enough to feel polished but still botanical because the leaf shapes curve naturally. It's a great choice if you want plants but don't want vines everywhere.
Paint a thin white French tip. Then on each nail, place two olive leaf halves so they mirror each other left and right, with the French smile line still visible between them. Keep the leaf halves under 2 mm tall so they don't swallow the tip. Outline the leaf edges with a near-black liner if you want extra sharpness.
Pro tipIf your leaf shapes wobble, trace the curve with a striping brush first, then fill with olive gel.
Watch outDon't thicken the French line to make room - thin French plus leaf framing looks cleaner.
5. Single-Line Monstera Leaf on Each Nail
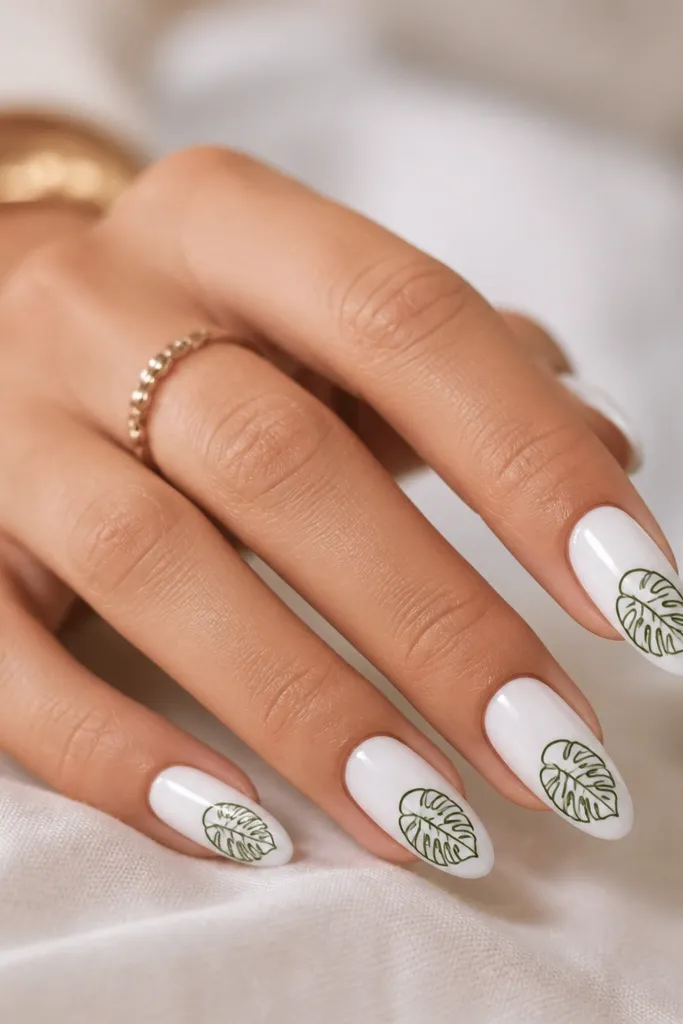
Monstera instantly reads as plant because of the cutout pattern. Doing it as linework keeps it modern instead of bulky. Deep green on white gives strong contrast, so the leaf stays legible even at short length. The diagonal placement uses the almond shape well - the leaf follows the nail's natural curve.
Use milky white as a full base. Draw the monstera outline first, then add 2-3 interior cutout slashes (don't overdo it). Place the leaf so the stem starts around the center of the nail and the tip ends near the top third. Add a tiny dot at the stem end for a finishing touch.
Pro tipPractice one leaf on a paper swatch - line thickness matters more than the exact leaf shape.
Watch outDon't fill the monstera with solid green - it gets heavy and loses the "airy" look.
6. Pressed Flower Look with Tiny Leaf Sprigs
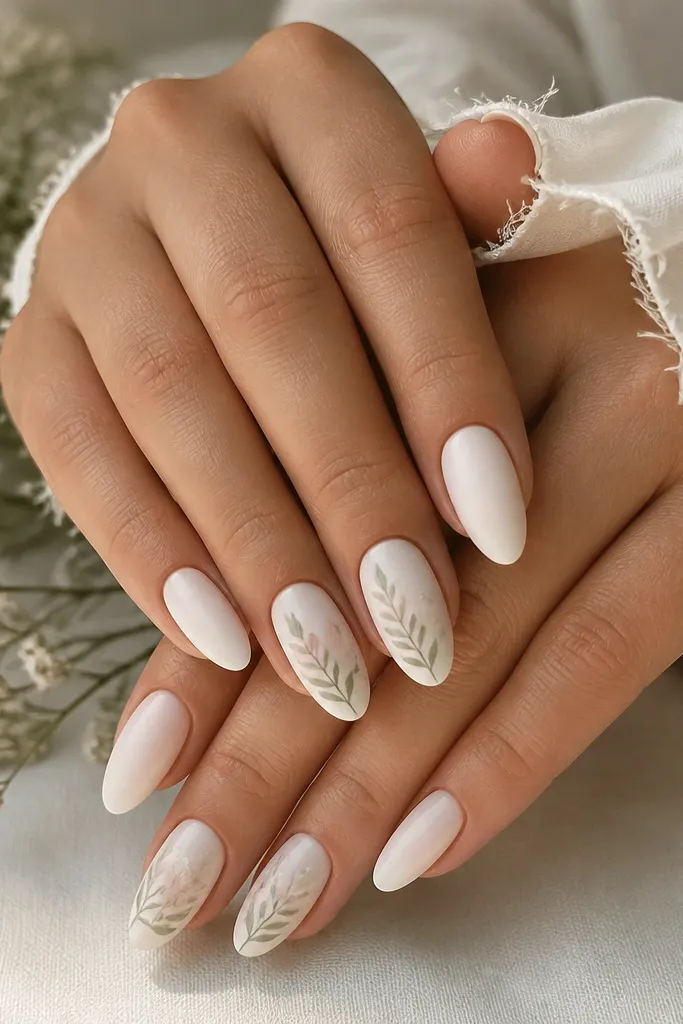
This design looks like real pressed botanicals because the colors are muted and the details are subtle. A matte or soft-satin finish makes the flower look more like paper than gel. The tiny leaf sprigs add that plant-friendly vibe without turning the nail into a collage. It's perfect for spring outfits and it looks softer in daylight.
Start with milky white, then apply a matte top coat on the whole nail. For the pressed effect, use very thin lines and light sage/pale pink - keep it faint. Add leaf sprigs with deep green liner so they're the darkest element. Seal with a second matte coat for uniform texture.
Pro tipIf your pressed effect looks too strong, wipe the brush before dragging - you want airy coverage, not opacity.
Watch outDon't use bright neon greens with this - it breaks the pressed-paper illusion.
7. White French + Micro Pine Needles
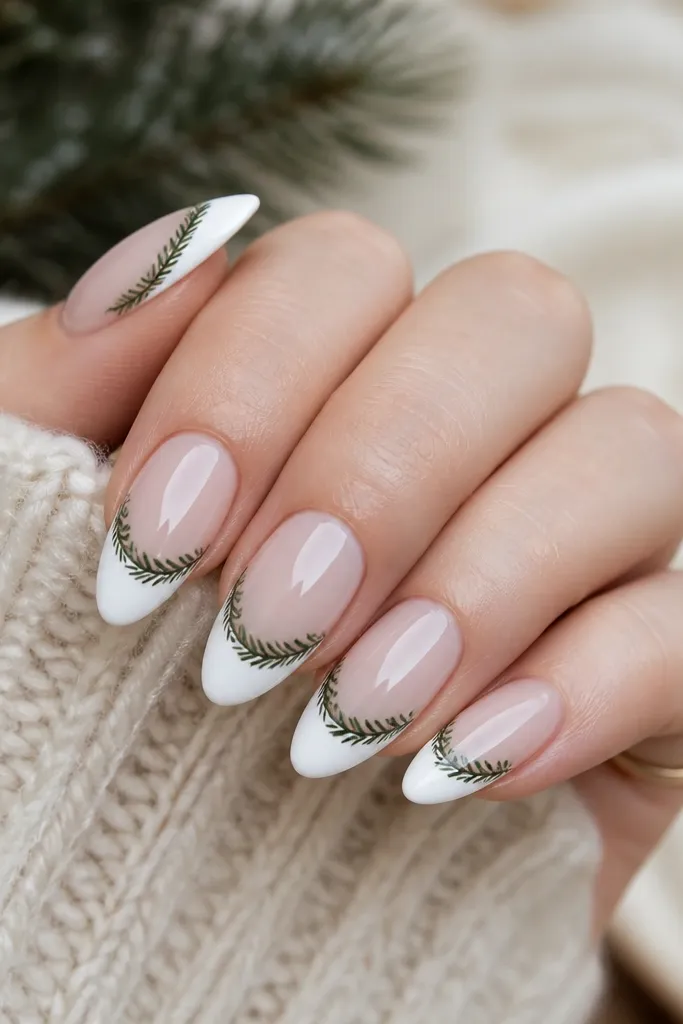
Pine needles give a plant look that still feels tidy because the strokes are consistent. The needles sit right on the French edge, so the design reads even from far away. Deep green on white makes it crisp and clean. This one also feels seasonal without going full winter theme because the shape is delicate, not heavy.
Do a clean French tip. Then, using a thin liner brush, draw short needle strokes that fan outward from just under the smile line. Keep the needles 1-2 mm long and stagger them so they look natural. Add a single tiny dot bud every other nail if you want a focal point.
Pro tipUse a liner brush with a sharp point; dull brushes make needles look like scratches.
Watch outDon't crowd the entire nail with needles - keep it to the tip area.
8. Sage Leaf Ombre from Cuticle to Tip
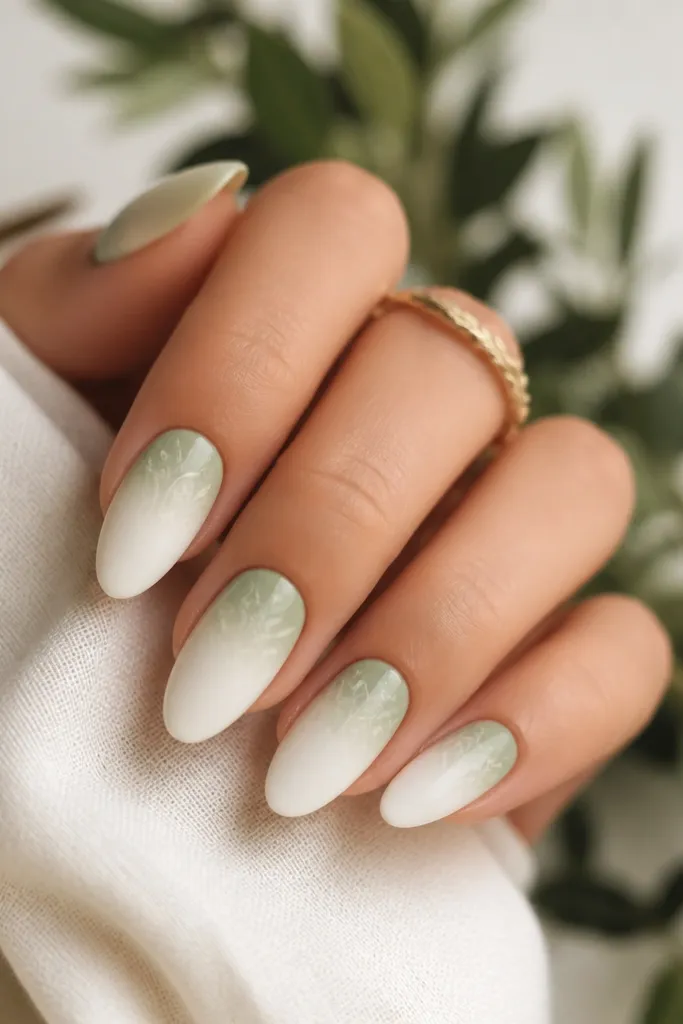
An ombre base makes the plants feel integrated instead of pasted on. Sage fade is soft, so the leaf outlines look like they're printed on fabric. You get a gradient effect that makes the almond shape look longer. The watermark leaves add botanical detail without needing heavy fill.
Apply milky white, then blend sage gel at the cuticle using a makeup sponge for a soft fade. Cure and then stamp or freehand very light leaf outlines in a slightly darker sage. Keep the leaf outlines thin and transparent - they should be visible but not dark. Finish with a glossy top coat so the gradient looks smooth.
Pro tipBlend in three thin layers instead of one thick one for smoother gradients.
Watch outAvoid thick leaf outlines over a gradient - it can look muddy.
9. Botanical French with One Bold Leaf Sweep
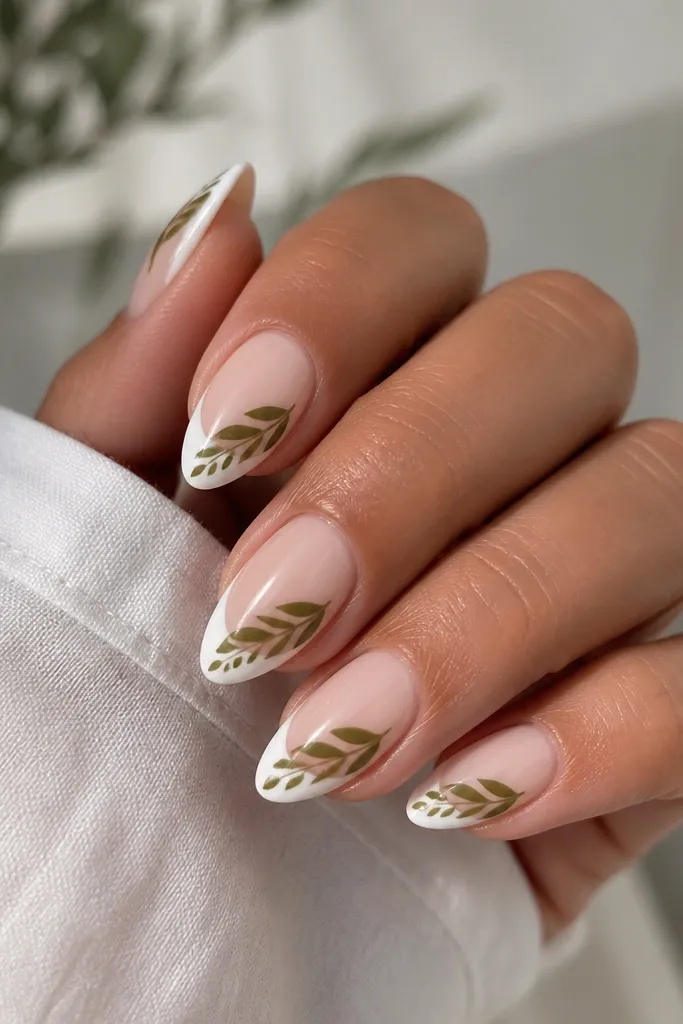
This is for when you want plants to feel like design, not decoration. The bold sweep creates a strong silhouette, and the smaller trailing marks keep it botanical instead of graphic-only. Olive gives an earthy vibe that looks good with gold rings. Because the leaf sweep is mostly near the top, it also hides minor growth.
Paint a thin French tip and cure fully. Then draw one large leaf shape starting at the sidewall near the upper third and sweeping inward. Add 2-3 smaller leaf marks trailing from the main leaf's base. Use a near-black outline if you want it extra sharp.
Pro tipKeep the bold leaf edge crisp by using a striping brush and wiping excess gel off the first side only.
Watch outDon't add multiple bold leaves per nail - the almond shape will look overloaded.
10. White Marble Base + Green Veined Leaves
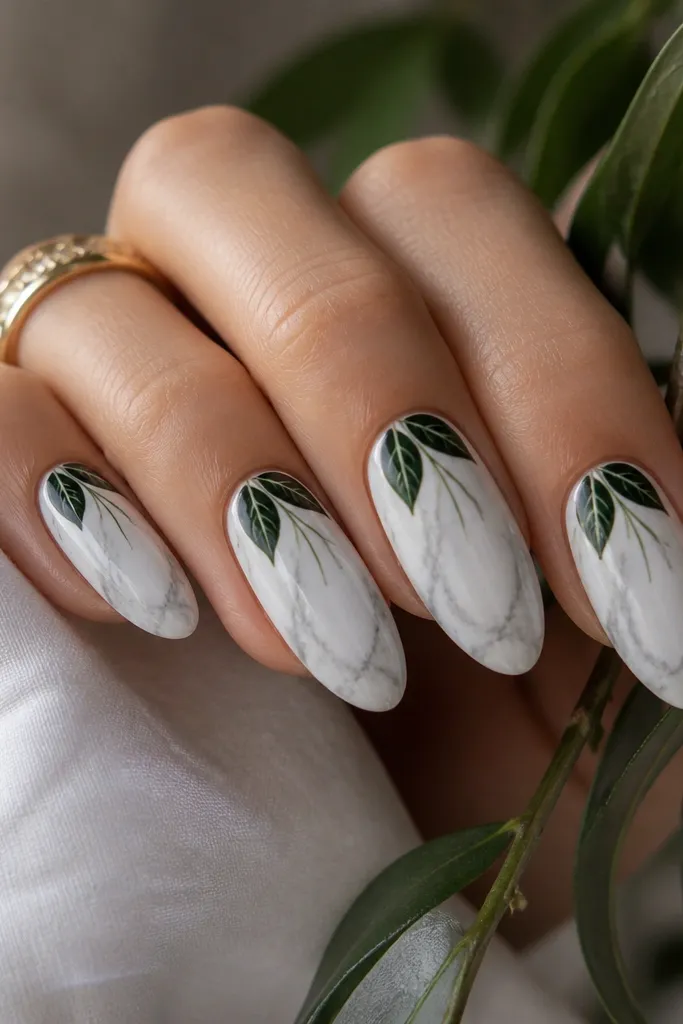
Marble makes the white base look dimensional, which helps the leaves look like they belong. Veined leaves add realism because the lighter vein color catches light. This set looks high-end with rings and watches because the marble gives movement. It's also forgiving because the marble texture hides tiny unevenness.
Create a soft marble using milky white and a tiny amount of gray gel dragged with a thin brush. Cure, then add deep green leaves near the cuticle. Draw one lighter-green vein line through each leaf and add a second short vein branching off. Seal with a glossy top coat so both marble and leaves look glassy.
Pro tipDo marble first, then leaves - you want the leaf edges to sit clean on top of the marble.
Watch outDon't over-darken the marble - it competes with the green leaves.
11. Mini Herb Sprigs on Every Nail (Two-Green Palette)
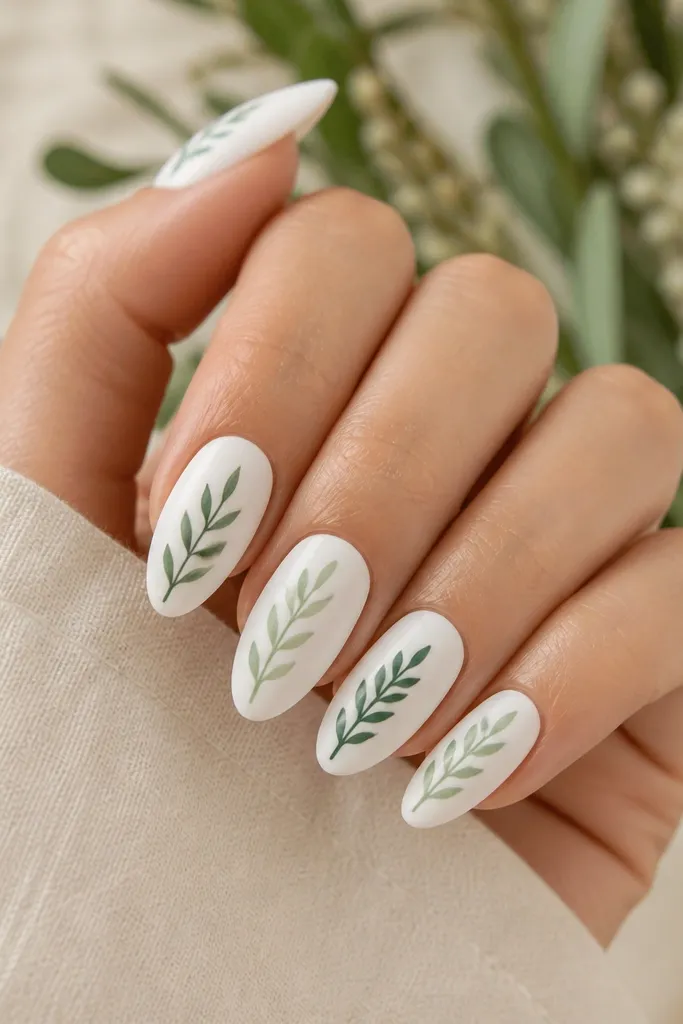
Alternating two greens keeps it interesting without getting chaotic. Mini sprigs read as herbs, which feels plant-friendly and more wearable than big flowers. The pale green dots add a soft filler detail so the design doesn't look empty. On almond nails, small sprigs keep the tip area clean and sleek.
Use a milky white base with a glossy top coat layer before art if you need extra slip. Place a tiny sprig cluster at the side of the nail near the cuticle and keep it under half the nail width. Alternate sage and deep green on each nail so the set looks planned. Add 2-3 pale green dot leaves as accents.
Pro tipUse a toothpick to place tiny dots - you'll get sharper circles than with a bulky brush.
Watch outAvoid using three or four greens - the set starts looking like mixed stickers.



