1. Glazed Cornflower Half-Moons
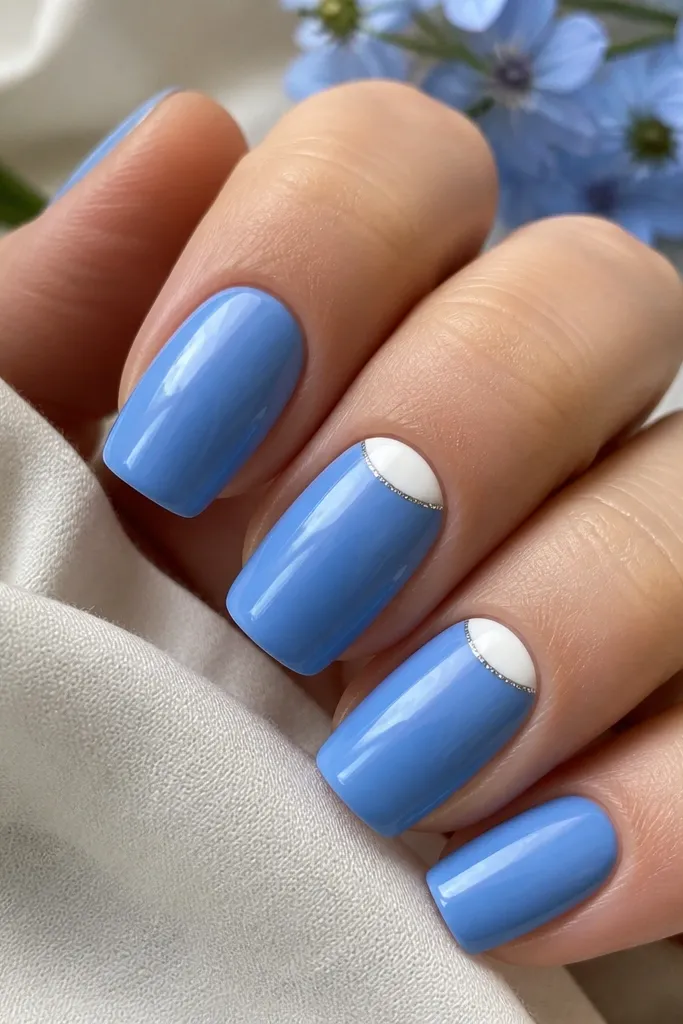
This look looks expensive because the contrast is controlled. Cornflower blue is saturated but not neon, and the tiny white half-moons give a clean architectural frame. The silver line makes the light bounce at the edges, which reads luxe in both daylight and indoor lighting. I like it because it still feels light and airy, not heavy like full white tips.
Use a sky cornflower blue cream or gel in two thin coats. For the half-moons, paint a small curved white band about 1.5-2 mm tall starting just off the sidewalls. Add a hairline silver chrome stripe right on top of the white curve, then finish with a high-gloss top coat.
Pro tipUse a nail art striping brush and drag the line from left to right in one smooth pass so the curve stays even.
Watch outDon't let the white half-moon touch your cuticle skin - that smears fast and looks messy.
2. Pearl Drip Tips on Powder Sky
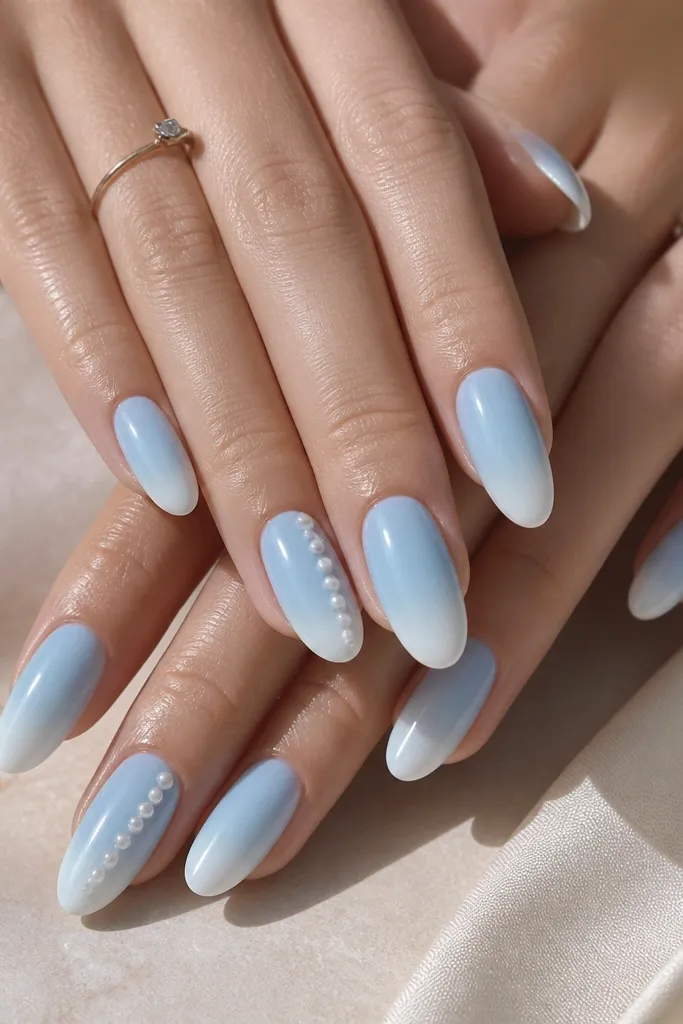
Pearl drip tips feel dreamy because the pearls sit in a raised line, not as flat stickers. The powder sky base has a milky softness that flatters hands, and the subtle white fade at the tip makes the nail look longer. When the pearls are small (think pinhead size), they read delicate instead of chunky.
Paint powder sky blue (slightly gray) as your base. For the tips, sponge on a very thin white-to-blue gradient only at the last 2-3 mm. Place 3-5 tiny pearls down the center of two nails, then cover with a clear builder gel or thick top coat to smooth the texture.
Pro tipIf your pearls snag on fabric, cap each pearl with a thin layer of gel so the surface feels glassy.
Watch outSkip big pearls - they make sky blue look like costume jewelry.
3. Icy Sky Micro-Glitter Fade
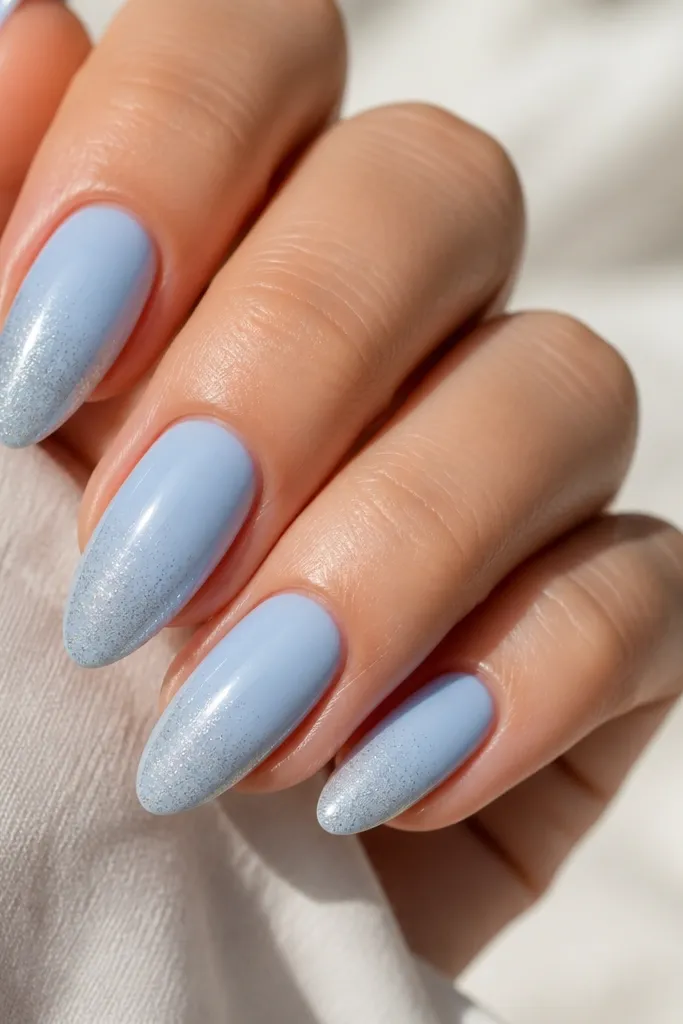
Micro-glitter looks expensive because it sparkles evenly instead of looking like chunks. The key is the fade: glitter only at the tip keeps the set airy and makes your nails look slimmer. Icy sky blue also helps because it reflects light without needing heavy decoration.
Start with an icy sky blue base in two coats. Add a sheer glitter gel or loose micro glitter mixed with clear gel only on the last 2-4 mm. Use a makeup sponge to feather the glitter upward, then seal with a thick, glossy top coat.
Pro tipWipe the sponge edge on a paper towel before feathering so you don't get glitter dust everywhere.
Watch outDon't do full glitter coverage - it turns sky blue from dreamy to dated.
4. Silver Chrome Arc Over Sky Blue
A chrome arc looks pricey because it gives a clean highlight line that moves with your hand. Keep the arc thin and curved so it reads like a design detail, not a random chrome smear. Sky blue under chrome also stays bright, so your nails look fresh instead of dull.
Use sky blue jelly polish (translucent but buildable) for a smooth glow. After curing, buff a small half-moon area on the top third of the nail with a chrome foil transfer tool or apply chrome powder with a sponge. Seal with a glossy top coat that is thick enough to smooth the chrome.
Pro tipPractice the arc on a fake nail first - the curve should mirror your smile line, not the cuticle.
Watch outAvoid thick chrome coverage; it can look metallic and heavy on a light blue base.
5. Matte Sky + Glossy Cloud Dots
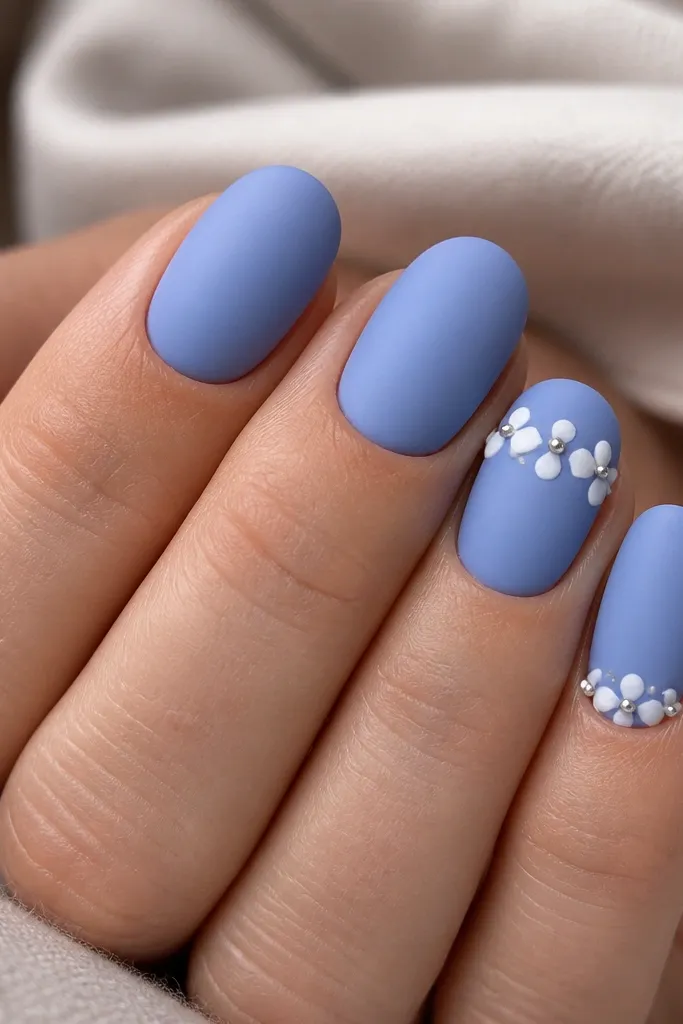
This contrast is what makes it feel expensive. Matte sky blue hides minor ridges, and glossy cloud dots create a "caught in the light" effect. The white dots are soft and cloud-like, so the set stays dreamy instead of graphic. A single silver center dot keeps it from looking childish.
Paint periwinkle blue and finish with matte top coat. On two nails, use a dotting tool to place 7-10 small white dots clustered like a cloud near the cuticle but not touching skin. Add one micro silver chrome dot in the center, then spot-gloss just the dots with a thin glossy top coat.
Pro tipUse a slightly thicker white gel for the dots so they stay rounded, not runny.
Watch outDon't matte the entire nail if you want the glossy cloud effect - it will flatten the design.
6. Sky Blue French with Micro Rhinestone Edge
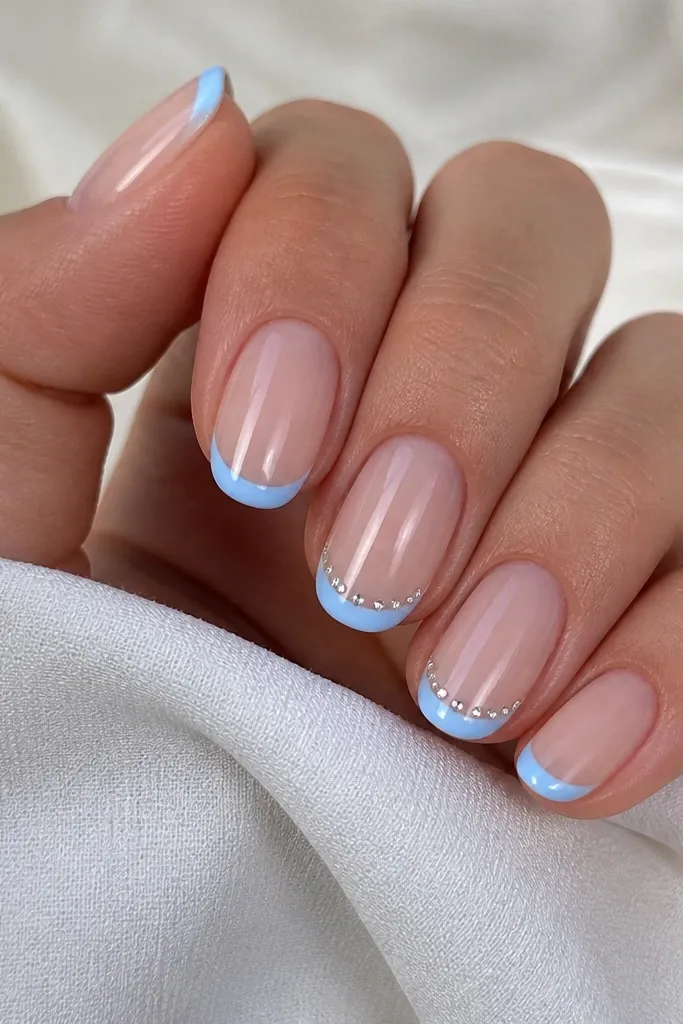
A sky blue micro French looks classy when it's narrow and crisp. The tiny rhinestone edge adds sparkle without covering the nail, so the set still feels light. I like this for events because it reads polished even when your blue manicure has grown out.
Use a nude base close to your nail bed color. Paint a micro French tip in sky blue, keeping the tip width around 1.5-2 mm. On two nails, place micro rhinestones along the smile line with a small amount of clear gel, then cap with top coat.
Pro tipKeep rhinestones to the smile line only - if you extend them up the nail, it looks crowded fast.
Watch outDon't make the French too wide; wide tips turn sky blue into a toddler art look.
7. Cotton Candy Marble with White Vein
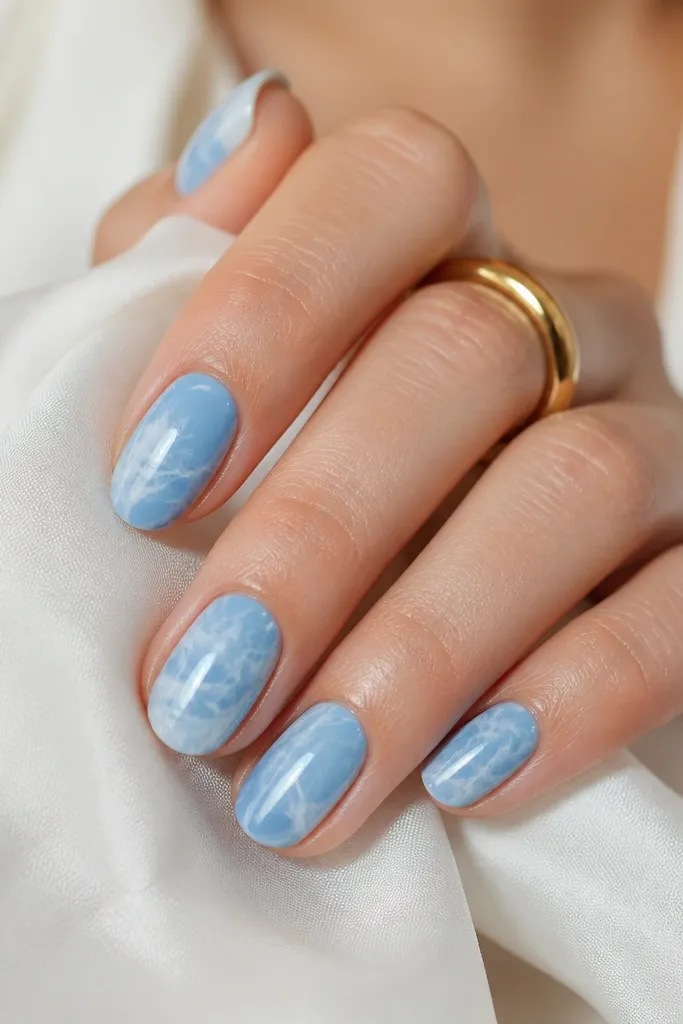
Marble is expensive-looking when the veins are thin and the colors are close. Cotton candy sky blue plus fine white veining keeps it airy and not heavy. The marble effect also makes each nail unique, but the palette stays consistent so it still looks intentional.
Start with a glossy sky blue base. Add wisps of diluted white gel using a small brush, then drag a thin clear gel through it with a dotting tool to soften. Keep the veins narrow - around 0.5 mm lines - and seal with a glossy top coat.
Pro tipLet each nail cure or fully set before you add more white veins so the pattern stays crisp.
Watch outAvoid thick white swipes; they look like paint, not marble.
8. Sky Blue Negative Space Starburst
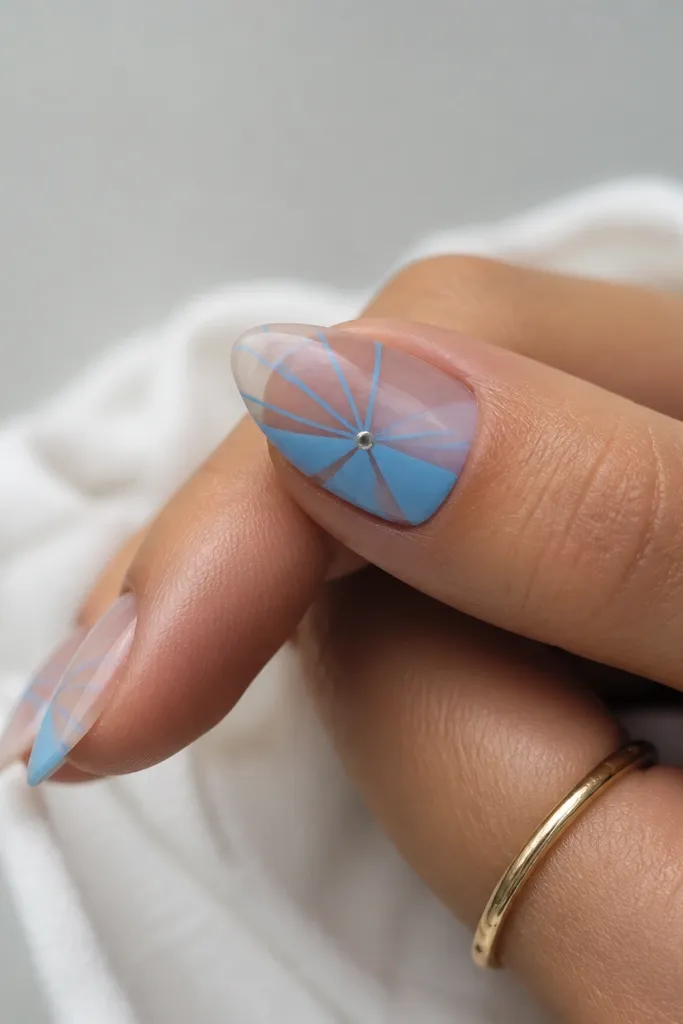
Negative space is the cheat code for expensive-looking nails. The clear nude keeps the design light, and the starburst lines add structure without filling the whole nail. Sky blue lines stay fresh, and the tiny center dot gives a "finished" feel.
Leave the base nude and glossy. Paint sky blue lines radiating from near the center - 6-8 lines per nail - leaving the rest clear. Add one small dot of silver chrome or glitter at the center, then top coat over the whole thing carefully.
Pro tipUse a striping brush and keep the line thickness consistent by wiping excess polish on the brush edge.
Watch outDon't cover the entire nail with blue - it kills the negative space effect.
9. Baby Blue Ombré with Clear Gloss Cap
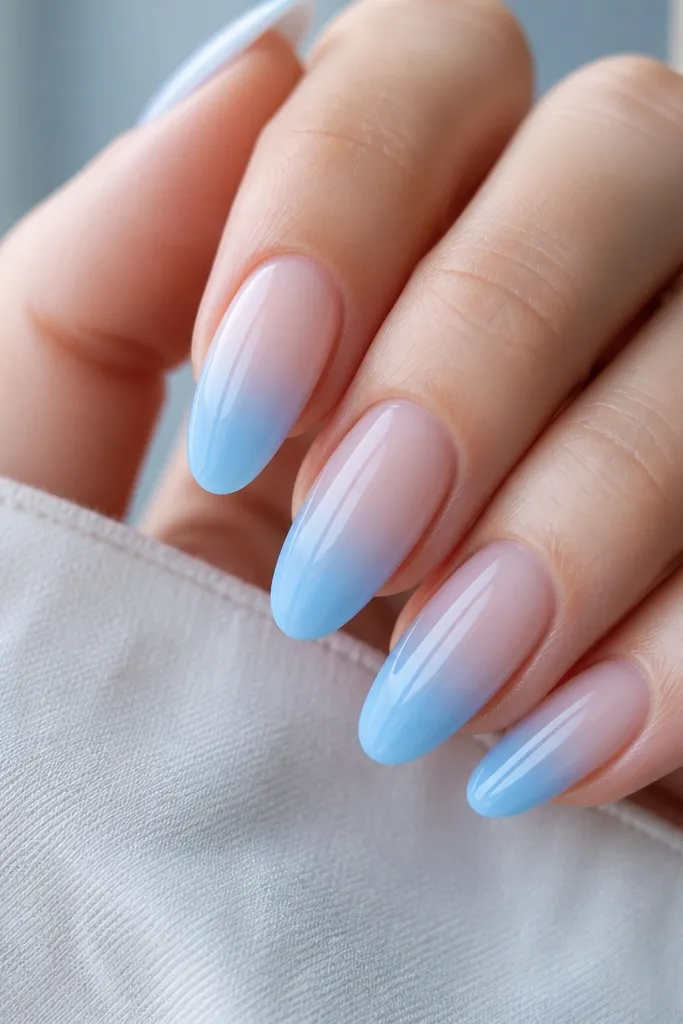
An ombré looks expensive when the gradient is smooth and the surface is sealed. The clear-to-sky transition makes nails look longer and more airy than a solid blue. The extra clear cap on top makes the ombré look like it's under glass, which is what people notice.
Start with a clear or sheer nude base. Sponge baby blue from the tip upward, blending until the middle fades into sheer. After it sets, apply a thick clear layer (gel or builder gel) to smooth and level, then finish with a high-gloss top coat.
Pro tipUse a sponge that's slightly damp with clear gel so the gradient blends without hard edges.
Watch outAvoid harsh ombré lines; they read amateur fast in sky blue.
10. Sky Blue Satin Stripes and White Dot Grid
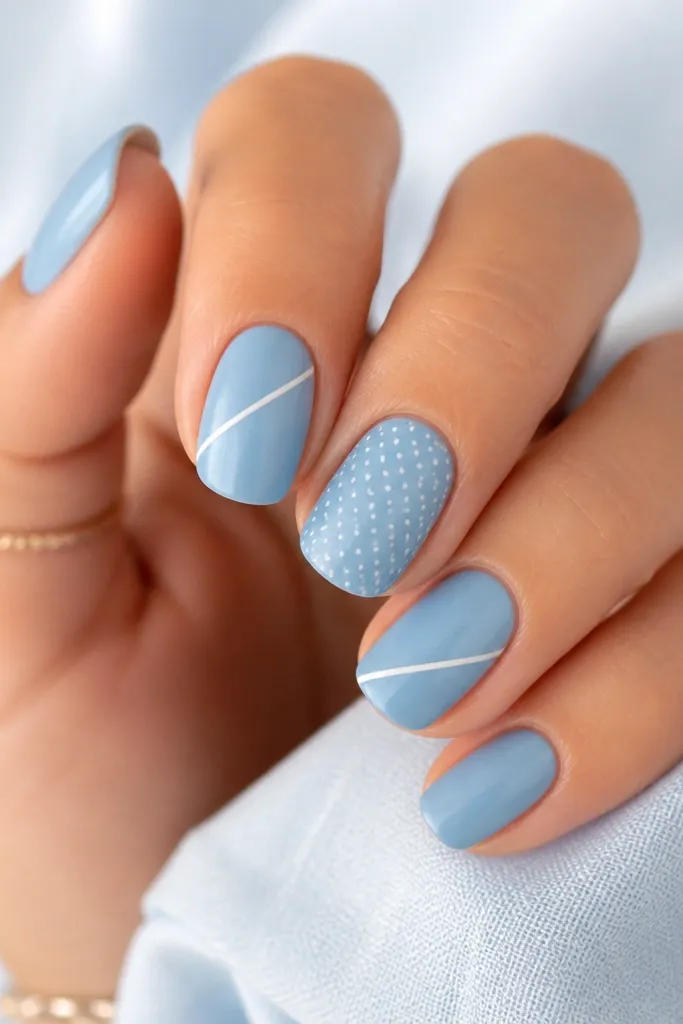
Satin finish makes sky blue look softer and more expensive because it reduces glare. The diagonal stripes add movement, while the dot grid keeps it playful but still controlled. White accents pop against blue without needing heavy rhinestones.
Paint sky blue and finish with satin top coat on most nails. On two nails, use striping tape for diagonal lines and paint thin white stripes over the satin. For the dot grid, use a dotting tool with diluted white gel and place dots in 4-5 rows, then seal with satin top coat or a very light gloss only on the dots.
Pro tipPress the tape for 2-3 seconds before painting so the edge stays sharp.
Watch outDon't mix satin and full gloss on the same nail unless you spot-gloss only the dots.
11. Sky Blue Floral Foil on One Accent Nail
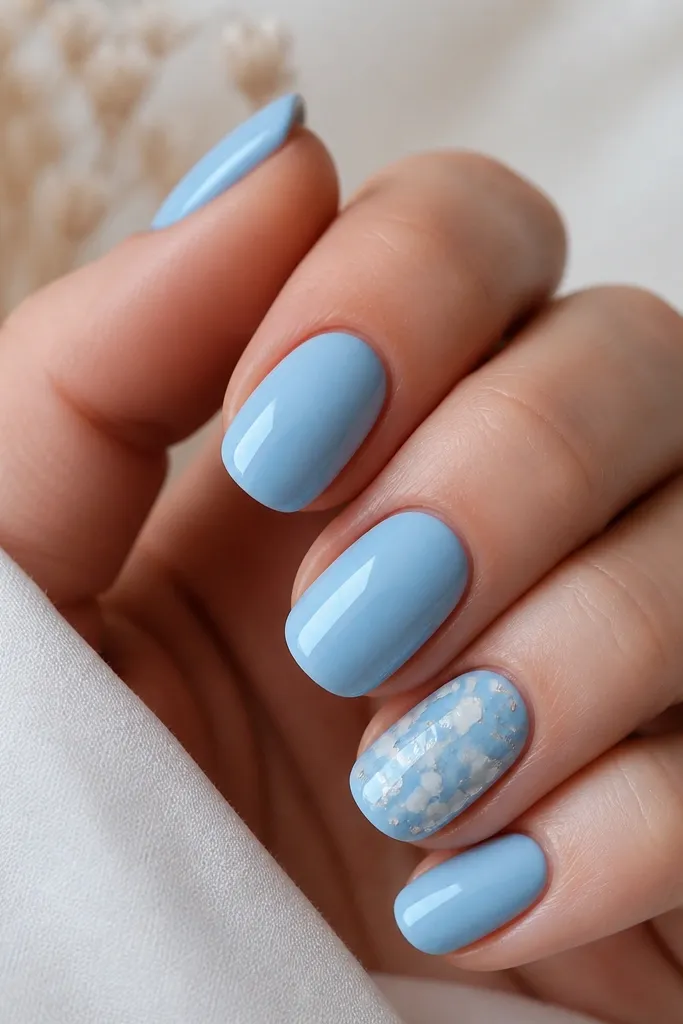
Foil looks luxe when it's limited. Keep floral foil on one nail per hand so it feels like a deliberate accent. Sky blue is the perfect background because it makes the white foil look like it's floating. The scattered placement also hides small application imperfections.
Paint glossy sky blue on all nails. Choose one accent nail and apply a thin tack layer of foil gel, then press the floral foil fragments onto the tack area. Leave some negative space so the foil doesn't look like a sticker, then top coat carefully to seal.
Pro tipUse tweezers and press each fragment for one second - too long smears foil texture.
Watch outAvoid foil on every nail; it turns the manicure into a busy patchwork.
12. Iced Sky Marble French Tip
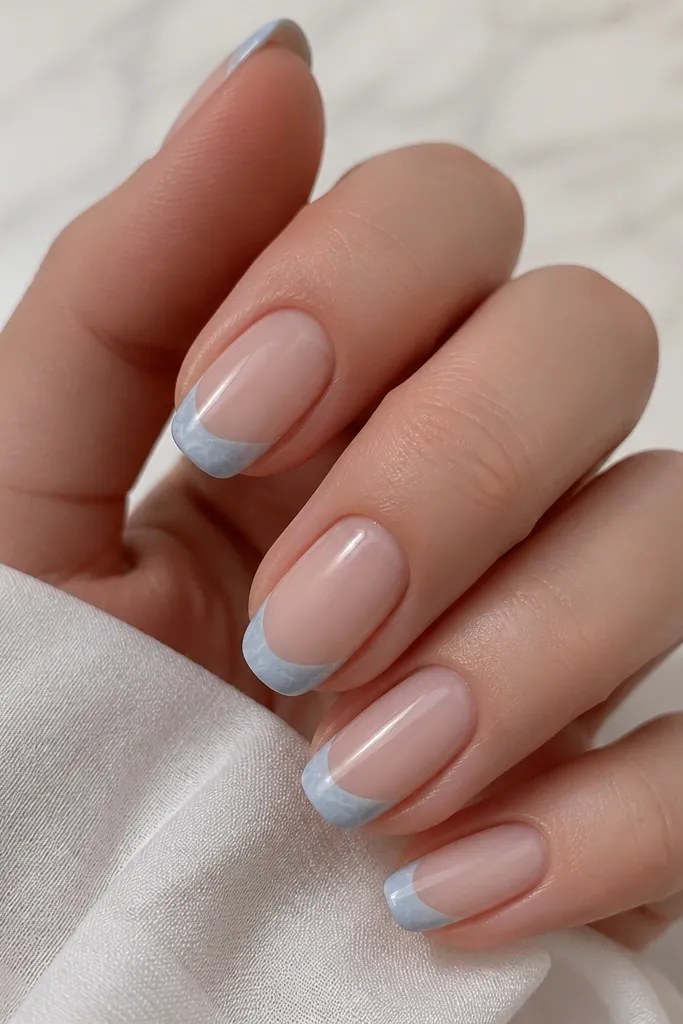
This is a French tip that doesn't look like a basic set. The nude base keeps it clean, and the iced sky tip with white marble lines adds interest without covering the whole nail. Marble lines at the tip also hide growth because the design sits near the edge.
Use a nude base and two thin coats. Paint the French tip in icy sky blue, then add thin white marble veins inside the tip area only. Keep the veins under 1 mm wide and seal with a thick glossy top coat.
Pro tipIf your French edge gets wobbly, add one thin white vein along the edge to visually straighten it.
Watch outDon't bring marble veins all the way to the cuticle - it crowds the nail.