1. Toasty Micro-Moons on Cream
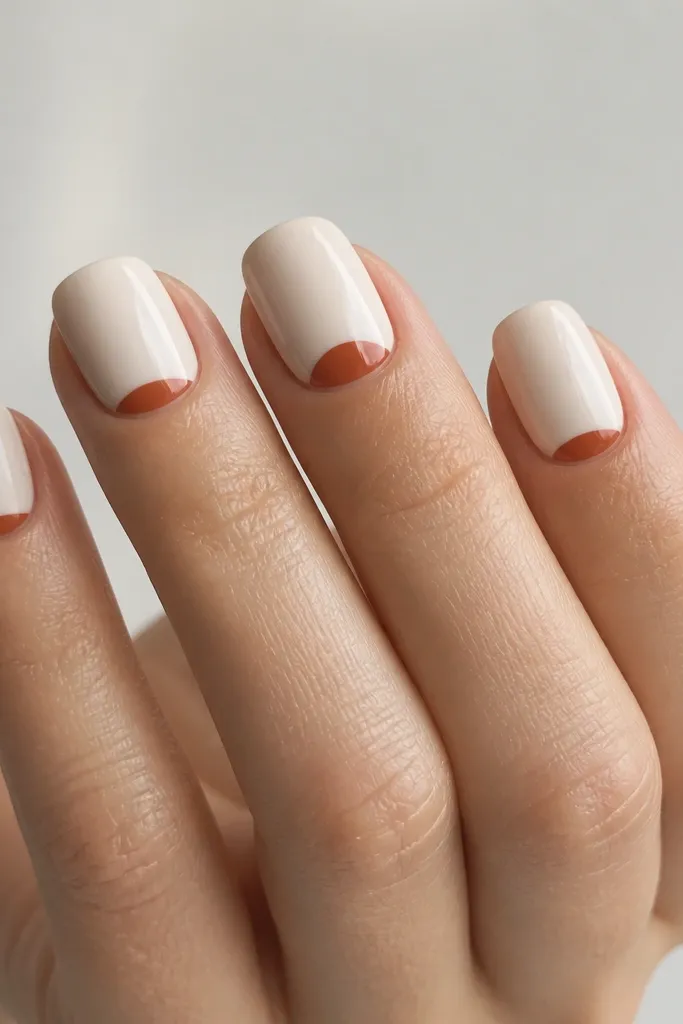
This one gives Halloween vibes using only shape. The burnt orange crescents look like warm candlelight against the cream, and micro placement keeps it classy. Because the art is tiny, you don't need perfect symmetry - the eye reads the theme anyway. It also works for both matte and glossy top coats, but glossy makes the moons pop.
Paint a milky cream base. With a dotting tool or the tip of a toothpick, place 1-2 small crescent arcs at the cuticle on each nail. Keep the crescents under 1/8 of the nail width so it stays delicate. Finish with a regular clear top coat that is slightly thicker around the cuticle area.
Pro tipIf your moons get messy, clean the edge with a small brush dipped in acetone before the top coat dries.
Watch outAvoid covering the entire nail with crescents - it turns into a busy pattern fast.
2. Caramel Swirl Accent
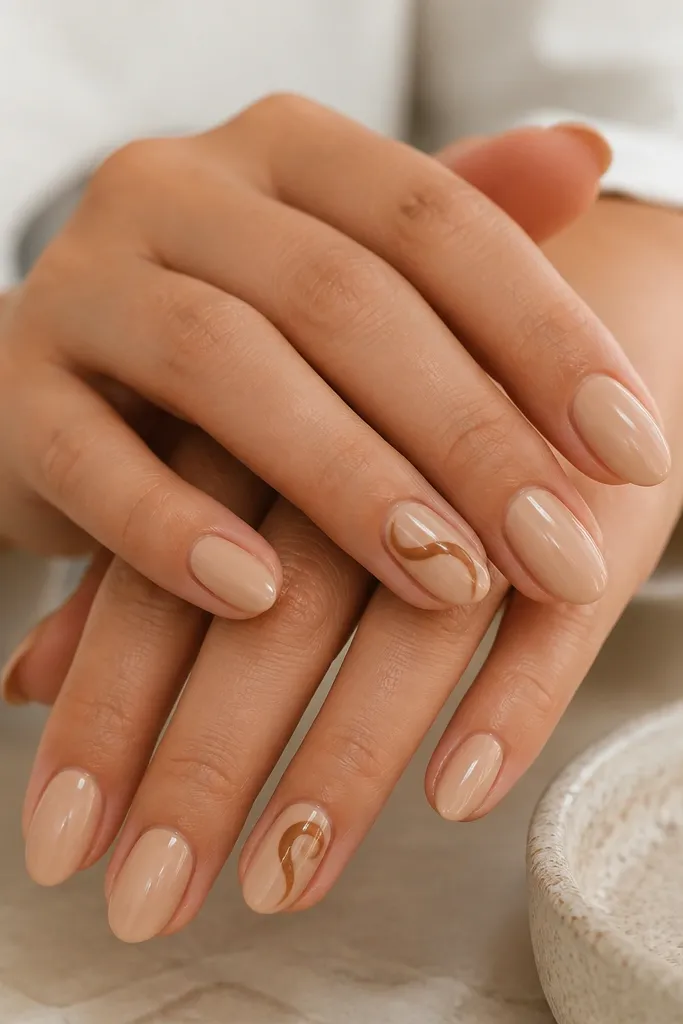
A single swirl reads like a cozy ribbon or caramel drizzle. Warm nude keeps it soft, and caramel-brown line work gives the Halloween signal without skulls or black. This design looks good even if your swirl isn't perfectly even because the line thickness variation feels hand-done. It's also easy to scale up or down depending on nail length.
Use warm nude as the base on all nails. On two nails per hand, draw one smooth "S" curve with a striping brush dipped in caramel-brown polish. Thicken the swirl line slightly where it turns, then leave the rest thin. Seal with two coats of top coat, focusing on the swirl so it doesn't lift.
Pro tipDo the swirl in one confident stroke, then fix only the very ends - overworking makes it look shaky.
Watch outSkip using a nail art pen if it skips or drags - it makes the swirl look chunky in a bad way.
3. Burnt Orange Dot Row
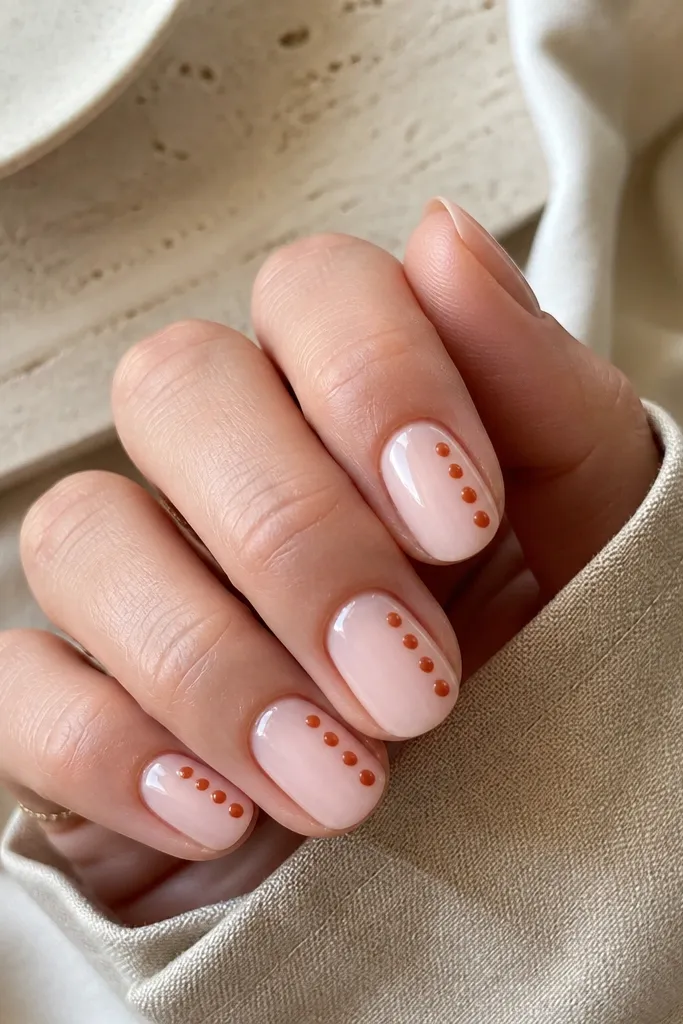
Dot patterns are the easiest way to get clean Halloween detail. The burnt orange dots mimic autumn seeds or warm spices, and the sheer nude base keeps it cozy. A side row looks modern and elongating, especially on short nails. You get a clear "design" without needing lines that can smear.
Start with a sheer nude or nude-pink base. Load a dotting tool with burnt orange and place 5-6 dots in a straight line down one side. Keep the spacing consistent - I aim for about 1 dot-width between dots. Top coat with a glossy finish to make the dots look like they're sitting under glass.
Pro tipIf your dots spread, wait longer between dips and avoid overloading the tool.
Watch outDon't place dots too close to the free edge - they'll catch and chip first.
4. Chocolate Check Tip (Mini Plaid)
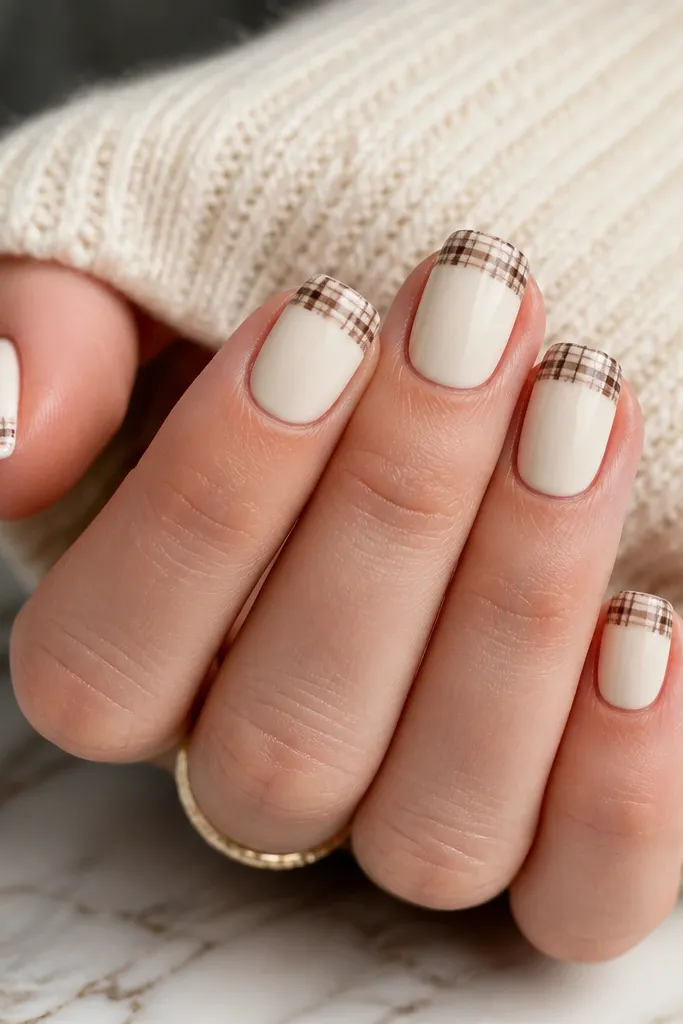
Plaid tip art is cozy Halloween in a single glance. The warm cream base keeps it soft, and chocolate lines look like a flannel scarf. Because it's only on the tip, your lines can be a little imperfect and still read as plaid. It also pairs well with gold jewelry and warm-toned makeup.
Paint cream base on all nails. For the tip, draw horizontal lines across the tip area with chocolate polish, then add vertical lines to form small squares. Keep the squares small (about 1-2 mm on short nails). Add a light fill only to every other square so it doesn't look heavy.
Pro tipUse a striping brush for straight lines, then fix any wobbles by adding a second pass only where needed.
Watch outAvoid full plaid across the entire nail - it looks busy and chips faster.
5. Soft Pumpkin Half-Moons (No Outline)
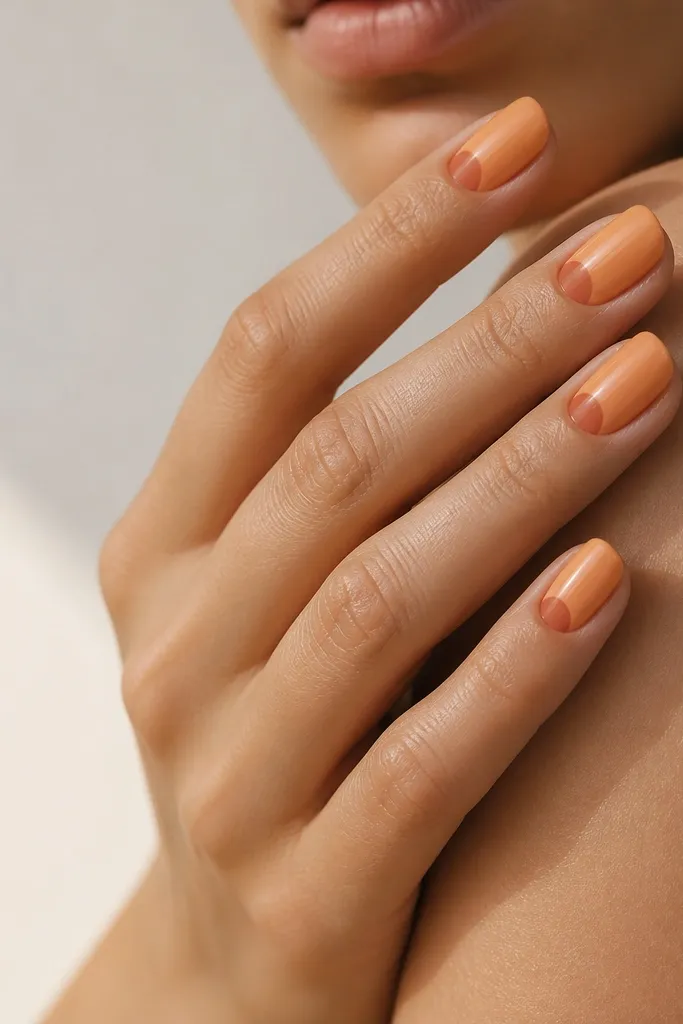
This gives the pumpkin vibe without cartoon faces or orange overload. The deeper orange-brown at the cuticle acts like the pumpkin's shadow. Because there's no outline, it stays beginner-friendly and forgiving. It also looks great on matte top coat, but I prefer glossy for a "warm candle" feel.
Base with a milky peach-orange. On each nail, place a half-moon at the cuticle using a deeper pumpkin-brown. Blend the edge by lightly tapping the boundary with a clean sponge (just once) or by nudging the polish with the brush tip before it sets. Finish with top coat.
Pro tipIf the half-moon is too harsh, do a tiny dab of base color to smooth the edge.
Watch outSkip black outlines on this one - they make it look harsher than cozy.
6. Spiced Wine Marble Swipe
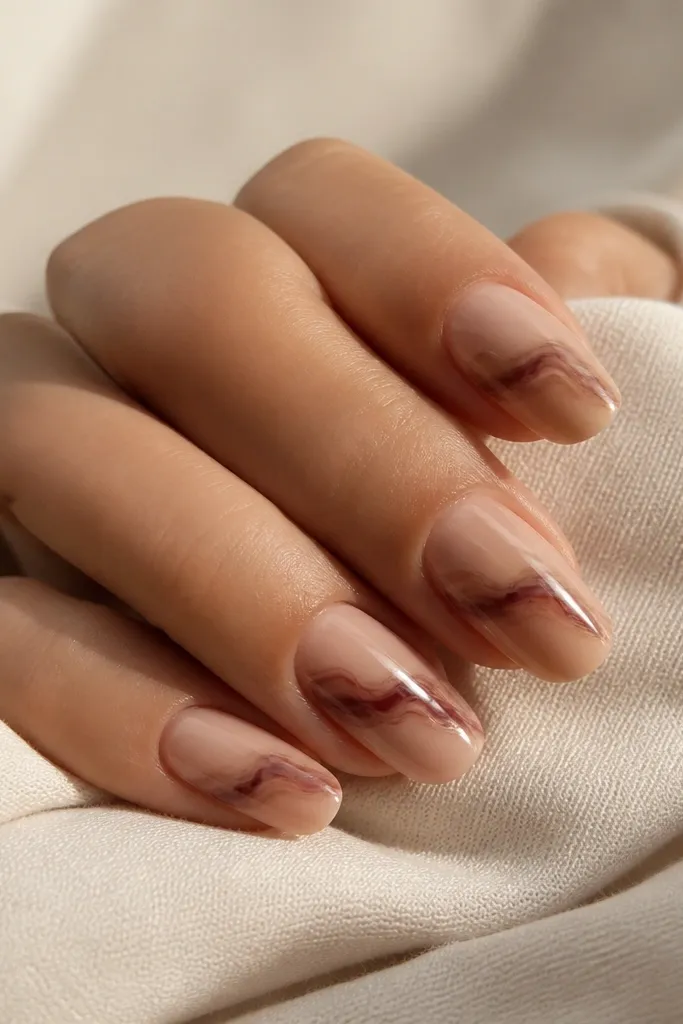
Marble swipes look fancy but they're fast when you keep the pattern minimal. The spiced wine gives Halloween mood, while caramel keeps it warm. I like doing it as one diagonal swipe so the set still feels clean. Even if the marble lines aren't "perfect," the mixed colors read as a single design element.
Paint nude base. On two nails per hand, swipe spiced wine diagonally with a thin brush. While it's still slightly wet, drag a clean brush through a tiny amount of caramel-brown polish to create movement. Keep it to one swipe per nail so it stays elegant and not chaotic.
Pro tipWork one nail at a time so the marble doesn't dry before you drag the second color.
Watch outDon't add glitter to marble - it makes the texture look muddy.
7. Tiny Black Cat Nose Dots
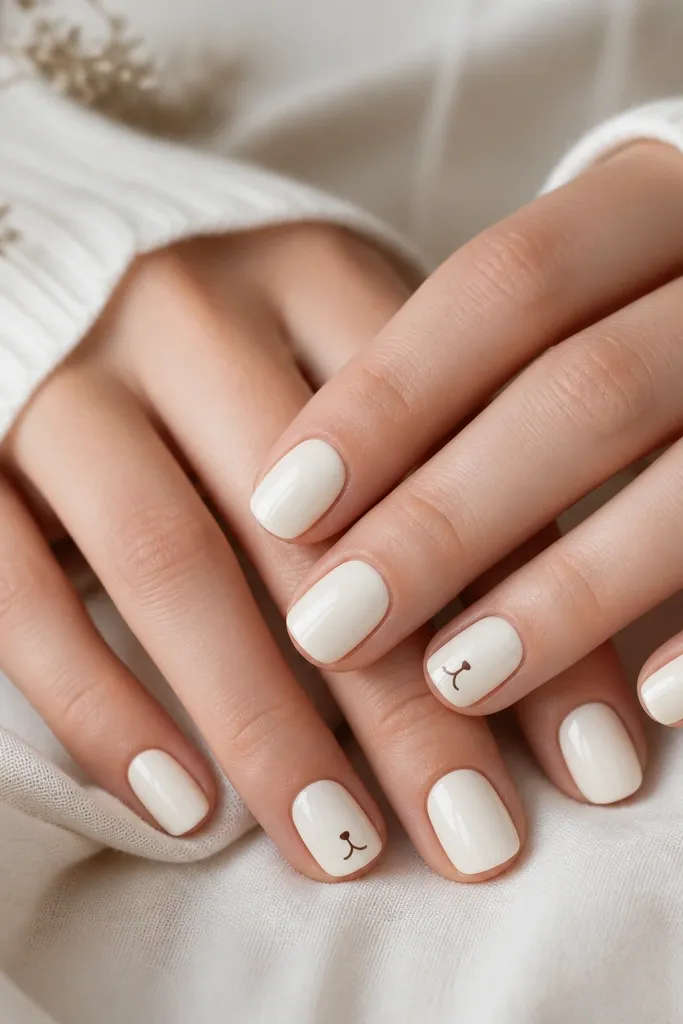
This is Halloween cuteness without drawing a full cat. The "nose" shape uses a dot plus a V, so it's quick and stays adorable at short lengths. Cream keeps it cozy, and the tiny marks feel like a wink. You get the theme without the clutter of full silhouettes.
Paint cream base on all nails. On two accent nails, place one small black dot slightly above the middle. Then use a toothpick to add a tiny V in dark brown or black just under the dot. Top coat carefully so the tiny details stay crisp.
Pro tipUse the smallest dotting tip you have so the nose doesn't turn into a blob.
Watch outAvoid drawing whiskers - they smear and look messy on beginners.
8. Gold Leaf Pumpkin Glow
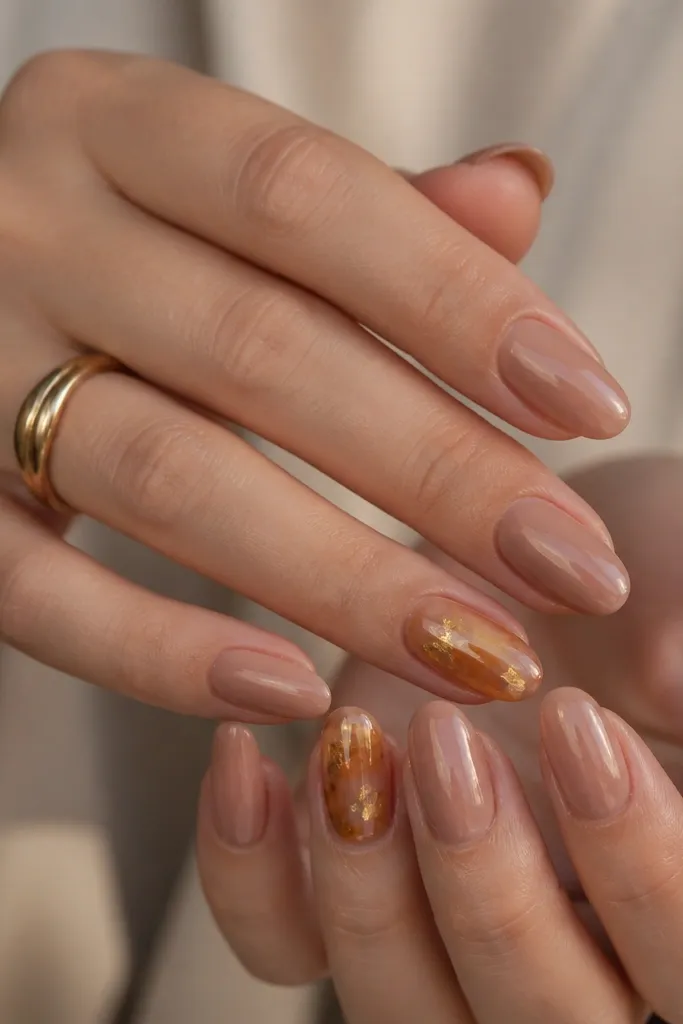
Gold leaf makes Halloween look expensive without heavy art. The amber glaze gives that pumpkin glow, and gold leaf pieces look like spark from candle flames. This design is forgiving because natural leaf edges hide minor polish unevenness. It's cozy because the palette stays warm - nude and amber, not neon orange.
Base with warm nude. On accent nails, sponge or brush on a translucent amber/orange-brown gel polish in thin layers. Tap gold leaf pieces into the tacky layer and press gently. Seal with a thick top coat that can smooth over texture.
Pro tipIf the leaf catches on fabric, do one extra top coat pass around the edges.
Watch outDon't use a thin, watery top coat - gold leaf texture can stay scratchy.
9. Cinnamon Scallop Tips
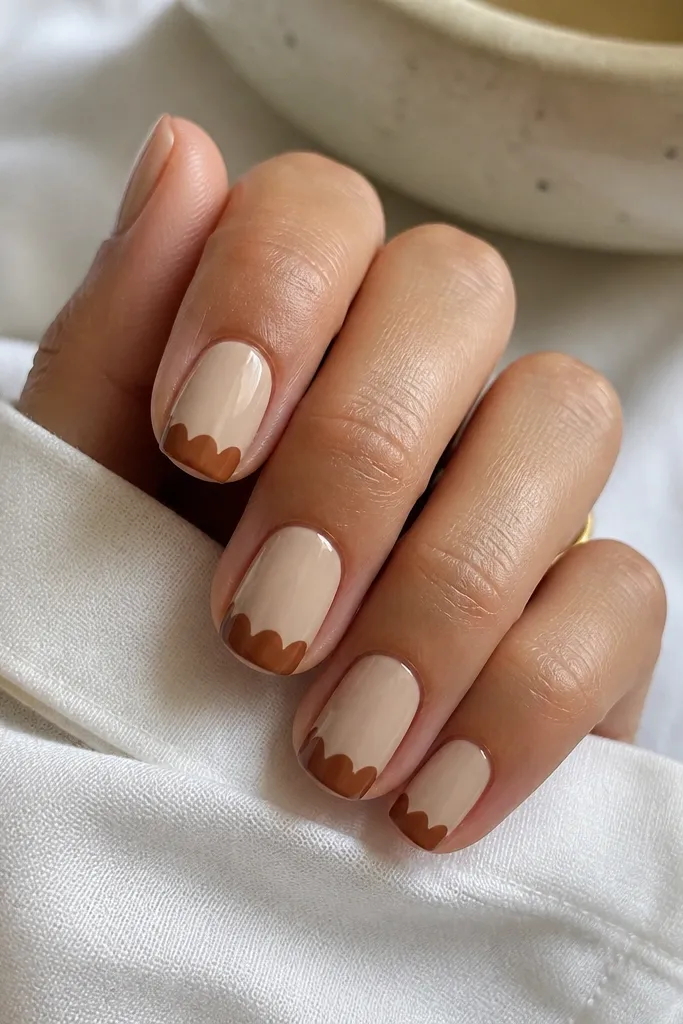
Scallops look like knitted fabric or cinnamon rolls. The warm beige base makes it cozy, and cinnamon-brown scallops give a clear Halloween feel without black. This pattern works because it's repeating shapes - your brain reads it as intentional even if some arcs are slightly uneven. It also looks great on short nails where stripes can feel too sharp.
Paint beige base. At the tip, use a dotting tool to stamp small half-circles along the edge. Start at one side, place one arc, then continue until you reach the other side. Keep arcs touching or nearly touching so there's no gap. Top coat twice, especially over the scallops.
Pro tipUse a light hand on the dotting tool so the arcs stay crisp instead of smeared.
Watch outAvoid going too high up the nail - scallops should live at the tip.
10. Deep Burgundy Side Stripe
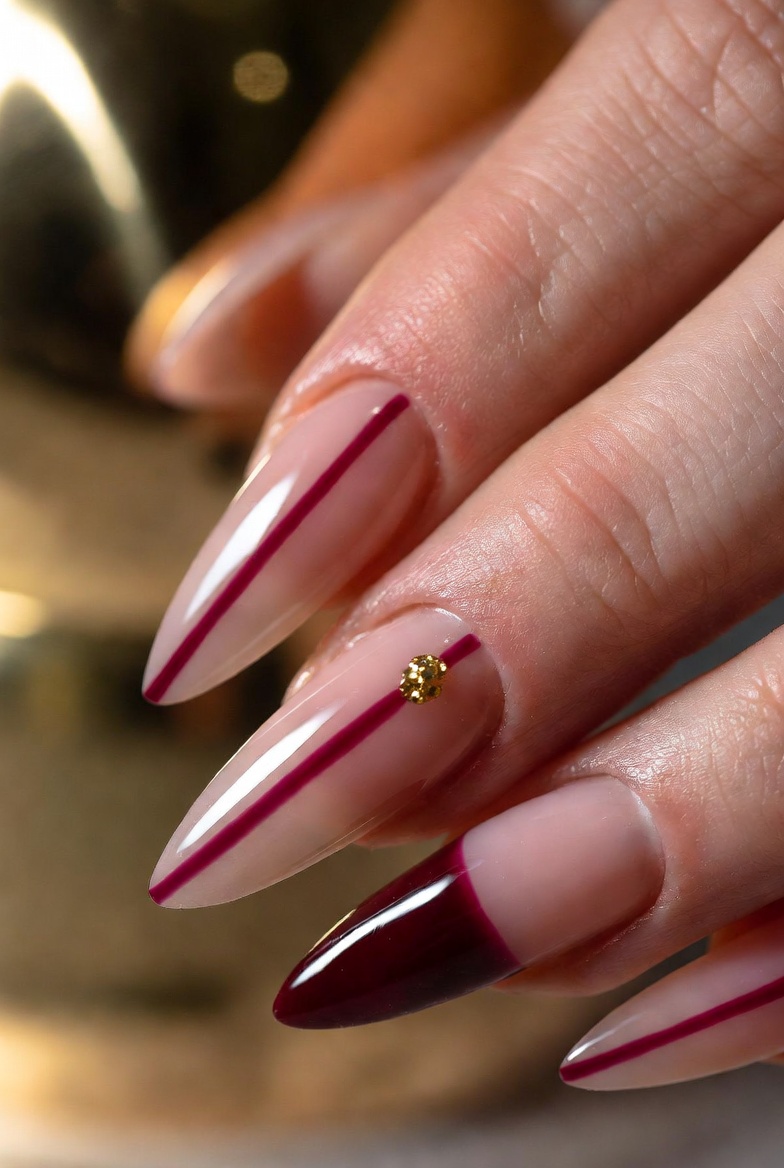
A single stripe is the fastest way to look "done." Deep burgundy reads like spiced wine and makes nude nails feel autumn. The stripe also elongates the nail visually. Adding one tiny gold dot keeps it playful without going full Halloween cartoon.
Base with a sheer nude or nude-pink. Use a striping brush to paint one vertical burgundy stripe on each nail, leaving a small gap between stripe and side edge. On one accent nail, place one tiny gold dot where the stripe crosses the center. Finish with glossy top coat.
Pro tipIf the stripe wobbles, clean the outer edge with a small brush and acetone - don't repaint the whole stripe.
11. Spooky-Soft Gradient: Cocoa to Cream
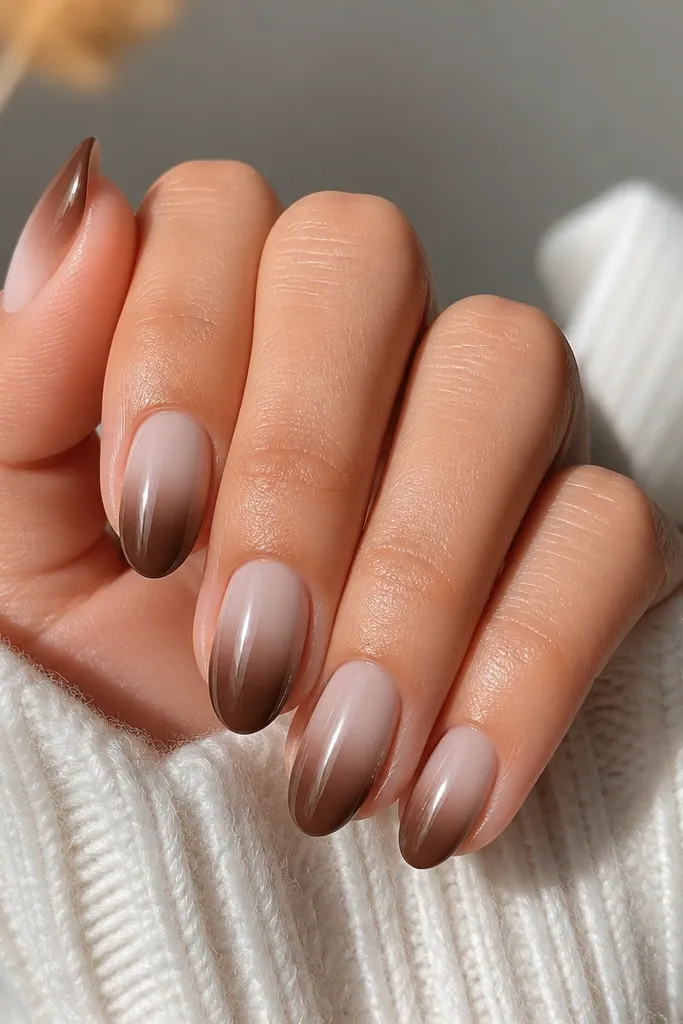
This looks like warm smoke or a cozy latte, and it feels Halloween without any symbols. The cocoa-to-cream gradient reads expensive and soft, and it hides small imperfections. Gradients are great if you hate drawing lines. Keep it subtle so it stays cozy instead of goth.
Use a sponge to blend. Start with milky cream at the cuticle, then tap cocoa brown starting around the middle and drag it toward the tip. Do 2-3 thin layers rather than one heavy layer. Wipe the skin around the nail and seal with top coat to smooth the blend.
Pro tipUse a makeup sponge with tiny pores for less streaking than a chunky nail sponge.
Watch outDon't press the sponge hard - it lifts polish and creates patchiness.
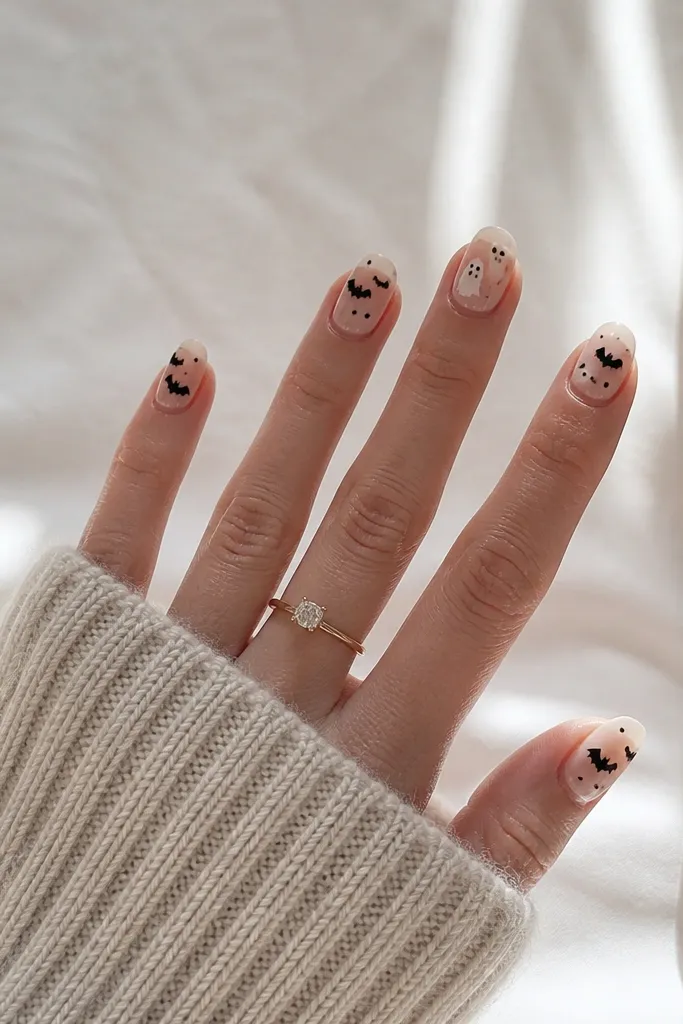
12. Mini Bat Silhouettes (Two Nails Only)
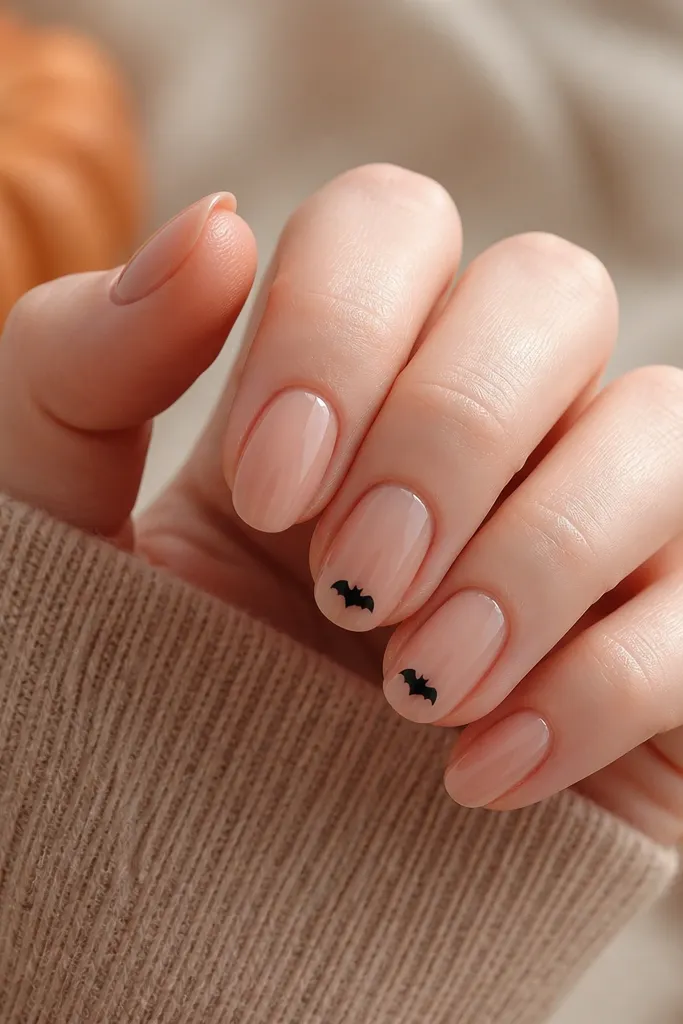
Full bat nail art takes time. Two tiny silhouettes create the Halloween cue while keeping the rest calm and cozy. The nude base makes the black look crisp, and the small size prevents the design from looking like a sticker. You also avoid the "too much Halloween" feeling.
Paint warm nude on all nails. On two accent nails, place a tiny black bat shape near the tip using a detail nail art brush. Keep the wings symmetrical enough to read, but small. Add one thin coat of top coat over the bats, then a second full top coat.
Pro tipIf your bat wings look uneven, make them uneven on purpose - it reads like a stylized silhouette.