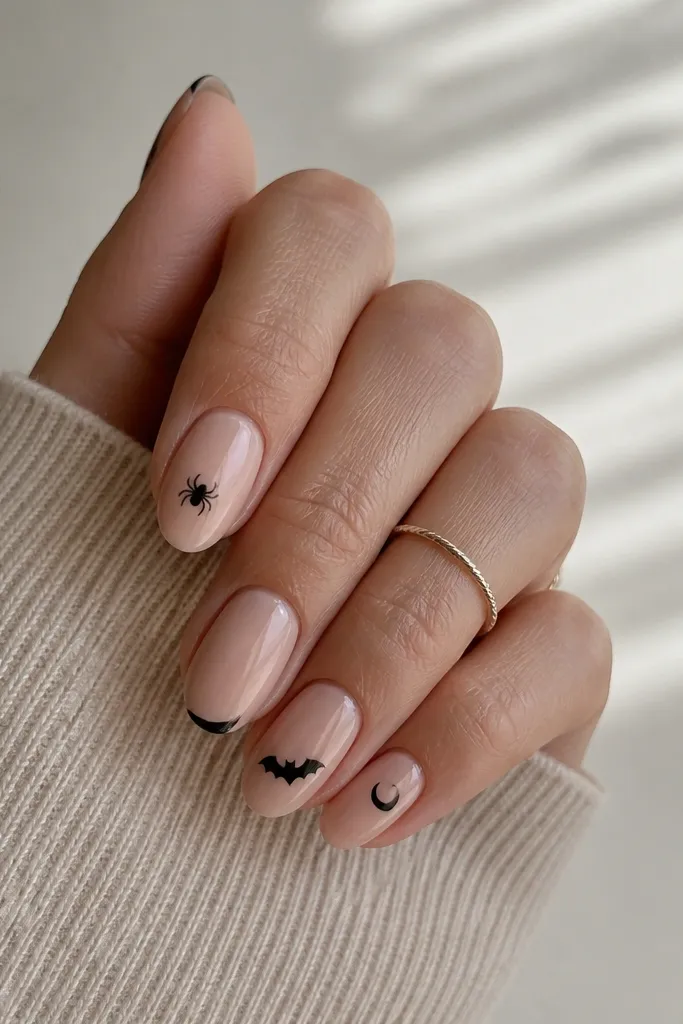
1. Milky Nude with Tiny Black Moon at the Cuticle
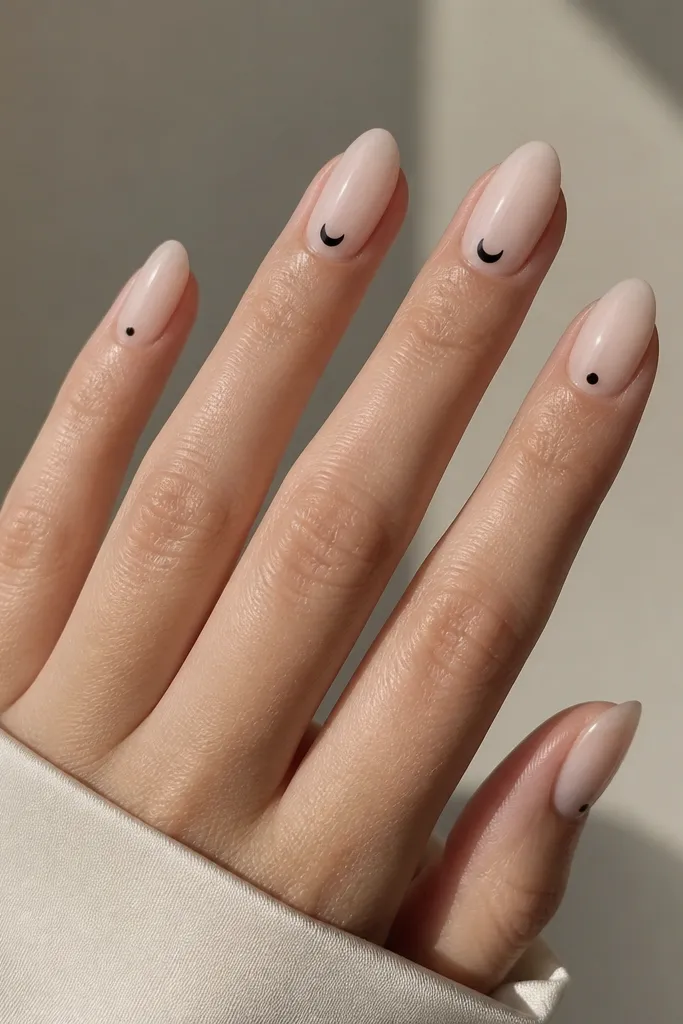
This looks Halloween without screaming because the moon is small and sits where your eye naturally goes - the cuticle area. Milky nude keeps it wearable with any outfit, and black gives that instant spooky contrast. I like a crescent that's slightly tilted so it doesn't look like a sticker. The glossy finish makes the moon look painted instead of printed.
Paint two thin coats of milky nude. With a striping brush or a small gel brush, draw a tiny crescent about 2-3 mm wide and place it just below the cuticle, centered. Cure fully, then top coat with a thicker layer and cap the tip.
Pro tipIf your crescent looks wobbly, stamp the moon first, then trace the edges with black gel for a clean outline.
Watch outDon't make the moon bigger than a match head - large moons turn this into a full Halloween scene.
2. Forest Green Gloss with One Orange Dot "Jack" Accent
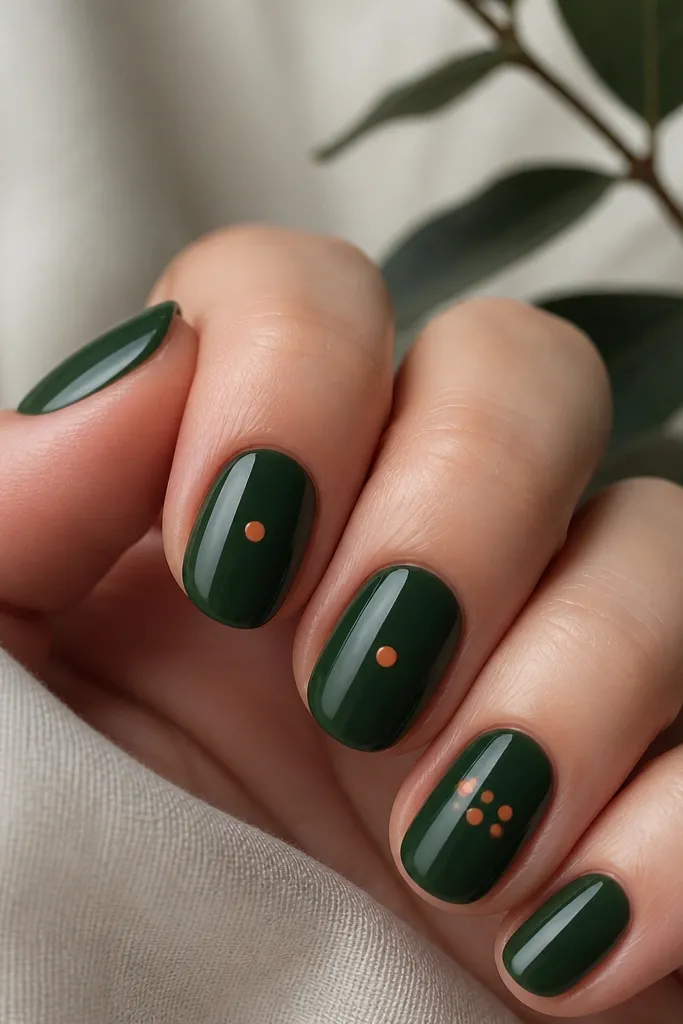
Forest green reads evergreen in winter and still feels Halloween with one muted orange pop. The dot face is friendly, not scary, because it uses dots instead of thick lines. I keep the orange slightly dusty so it doesn't look neon. It also photographs well because the green reflects light.
Use forest green as the base for all nails. Add one orange dot per accent nail using a dotting tool, then for the face place two dots about 3-4 mm apart and a third dot centered below. Top coat twice if you're using regular polish so the dots stay smooth.
Pro tipTry orange that's closer to terracotta than bright pumpkin for a year-round look.
Watch outSkip orange glitter - it catches on clothing and makes the set feel costume-y.
3. Soft Pink "Spooky French" with Thin Black Tips
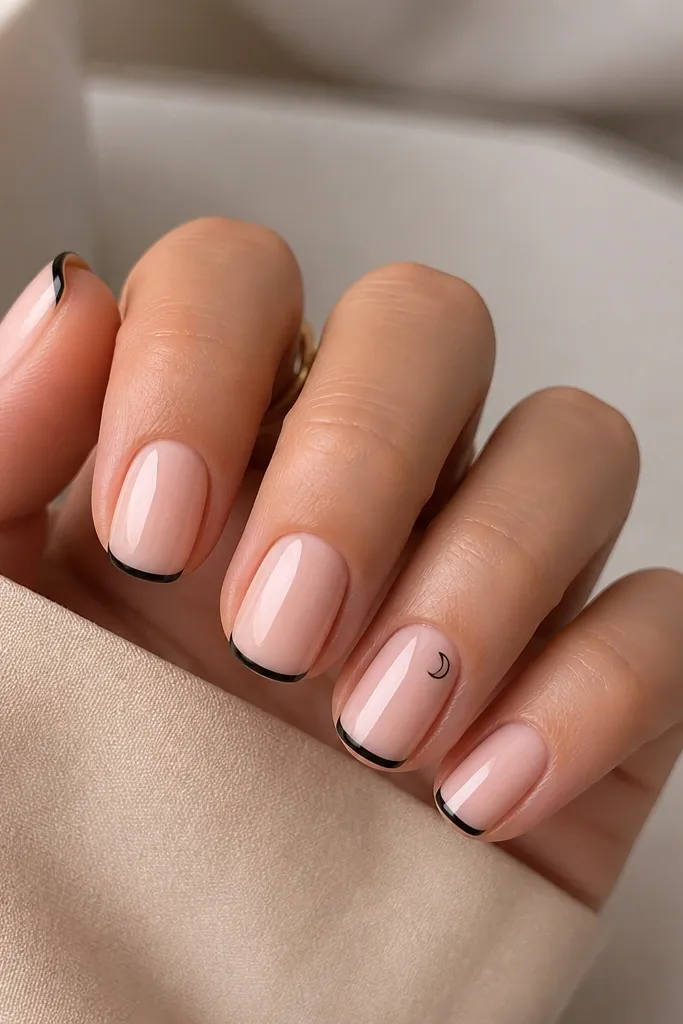
This is my go-to when someone says they want Halloween nails but hate nail art. A thin black tip is graphic and clean, like a fashion manicure. The soft pink base keeps it gentle, and the single crescent detail adds just enough Halloween. Because the lines are thin, it looks intentional instead of messy.
Paint two coats of soft pink jelly polish. Use a striping brush to paint a 1 mm black line at the free edge, then slightly blend it into the tip by dragging once from the side. Place the crescent on one nail only to keep the set simple.
Pro tipUse painter's tape as a guide for the first tip line, then remove it while the polish is still tacky.
Watch outDon't make the tip too wide - chunky tips look like Halloween stickers.
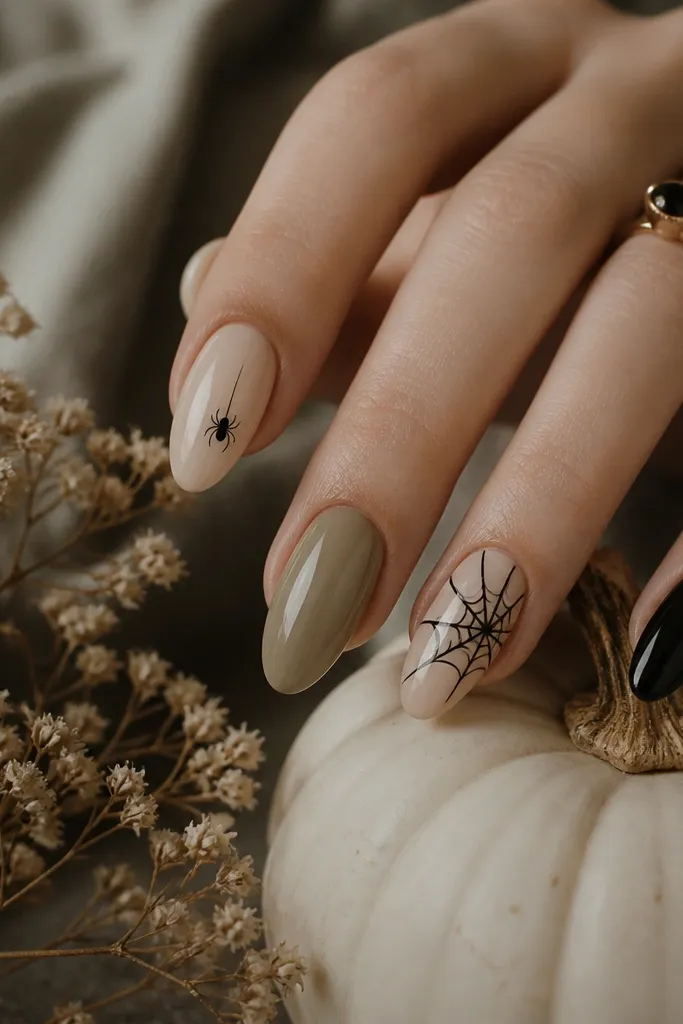
4. Milky White Base with Black Dot Web Near the Sidewall
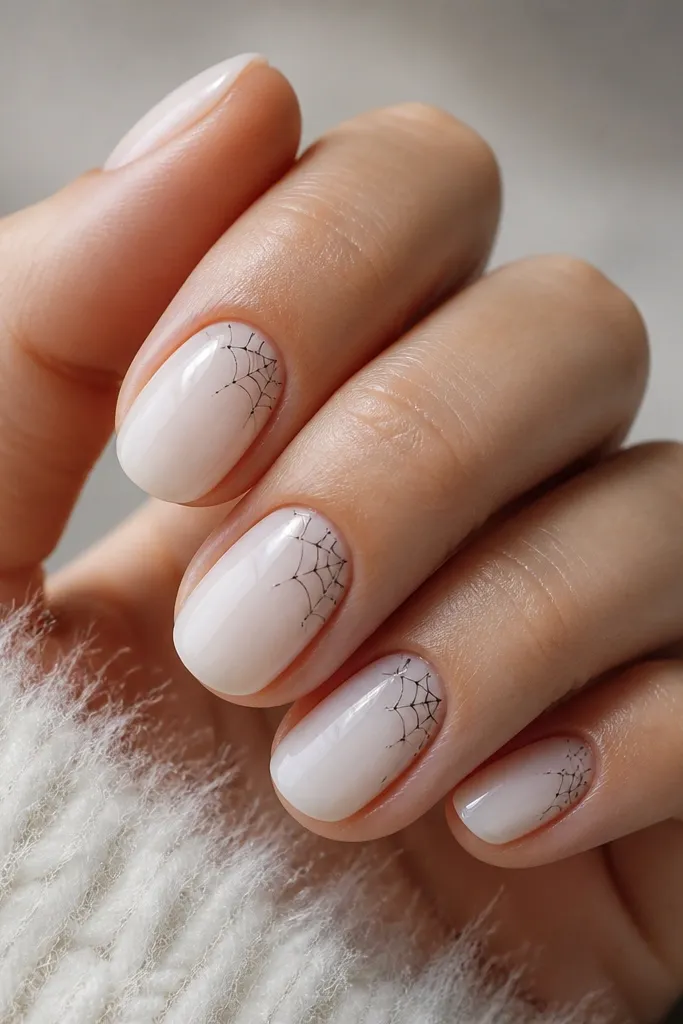
A web can look creepy or cute. This one looks cute because it's minimal and placed on the sidewall instead of across the whole nail. Milky white makes the black lines pop, and dotted web lines look hand-drawn rather than printed. It also feels evergreen because it's just black and white.
Use milky white as the base. Dot three points close to the side near the cuticle, then draw two thin lines from each dot toward the center with a striper brush. Finish with a top coat that levels the surface.
Pro tipIf the lines look shaky, use a dotting tool to place the line start and end points, then connect with one steady stroke.
Watch outDon't draw a full spider web across the whole nail - it reads costume.
5. Clear Nude with Micro Glitter Halo Around a Black Dot
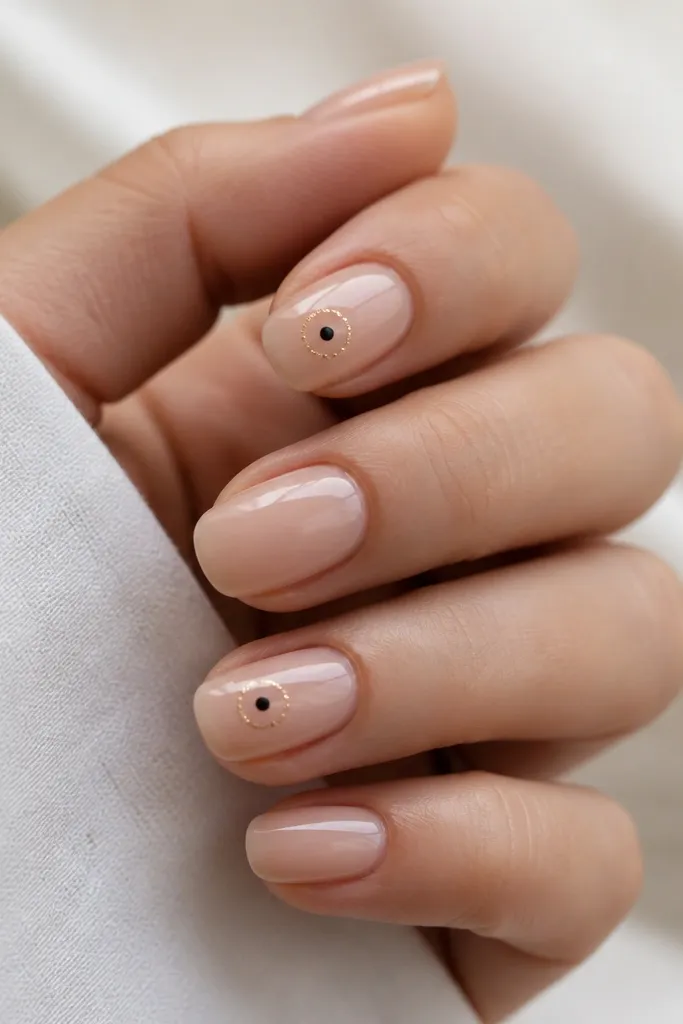
This is Halloween-adjacent in the best way because it's mostly clean and only has one spooky point. The halo glitter makes it feel special without turning it into a full glitter manicure. I use micro gold glitter because chunky glitter looks dated fast. The black dot anchors it so it still reads "spooky."
Start with clear nude or a nude builder gel. Place one small black dot, then use a fine liner brush to pull glitter into a circle around it, leaving a tiny gap so the dot stays crisp. Cure, then seal thoroughly.
Pro tipUse a glitter top coat that's not too thick so the halo stays round.
Watch outSkip big holographic glitter - it makes the halo look party, not Halloween.
6. Taupe Marble with One Black "Cat Eye" Stroke
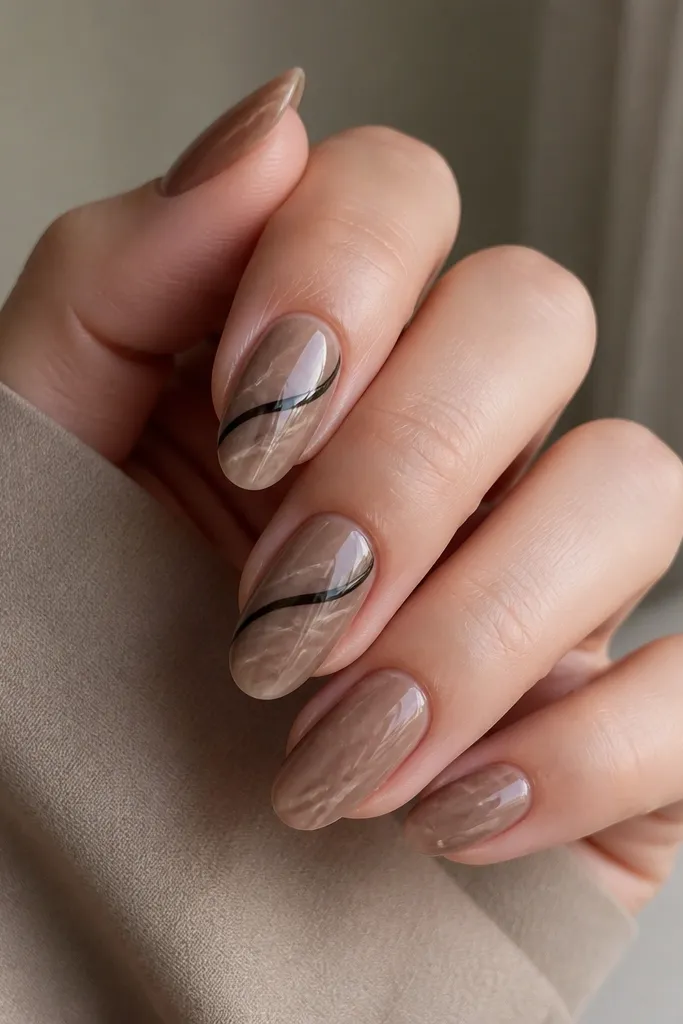
Marble gives you movement, so you don't need a lot of Halloween symbols. The black cat-eye stroke is tiny and stylized, which keeps it evergreen. Taupe also hides chips better than bright colors, so your set still looks decent day 10. The contrast is subtle but clearly spooky.
Create marble with taupe base plus a lighter taupe using a sponge and a small amount of gel on a silicone mat. Use a striping brush to draw a single curved black line on two nails, tapering the ends. Keep the stroke about 3-4 mm long.
Pro tipMarble looks best when you vary pressure - light, then slightly heavier, so the swirls aren't all the same thickness.
Watch outDon't add multiple cat strokes - one is enough or it gets cartoonish.
7. Black-and-Brown Checker Accent on a Nude Base
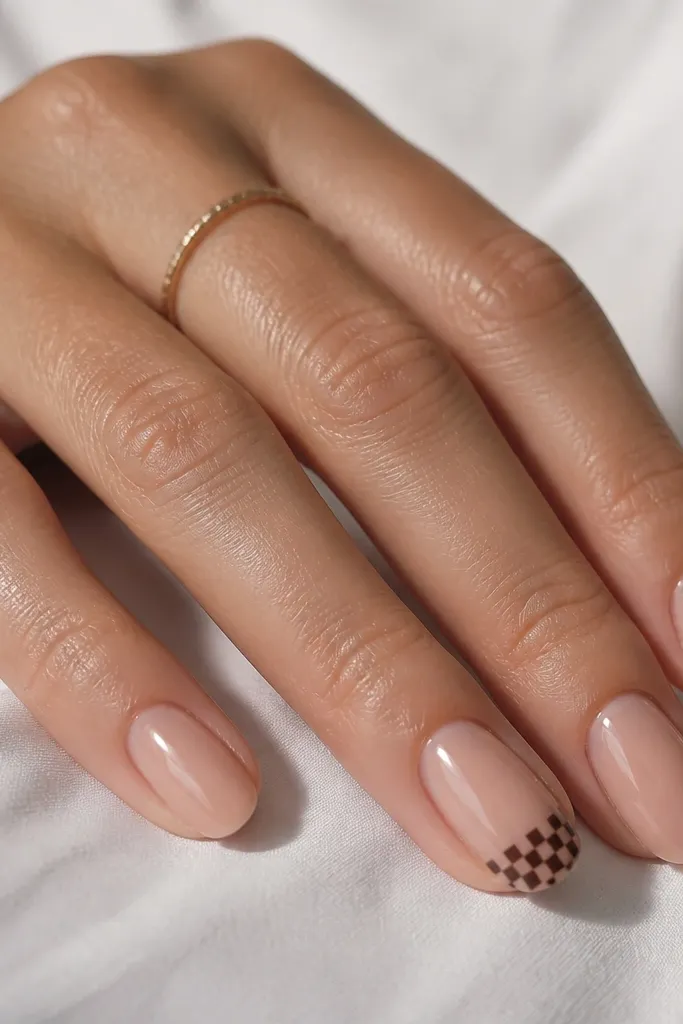
Checker detail feels Halloween because it's graphic, but it also reads "fashion" on a nude base. Keeping it to the last third makes it simple and wearable. Black and dark brown looks more expensive than harsh black-and-orange. This design works great if you want something that isn't a spider web or ghost.
Paint nude base across all nails. On accent nails, tape a straight line at about 1/3 from the tip, then paint alternating small squares with a dotting tool or striping brush. Remove tape after curing or while still tacky depending on your gel system.
Pro tipUse a toothpick to clean the edges between squares while the polish is still slightly soft.
Watch outDon't make the squares too big - large checkers look like a costume print.
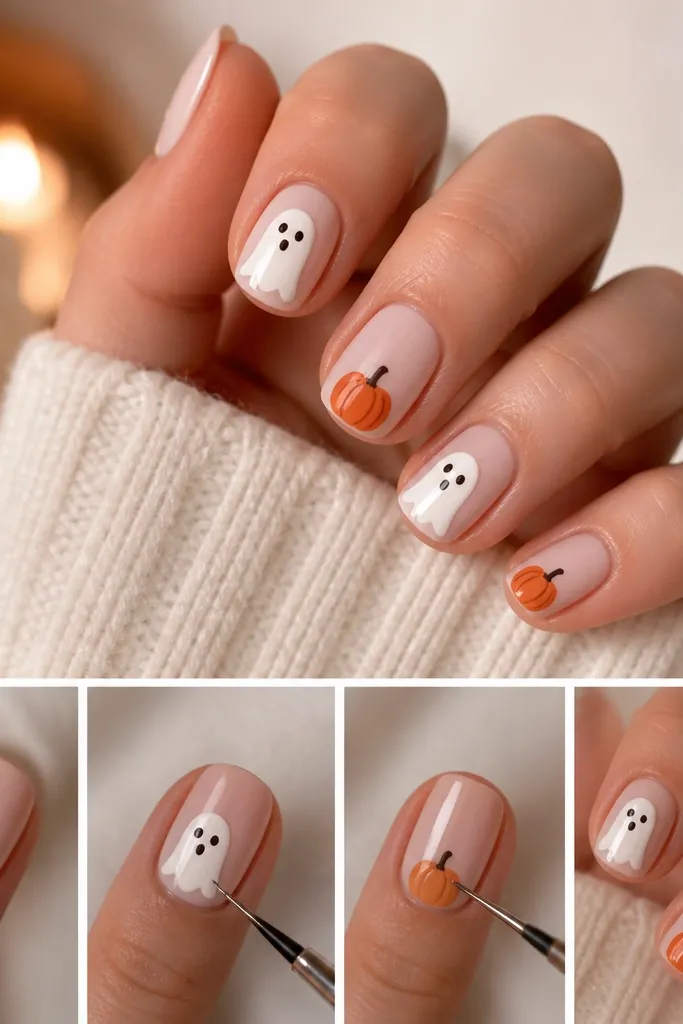
8. Sheer Nude with Micro Ghost Outline Only on Two Nails
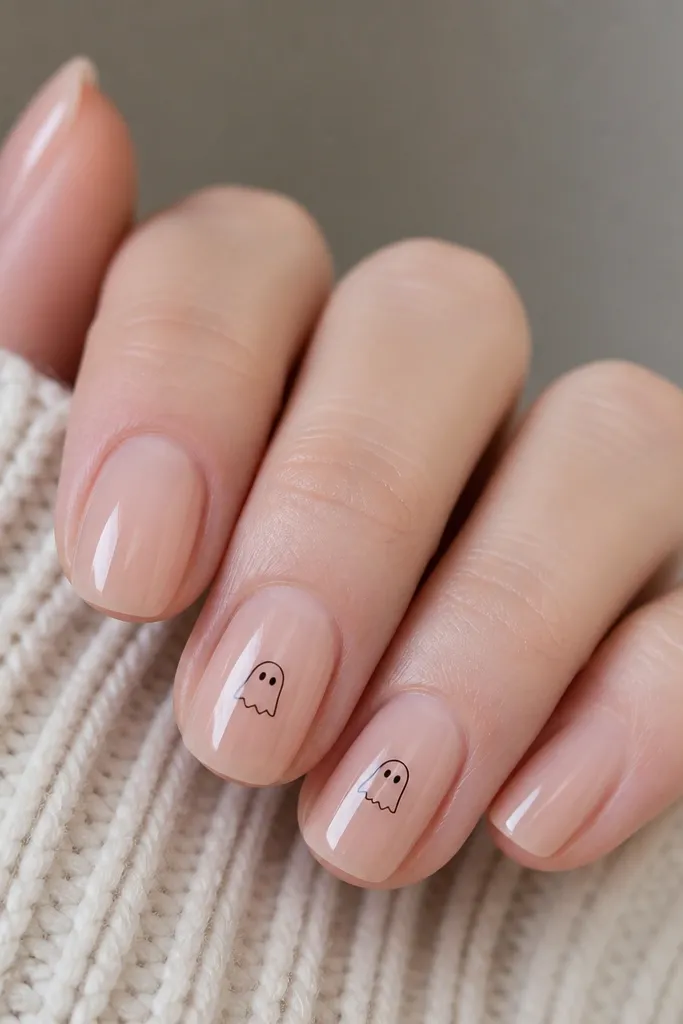
This one is for the people who want a ghost but hate full ghost faces. The nude base stays clean, and the outline-only ghost keeps it modern. I like placing it on only two nails so you don't end up with "kids Halloween" energy. Black line art also stays sharp longer than filled-in shapes.
Use sheer nude. With a fine liner brush, draw a simple ghost outline about 4-5 mm tall. Add two tiny dot eyes and a small curve for the mouth, then top coat carefully so the lines don't smear.
Pro tipIf your brush is too thick, load less gel and do two light passes instead of one heavy one.
Watch outDon't fill the ghost completely - filled ghosts look bulky and cheap.
9. Burnt Orange Half-Moon at the Cuticle
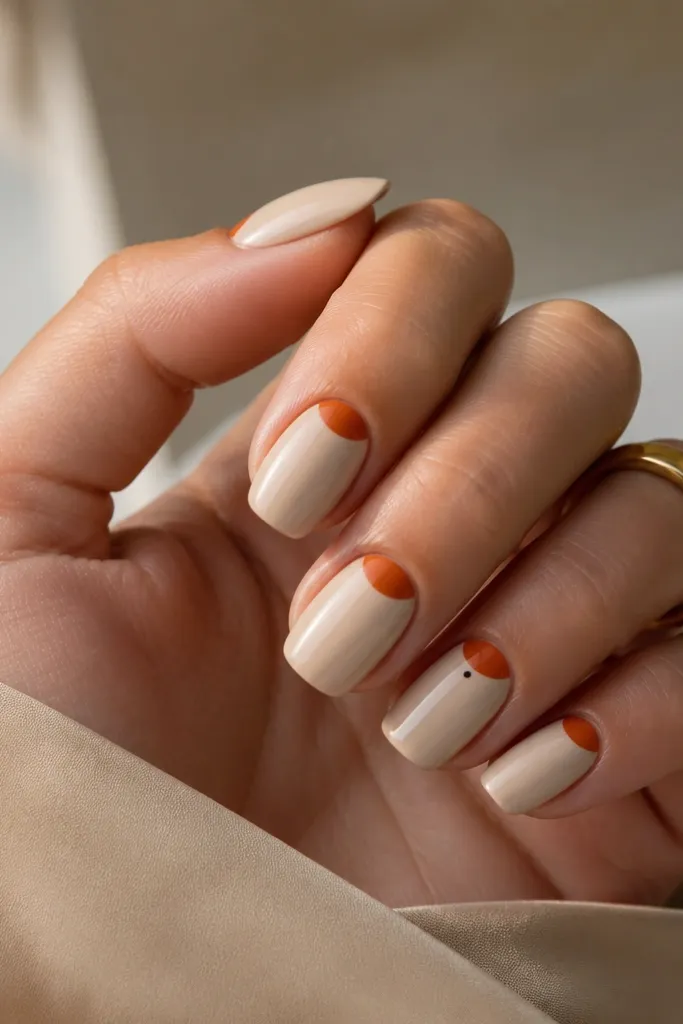
Half-moons feel retro and they read Halloween because orange is right there at the cuticle. Keeping it to a clean crescent makes it wearable all year. Burnt orange is softer than bright pumpkin, so it doesn't look like a costume. The black dot adds a spooky wink without clutter.
Paint nude base, then use a small makeup sponge or a half-moon stencil to place burnt orange right at the cuticle. Clean up edges with a thin brush dipped in cleaner. Finish with a glossy top coat to smooth the boundary.
Pro tipIf you freehand, start by placing the two ends of the crescent first, then connect the curve.
Watch outDon't let orange touch the skin - a messy cuticle edge ruins the whole look.
10. Matte Black Accent with One Glossy Orange Dot
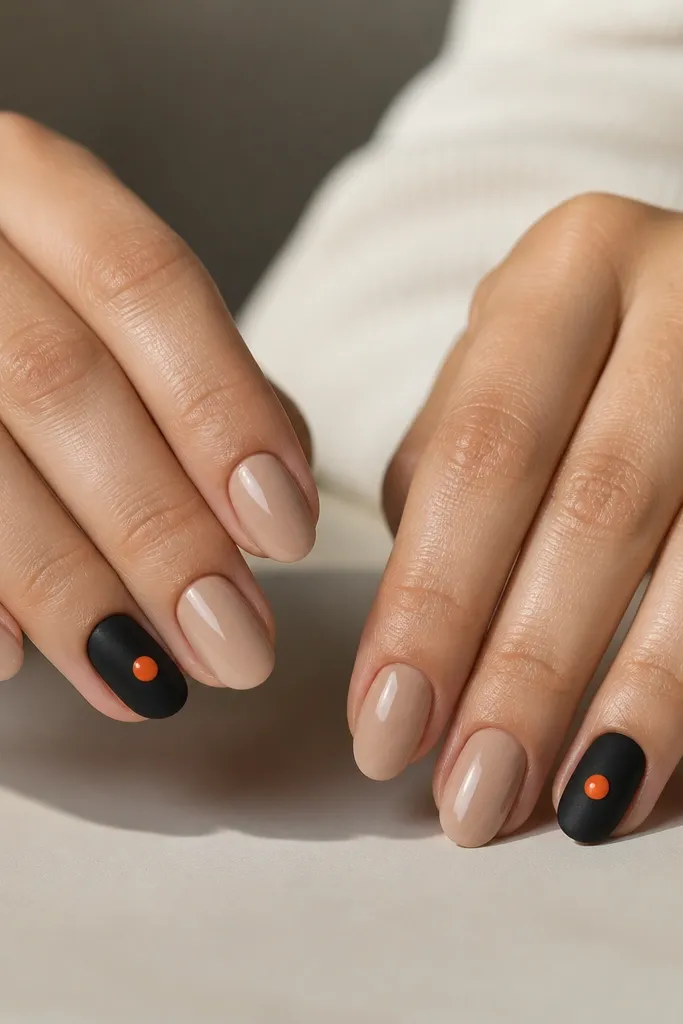
Matte black is the quickest way to make nails feel Halloween without adding icons. The one glossy orange dot breaks the matte and adds warmth. I like this because it's bold but still simple, and matte hides tiny imperfections better than glossy dark colors. It also lasts well because matte top coats camouflage micro chips.
Paint nude on all nails. On accent nails, apply matte top coat over black polish (or use matte black polish) and cure. Add one orange dot with gel and cure, then you can top coat only the dot with gloss so it stays shiny.
Pro tipUse two different top coats: matte for the nail, gloss only on the dot.
Watch outDon't put glossy top coat over the whole matte nail - it removes the intentional contrast.
11. Brown Sugar Ombre with a Thin Black "Broom" Line
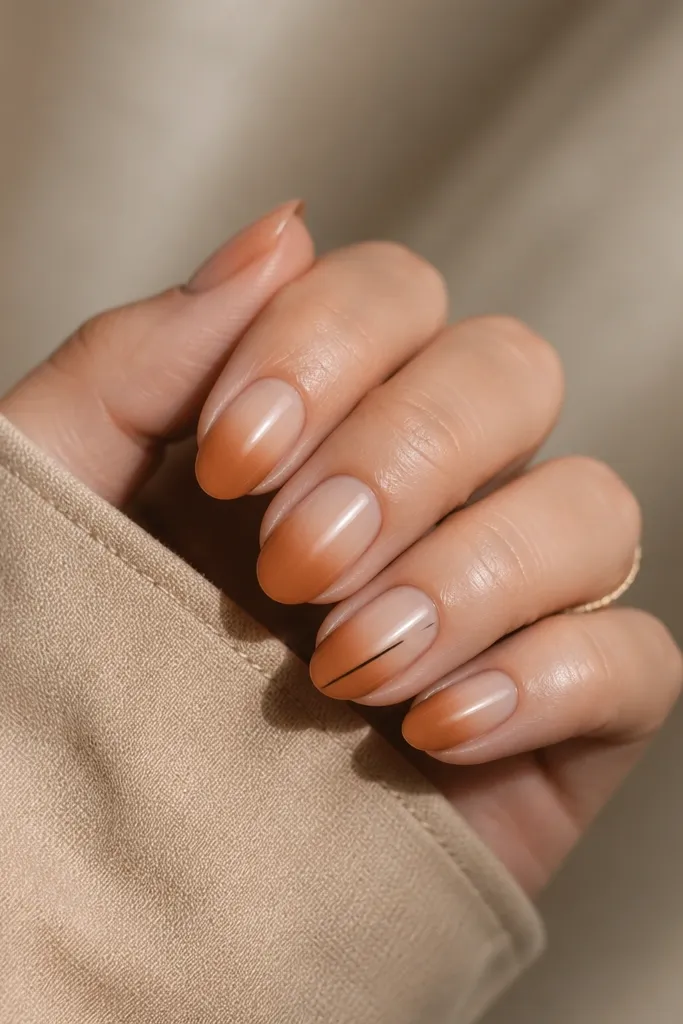
Ombre gives you depth so you don't need multiple symbols. The broom line is a minimal Halloween nod that looks artsy, not childish. Warm caramel ombre looks good in daylight and still reads spooky because the black line is crisp. I keep the line thin so it looks like a single drawn gesture.
Create ombre using a makeup sponge with nude base and caramel gel. Fade the caramel at the tip only, leaving a soft gradient. Draw a thin diagonal black line on one nail and add a tiny angled stroke at the end to suggest bristles.
Pro tipWipe the brush on a lint-free pad before drawing the black line so it doesn't flood the ombre.
Watch outSkip thick black strokes - they overpower the ombre and make it look messy.
12. Glazed Donut Nude with One Tiny Silver Web Thread
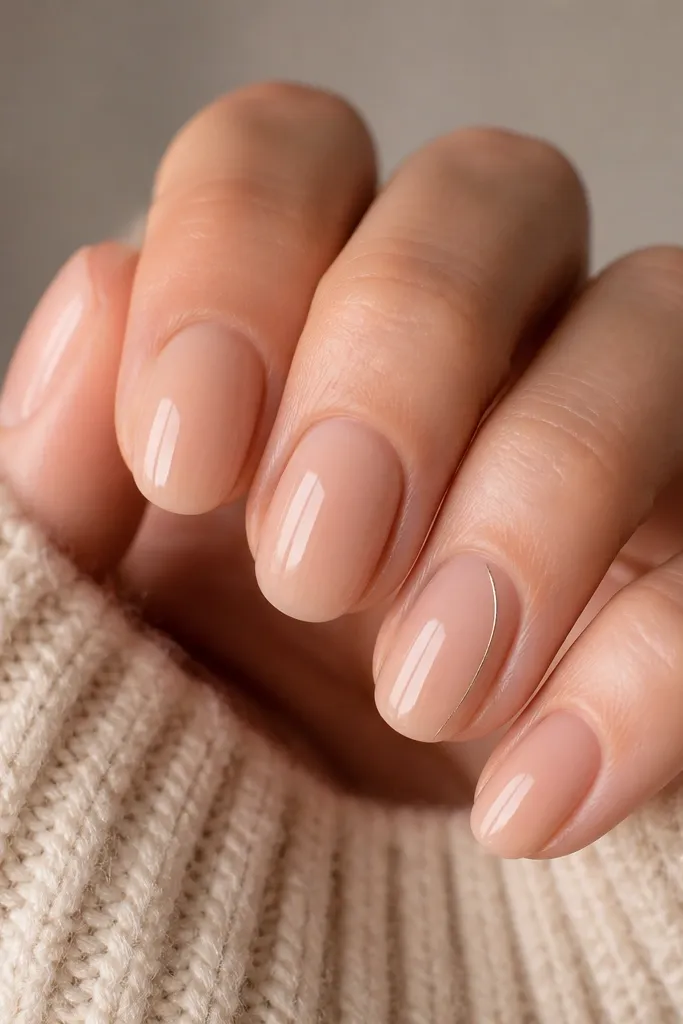
This is the most subtle option if you want Halloween but hate obvious symbols. The glazed donut base already has dimension, and the single silver thread reads like a web without drawing a whole pattern. Silver looks clean instead of harsh, and it matches fall jewelry. It's also easy to do fast because you're not covering the nail with detail.
Use a glossy nude gel with a slightly warm undertone. Add one thin silver line using striping tape as a guide or a fine liner brush, placing it near the sidewall and curving it once. Top coat lightly so the line stays crisp.
Pro tipIf you're using regular polish, use a silver nail art pen for the thread so the line stays straight.
Watch outDon't add multiple threads - one line looks intentional; many lines look like a mistake.