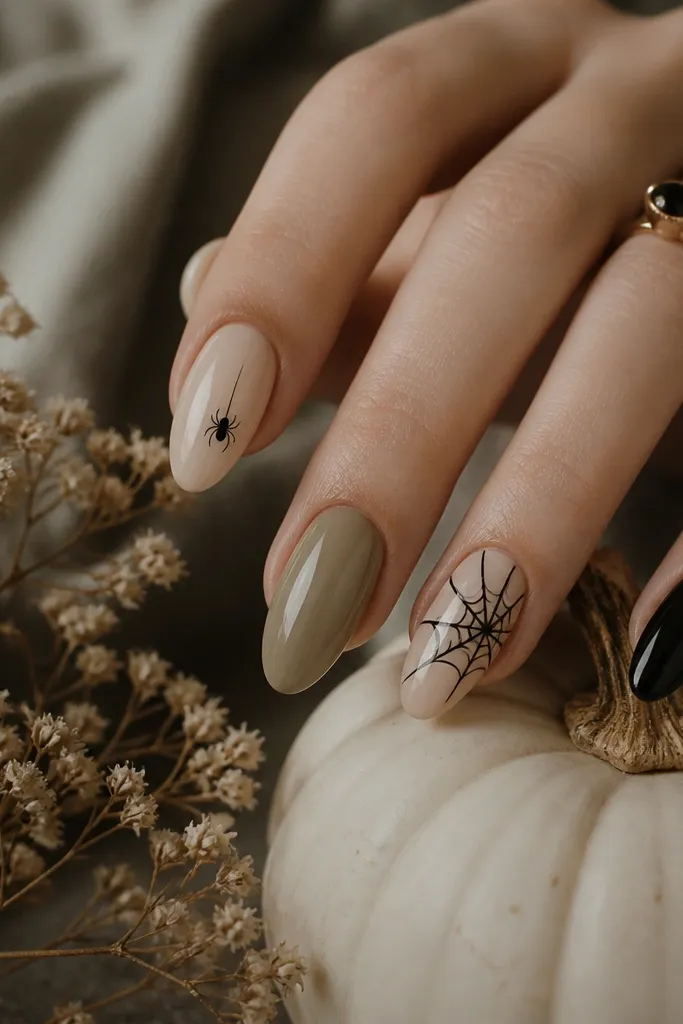
1. Milky Nude Web With Tiny Black Spiders
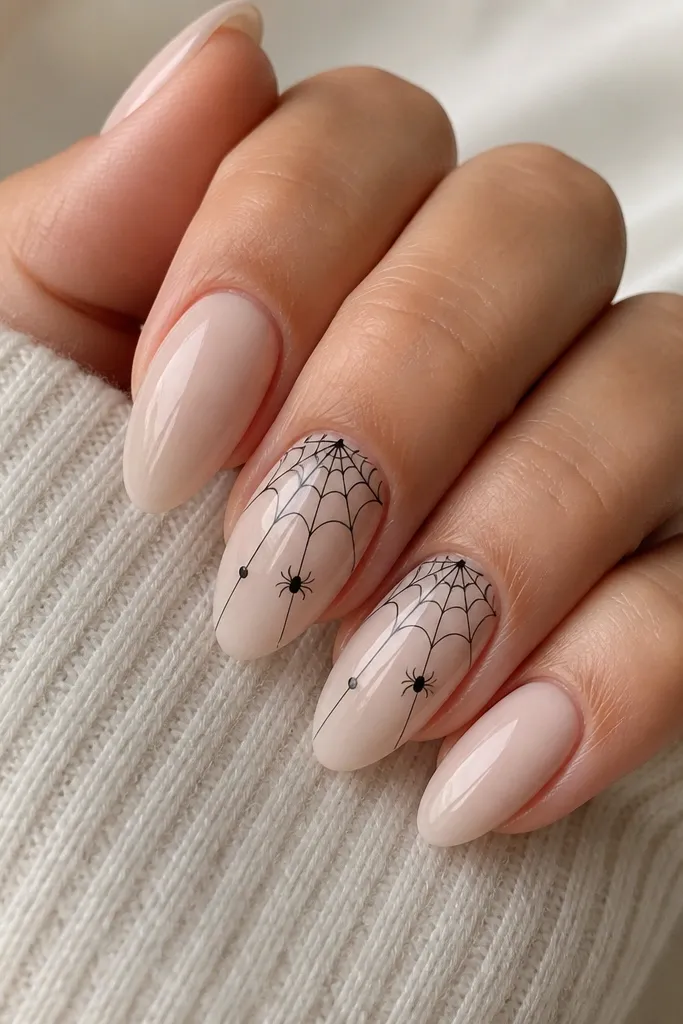
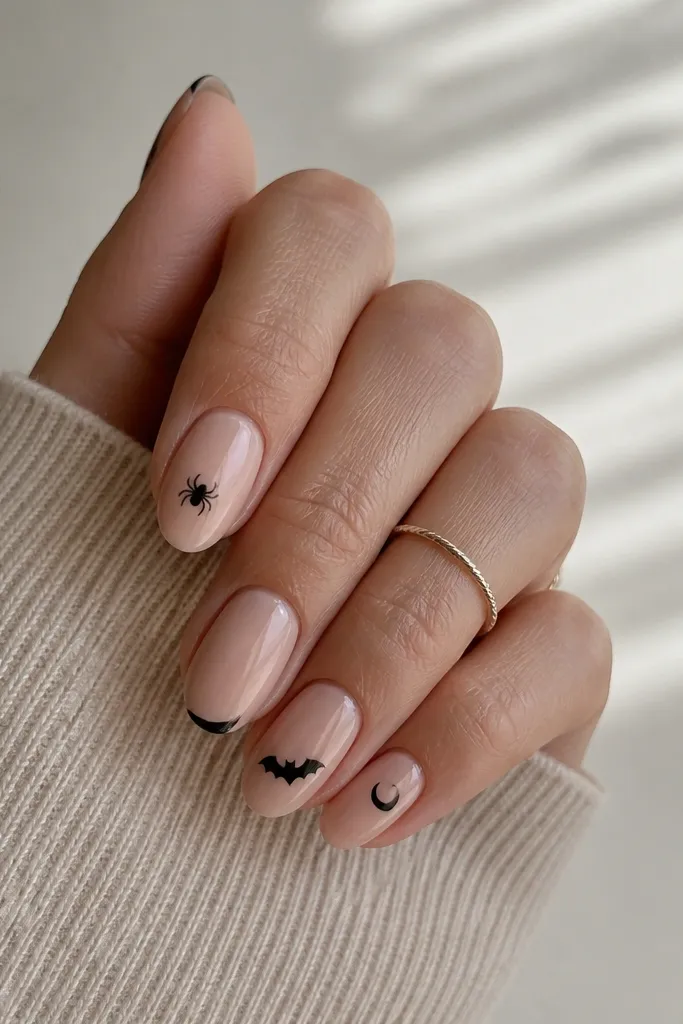
This one looks spooky without turning your nails into a Halloween costume. The milky nude base keeps your hands looking fresh, and the black web lines give that instant "spider in the corner" vibe. I like adding tiny dot spiders because they read clearly in close-up photos even when the lines are thin. The glossy top coat makes the web look like it's drawn with ink.
Paint a milky nude base (sheer pink-beige) on all nails, then on two nails use a striping gel to pull web lines from near the cuticle to the side walls. Add three tiny black dots for spider bodies and place legs with a single-stroke line. Cure fully, then finish with a normal glossy top coat on everything.
Pro tipUse a 10/0 liner brush and do web lines in two passes: first the spokes, then the connecting loops.
Watch outAvoid thick black lines - they look like stamp art instead of hand-drawn webbing.
2. Black Cherry Cat-Eye With One Orange Eye Glow
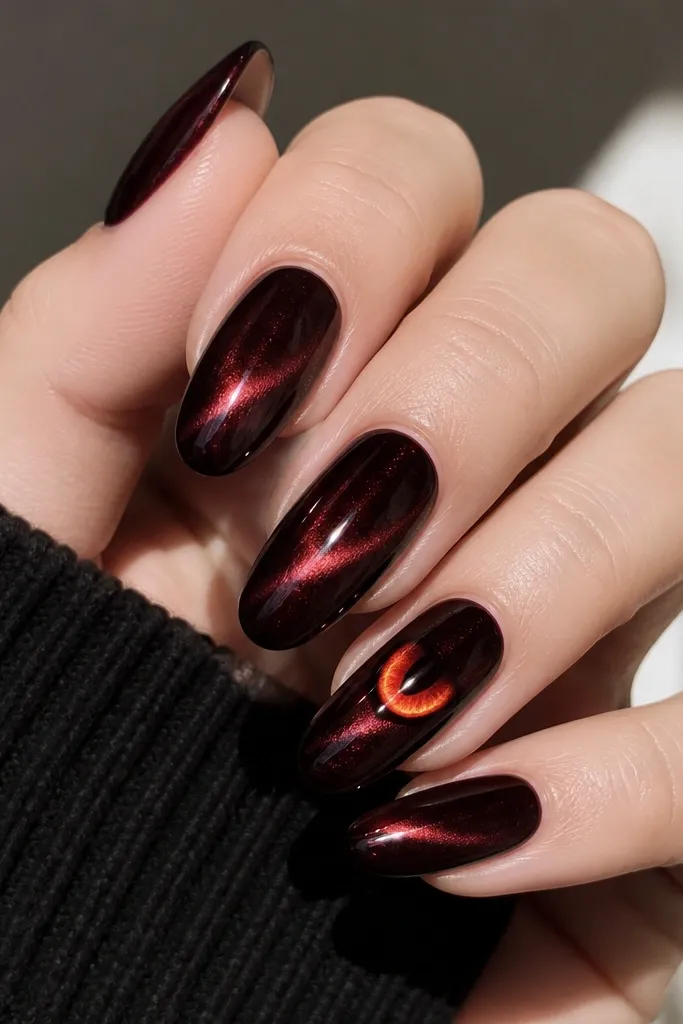
Cat-eye polish already looks like it has depth, which makes Halloween feel moody without adding clutter. The black cherry base reads like midnight and shifts red when you move your hand. The single orange crescent is the "cat eye" moment - bright enough to pop but small enough to stay clean. A glossy finish keeps the color shift dramatic.
Apply two thin coats of black cherry cat-eye polish, then magnet for the line placement right above the center of each nail. Pick one accent nail and use a dot of orange gel (or metallic orange pigment mixed with clear gel) for the crescent. Seal with glossy top coat.
Pro tipMagnet right after each coat and keep your hand still for a full 10 seconds.
Watch outDon't magnet too late after the coat starts to thicken - the line goes cloudy.
3. Orange Peel Marble Tips Over Nude
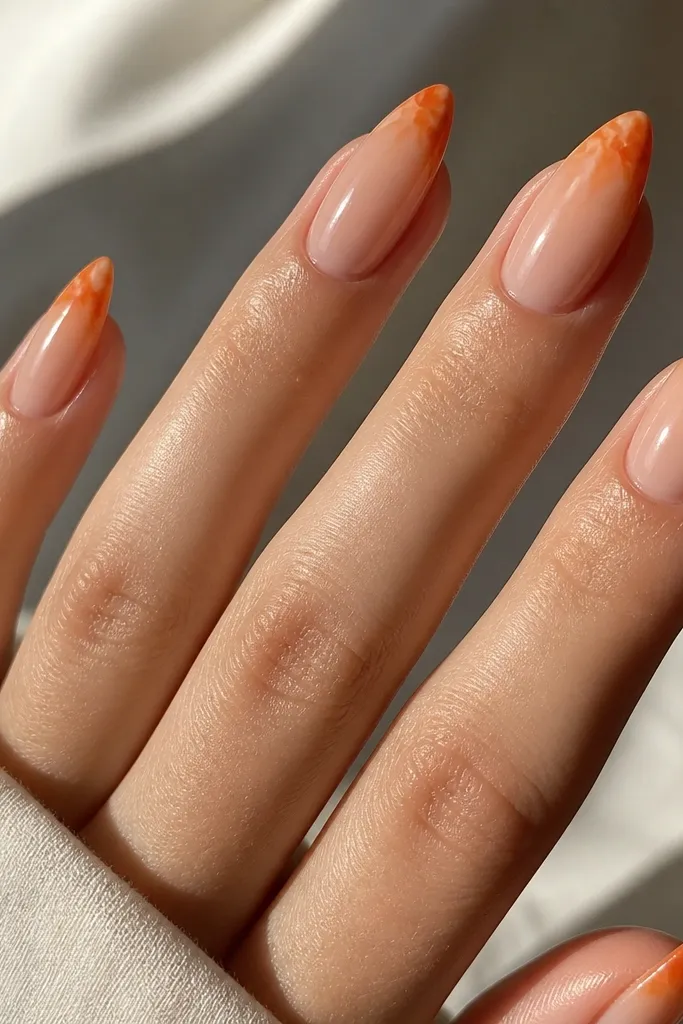
Marble tips give you Halloween energy without needing characters or decals. The orange peel effect looks like candy corn vibes, but it's subtler and more grown-up. Start with a nude base so the swirls have contrast. Glossy top coat makes the marbling look like stained glass.
Use a nude base in two coats, then tape a thin guide at the 1/3 mark from the tip so you only work the tip area. Drop a few lines of orange gel (tangerine + burnt orange) and swirl with a toothpick tip lightly. Clean edges with a brush dipped in acetone, then top coat.
Pro tipDo fewer swirls than you think - two or three bold ribbons look cleaner than a busy pattern.
Watch outSkipping edge cleanup makes marbling smear into the sidewalls and look messy.
4. Matte Witch Green With Micro Gold Stars
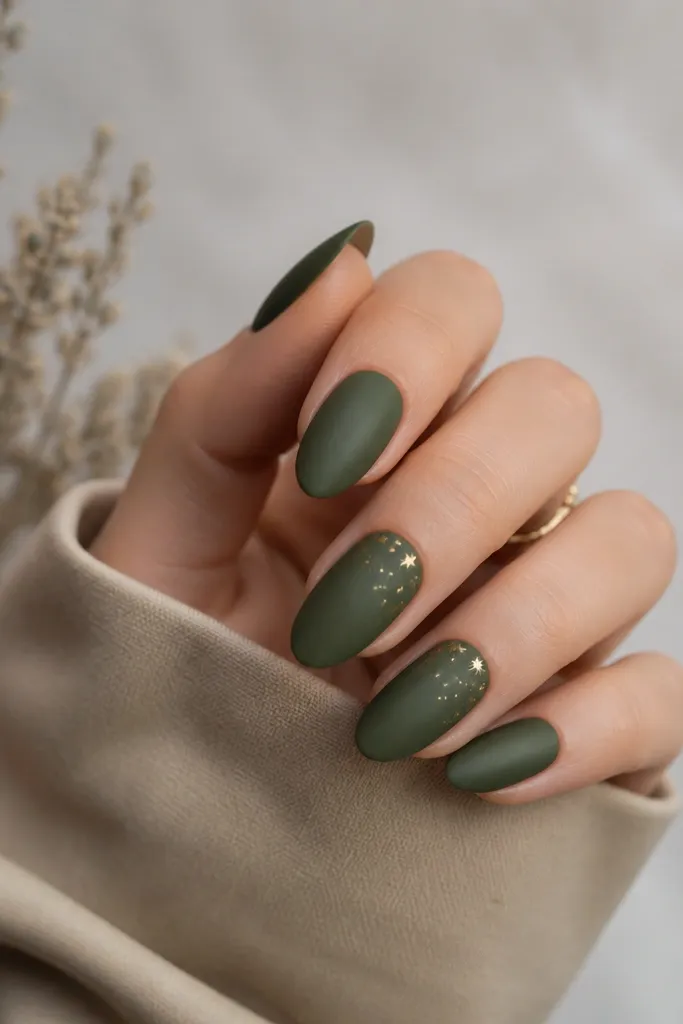
Matte witch green reads like potion energy. The micro gold stars add a magical twist without looking like glitter confetti. Keeping the stars small makes the set feel intentional. Matte finish also hides tiny surface imperfections better than glossy.
Paint all nails witch green, two thin coats. On two accent nails, use a dotting tool to place 6-10 tiny gold star decals or gold gel dots cured in a small cluster near the cuticle. Finish with matte top coat on every nail for a uniform velvet look.
Pro tipIf you're using gold gel dots, cure in short bursts so they don't spread.
Watch outDon't overdo star size - big stars look like stickers.
5. Espresso Brown Coffin Tips With Thin White Halftone
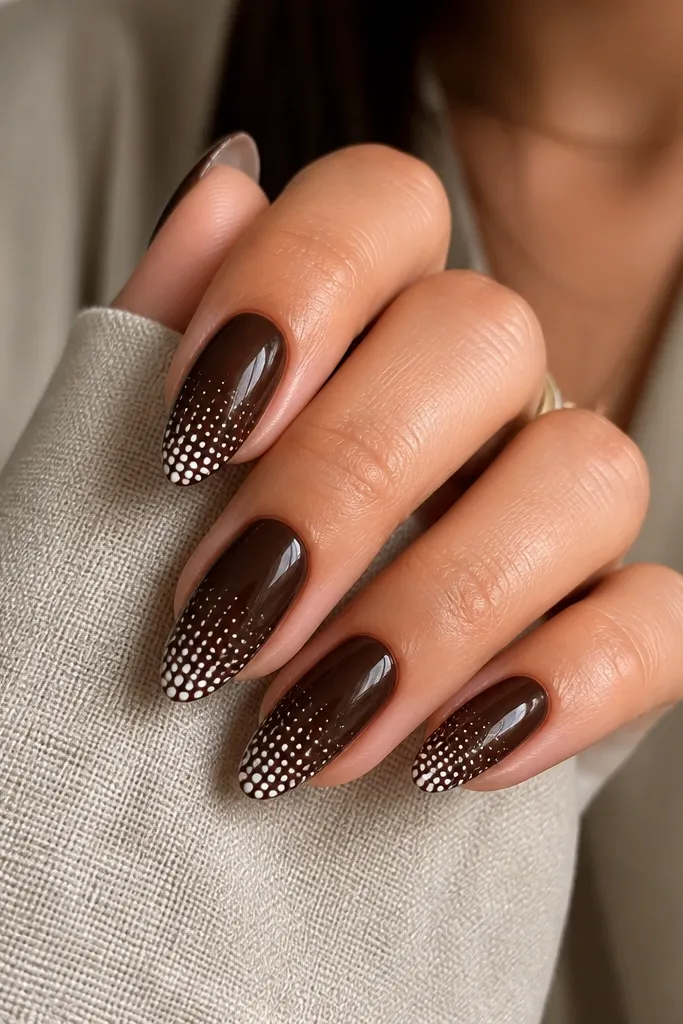
This is Halloween with a graphic design brain. The espresso brown feels like old wood and burnt cocoa, and the white halftone gives a spooky "screen print" vibe. It looks sharp because the pattern is confined to the tips. Glossy finish makes the brown look deep and expensive.
Use a glossy espresso brown, then on half the nails add halftone dots with a sponge or dotting tool. Start with tiny dots at the very tip edge and work upward with slightly larger dots. Seal everything with glossy top coat.
Pro tipPractice the halftone on a fake nail first - dot spacing is what makes it look intentional.
Watch outAvoid random dot patterns across the whole nail - it reads sloppy.
6. Clear Jelly Orange With Black Webbed Accent Nail
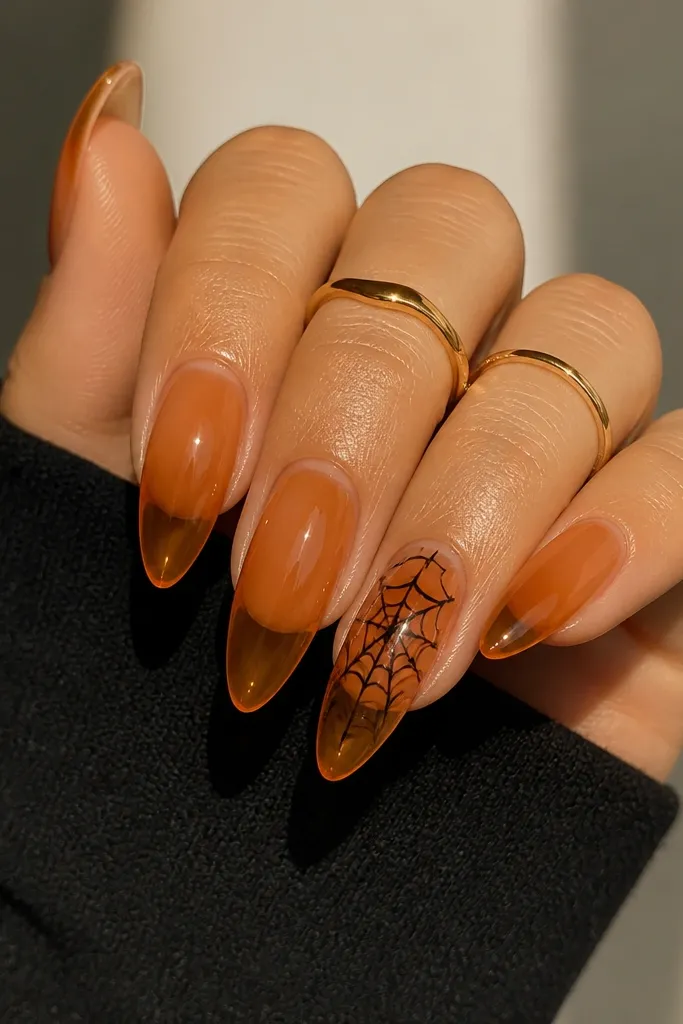
Clear jelly orange makes your nails look juicy and Halloween-bright without looking heavy. Because the base is translucent, your cuticles still look clean. The black web on one accent nail gives contrast and keeps the set from feeling busy. This one is great if you want the look to work with both casual outfits and Halloween costumes.
Apply a sheer jelly orange on all nails in two thin coats, making sure you don't flood the cuticle. On one or two nails, draw the web in black gel using the same spoke method as a spider web French tip. Cure and seal glossy.
Pro tipIf your jelly looks streaky, do a third very thin coat instead of thickening the first two.
Watch outAvoid fully opaque orange - it loses the jelly glow.
7. Purple Smoke Gradient With Silver Moon Cutout
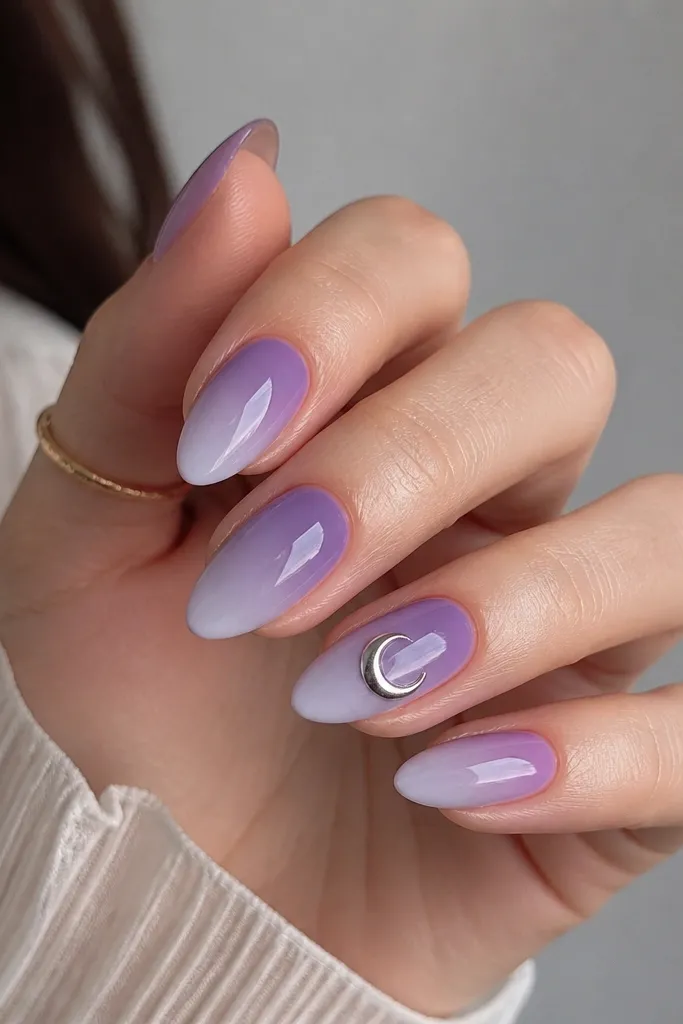
Purple smoke gradients look like you're wearing twilight. The gradient is the spooky part, and the silver moon makes it feel like a themed set without adding characters. Silver on purple looks bright in photos and still classy in real life. A glossy top coat keeps the "smoke" smooth instead of chalky.
Blend purple and lavender with a makeup sponge starting at the cuticle and fading into the tip. On an accent nail, place a silver crescent using metallic chrome gel or a thin silver strip cured in place, then top coat to smooth it. Cure well to avoid lifting at the edges.
Pro tipWipe the sponge with a lint-free wipe between colors so the fade stays clean.
Watch outDon't overblend - muddy gradients look like spilled paint.
8. Skeleton Hand Outline On Nude Almonds
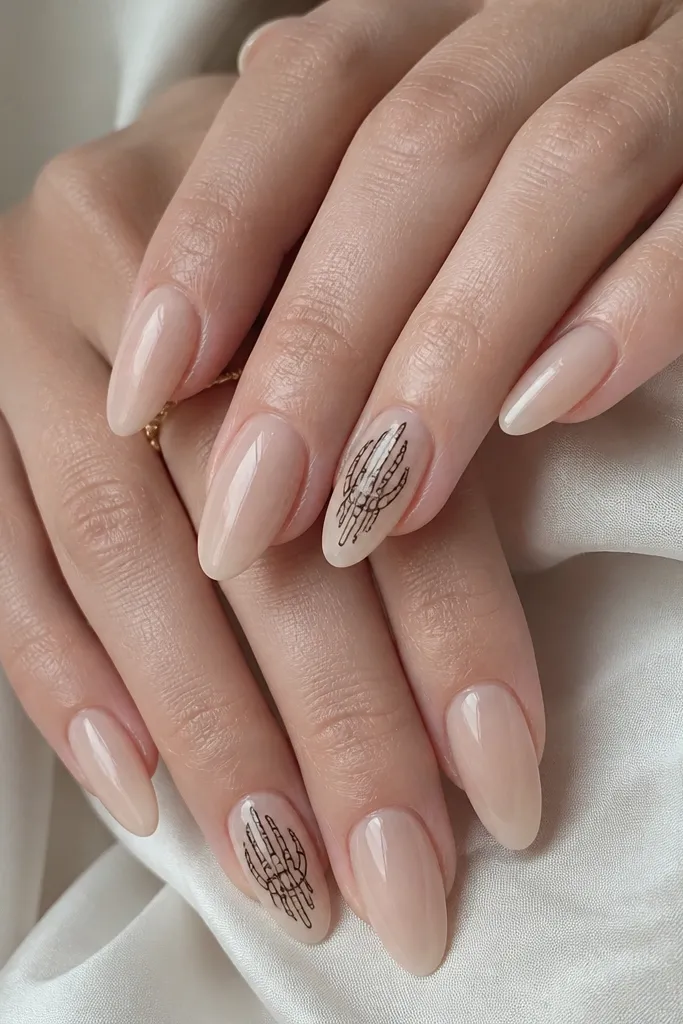
Line art skulls and skeleton hands are the easiest way to make Halloween nails look intentional. The nude base keeps your hands looking polished, and the thin black outline reads like a tattoo. I like placing the skeleton hand slightly higher than the center so it lines up with your fingertip curve. Glossy top coat makes the ink lines look crisp.
Paint a nude base, then use a nail art stamping plate or a fine liner brush to place the skeleton outline. Keep it to one accent nail per hand so the set stays wearable. Seal with glossy top coat in thin layers.
Pro tipIf you freehand, draw one outline line first, then fill in only the fingers - it's faster and looks cleaner.
Watch outSkip thick marker-like lines - they bleed under top coat.
9. Candy Corn Split Diagonal
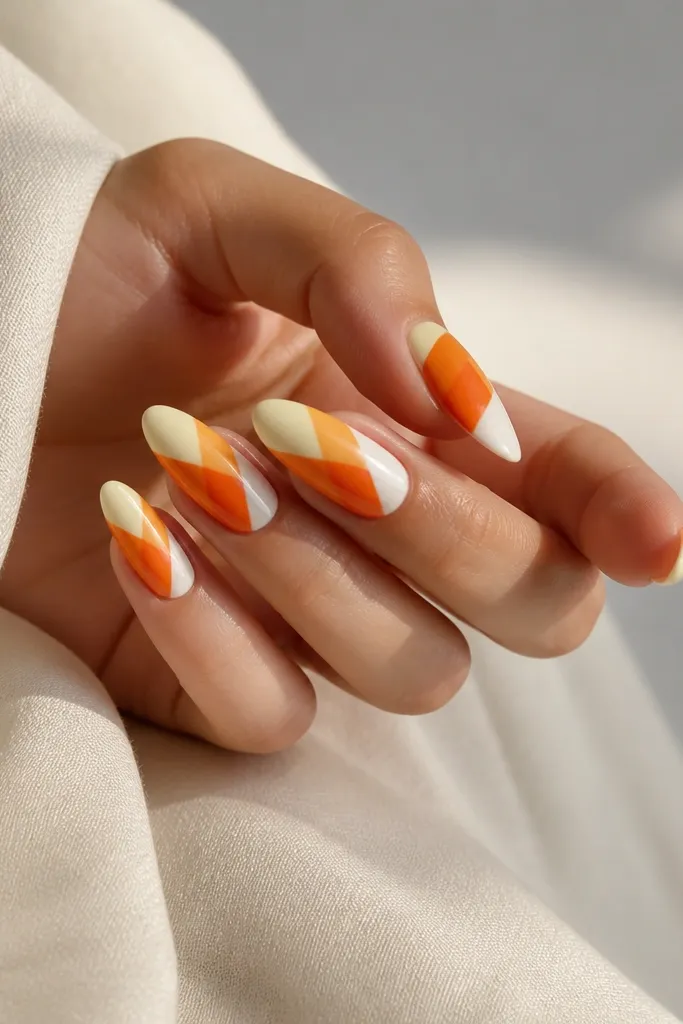
Candy corn is instant Halloween, but diagonal placement looks more modern than the classic straight triangle. The three colors are bright, so sharp edges matter. Use glossy top coat so the colors look candy-like instead of matte chalk. This one looks great in daylight and in flash photos.
Base coat with white at the tip area, then tape a diagonal guideline. Paint orange in the middle band and pale yellow on the remaining section. Remove tape while the polish is still slightly tacky so edges stay crisp. Top coat glossy.
Pro tipUse thin striping tape and burnish it with a silicone tool so paint doesn't seep.
Watch outDon't blend the diagonal edges - candy corn should look like clean color blocks.
10. Ghost Sticker Fade Over Milky Pink
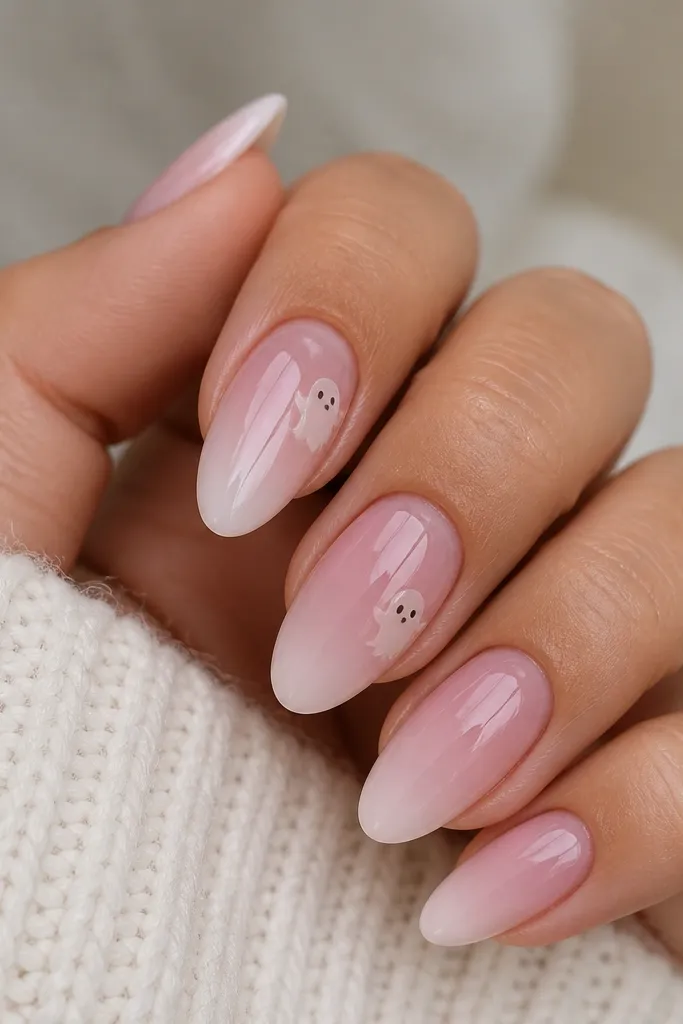
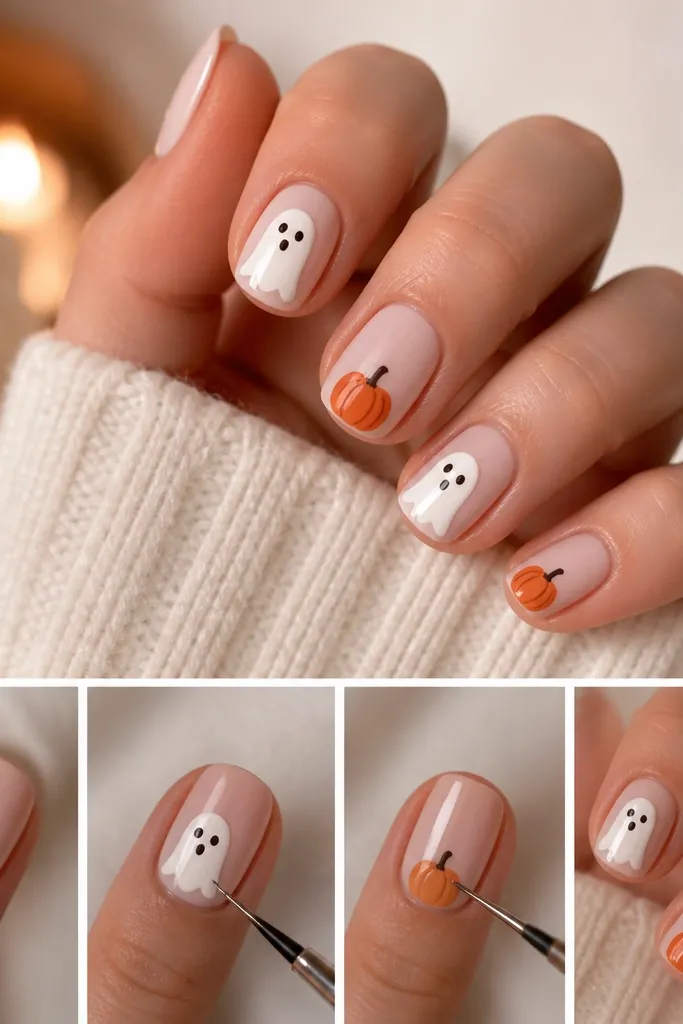
Ghost stickers are the fastest Halloween win, but the fade is what makes them look custom. Milky pink keeps your hands soft-looking, and the white fade at the tip ties the sticker into the rest of the manicure. Because the ghost is near the cuticle, it looks cute without covering your whole nail. Glossy top coat makes the sticker edges look smoother.
Paint milky pink in two coats. Add a white fade on the tips using a sponge and keep it light so it looks like a cloud. Place ghost stickers on two nails, press flat, and seal with two thin top coat layers around the sticker perimeter.
Pro tipSeal the sticker edges with a slightly thicker top coat bead, then drag it out with a flat brush.
Watch outAvoid skipping the second top coat layer - sticker edges lift if you rush.
11. Black French With Orange Web Lining
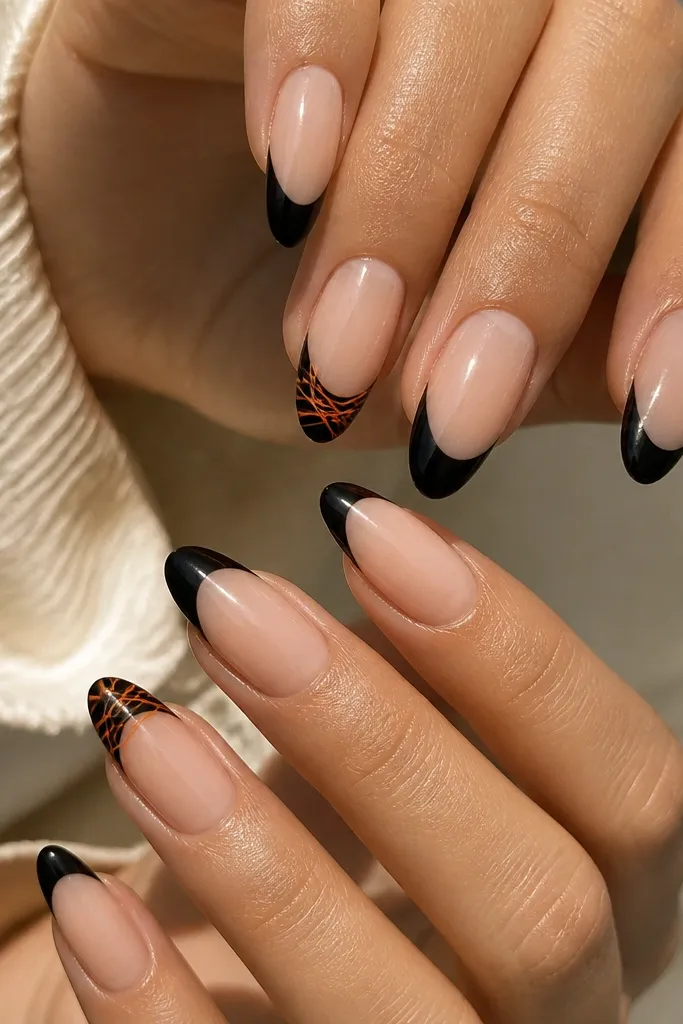
This is a clean Halloween manicure that still looks sharp in a professional setting. Black French tips frame the nail, and the orange web lining adds Halloween detail without turning the manicure chaotic. The web wraps the French line, so it looks like it was planned from the start. Glossy finish keeps the black crisp and the orange visible.
Paint a nude base, then create black French tips with a guide or freehand. On two nails, draw a small web pattern using orange striping gel right along the border between nude and black. Cure and top coat glossy.
Pro tipMake the web on the border only - if it goes too far down the nail, it loses the French structure.
Watch outAvoid uneven French curves - asymmetry makes the whole set look off.
12. Glitter Jack-O-Lantern Smile Line
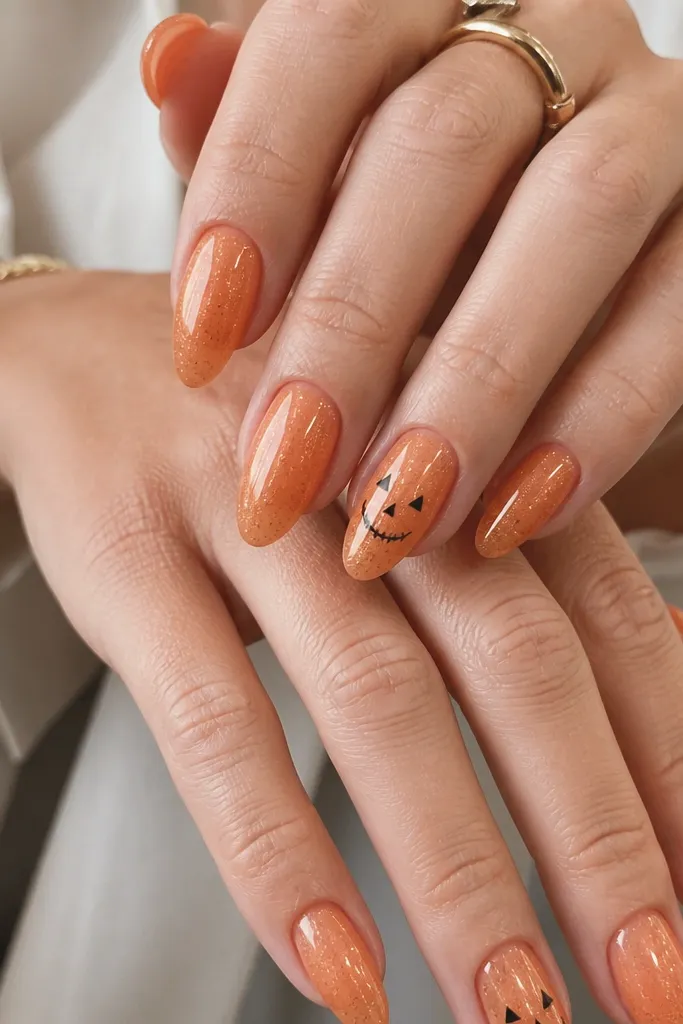
A jack-o-lantern face is cute, but the trick is to keep it minimal. A sheer orange glaze with fine glitter gives you glow without heavy chunks. The face details stay small and centered so they read clearly without covering the whole nail. Glossy top coat makes the glitter look like it's embedded.
Apply sheer orange gel and sprinkle fine orange glitter only on the top half of the nail if you want a subtle gradient. Draw a black smile line and two triangle eyes on the accent nails with a liner brush. Cure and seal with glossy top coat.
Pro tipKeep the smile line thin - thicker lines look like cartoon stickers instead of nail art.
Watch outAvoid chunky glitter - it catches on sleeves and feels rough fast.