1. Eucalyptus French with micro gold tips
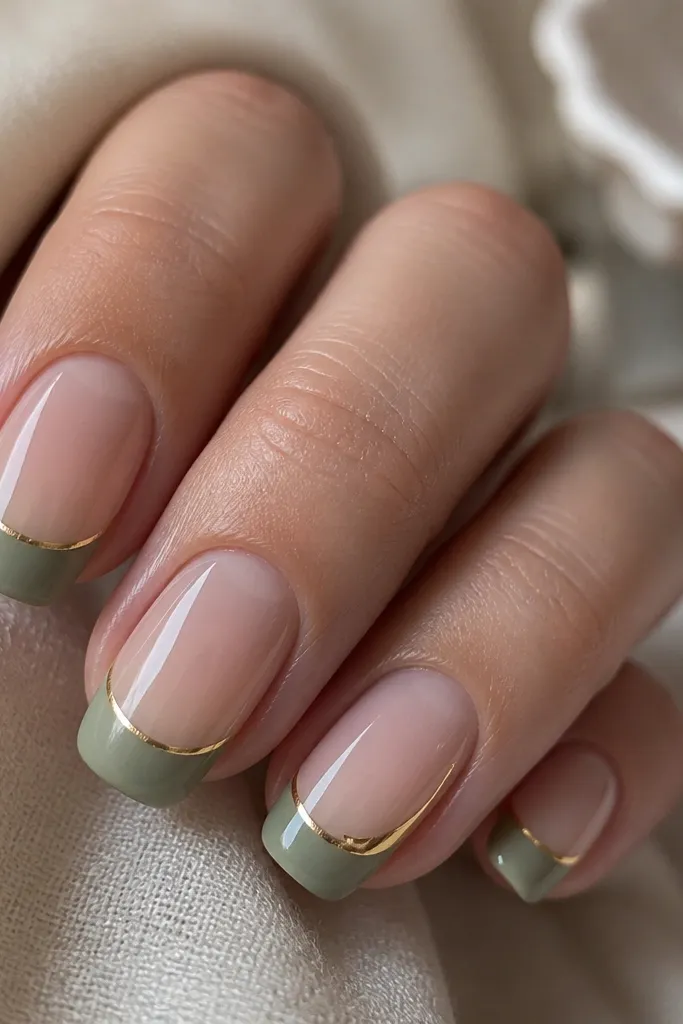
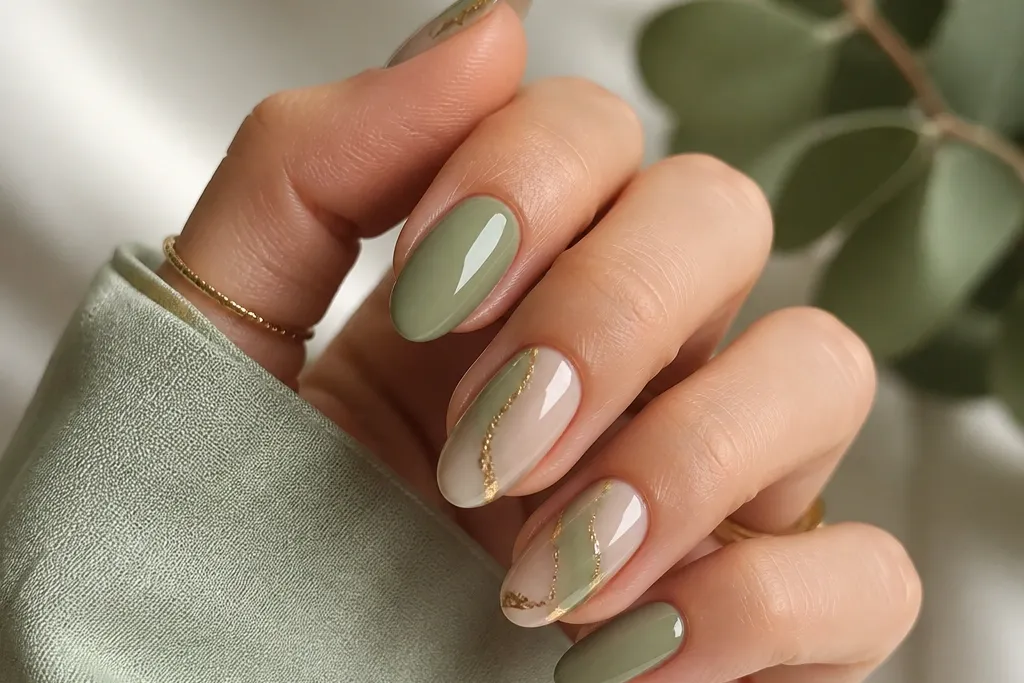
This one works because the French shape gives structure and the gold line is small enough to look like a ring on the nail. The sage stays muted, so the gold reads like metal, not decoration. I like a micro line because it frames the tip without turning the whole nail into glitter. It also looks clean when your nails grow out since the base is solid and the tip line is neat.
Paint the nail with a milky nude base, then create a French tip using a fine brush or French guide. Keep the sage tip about 1.5-2 mm wide on most nails. Add a 0.5 mm gold strip right at the boundary, then seal with a glossy top coat. For longer nails, extend the French slightly higher on the sides; for short nails, keep it flatter so it doesn't thicken.
Pro tipUse striping tape as a guide for the gold line - press it down gently and remove while the gold is still slightly tacky.
Watch outDon't make the gold line wide; thick gold over sage can look like cheap foil sticker.
2. Sage marble with cracked gold veins
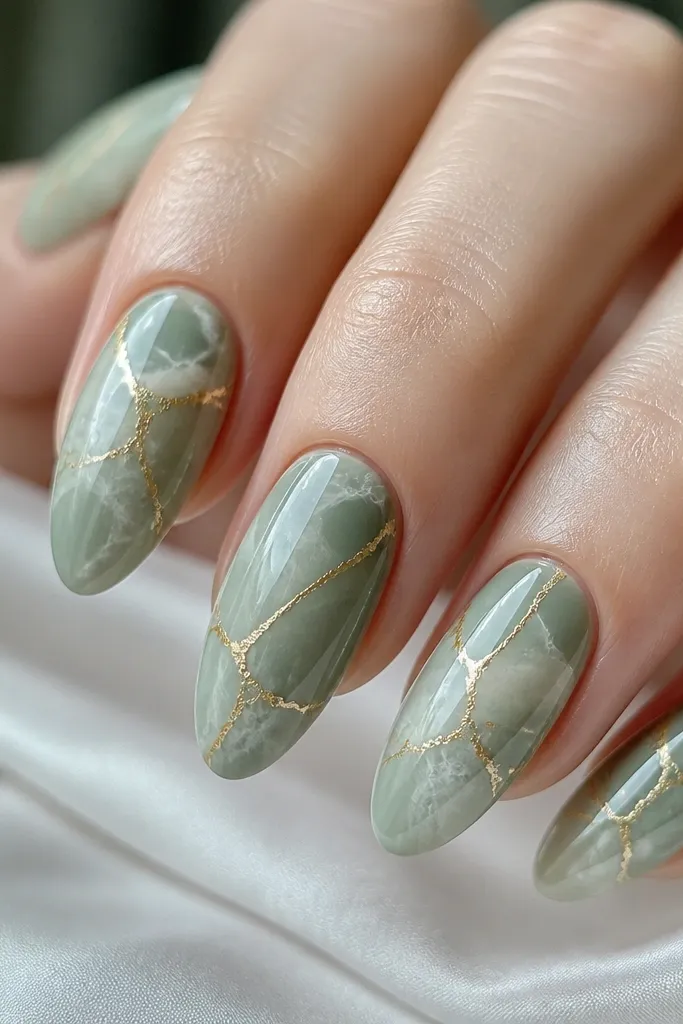
Marble looks expensive when the contrast is controlled. The sage base is calm, then the white-gray movement keeps it from looking flat. Gold veins add that "natural mineral" vibe, especially when they're cracked instead of perfectly straight. This design photographs well because the marble has depth and the gold catches light in small flashes.
Start with a sage creme base. Add thin wisps of diluted white or light gray using a sponge or a thin brush - don't overblend. Then use a gold gel liner and draw irregular vein paths, leaving breaks so it looks cracked. Cure each gold line in short bursts so it stays crisp.
Pro tipIf you mess up a vein, wipe the liner brush with alcohol and redraw only the broken section - marble forgives mistakes.
Watch outDon't use chunky gold glitter for veins; it reads like craft glitter instead of metal.
3. Half-moon cuticle sage with gold crescent
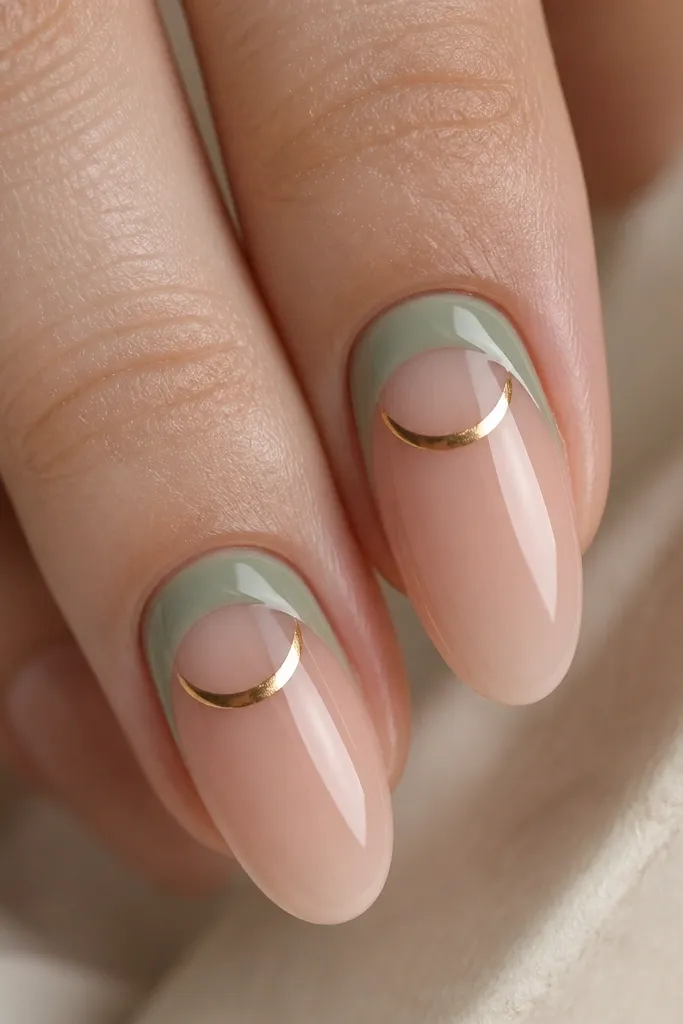
Half-moons make your nail bed look tidy and longer, and the gold crescent acts like jewelry at the root. This is a great "grown-up" version of holiday nails. The negative space keeps it modern and stops the sage from overpowering your hand. It also hides small imperfections because the gold sits on the line you want to control.
Apply a sheer nude base. Use a small makeup sponge to place sage only in the half-moon area - keep it tight to the cuticle. Cure, then add a thin gold crescent either with a liner brush or a pre-made half-moon charm. Finish with a smooth top coat, especially over the crescent so it doesn't snag.
Pro tipWarm up your liner brush by wiping it once on a lint-free wipe - it glides better and gives a cleaner gold curve.
Watch outDon't paint sage too far down the nail; if it turns into a full base, the design loses its length effect.
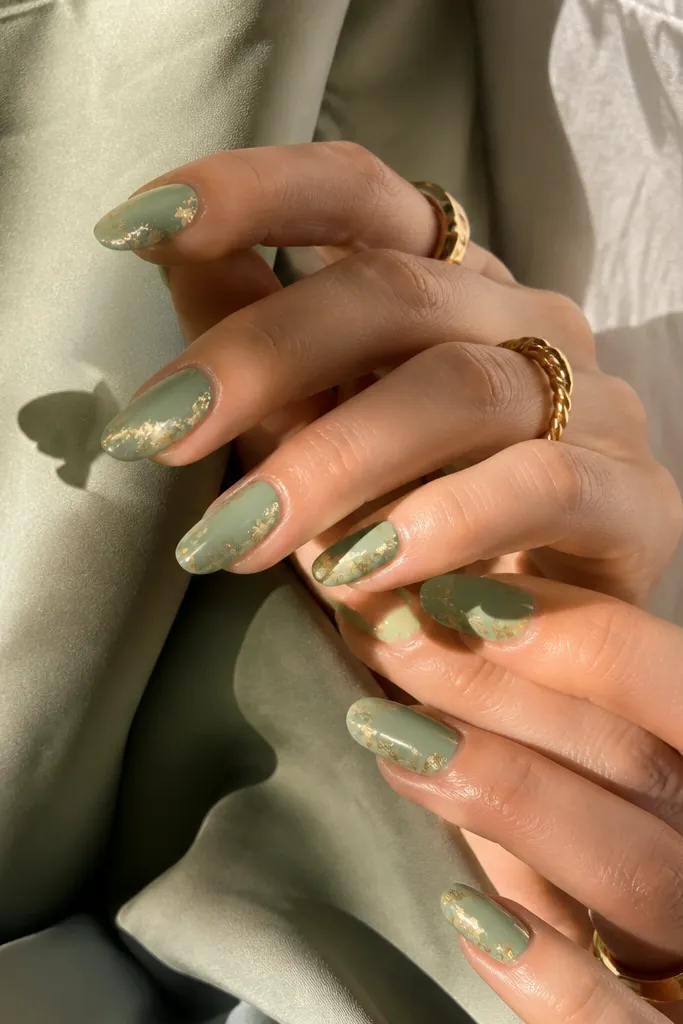
4. Sage base with gold foil corner pop
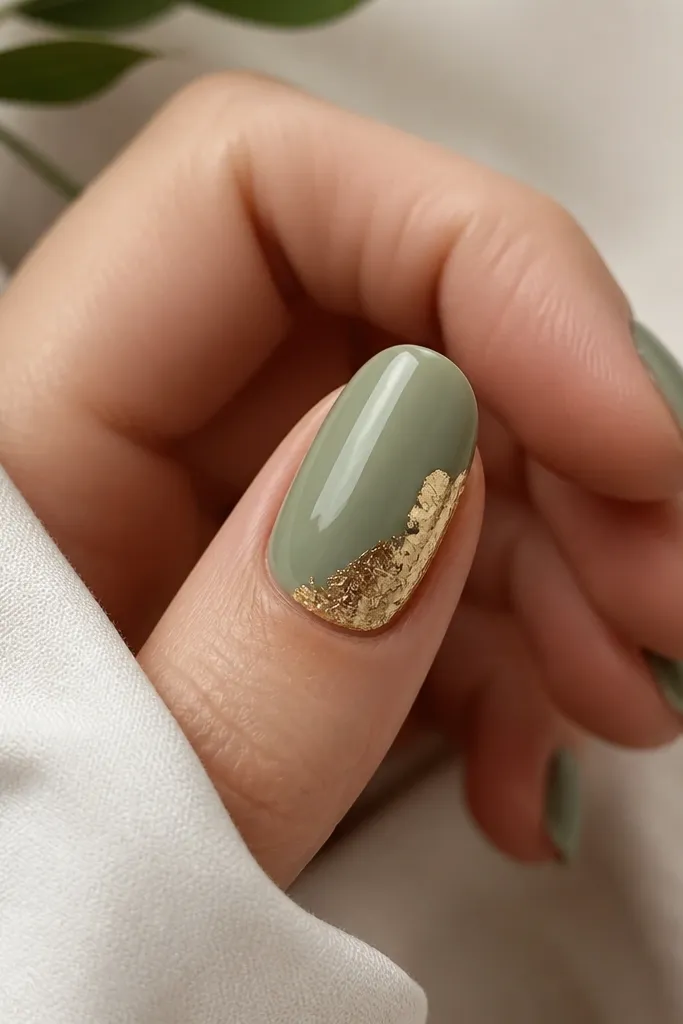
Gold foil corner placement is the fastest way to get that "designer manicure" look. You get texture and shine without clutter, because only one small area is reflective. Sage is the perfect background because it's muted and doesn't fight with the foil. This style looks good on short nails since the foil spot is compact.
Paint two thin coats of sage creme. Let it cure fully. Apply a tacky layer (or tacky gel) at the corner near the tip - about 3-4 mm wide. Press gold foil onto that tack, then seal carefully with a gel top coat. Avoid dragging top coat over the foil while it's still soft.
Pro tipPress foil with a silicone tool or foam applicator, not your fingertip - you'll keep the edges cleaner.
Watch outDon't use too much foil; a full-coverage foil coat tends to look chunky and uneven.
5. Clear nude with sage diagonal stripe and gold edge
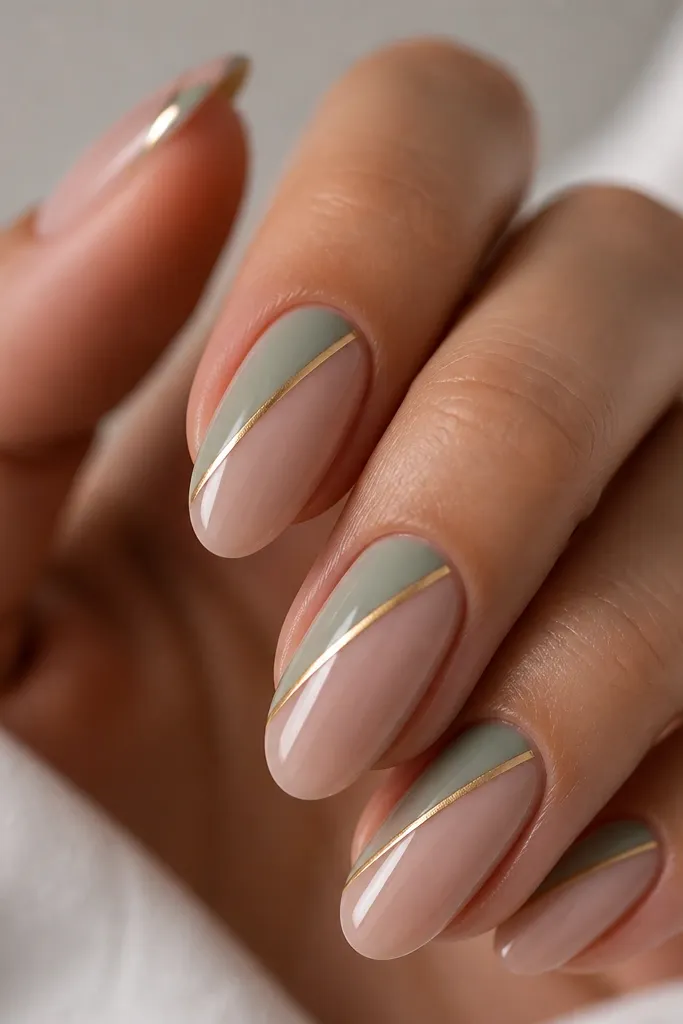
This is a clean, modern look that makes your nails look longer because the stripe is diagonal and the center stays sheer. The gold edge adds definition, like a frame. I like it because it works for both casual and office settings - it's graphic but still soft with sage. It also hides minor nail shape issues since the diagonal line draws attention.
Start with a clear or sheer nude base and cure. Use striping tape to mask a diagonal path, then fill with sage gel. Remove tape carefully after curing or right after for gel that stays tacky. Add a thin gold line along one side of the stripe using a liner brush. Seal with top coat for a smooth surface.
Pro tipMake the diagonal stripe slightly thicker at the center and thinner near the tip for a more natural look.
Watch outDon't flood under the tape; excess product creates bleed and ruins the sharp line.
6. Sage ombre fade into sheer with gold shimmer line
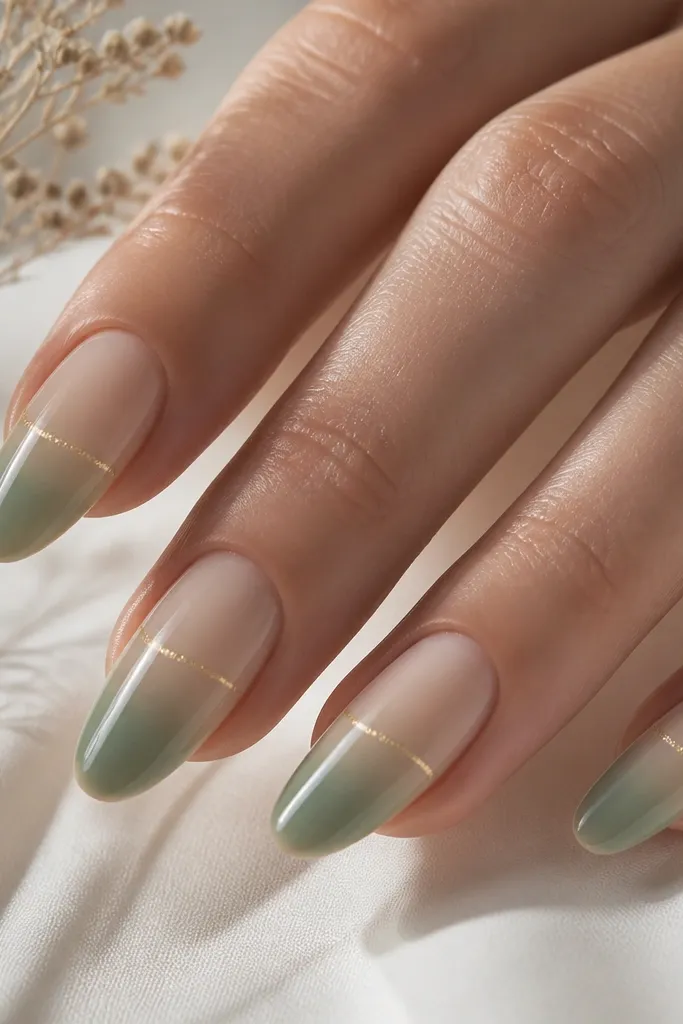
Ombre makes nails look "soft focus," and the sage-to-sheer fade keeps it flattering. The gold shimmer line adds a focal point without taking over. This design works when you want something pretty but not busy. It also looks great on medium lengths because the gradient shows clearly.
Paint a sheer nude base. Sponge sage gel onto the lower third, then blend upward with a clean sponge. Build the gradient in two to three thin layers so it doesn't streak. Add a gold shimmer line across the middle using a liner brush or a striping tape + gel method. Finish with high-gloss top coat.
Pro tipUse a small makeup sponge and press, don't swipe - swiping creates muddy edges.
Watch outDon't skip sealing; ombre can chip faster if the top coat is thin.
7. Sage dots on nude with gold micro studs
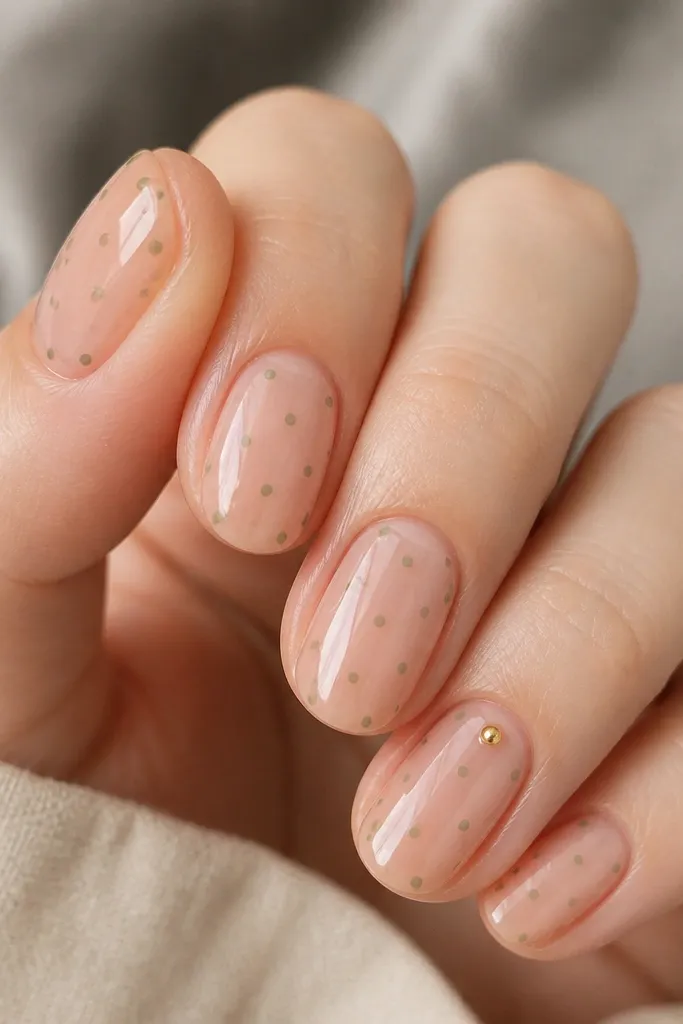
Dots give you a playful vibe while sage keeps it calm. The gold micro stud adds a three-dimensional sparkle without needing lots of foil. This is my go-to when I want nail art that still grows out nicely. The design also works with short nails because the dots are small.
Use nude gel as your base. Place sage dots with a dotting tool - aim for 3-5 dots per nail, varying size slightly. Add one tiny gold stud (or a small rhinestone) near the cuticle curve on two accent nails. Seal around the stud carefully so the edges don't catch.
Pro tipIf your studs sit too low, add a thin layer of clear gel under them so they look lifted like jewelry.
Watch outDon't use oversized rhinestones; bigger stones make the gold feel costume-y.
8. Sage chrome tips with gold stripe border
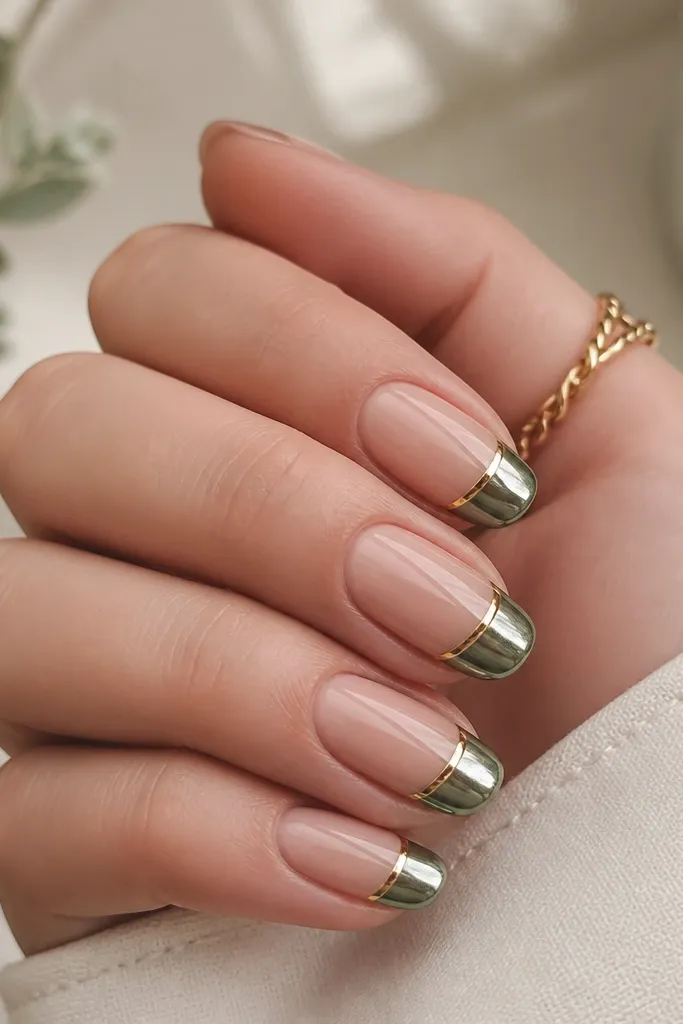
Chrome tips look sharp, and sage chrome is softer than classic silver chrome. The gold stripe border makes it feel intentional, like a frame around the metallic area. This combination gives you shine from both finishes - chrome for surface reflect, gold stripe for line detail. It's a great party manicure that still feels wearable.
Start with a nude base. Create a French tip shape for the chrome area, then apply sage chrome powder or transfer foil on the tip only. Add a thin gold stripe just above the chrome using gel liner. Seal with a smooth top coat designed for chrome so you don't dull it.
Pro tipDo chrome on the last step before top coat - chrome powders can smear if you handle the nail too much.
Watch outDon't use regular top coat over chrome without checking - some top coats kill the mirror effect.
9. Sage swirl with gold leaf trail
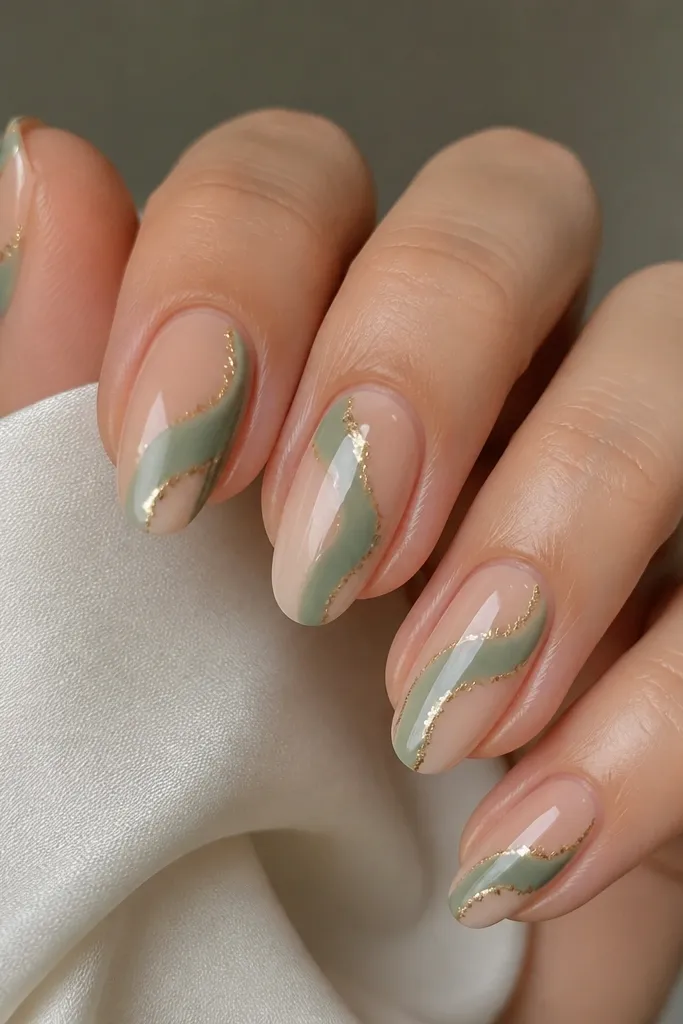
Swirls look artistic, but they can go messy fast. Keeping the sage swirl thick enough and leaving a lot of nude space keeps it clean. Gold leaf trail adds motion along the curve, like a highlight following the design. This looks best when your swirl is one continuous path instead of multiple disconnected lines.
Paint nude base. Use a liner brush to draw a single swirl curve in sage gel - start near mid-nail and loop toward the tip. Cure. Press small gold foil pieces along part of the swirl where you want the highlight. Seal with top coat, but avoid overworking the foil area so it stays textured.
Pro tipPractice the swirl on a nail tip first - the curve is easier once you find the natural arc.
Watch outDon't add gold leaf to every part of the swirl; too many foil pieces makes it look busy.
10. Sage negative space rectangle with gold corners
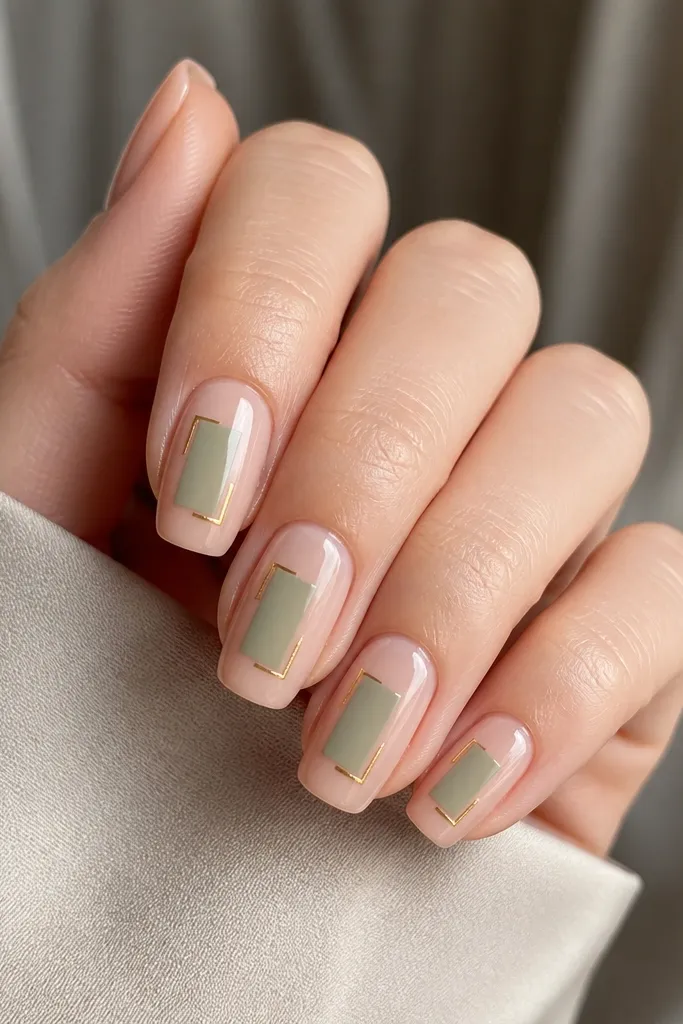
Negative space makes nails look modern and neat, and rectangles read graphic instead of girly. Sage provides the softness so the design doesn't look harsh. Gold corners give you that architectural feel - like a frame. This design is also forgiving because your edges are defined by the rectangle lines.
Apply nude base. Use striping tape to mask a rectangle about 4-5 mm wide and 6-8 mm tall centered on the nail. Fill with sage gel and cure. Remove tape to reveal clean negative space edges. Add gold corner accents using foil or a tiny gold gel dot at each corner. Seal with top coat.
Pro tipPress the tape firmly with a cuticle pusher before applying gel so you don't get seepage.
Watch outDon't make the rectangle too big; oversized blocks can make nails look shorter.
11. Sage lace pattern with gold dot ladder
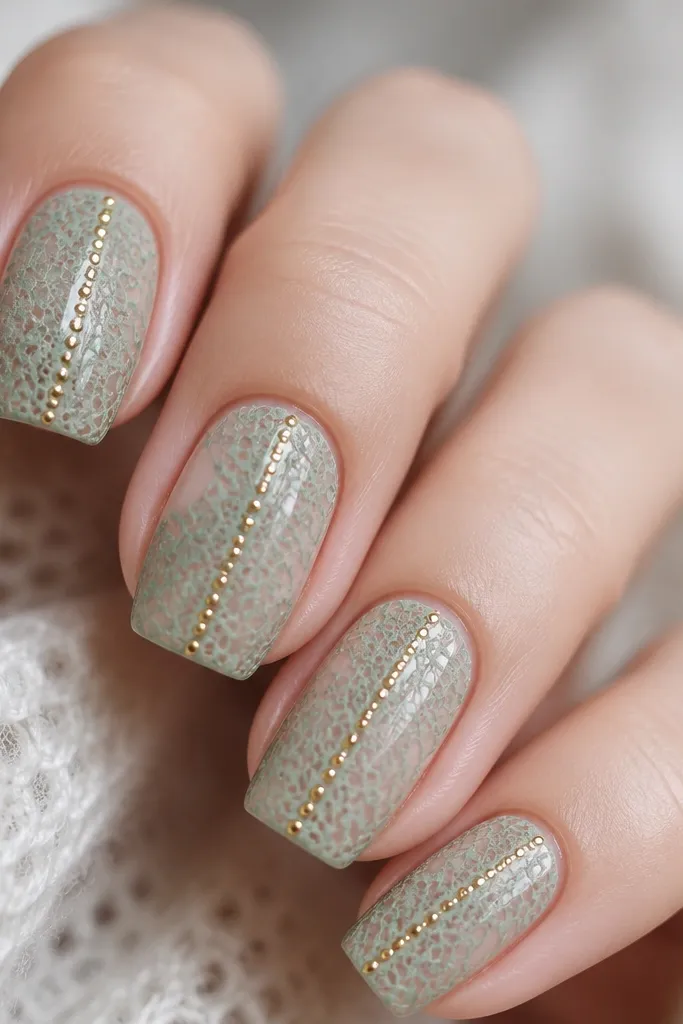
Lace patterns are delicate, and sage makes them feel soft instead of spooky. The gold dot ladder adds structure so the lace doesn't blend into the base. This looks great on almond nails because the pattern curves with the shape. It also works for bridal events if you keep the gold minimal.
Use a sheer nude base. Add a sage lace effect using a stamping plate or a lace-pattern nail stencil - I use stamping for consistency. Then place tiny gold dots with a dotting tool along one edge - top to near the tip. Cure and top coat smoothly over the lace so it stays glossy.
Pro tipStamp with a scraper that drags once, not back and forth - it keeps lace lines crisp.
Watch outDon't thicken the lace lines with extra gel; it turns lace into blobs.
12. Sage glitter fade with gold foil halo
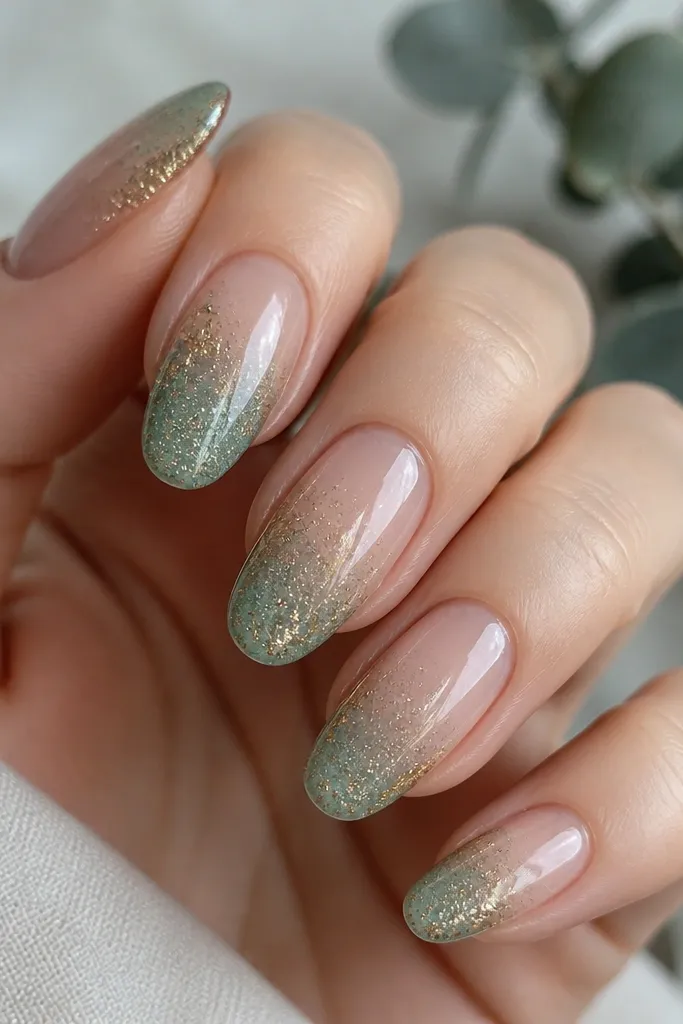
Glitter fade gives you sparkle without covering the whole nail. The gold foil halo frames the glitter like a halo ring, which makes it look intentional and photo-ready. Sage glitter is the key - it keeps the sparkle green-gray instead of turning icy. This is a "night out" version of the classic combo.
Use nude base. Sponge or brush sage glitter gel at the tip, then fade downward with a clean sponge. Place gold foil on the outer edges near the tip - about a half-moon width. Seal well so glitter doesn't snag and foil doesn't lift.
Pro tipLet the glitter layers cure fully between coats so the fade stays smooth.
Watch outDon't put foil directly under loose glitter; it can lift when you top coat.