1. Emerald Center Stripe with Micro Gold Foil
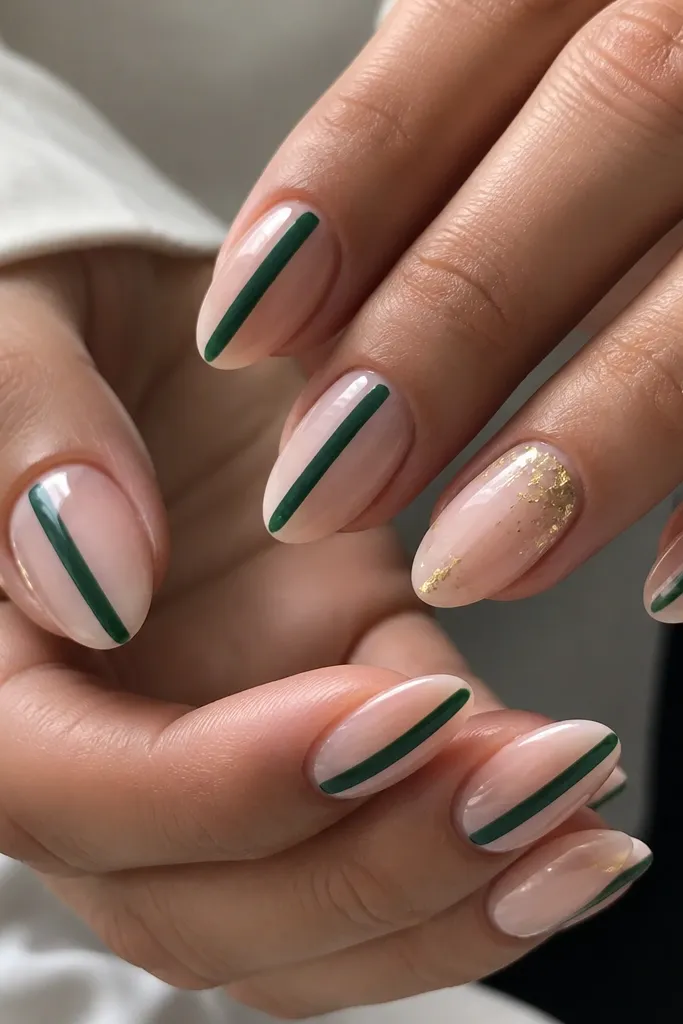
This look works because the emerald stripe gives you a clean vertical line that makes fingers look longer. The gold is micro-sized foil - it flashes without covering the whole nail, so the green stays rich instead of turning dark. I like nude base + one bold stripe because it looks intentional even on short growth.
Build the nail with a nude base (sheer pink or clear nude acrylic). Use a thin striping brush to lay the emerald stripe, then cap lightly with clear so the stripe doesn't sink. Place gold foil only at the cuticle on one or two nails, using a small dot of gel or foil adhesive so it doesn't lift.
Pro tipPress the foil with a silicone tool for 5-10 seconds per nail. It flattens the edges so you don't feel bumps when you run your finger.
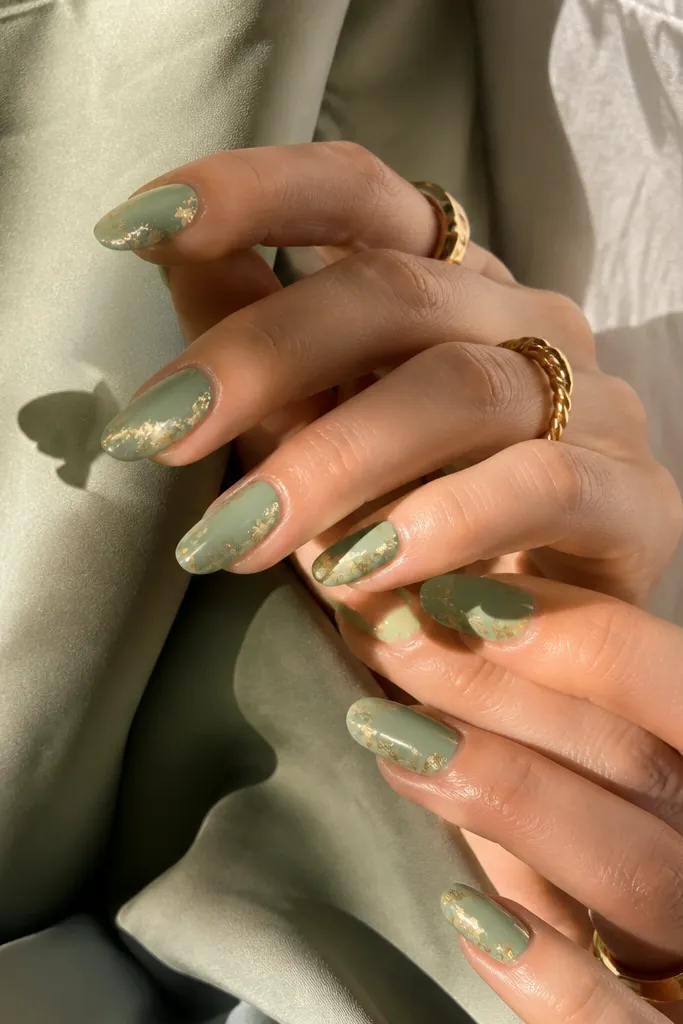
2. Gold Foil Half-Moons on Sheer Olive
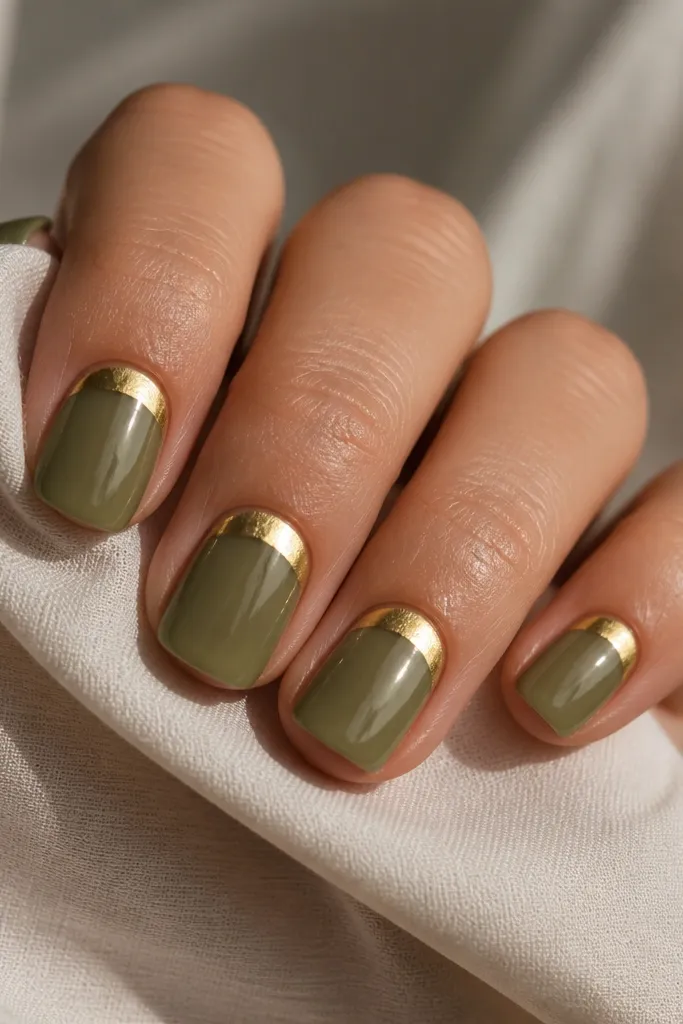
Half-moons look expensive because they frame the cuticle - your nail bed looks fuller. Olive reads softer than emerald, so the gold doesn't overpower. The sheer base keeps the set light, which is why this one looks good even when your nails are only 2-3 mm past the fingertip.
Start with a sheer olive acrylic or sheer olive gel under acrylic. Leave a clean cuticle gap line so the half-moon shape is crisp. Add gold foil in a crescent, then seal with a glossy topcoat so the foil edges feel smooth.
Pro tipUse a cuticle pusher to clean the crescent line before curing or capping. A sharp boundary makes the gold look like it was placed by a pro.
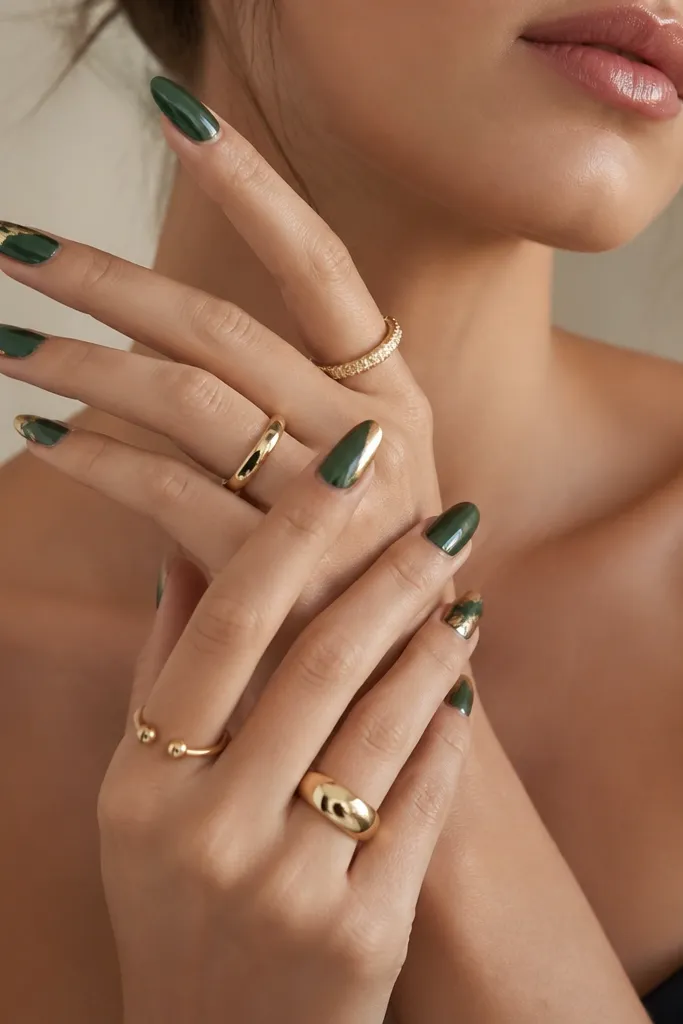
3. Emerald French Tips with Sharp Gold Outline
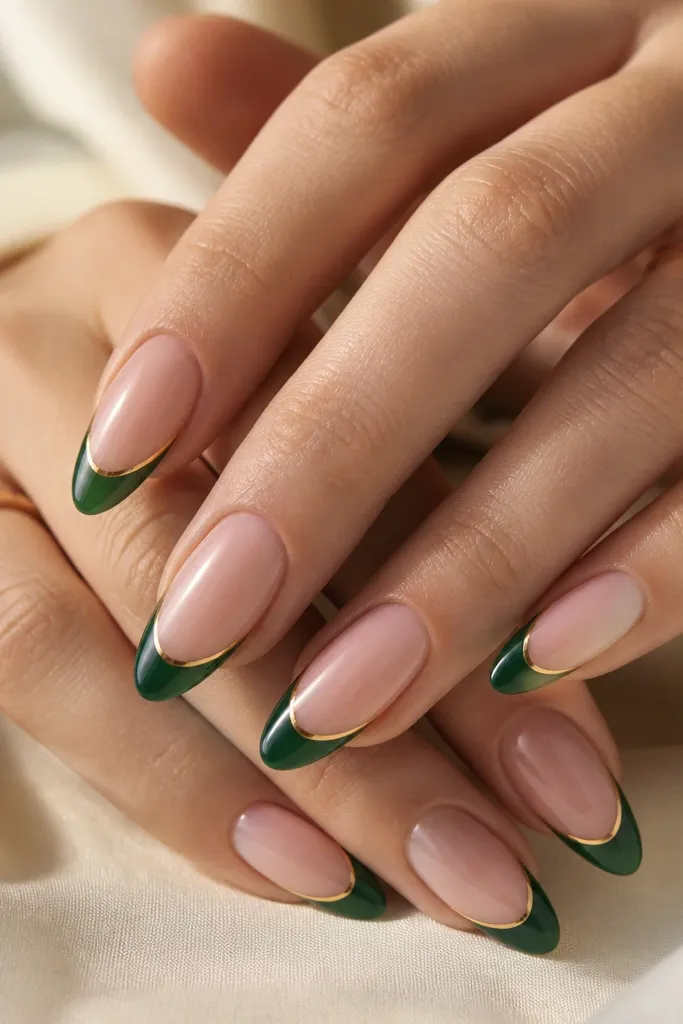
This is the "holiday but wearable" combo. The emerald tip does the heavy lifting, and the gold outline keeps it from looking flat or blocky. I've seen this turn out best when the gold line is slightly irregular like real foil edges, not perfectly printed.
Paint the French tips with a fine brush and a steady smile line. Add a thin gold striping tape line right along the tip edge, then remove excess tape after placement if you're using tape. Cap with clear so the outline stays smooth and doesn't catch on fabric.
Pro tipKeep the emerald tip about 2.5-3 mm wide at the widest point. Too thick makes the gold look thin and cheap.
4. Olive Marble with Leafy Gold Veins
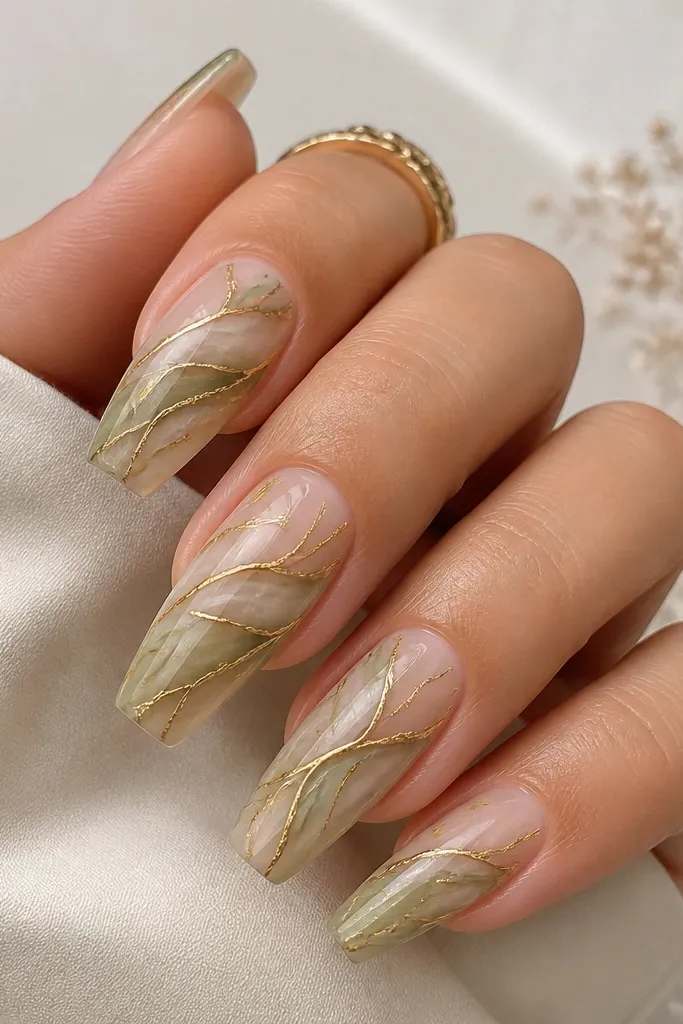
Marble gives you movement and hides tiny acrylic application lines. Olive marble is forgiving, and gold veins make it feel botanical without going full flower art. The gold should look like "lines," not blobs - that keeps the marble airy.
Use two olive shades: one darker at the center and one lighter for the swirls. Drag them with a toothpick through wet polish or soft acrylic color. Add gold lines with striping gel or a thin gold paint pen, then seal with clear for a glassy finish.
Pro tipDo one nail at a time and stop when you like the swirl. Overworking marble creates muddy gray-green.
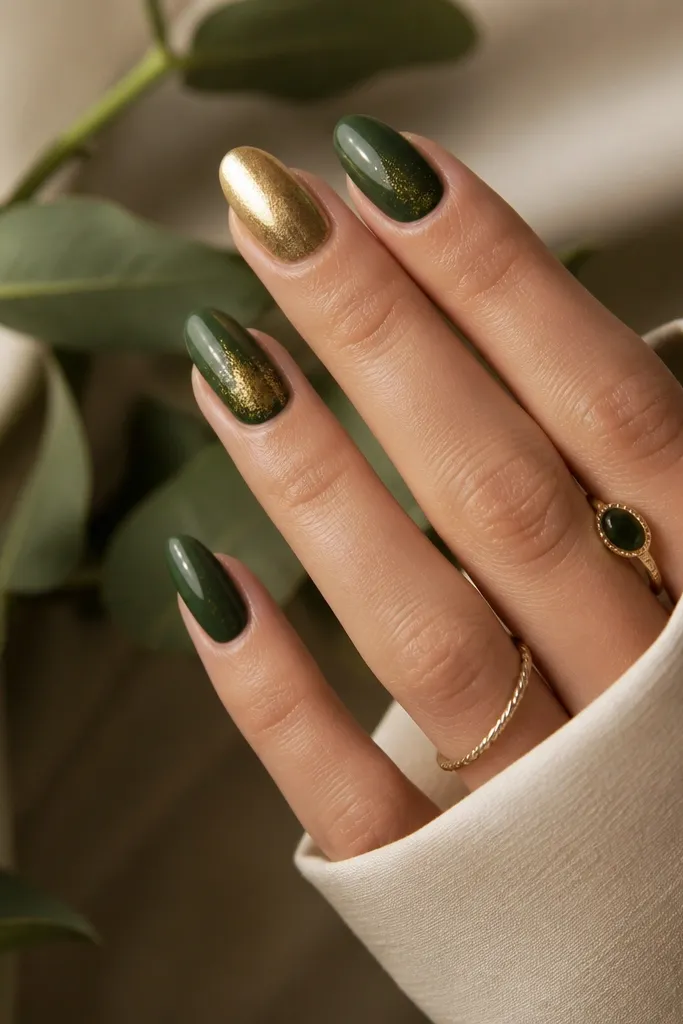
5. Green Chrome Gradient with Rolled Gold Specks
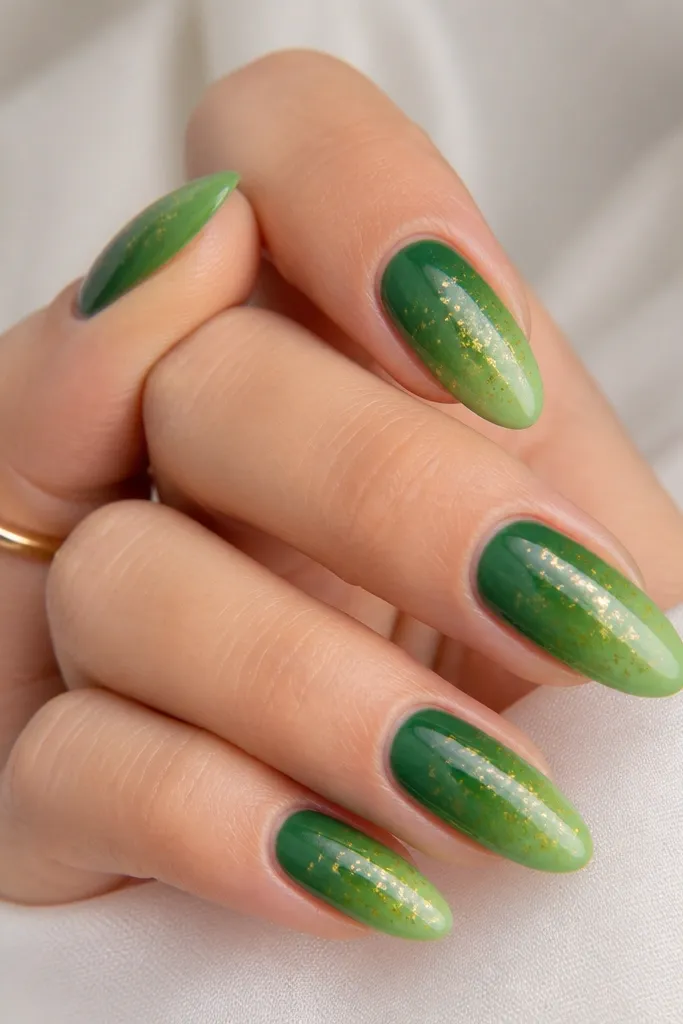
Chrome gradient makes green look expensive because it reflects light in a way regular polish can't. Gold specks add sparkle without blocking the reflective finish. This one looks best on longer almond because the gradient has room to show.
Start with an emerald gel base, then blend into a lighter green at the tip using a sponge. Apply chrome powder over the tacky layer, then place gold specks with foil adhesive. Seal with a high-gloss topcoat that doesn't dull chrome.
Pro tipIf your chrome looks patchy, your base coat is usually too thick. Wipe the surface with a lint-free pad before chrome to smooth it out.
6. Shimmer Green Ombré with Gold Stipple Cuticle
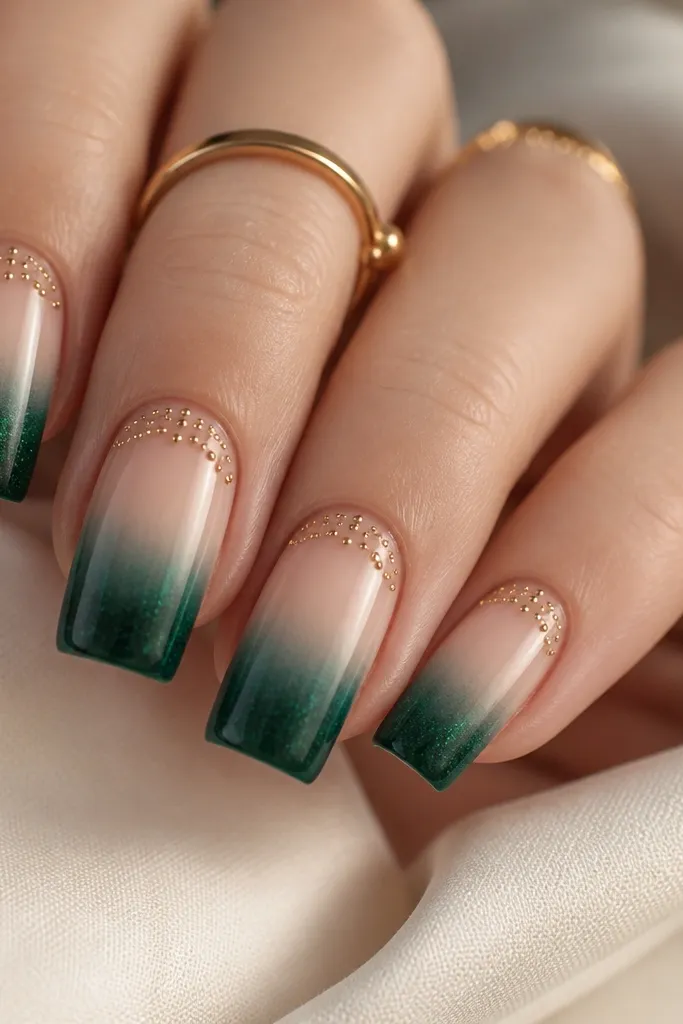
Ombré is easy because it hides the exact line where your acrylic meets the natural nail. The emerald shimmer at the tips gives you that "glam" effect, and the gold stipple keeps it from looking like plain green. I like stipple because it looks intentional even if your dot spacing is slightly uneven.
Use a sponge to blend shimmer gel or shimmer acrylic powder from mid-nail to tip. Keep the cuticle area sheer so the fade is clean. For the gold dots, dab gold pigment or gold acrylic dust mixed with a tiny amount of clear gel right at the cuticle band.
Pro tipUse a dotting tool with a tiny amount of product - too much makes the dots turn into streaks.
7. Nude Base with Emerald Sidewall and Gold Corner Accent
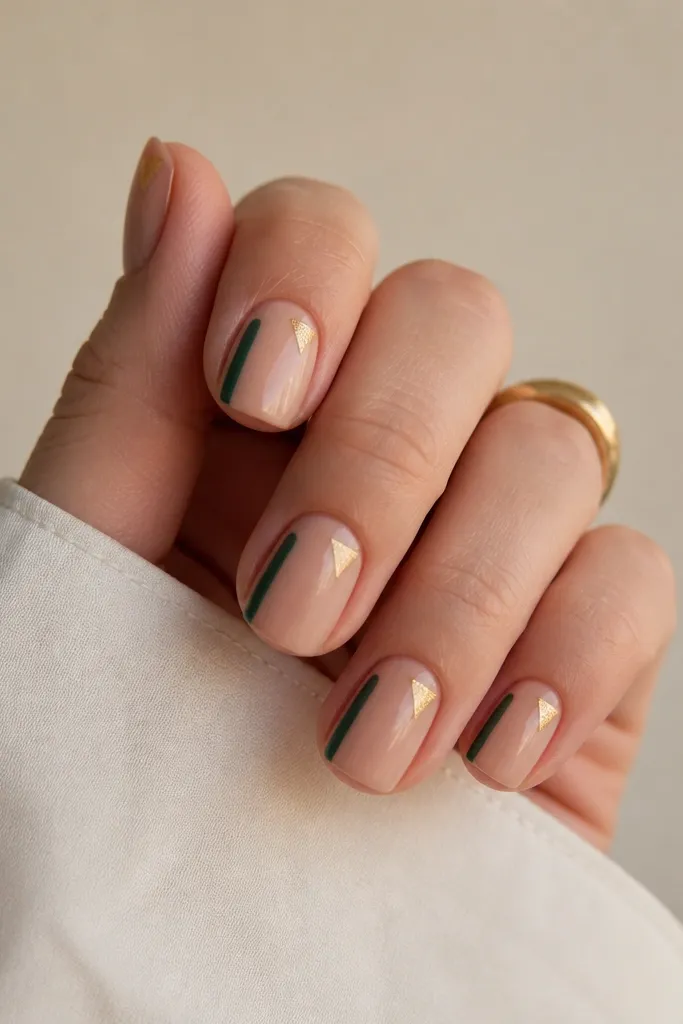
Sidewall color makes your nails look longer because it keeps the center clear and bright. The gold corner gives you a geometry hit without covering the whole nail. This is also one of the most forgiving designs when your nail shape isn't perfectly symmetrical yet.
Paint the nude base first, then place a thin emerald stripe along one sidewall from just below the cuticle to about 1 mm before the tip. Add a tiny gold foil triangle at the top corner near the tip, anchored with adhesive. Cap so the triangle edges are smooth.
Pro tipMeasure with your brush tip: keep the stripe width about the thickness of the brush hair, not a wide panel.
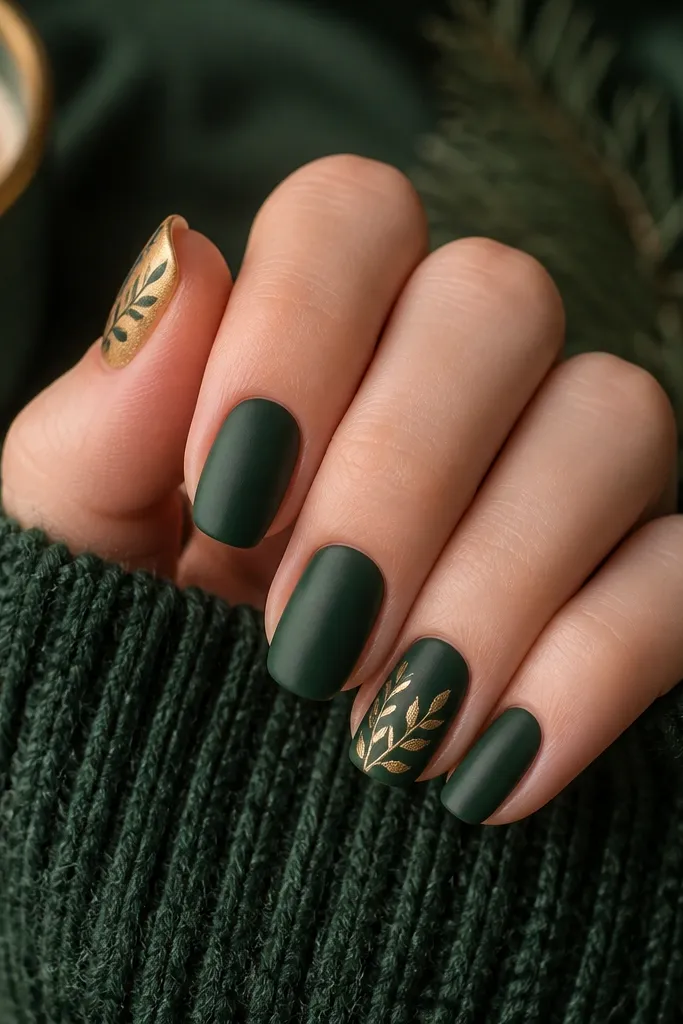
8. Green Velvet Effect with Gold Chrome Ring
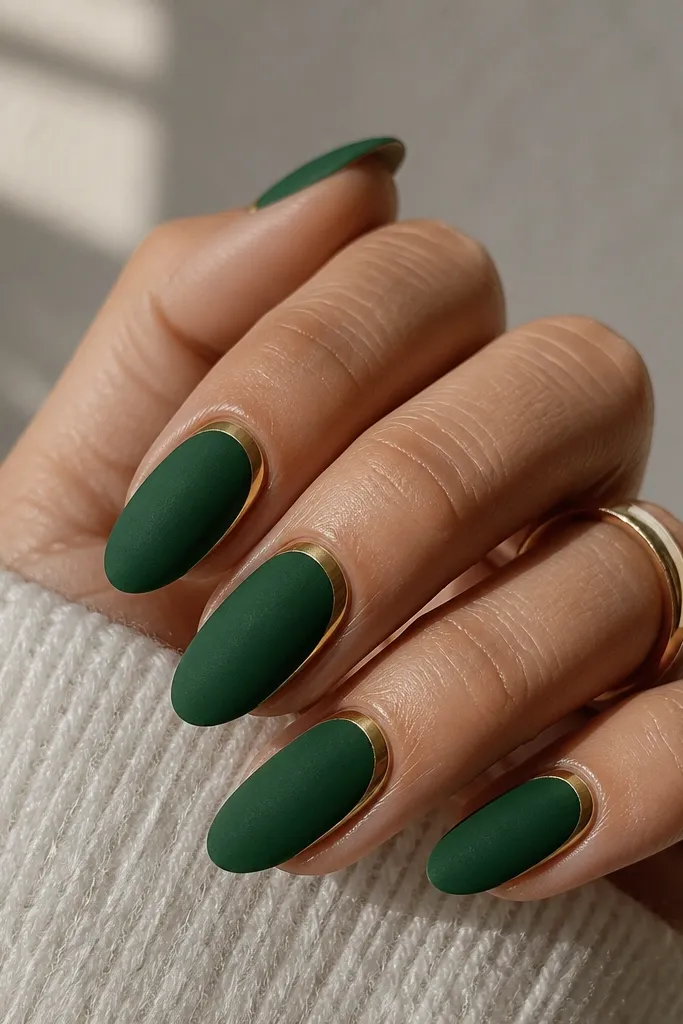
Velvet effect hides minor surface texture, and it makes emerald look deeper and more expensive. The gold chrome ring catches light in a clean band, like jewelry. This combo reads grown-up and doesn't scream "kid glitter," even with heavy color.
Use a matte velvet powder over a green gel base (or acrylic powder effect, depending on your setup). Apply gold chrome only on a thin band around the cuticle, then seal with a topcoat that won't kill the velvet texture. Keep the gold ring narrow - about 1 mm - so it looks like a ring, not a halo.
Pro tipAvoid getting velvet powder on the gold area. Once chrome gets dusty, it loses the mirror look.
9. Emerald Glitter Topcoat with Gold Foil Cuticle Dot
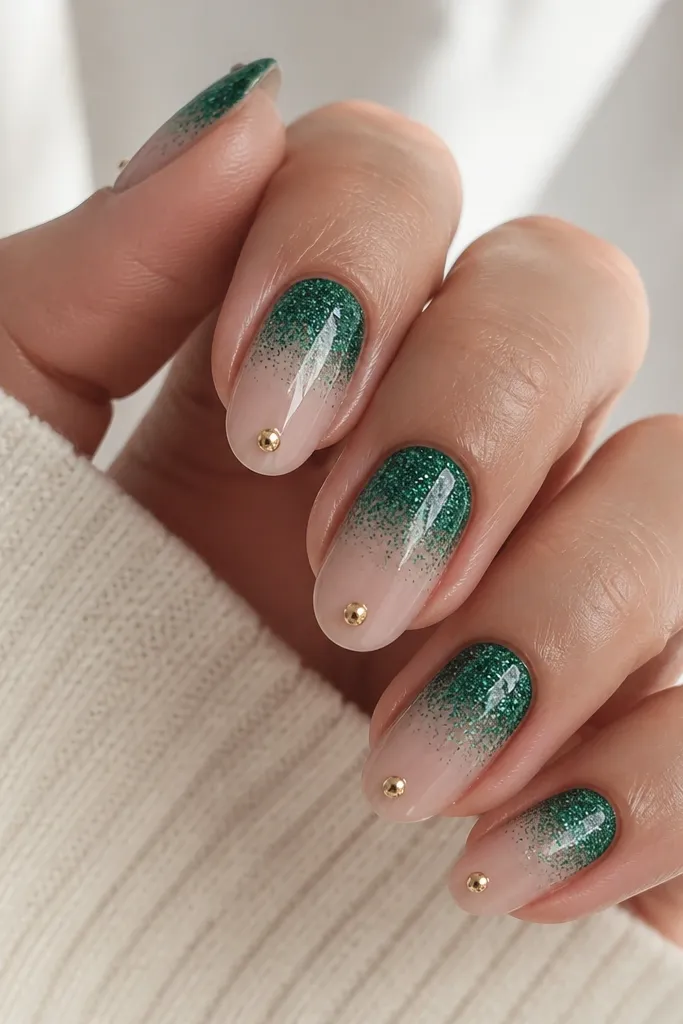
This is the easiest way to get sparkle without detailed nail art. Emerald micro-glitter gives you a smooth, even shimmer, and the single gold dot makes it look styled. I like this on oval nails because glitter and shape stay in balance.
Apply sheer nude base, then build a micro-glitter layer from mid-nail to tip. Place one gold foil dot at the cuticle center using a tiny adhesive bead. Cap with clear, then use a glossy topcoat so the glitter doesn't look gritty.
Pro tipIf your glitter layer looks patchy, add a second thin layer instead of one thick coat.
10. Olive Linework with Gold Micro-Studs
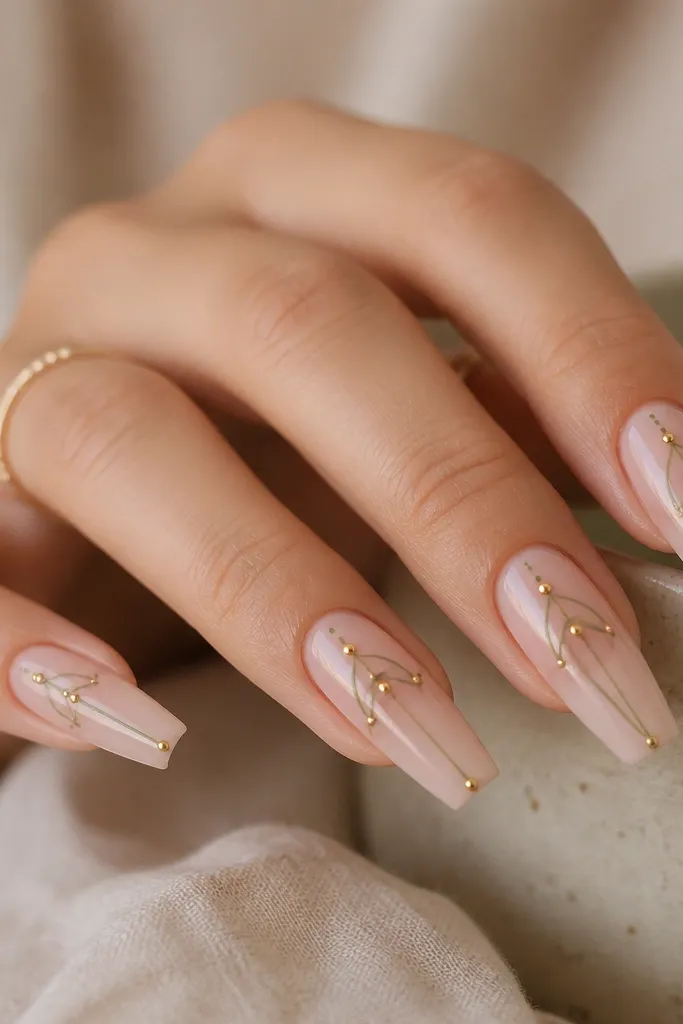
Linework keeps the design crisp and modern, and olive gives it a softer, lived-in look. Gold micro-studs add dimension without covering the nail. This one looks great for everyday because the pattern is light, not heavy.
Draw thin olive lines with a striping brush and gel paint. Add micro-studs at line ends only, then cure and cap. Keep the studs small, like rhinestone sizes around 1.3-1.6 mm, so they don't snag.
Pro tipPress studs with a flat tool right after placement so the edges sit flush.
11. Deep Emerald Aura with Gold Leafy Confetti
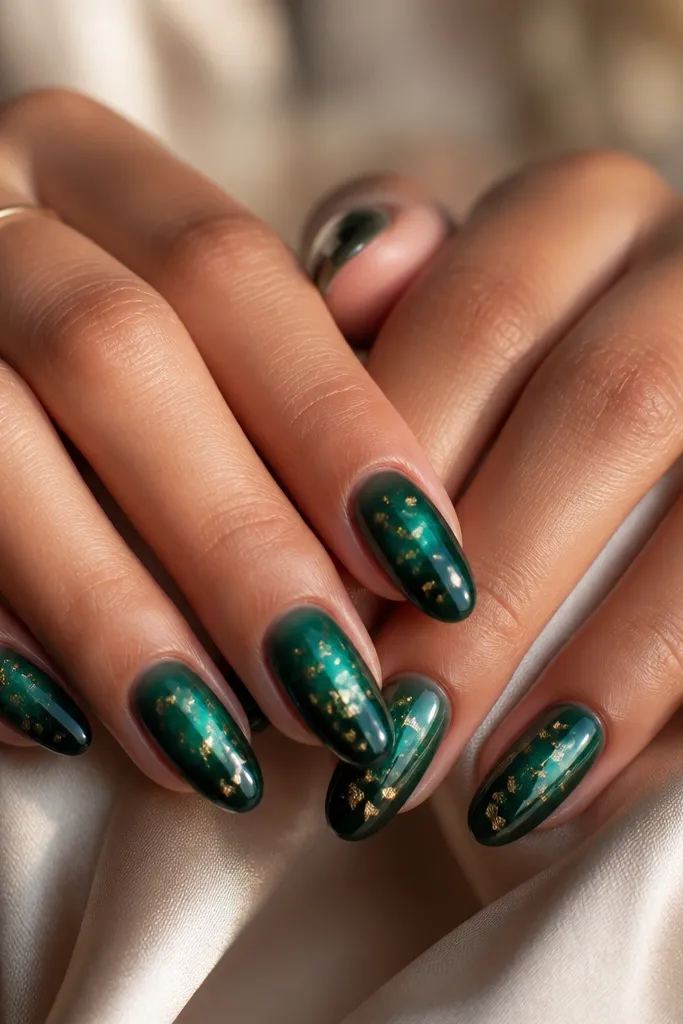
Aura nails look like color is coming from the center of your nail, which makes green feel dimensional. The gold confetti adds movement and keeps the aura from looking plain. I like this when you want something different from straight French or stripes.
Airbrush or sponge a deep emerald center onto a nude base, then fade outward with a lighter green. Add gold leaf confetti in small pieces, then seal with clear. Use a glossy topcoat so the aura edge stays smooth.
Pro tipKeep the aura fade soft - a harsh edge makes it look like a sticker.