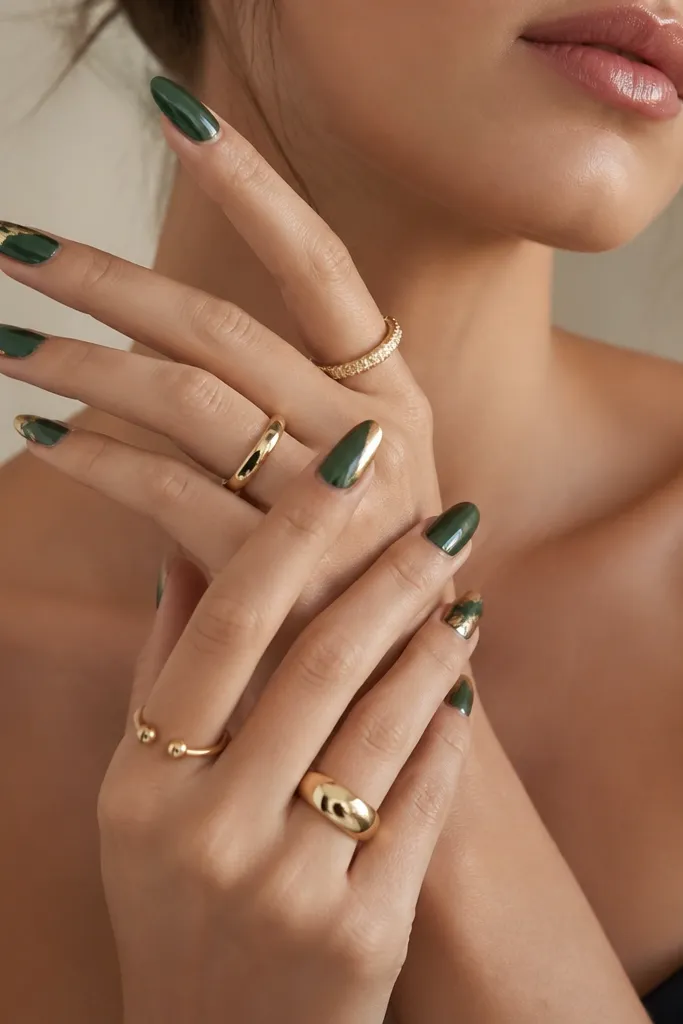
1. Emerald Chrome Tip with Thin Gold Edge
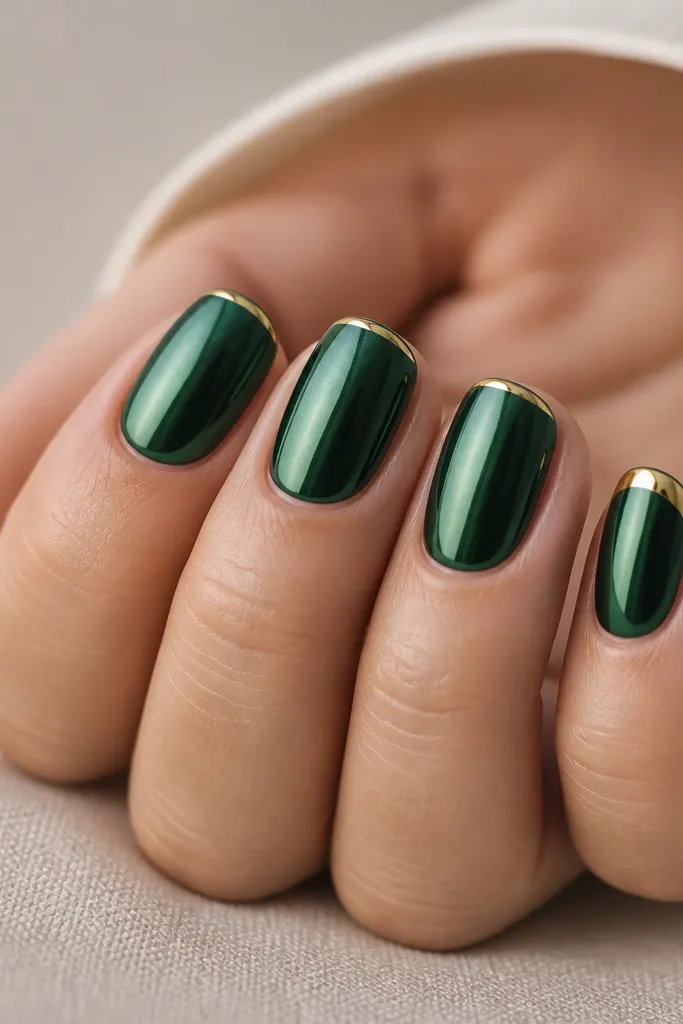
This one looks like a high-end manicure because the emerald chrome reflects like glass. The thin gold edge adds a "frame" effect that makes the tip look sharper, not blocky. I love it because it works on short, medium, or long nails - the gold line scales with your nail width.
Paint emerald chrome on the full nail or just the bottom two-thirds, then leave a clean strip at the very tip for the gold. Use gold nail art paint with a striping brush to draw one straight line across the smile line, then cap with top coat. Finish with a glossy top coat that doesn't pull back around the line.
Pro tipDo the gold line with your brush loaded lightly - one smooth pass beats two messy passes.
Watch outAvoid gold paint that's too thick; it dries chunky and makes the line look like a sticker.
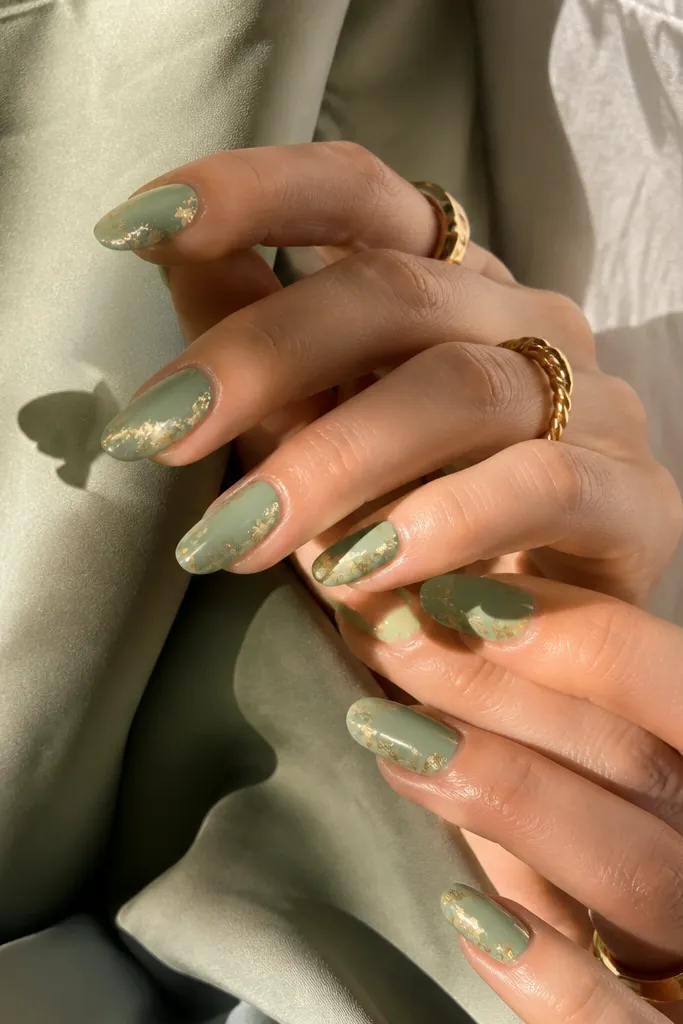
2. Sage Jelly Base with Gold Foil Cuticle Crescent
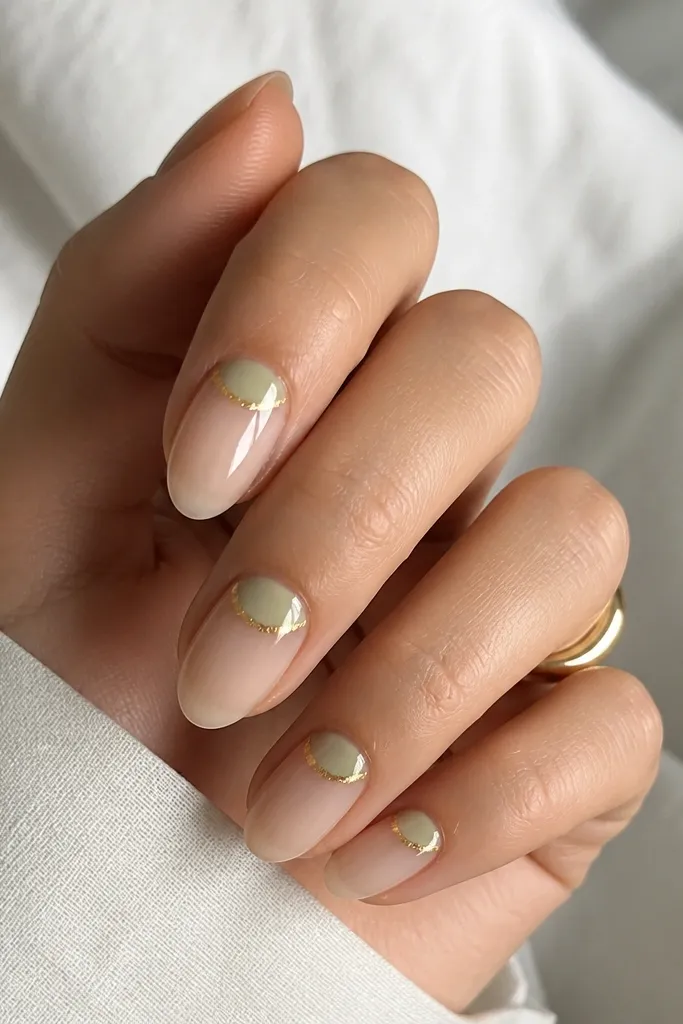
Sage jelly makes the whole set feel soft but still luxe because the foil flashes gold when your hand moves. The cuticle crescent is a tiny placement - it reads intentional instead of overdone. This is the manicure I reach for when I want green and gold but not heavy.
Apply 2-3 thin coats of sage jelly so the nail stays see-through at the edges. Press gold foil flakes into a small curved area around the cuticle using foil glue or tacky gel, then seal. Keep the crescent about 1/8 inch wide so it doesn't creep down the nail.
Pro tipIf foil keeps lifting, press with a silicone tool for 10 seconds per nail before curing.
Watch outSkip a thick foil layer; it causes bumps that catch on hair and snag cuticles.
3. Forest Green Micro French with Gold Dot Accent
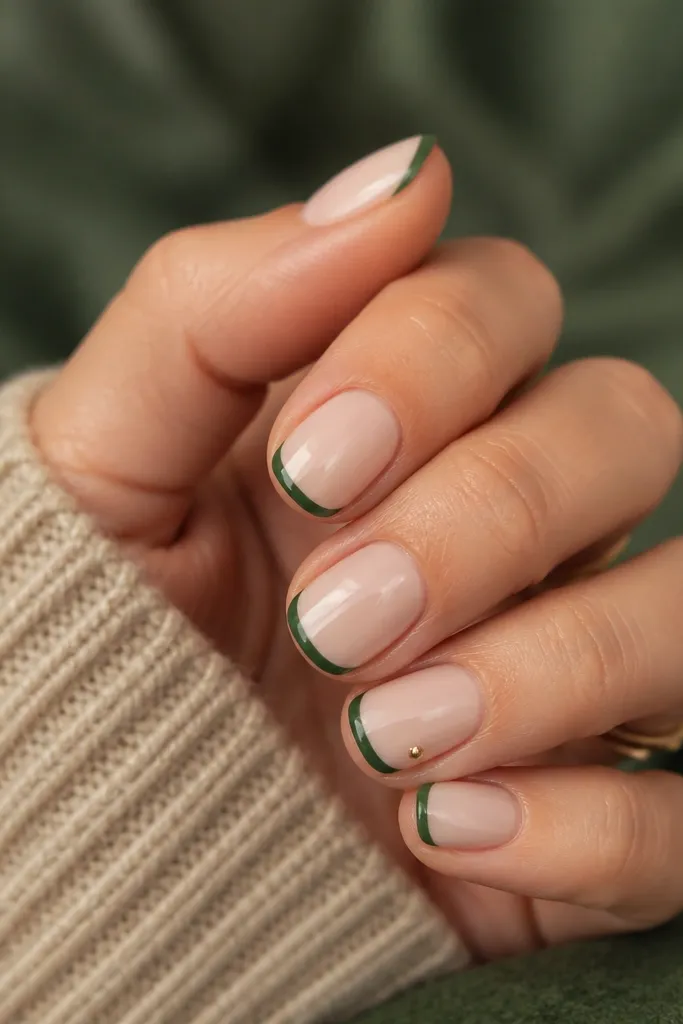
Micro French is clean and classic, but the green makes it feel modern. The single gold dot adds a "jewel" moment without turning the nail into a craft project. This design is great for people who like minimal details but still want the luxury green and gold nails ideas vibe.
Use a nude pink gel base. Paint micro tips in forest green with a French guide or freehand using a striping brush. Add one gold dot on the ring finger (or every other nail) using a dotting tool, then top coat.
Pro tipKeep the micro tip thin - if it takes up more than a third of the nail length, it stops looking expensive.
Watch outAvoid painting the French line from the center outward without steady pressure; it creates uneven edges.
4. Emerald Marble Swirl with Gold Leaf Veins
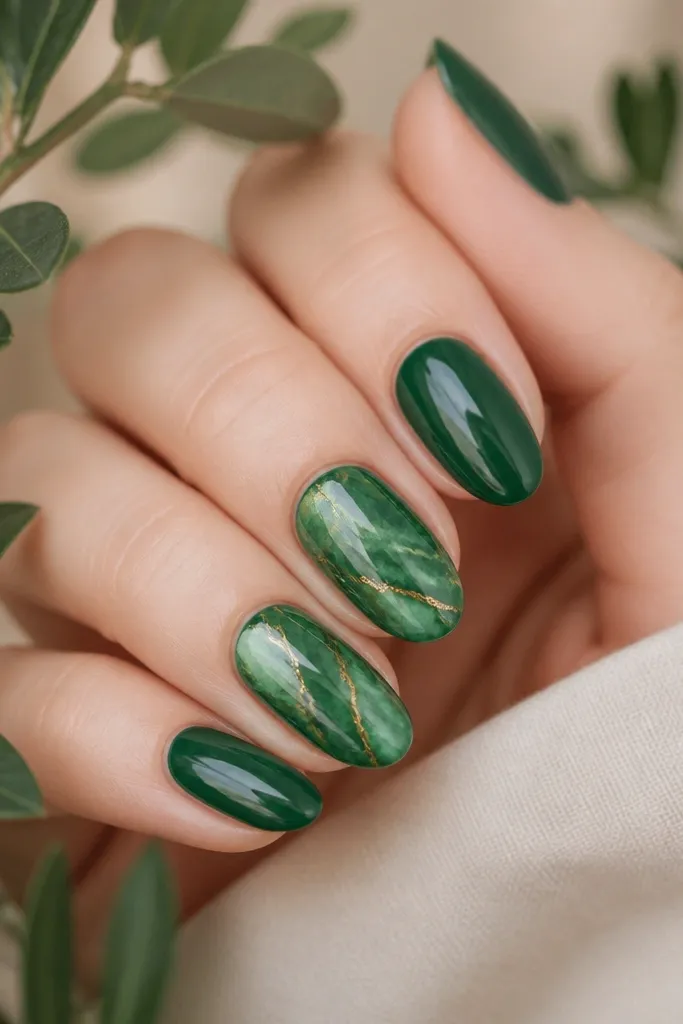
Marble looks harder than it is, and gold leaf makes it look like real stone. The trick is layering a few green shades and letting them break naturally, then adding gold veins only where the marble lines are. This set reads luxe in photos because it has movement.
Use a base of clear gel or a pale nude. For marble, drag a darker emerald gel in thin lines, then soften with a lighter green gel by tapping with a sponge or brush. Press gold leaf into selected cracks, not everywhere, then seal with a smoothing top coat.
Pro tipWork one nail at a time so the marble lines stay workable before curing.
Watch outDon't use one flat emerald shade for marble; it looks like a painted blob.
5. Gold Foil Half-Moon over Deep Green
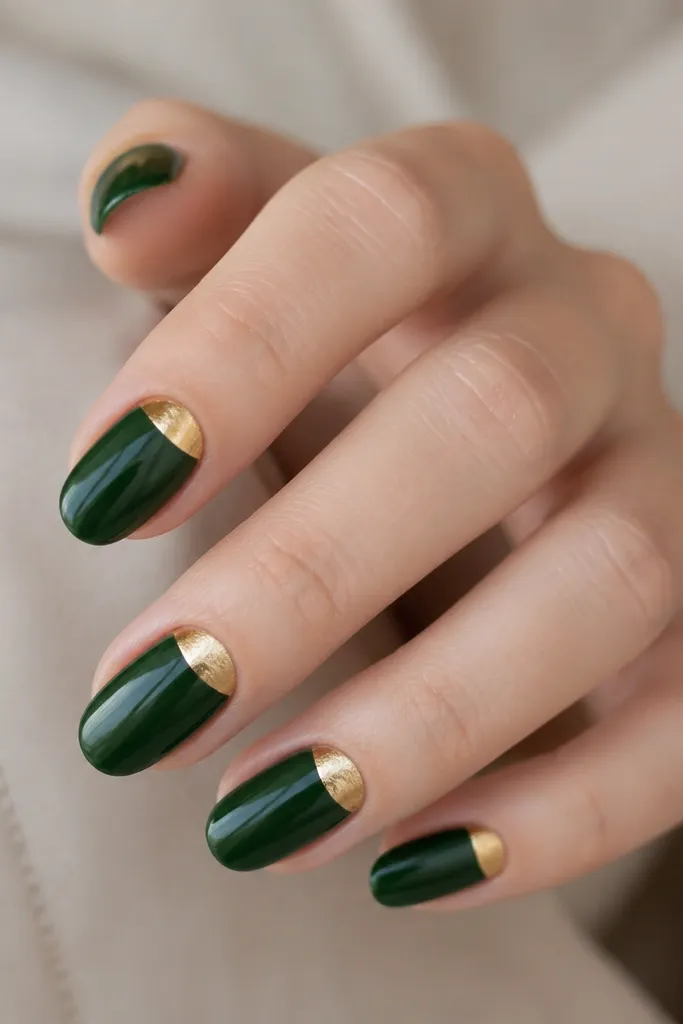
This is the "evening manicure" version of the half-moon. The gold foil catches light at the cuticle where your hands naturally move, so it looks like jewelry. It also makes your nails look longer because the foil shape draws the eye across the base.
Paint deep green opaque in 2 coats. Apply foil glue in a half-moon shape at the cuticle, then press gold foil so it covers that curve fully. Keep the half-moon height around 1/6 of the nail length for a balanced look.
Pro tipTrim foil edges with a small lint-free wipe or a gentle file after curing so the half-moon stays crisp.
Watch outAvoid foil that spills onto the sidewalls; it makes the shape look sloppy.
6. Sage Green Velvet Matte with Gold Outline
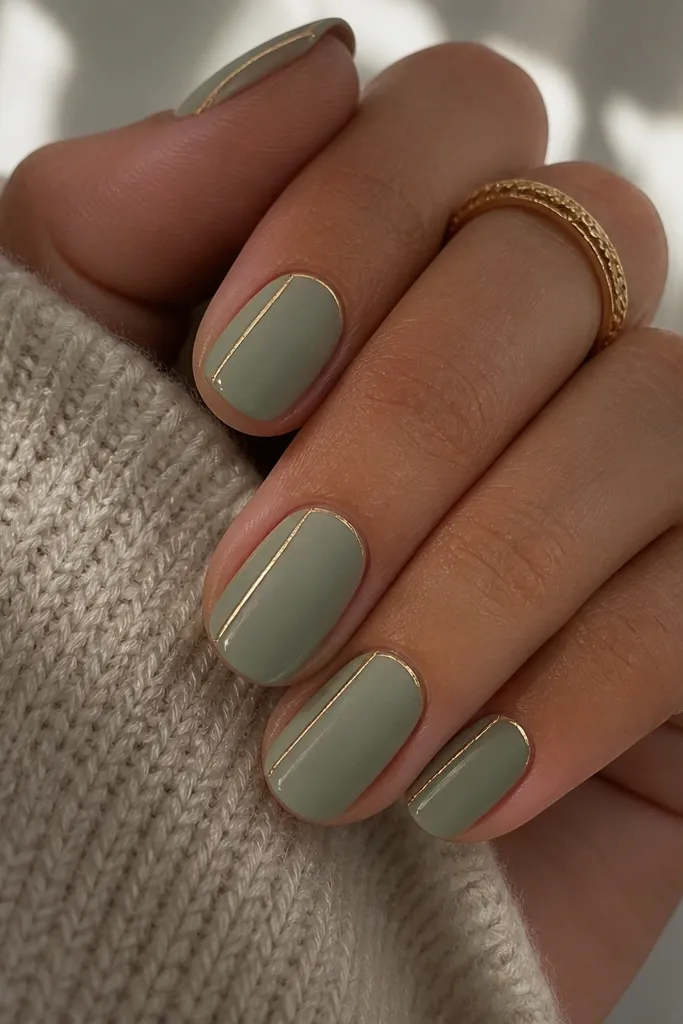
Matte velvet texture changes everything. Sage velvet looks soft and expensive, and the gold outline looks like a border on a piece of glass. This is a great set for fall and winter because it doesn't scream "party," it just looks polished.
Use a sage velvet powder over a matching sage base gel. After curing and removing any excess, paint a thin gold outline with nail art gel along the tip edge and one side. Seal with a top coat that stays matte or a very light glossy only on the gold lines.
Pro tipGold gel needs a clean surface - wipe the matte nail with alcohol before outlining.
Watch outAvoid glossy top coat over the whole nail; it kills the velvet effect.
7. Emerald Glitter Fade with Gold Micro Stripe
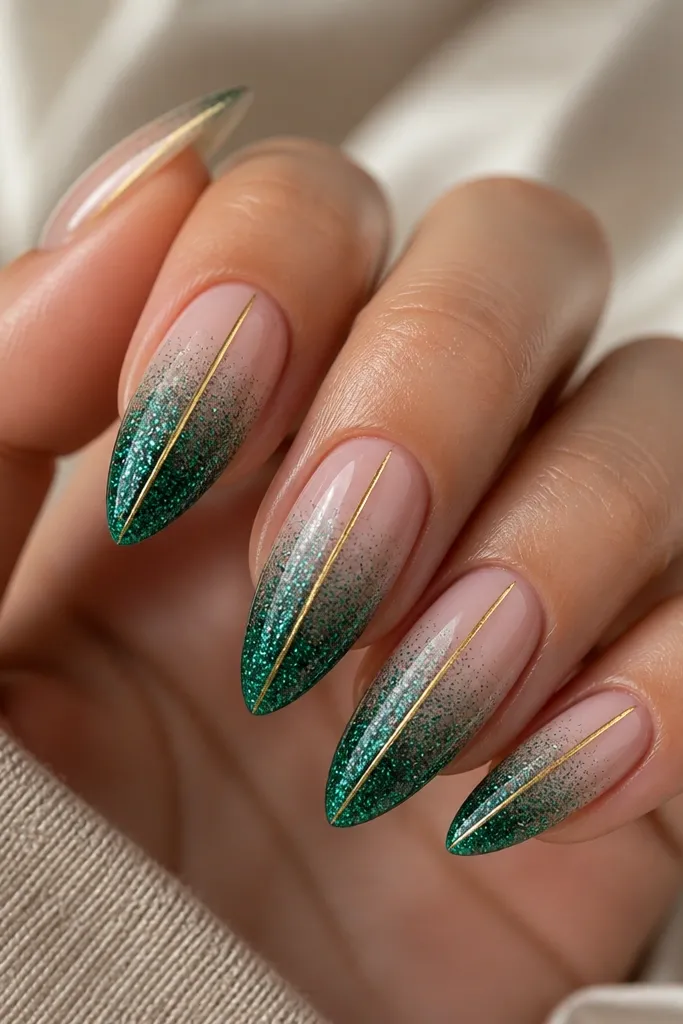
The fade keeps it airy, and the gold stripe gives structure. Emerald glitter near the tip looks festive without covering your whole nail. This set is a great "work-to-dinner" option because the gold is thin and the glitter is concentrated.
Start with a nude base. Sponge on emerald glitter gel from mid-nail to tip in 2-3 layers, curing between layers. Add a gold micro stripe down the center using striping gel, then top coat.
Pro tipUse a fine striping brush and pull the stripe in one direction to avoid ridges.
Watch outAvoid overloading glitter at the top; it makes the nail feel gritty and uneven.
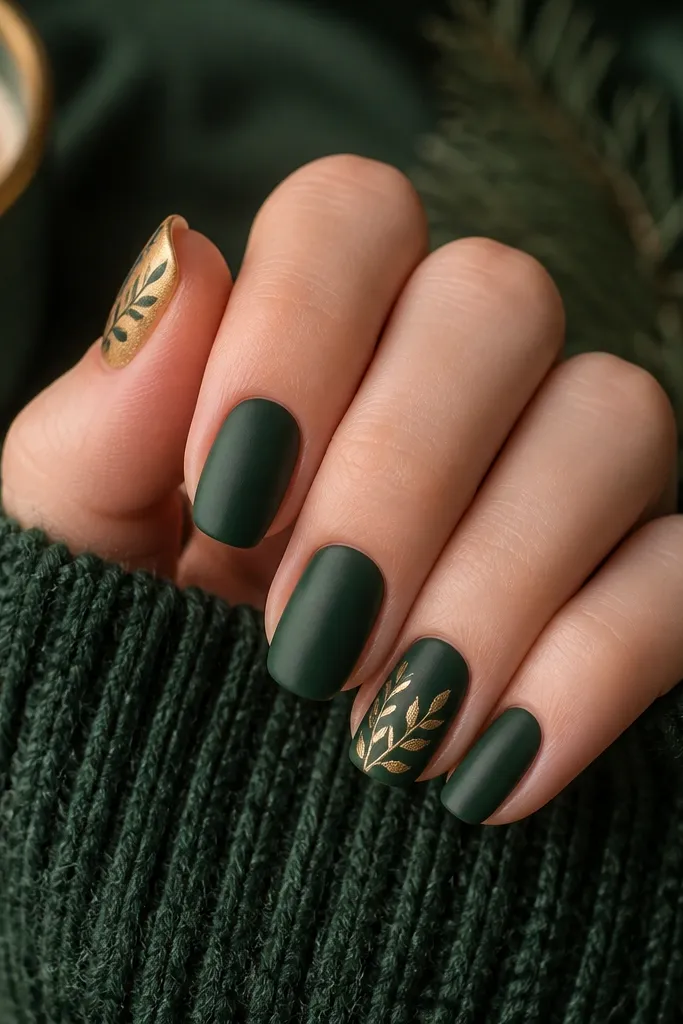
8. Deep Green Gloss with Gold Chain Link Accent
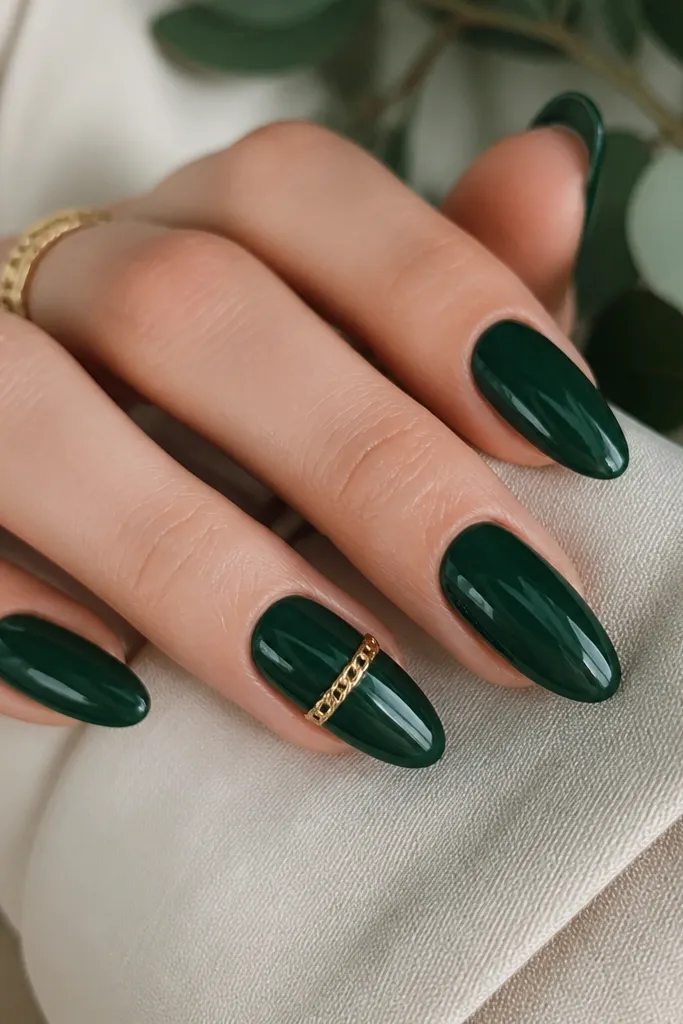
Chain link details make nails look like accessories. The deep green gloss makes the gold look brighter, and the small scale keeps it from turning costume-y. This is a look I've gotten compliments on because it looks custom, not store-bought.
Paint deep green in 2 coats and cure fully. Place a small pre-made gold chain nail charm or build with tiny gold links using nail glue, then cap with gel top coat in thin layers. Don't bury the charm in one thick coat - it can lift at the edges.
Pro tipCap the charm with gel and cure, then do a second thin cap after it levels.
Watch outSkip huge chain charms; the scale should match your nail width.
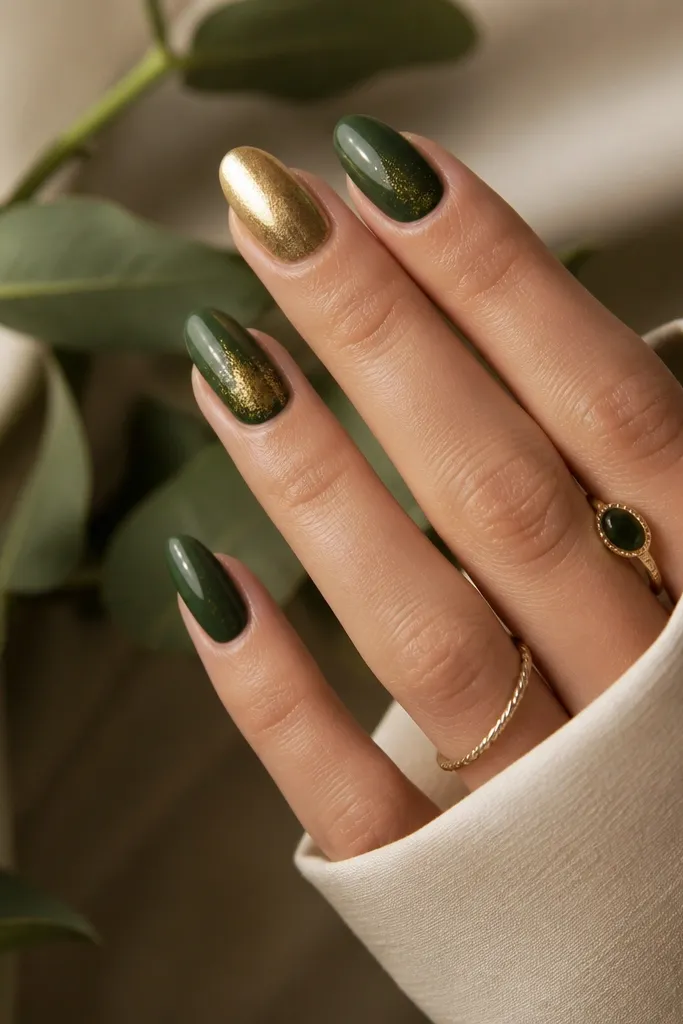
9. Gold Chrome Base with Emerald Negative Space
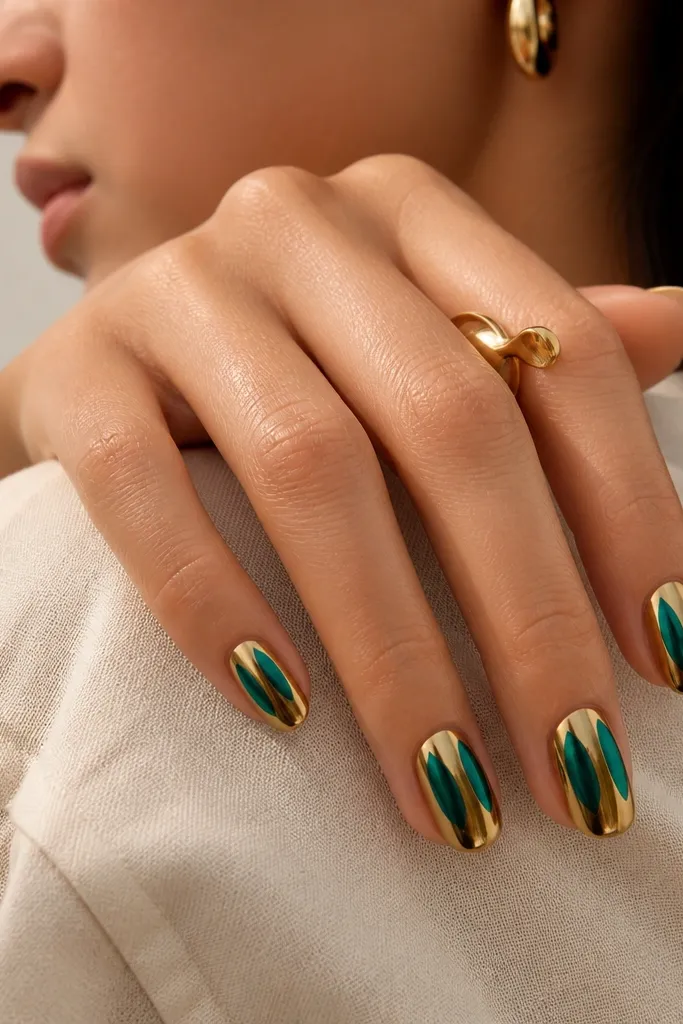
This flips the usual combo and looks high-end fast. Gold chrome is already eye-catching, and emerald negative space keeps it from looking like a full gold sticker. The contrast reads "luxury" because it's clean and graphic.
Apply gold chrome base. Then use emerald gel to paint two narrow panels on each nail, leaving chrome strips between them. Cure, then top coat carefully - chrome can dull if your top coat is too thick or matte.
Pro tipMask the negative-space strips with nail art tape for straight lines.
Watch outAvoid freehand panels that touch the edges; tiny gaps look intentional, but overlaps look messy.
10. Emerald and Gold Leaf Placement on One Corner
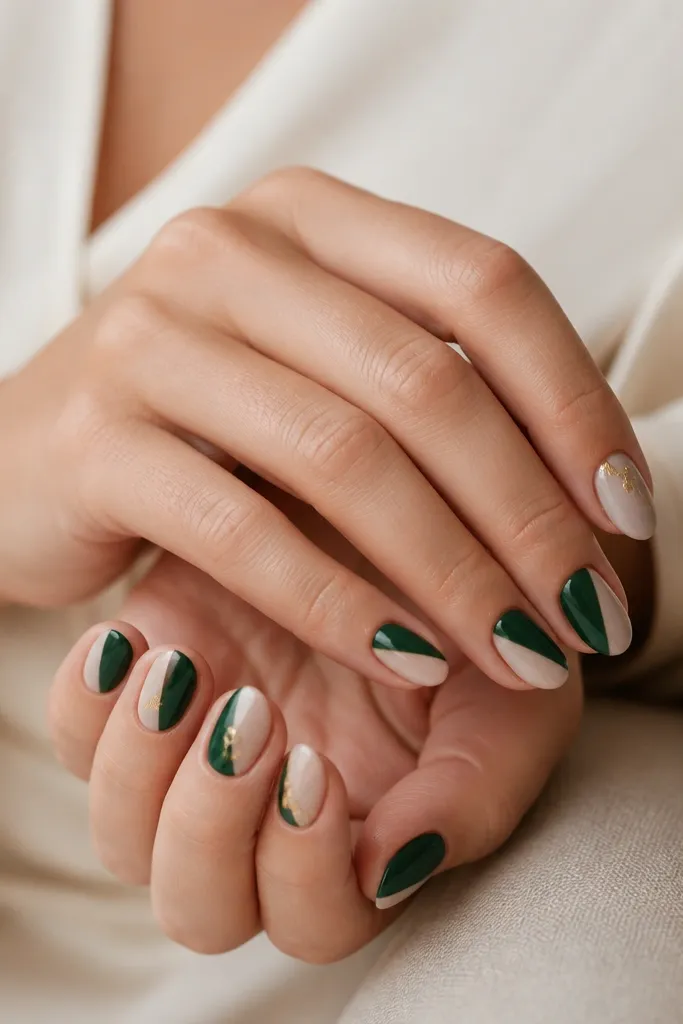
Uneven, corner-focused leaf placement looks like a designer manicure. The nude half keeps it light, and the emerald half gives you the punch. Gold leaf only on the corner adds sparkle without covering the whole nail.
Paint a nude base, then apply emerald gel on one side of the nail (about 60/40 split). Press gold leaf into the corner near the cuticle and seal. Keep the leaf area small - around the size of a pea.
Pro tipUse a small silicone pusher to press leaf down without smearing it.
Watch outAvoid covering the entire emerald section with leaf; it makes it look uneven and heavy.
11. Satin Emerald with Gold Foil Half Wrap
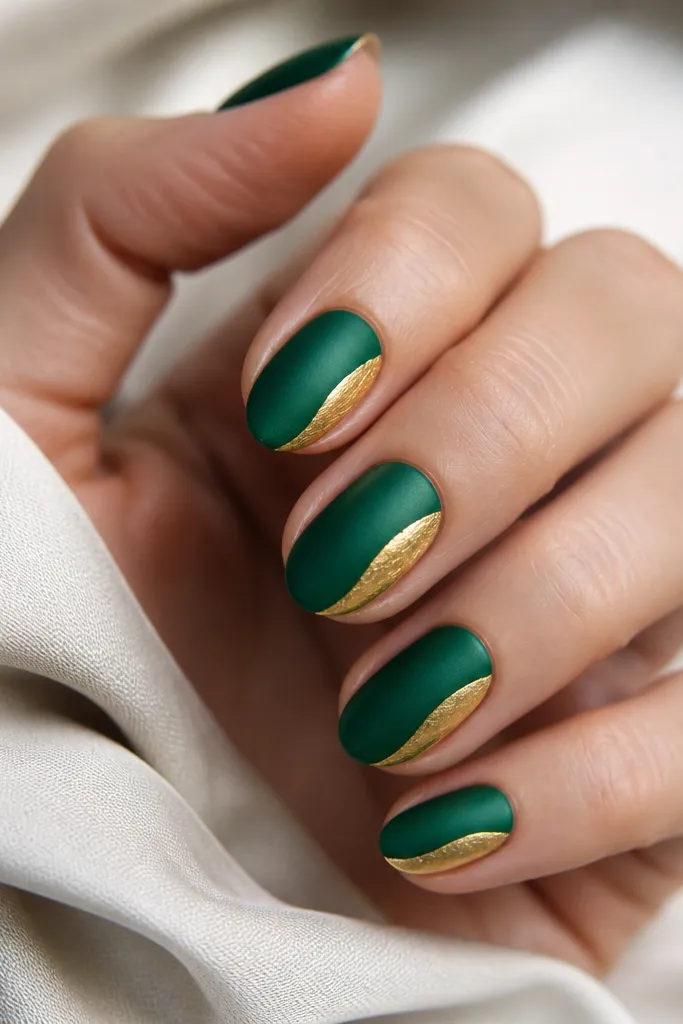
Satin finish gives that soft sheen that looks expensive under indoor lights. The gold foil wrap adds movement when you flex your hand. This design is different from the usual half-moon and looks fresh on photos.
Use a satin emerald top coat or satin powder over emerald gel. Apply foil glue from one sidewall, curving toward the center but stopping before the other sidewall. Press foil, then cap with a smooth gel top coat.
Pro tipCurve the foil line - straight edges make it look like tape.
Watch outAvoid foil glue leaking beyond the curve; it shows as dull patches.
12. Deep Green French with Gold Foil Smile Line
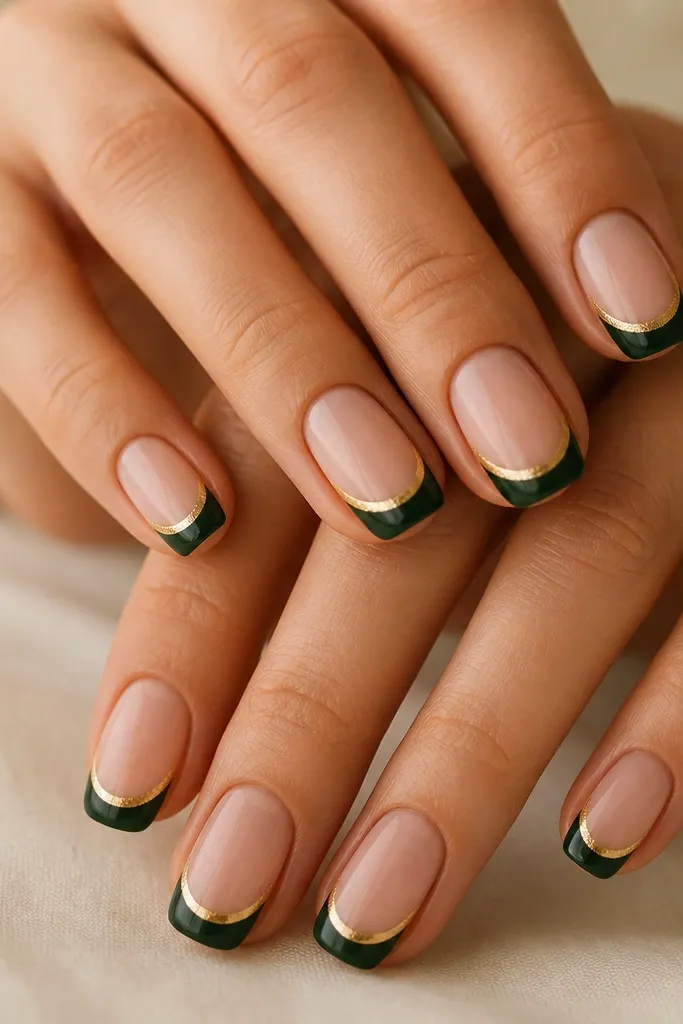
This is the cleanest "luxury" version of French. The gold foil band sits exactly where your eyes land, so it looks like a designer finish. It also hides any tiny French line imperfections because the foil band covers the edge.
Use a nude base and paint deep green French tips. Place foil glue right along the smile line, then press gold foil so it forms a thin band. Seal with top coat, and file the underside tip so it stays smooth.
Pro tipLet the French cure fully before foil so the band doesn't smear.
Watch outAvoid making the smile line band too thick; it turns into a chunky stripe.