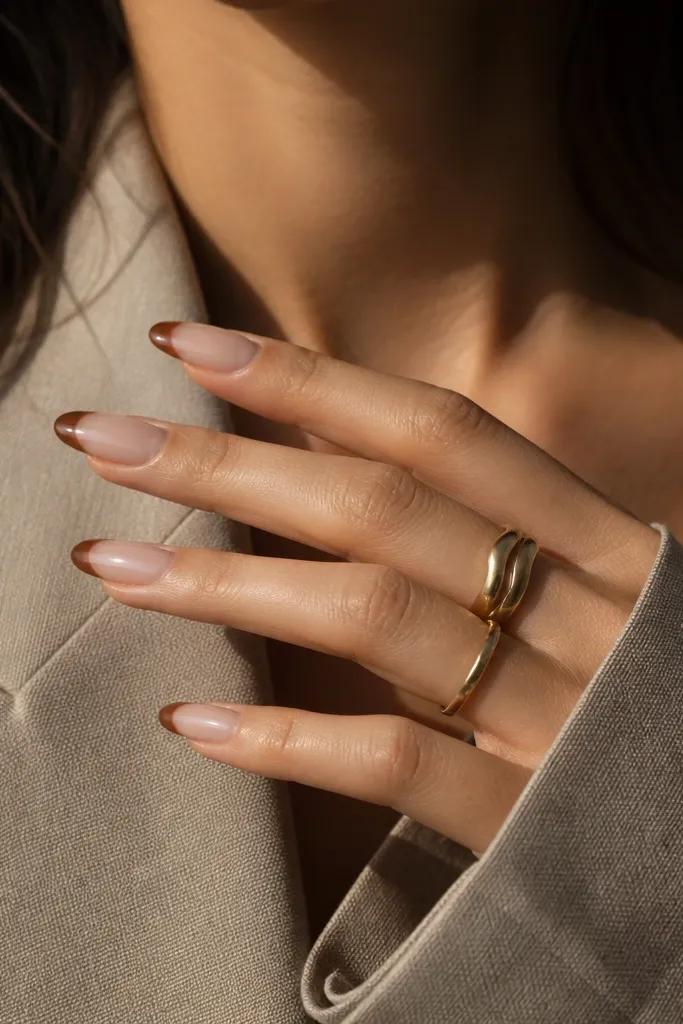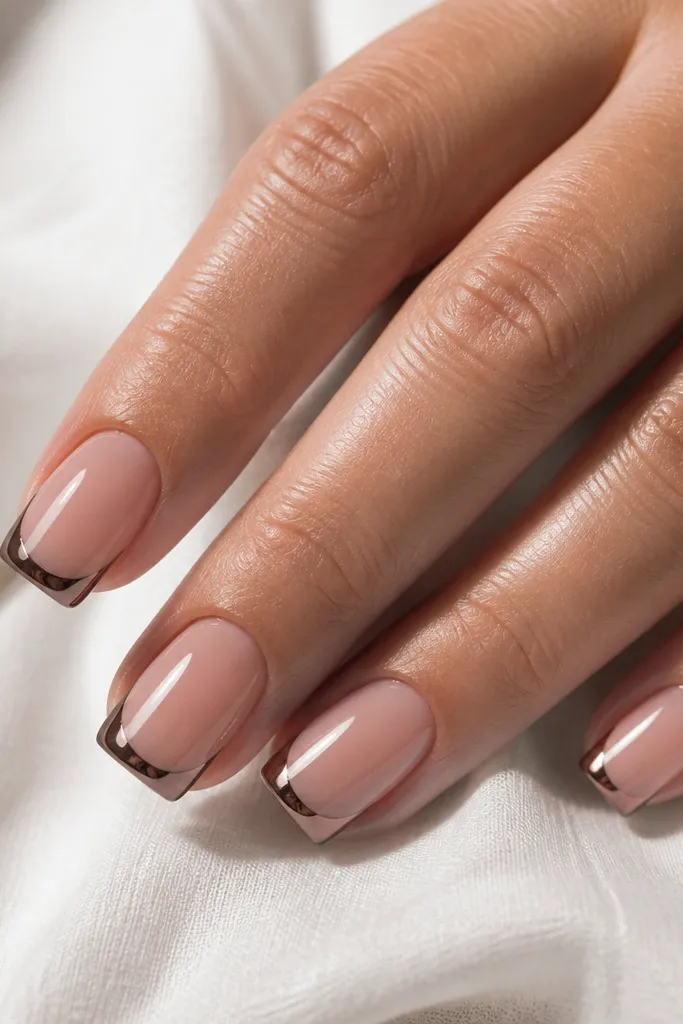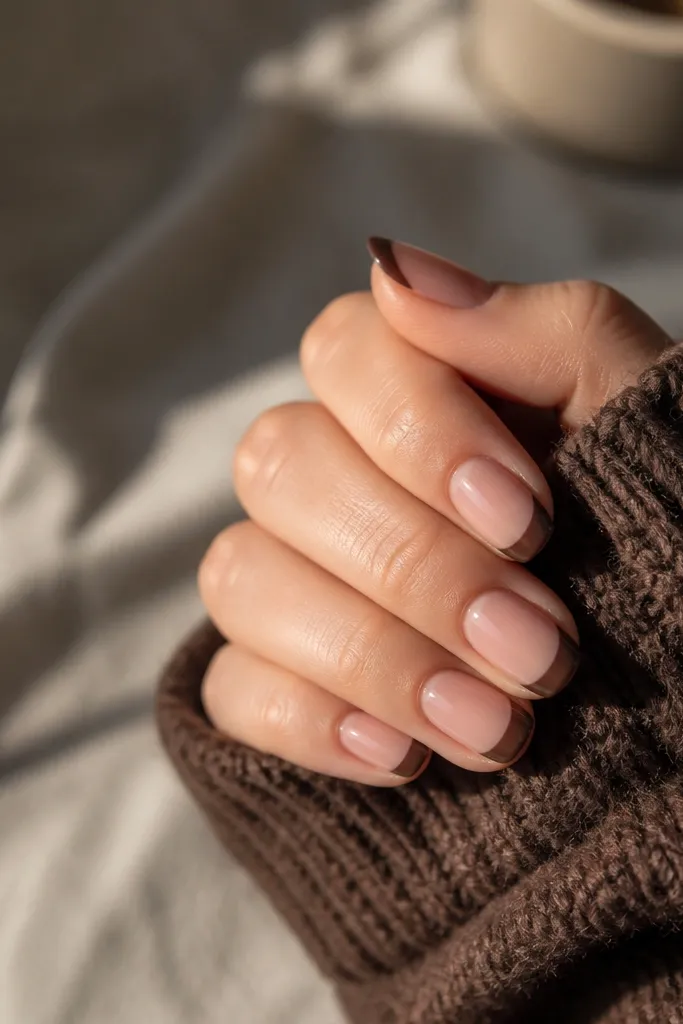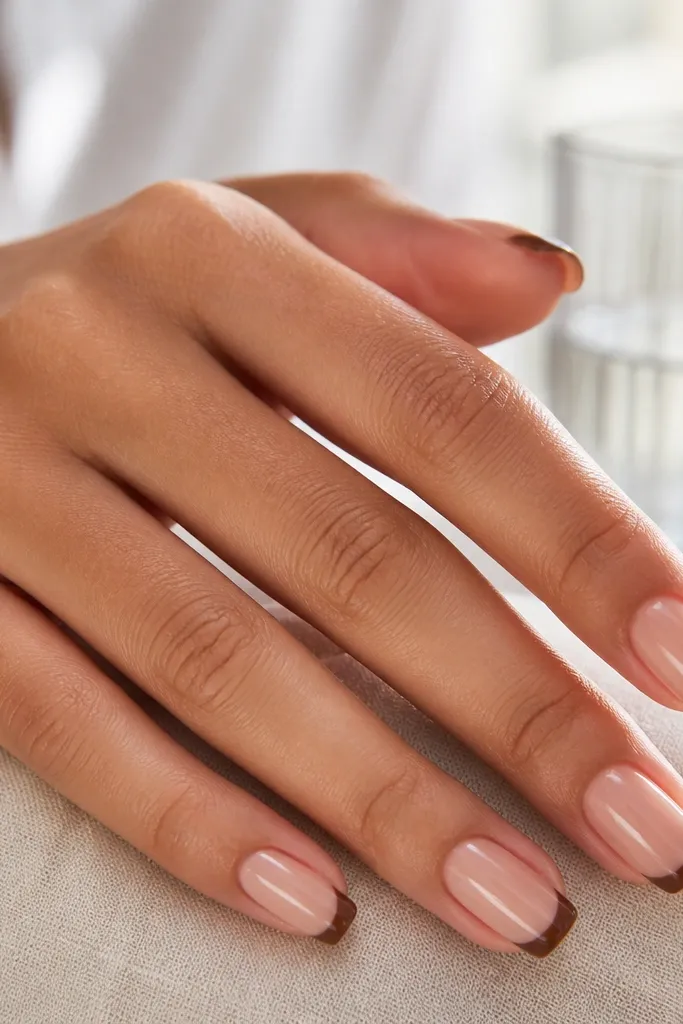
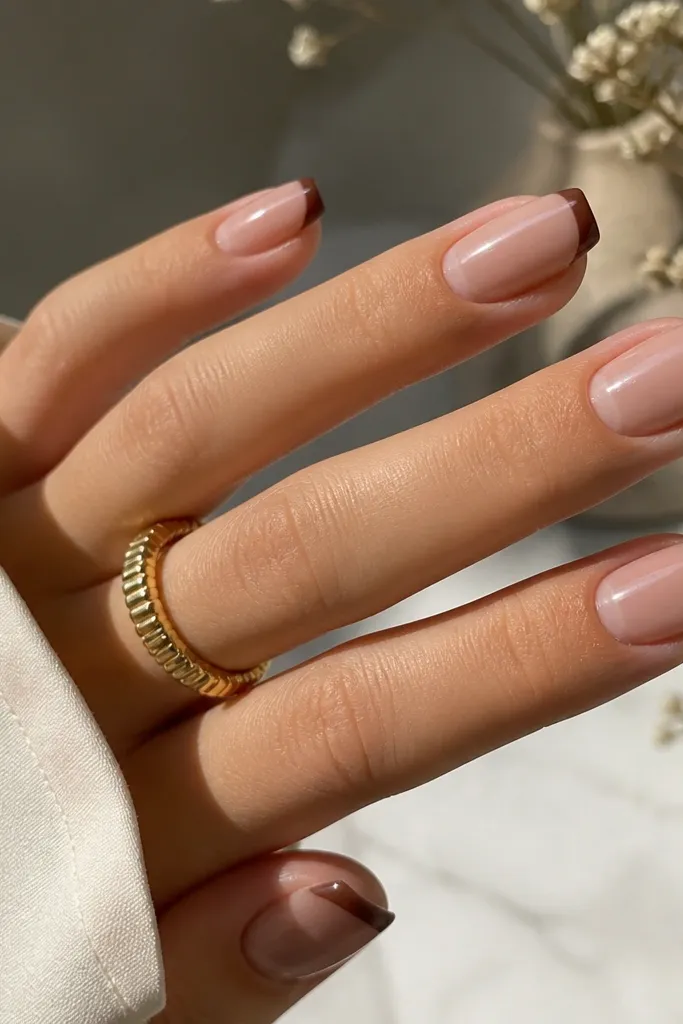
1. Glossy Cocoa French with Micro-Stripe Band
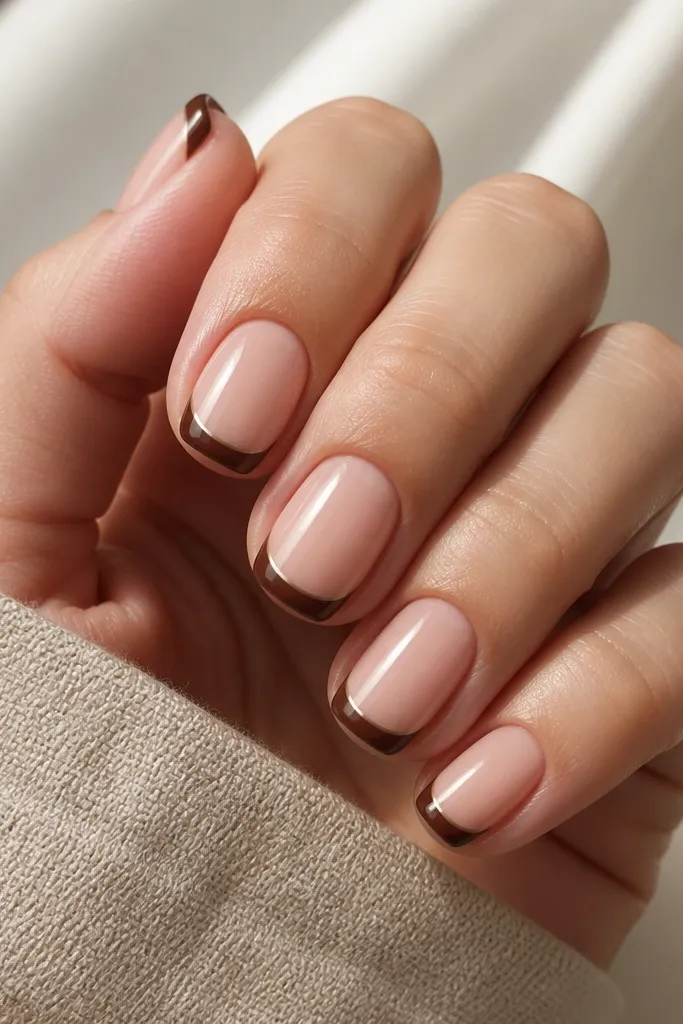
This look works because the micro stripe creates a "tailored" frame without adding length. The cocoa brown looks warm next to a nude base, and the glossy top keeps the line crisp even if your application isn't perfect. The lighter stripe gives depth so the French tip doesn't look flat. It reads polished for work and still feels fun for brunch.
Use a nude base that matches your skin tone - warm pink nude or beige nude both work. Keep the French tip width around 1.5-2 mm on short nails so it doesn't swallow the nail bed. Add the micro stripe on top of the French line area, not across the whole tip. Best with a short squoval form so the stripe stays aligned.
Pro tipWhen you place the tip, align the center first, then press the sides. That keeps the stripe from drifting.
Watch outAvoid a wide French tip - on short nails it makes your fingers look shorter.
2. Taupe Brown French with Negative Space Smile
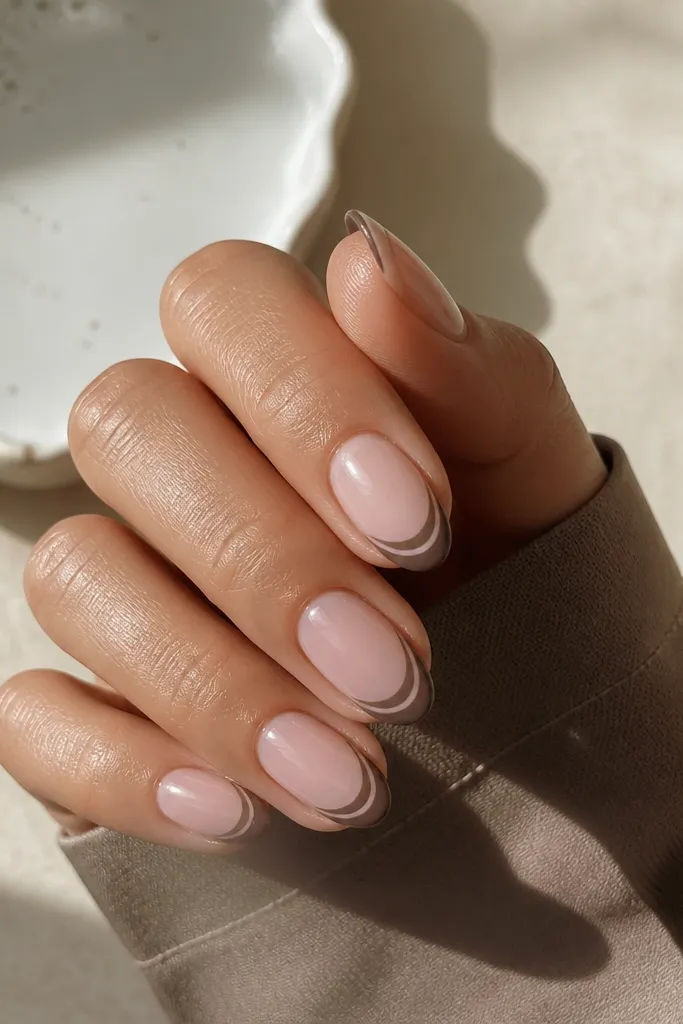
The negative space gap makes the brown look lighter and more modern. Taupe brown also flatters almost every skin tone because it's not too red or too dark. This version looks airy and clean, like a "designer" French. It's also forgiving because the smile line can hide tiny placement differences.
Choose a sheer base (not opaque) so the negative space effect reads intentional. Shape the French into a smooth curve instead of a straight line. Keep the taupe tip slightly thinner than you think - about 1-1.5 mm - so the gap stays visible. Almond shape looks best because the curve matches the nail contour.
Pro tipAfter you apply, run a finger over the tip edge to check for a ridge. If you feel one, add a thin topcoat and let it level.
Watch outDon't pick a fully opaque base - it makes the negative space look like a mistake.
3. Chocolate Brown French with Clear Gel Edge
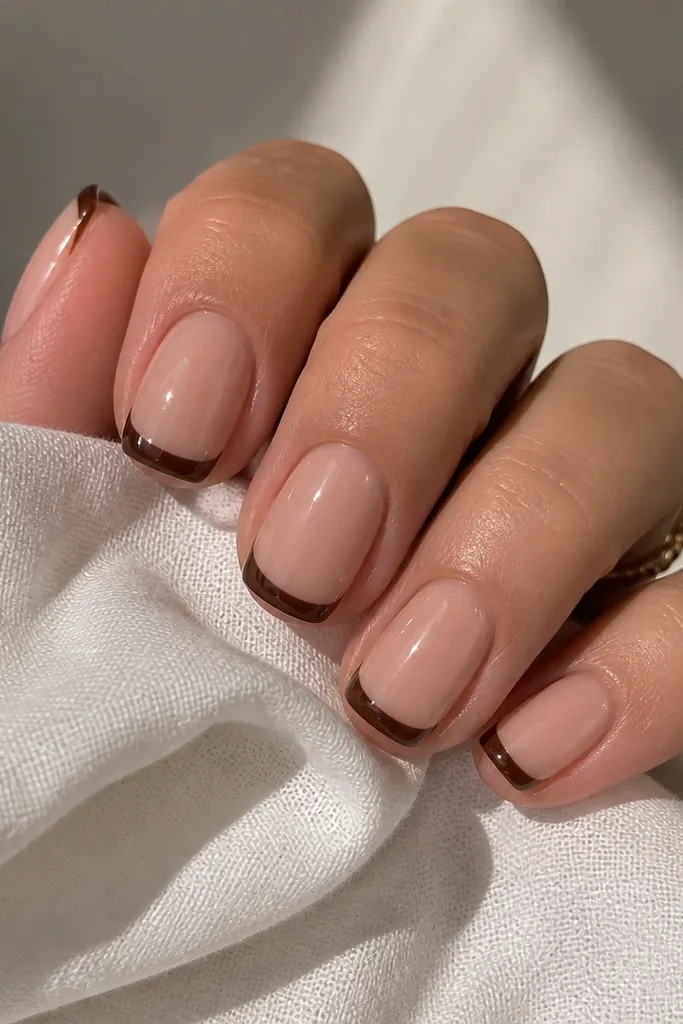
This one looks expensive because the clear edge catches light like a glass tip. The brown stays the star, while the transparent layer makes the French line feel dimensional. It also helps hide micro gaps at the boundary since the clear edge smooths the transition. Great if you want that salon "gel" vibe without the drill.
Use a set that includes a clear overlay piece or a press-on with a pre-clear tip section. Keep the brown coverage to the top third of the nail so the clear edge is actually visible. Squoval shape makes the clear overhang look even across the nail. It's best for nights out, but it also works for work if you keep it subtle.
Pro tipSeal the clear edge with a thin brush-on topcoat so it doesn't peel at the tip.
Watch outSkip thick layers - too much clear gel makes short nails look bulky.
4. Matte Mocha French with Glossy Tip Border
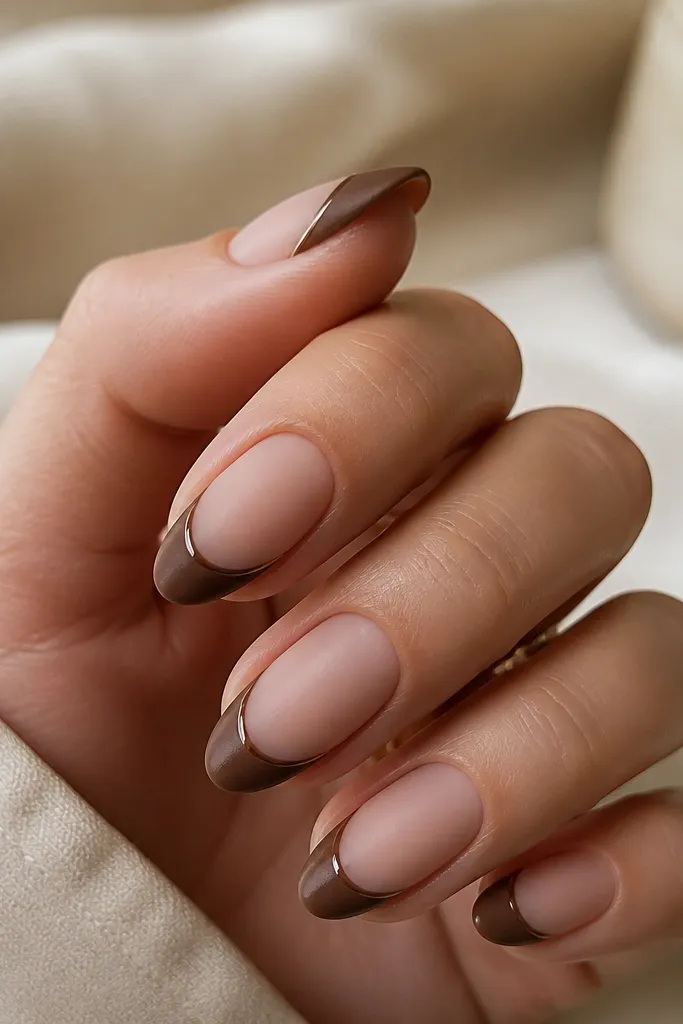
Mixing matte and gloss is the whole trick here. Matte mocha gives that modern, velvety look, while the glossy border keeps the design crisp. The contrast makes the French tip stand out without needing extra art. It also photographs well because the glossy edge reflects light even in low indoor brightness.
Pick a matte finish for the brown French and a glossy topcoat only on the border area. Keep the border line thin - about the thickness of a fine eyeliner line. Almond shape helps the matte surface look smooth. If your nails are oily, matte can grab less - wipe with alcohol before applying.
Pro tipAfter placement, avoid hand sanitizer for the first hour. Matte finishes can get streaky if you hit them with alcohol too soon.
Watch outDon't matte the entire nail - it can make the base look dusty and uneven.
5. Brown French with Tiny Gold Dot at the Corner
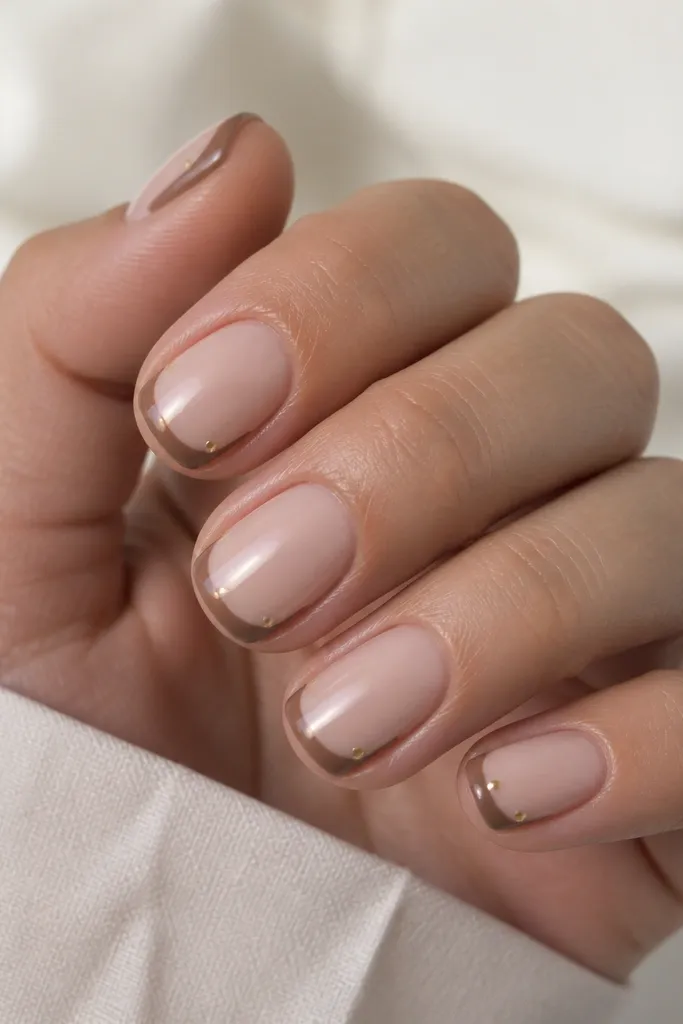
The gold dot acts like jewelry without adding a whole accent nail. Medium brown keeps it classic, and the dot gives a focal point that makes the French line look intentional. Because the dot sits at the corner, it also helps visually "lift" the nail shape. This is the easiest way to make brown French feel special for events.
Use a set that has the dot already printed if you want quick results. If you're building it, use a 1 mm gold chrome dot sticker and place it exactly at the outer edge where the French curve ends. Keep the French tip narrow so the dot doesn't compete. Squoval shape makes the gold dot look neat instead of scattered.
Pro tipPress the dot sticker down with a flat tool for 10 seconds so it seals into the topcoat.
Watch outAvoid bigger dots - anything over 1.5 mm starts to look like an accidental sticker.
6. Caramel Nude Base with Dark Brown French
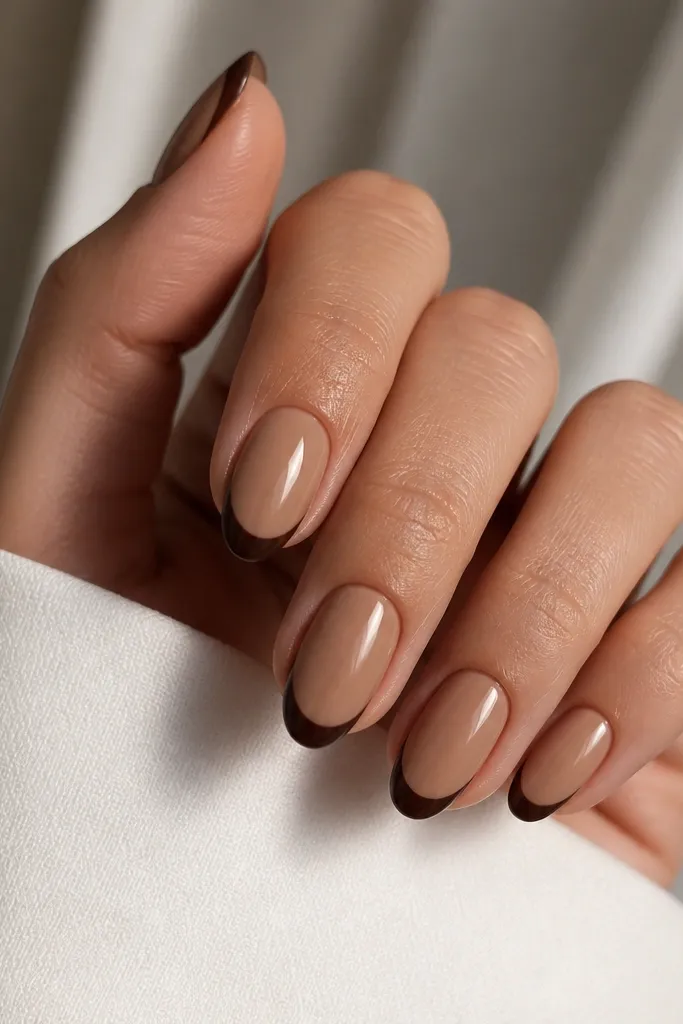
Caramel base + espresso French is the combo that makes short nails look longer. The base blends into your skin tone, then the dark brown gives a strong boundary. It's bold, but the short length keeps it wearable. This is the look I reach for when I want brown French to look higher-contrast in daylight.
Choose a caramel nude that's one shade deeper than your usual nude. Keep the French tip crisp and centered, about 2 mm wide. Almond shape looks sleek, but squoval works too if your nails are wider. If you're using press-ons, match the width - too narrow makes the French line look off-center.
Pro tipAfter applying, check each nail from the side. If the tip is slightly crooked, you'll see it immediately and can adjust before it sets.
Watch outDon't use a too-light brown tip on a caramel base - it turns into a muddy stripe.
7. Brown French with Side-Gradient Tip Line
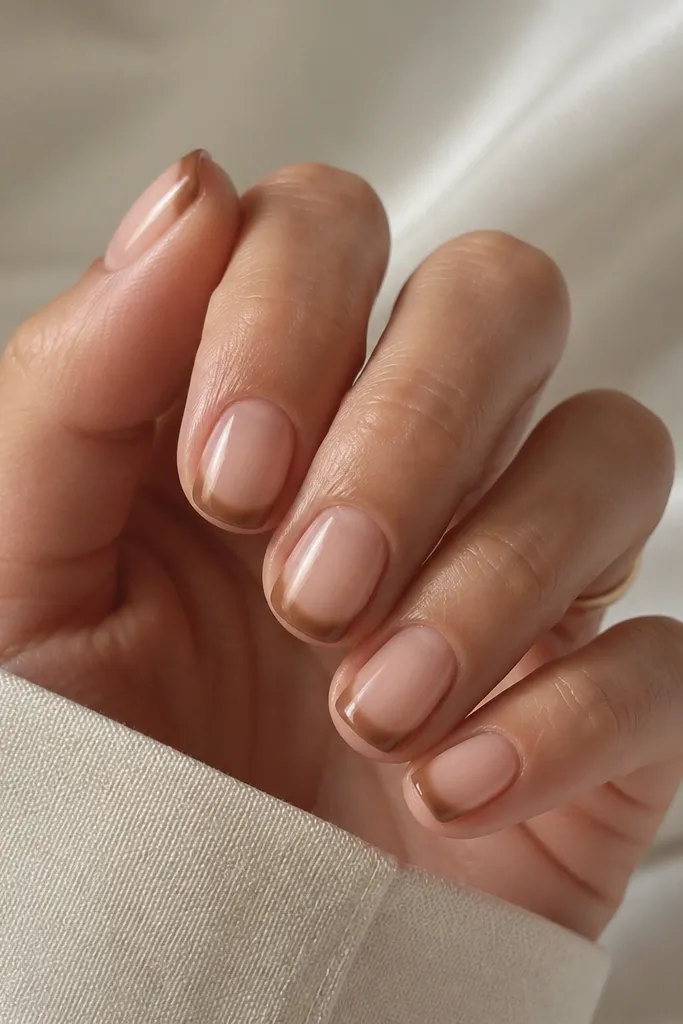
This gradient along the French line gives dimension without full ombre work. It makes the nail look shaped because the darker sides visually narrow the tip. The center light fade keeps it soft and wearable. If you're picky about French tips looking too flat, this one fixes that instantly.
Aim for a set with a printed gradient French tip or use a pre-brown French strip plus a lighter brown overlay in the center. Keep the gradient subtle - you should still read a French tip, not a blur. Squoval shape helps the gradient stay smooth. This looks great for everyday and also with warm-toned outfits.
Pro tipUse a glossy topcoat over the gradient so the fade looks even instead of patchy.
Watch outAvoid heavy contrast gradients - they can make short nails look uneven.
8. Warm Chestnut French with Thin White Outline
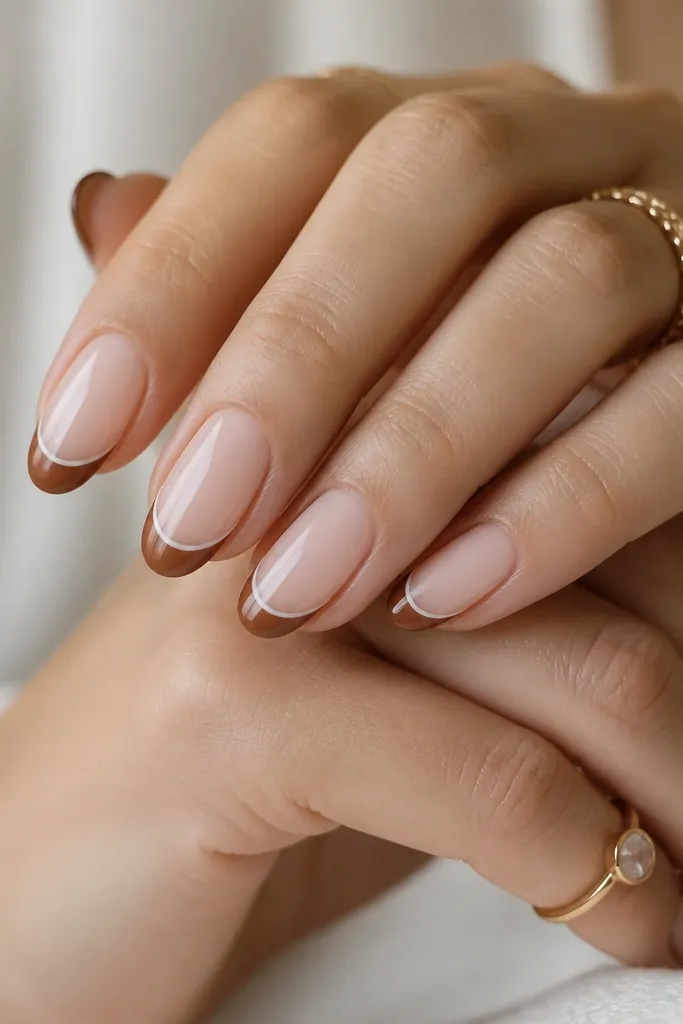
The tiny white outline makes the brown look cleaner and more graphic. Chestnut brown is warm and a little reddish, but the white line stops it from turning dull. This is the "French tip but make it fresh" look. It also helps hide slight boundary gaps because the white line reads as part of the design.
Keep the white outline super thin - about 0.3-0.5 mm - so it doesn't look like a border on a sticker. The base should be sheer or a milky nude, not fully opaque. Almond shape makes the outline look sharp. If you're applying press-ons, make sure the French line sits at the same height on all nails.
Pro tipIf the white outline starts to lift at the edge, seal it with a thin topcoat that covers the very tip edge.
Watch outDon't use a thick white outline - it overwhelms short nails fast.
9. Brown French with Micro Rhinestone at Cuticle
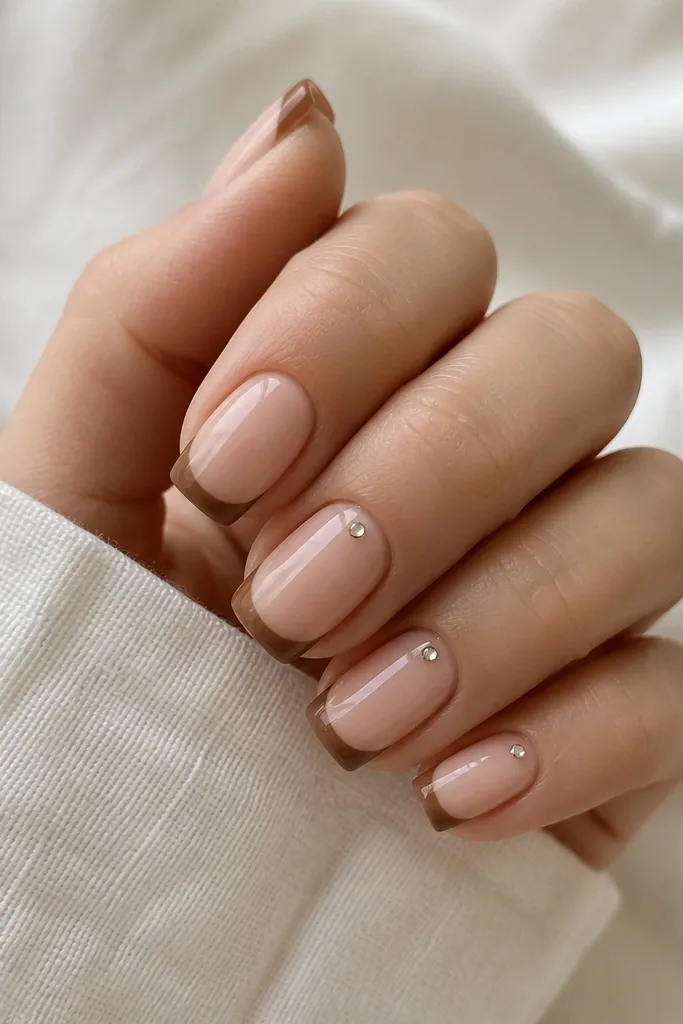
A single micro rhinestone near the cuticle adds sparkle without turning the whole set into bling overload. Medium brown keeps the design grounded so the rhinestone reads classy. Placing it near the cuticle draws the eye upward, which flatters short nails. This look is perfect for dinners, weddings, or any "I want something pretty" day.
Use a set that has a flat cuticle area where the rhinestone sits flush. Keep the rhinestone size tiny - think 1.5-2 mm. The French tips should stay narrow so the rhinestone is the only accent. Squoval shape makes the rhinestone placement look centered and neat.
Pro tipUse a dot of clear topcoat or gel glue under the rhinestone so it doesn't rock when you type.
Watch outAvoid placing rhinestones on every nail - it makes short sets feel crowded.
10. Double French: Light Brown + Dark Brown Bands
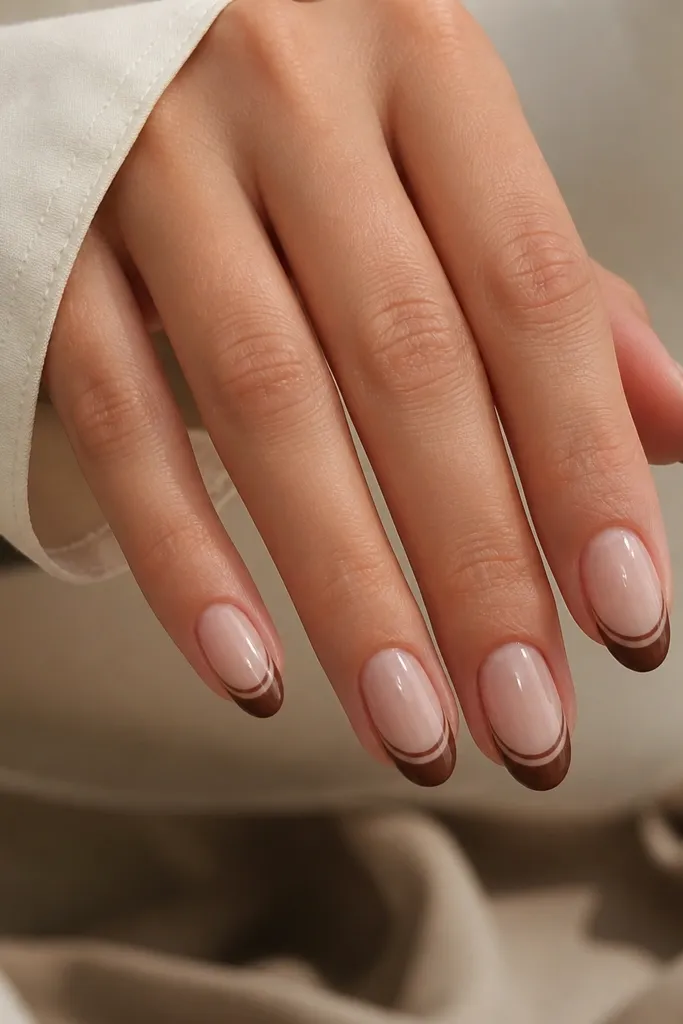
Double French makes short nails look designed because you get a layered frame. Light brown near the nail bed softens the transition, while dark brown at the edge gives definition. This is a great option if you want brown French but you're bored of the single line look. The layered effect also hides small application unevenness because the bands cover the boundary.
Keep the light brown band thin, around 1 mm, and the dark band slightly thicker, around 2-2.5 mm. Choose a nude base that doesn't compete - beige nude or sheer nude. Almond shape makes the double bands look longer and more curved. If you're using press-ons, make sure the bands are already centered; don't try to freestyle them on short nails.
Pro tipAfter applying, cap the edge with topcoat so the double bands don't catch on fabric.
Watch outDon't make both bands the same thickness - it stops reading as "double French."
11. Brown French Half-Moon Detail
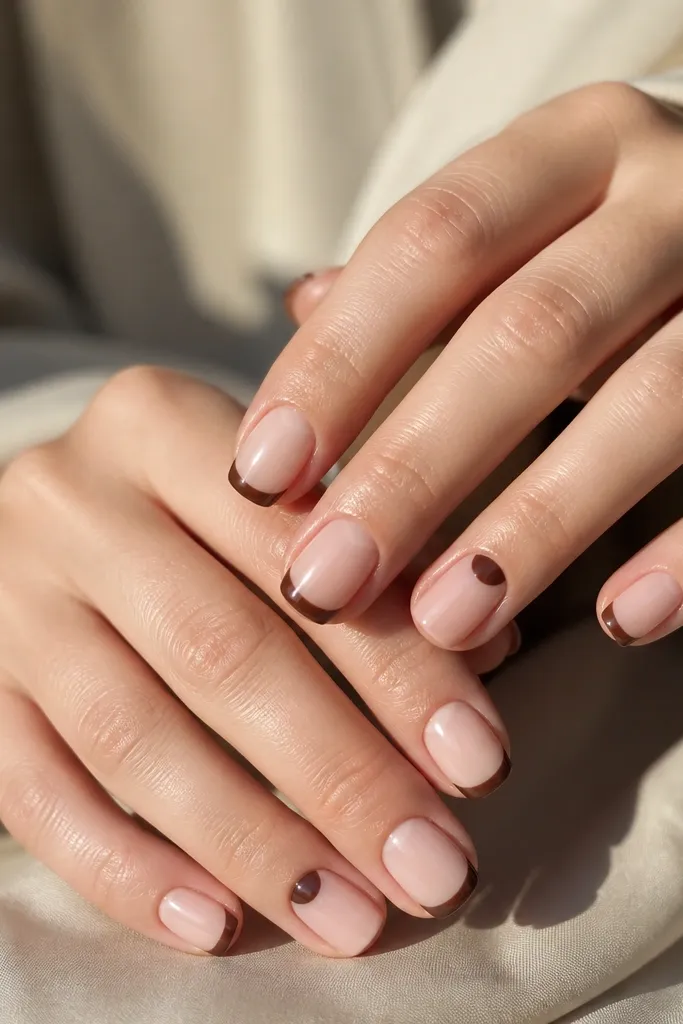
The half-moon detail balances the tip so the design looks intentional from every angle. Sheer nude keeps it light, and brown near the cuticle ties it to the French tips. This is the look I pick when I want something slightly different but still wearable. It's also forgiving because the accent nail detail draws attention away from minor alignment differences.
Use accent nails for the half-moon - two nails looks best on short sets. Keep the half-moon small and centered, leaving a clean gap so it looks like a cuticle shape, not a smudge. Brown should match the tip brown exactly or be one shade lighter. Squoval shape works because the cuticle curve matches the nail edge.
Pro tipIf you're placing half-moon details by hand, use a dotting tool and then clean the edges with a tiny brush dipped in remover.
Watch outAvoid large half-moons - they steal too much space from short nails.