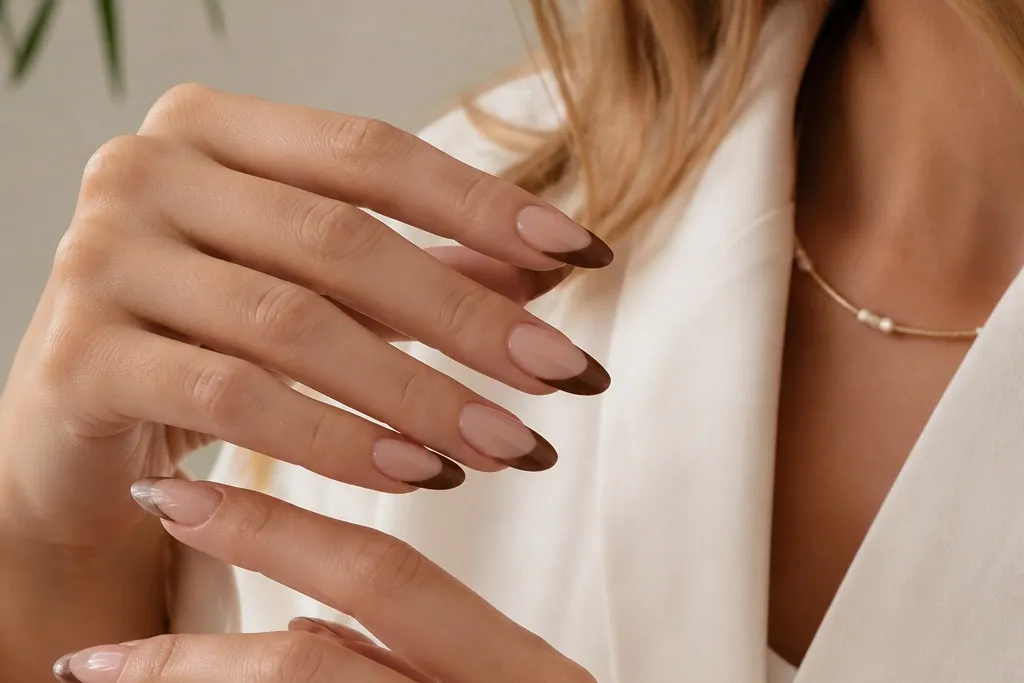
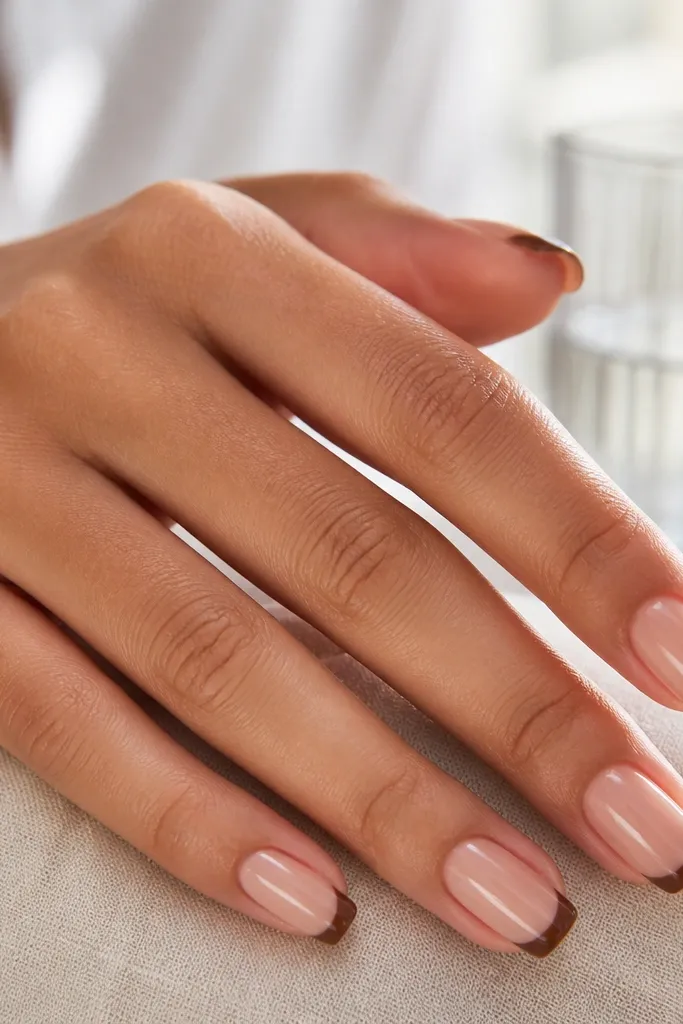
1. Cocoa Mirror Thin French
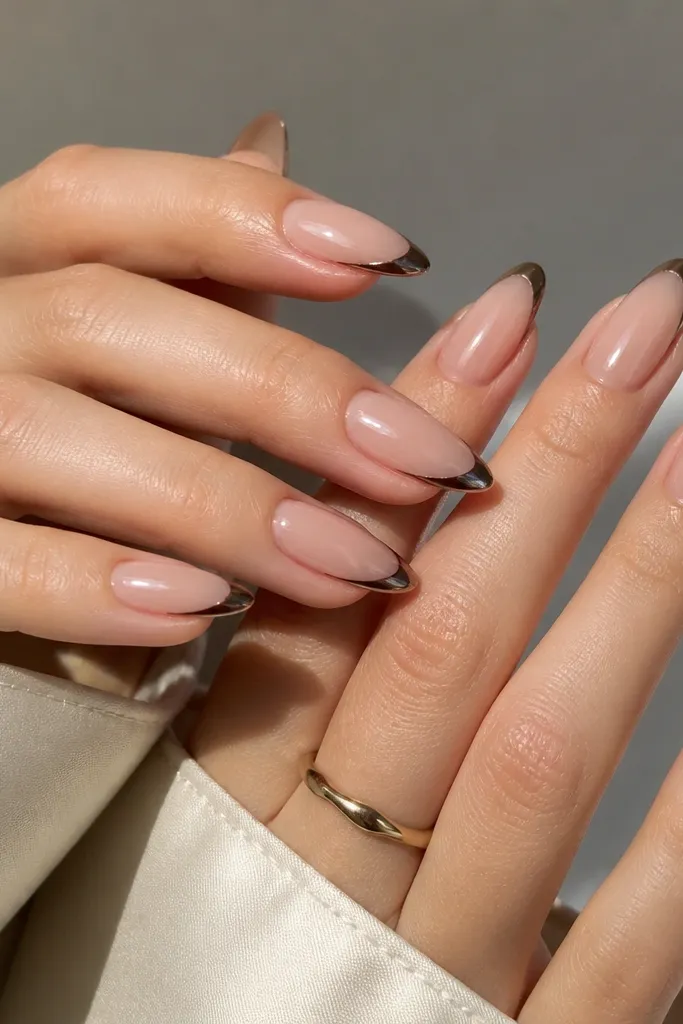
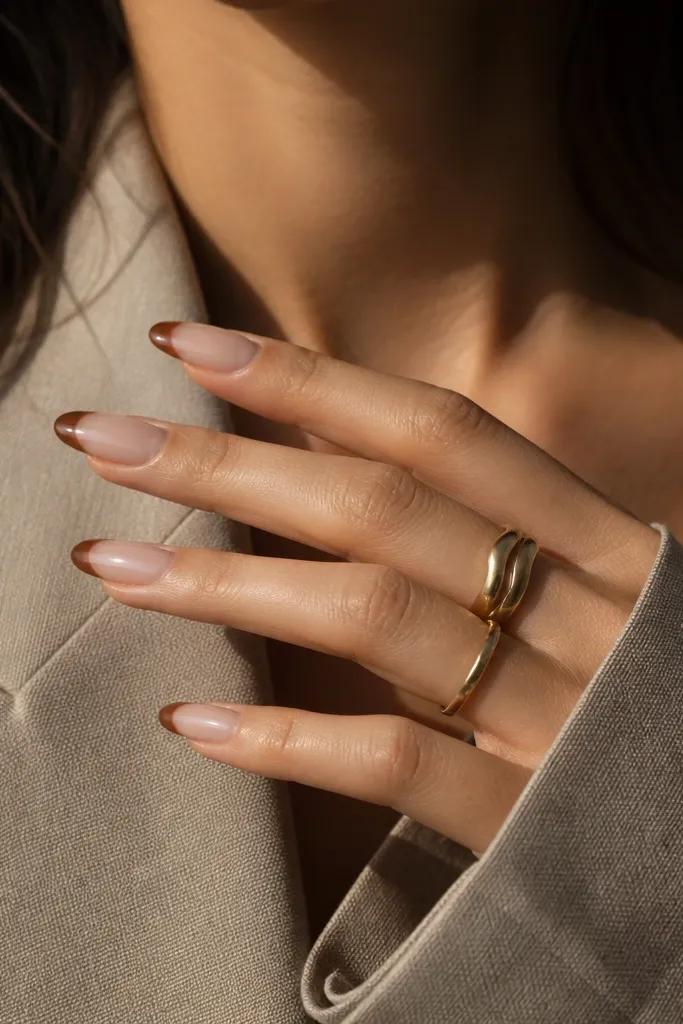
This one looks clean because the French line is thin and the chrome is mirror-smooth. Deep cocoa brown reads neutral and stays flattering against both warm and cool outfits. The mirror finish catches light like jewelry, so you do not need gems to make it pop. It also hides tiny imperfections better than thick art because the line is simple and symmetrical.
Shape: long almond or soft almond, with a smooth c-curve. Tip width: about 1.5-2 mm at the widest point. Use a clear or milky nude base so the brown looks like it sits on top, not mixed into the nail.
Pro tipAsk for a slightly higher smile line so the tip band still looks even when your nails grow.
Watch outAvoid a French line that's too low - it makes the set look messy by the second week.
2. Latte Brown Chrome Bold French
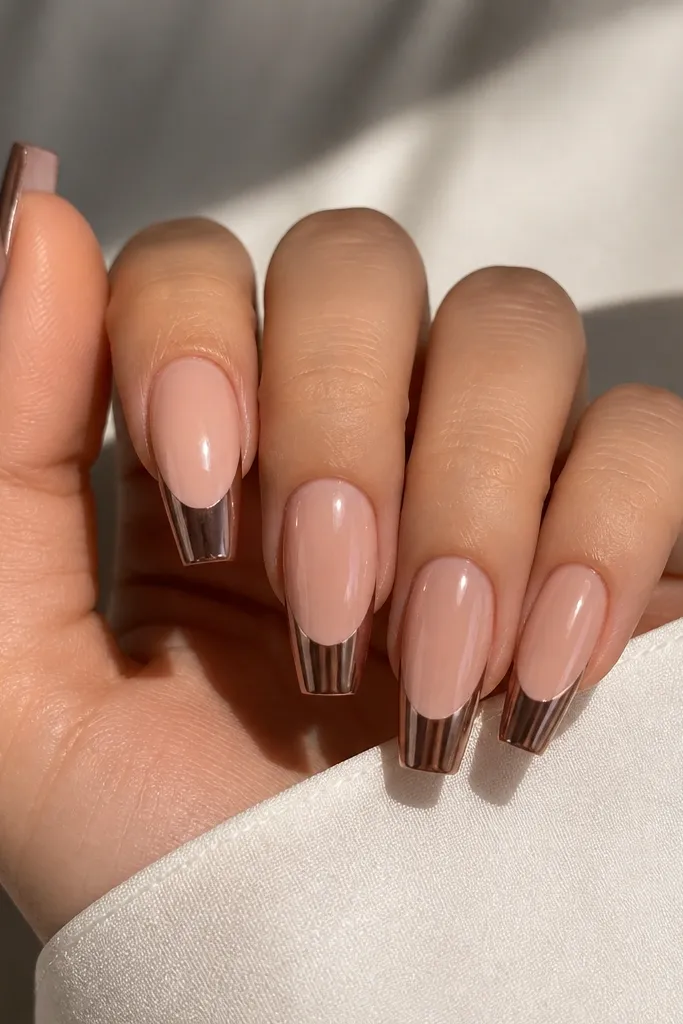
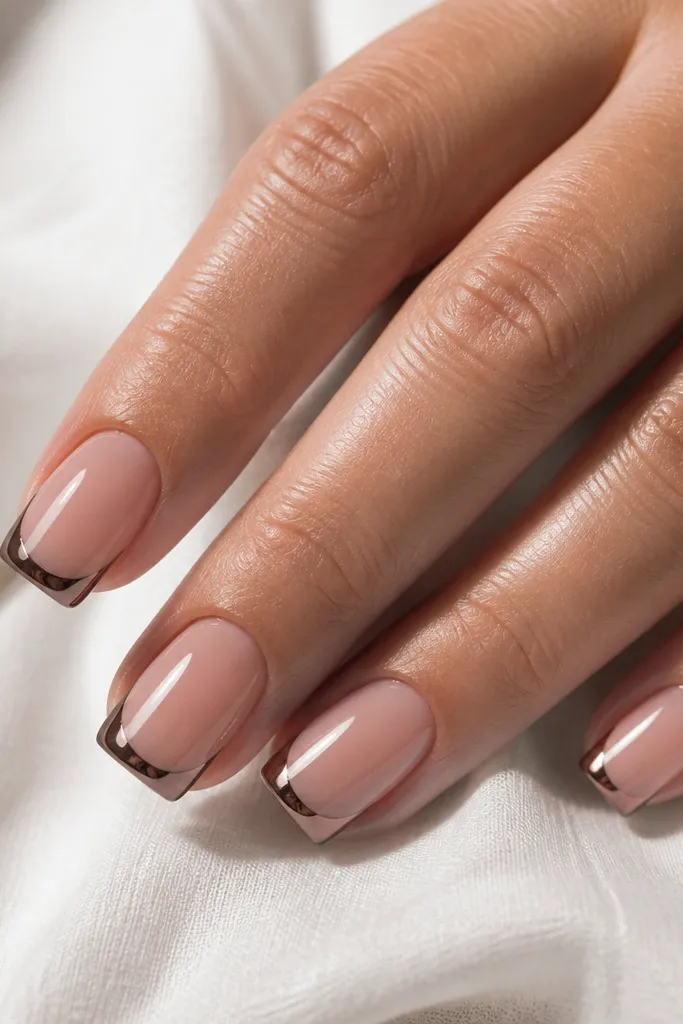
Bold French is the fastest way to make brown look "fashion" without extra design. Latte brown is light enough to feel fresh for spring and summer, but it still reads cozy in fall and winter. Chrome keeps it luxe and prevents the brown from looking flat or chalky. This style also works great if you're busy and want one consistent mani for months.
Shape: medium coffin or short coffin. Tip width: about 3-4 mm. Keep the base nude slightly milky (not pink) so the chrome looks bright and not muddy.
Pro tipUse a chrome that matches the brown temperature exactly (latte should be warm, not gray).
Watch outSkip uneven thickness - if one side of the French tip is thicker, it looks like a mistake instead of a deliberate style.
3. Mocha Taupe French with Micro-Glitter Fade
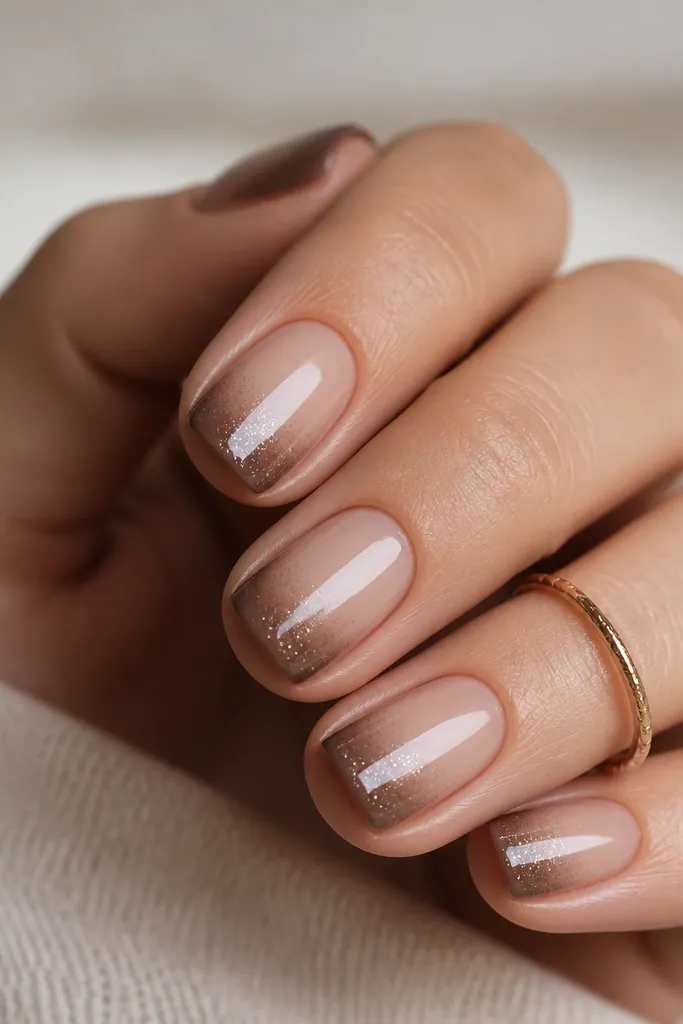
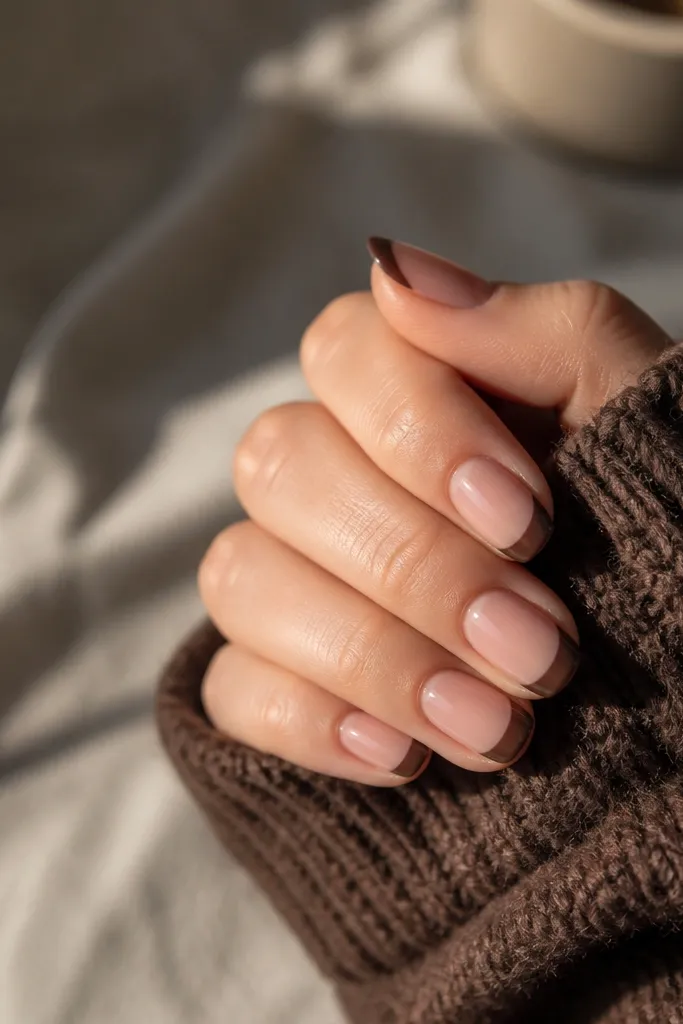
This is the brown French look for people who hate bold chrome but still want shine. The micro-glitter fade makes the line blend smoothly, so it looks intentional and wearable. Mocha taupe keeps it sophisticated and less "Halloween" than deeper browns. It also makes your nails look longer because the fade draws the eye across the tip.
Shape: short square or soft square. Tip: medium width with a gradient fade down about 1-2 mm. Use fine brown micro-glitter (not holographic) so it stays subtle.
Pro tipBlend the glitter transition with a small flat brush so the fade edge stays smooth, not speckled.
Watch outDon't use chunky glitter - it catches on clothes and makes the fade look uneven.
4. Caramel Chrome French with Gold Foil Edge
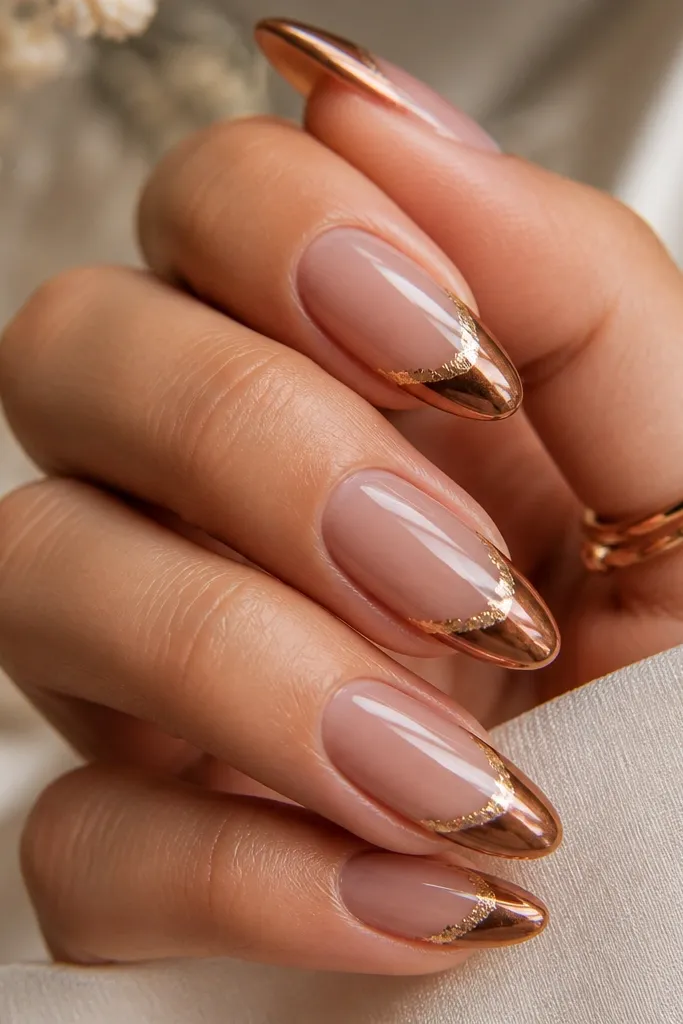
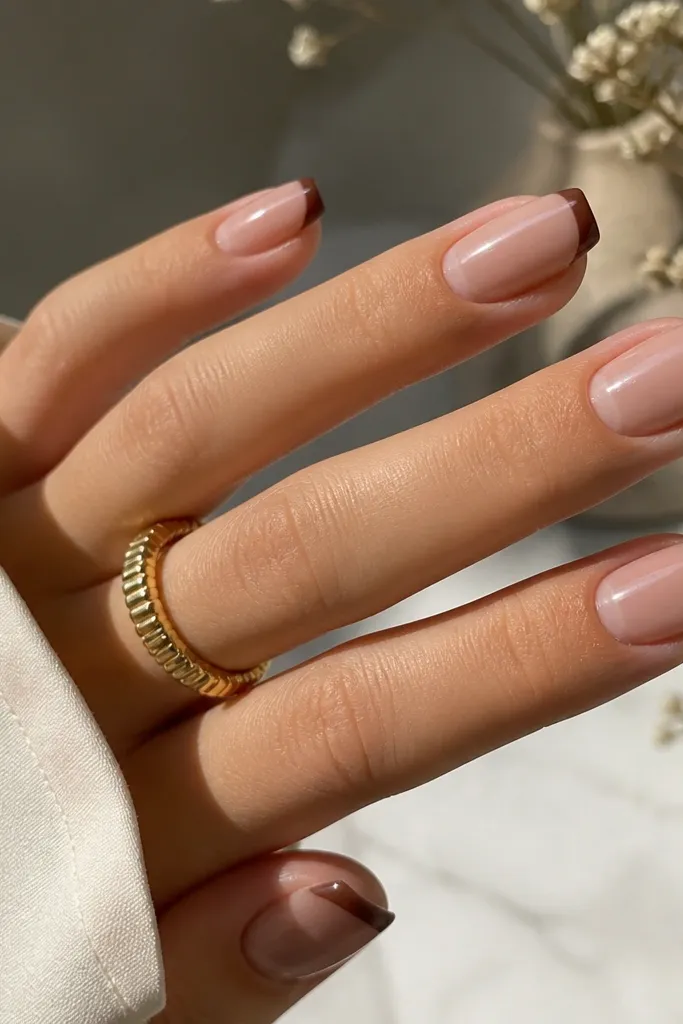
Caramel chrome gives you that warm "toasty" glow, and gold foil at the outer edge makes the French line look like it has a frame. The foil pieces create texture without covering the whole tip, so your nails still look sleek. Under warm lighting, this combo looks expensive fast. It's also forgiving if the foil placement varies slightly because it looks natural and artful.
Shape: medium almond. Tip width: 2.5-3 mm. Apply foil only on the top edge of the French curve so it reads like a highlight strip.
Pro tipPress foil in small sections and seal with two thin top coats instead of one thick coat.
Watch outAvoid full-foil coverage - it turns the French into a block and can look heavy.
5. Chocolate Brown French with Nude Negative Space
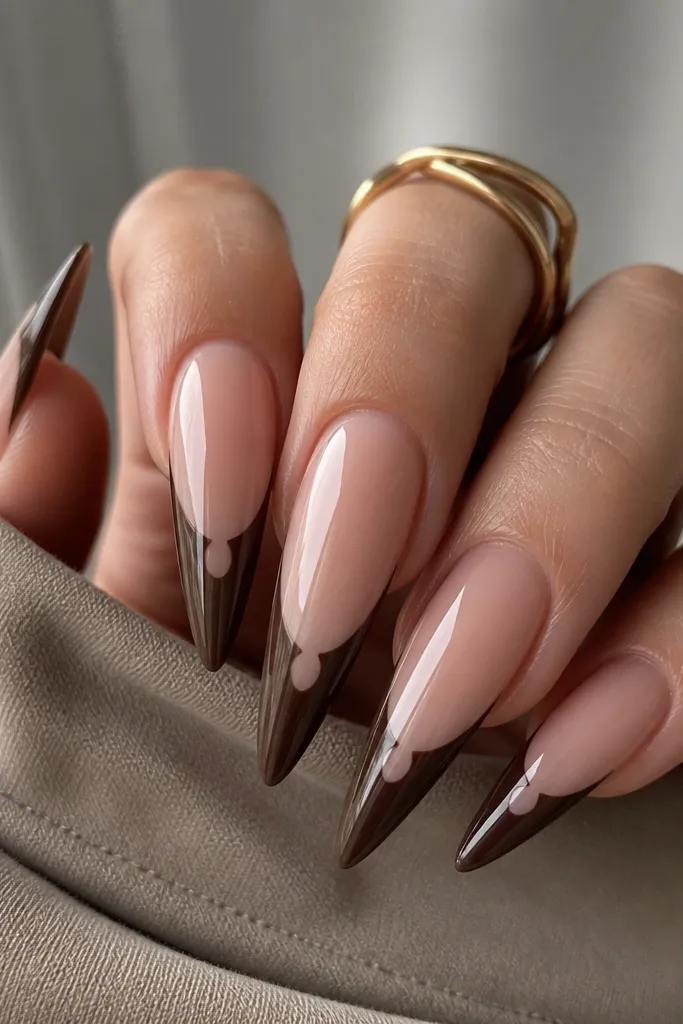
This design looks modern because the negative-space window breaks up the brown band. Chocolate brown feels deep and luxe, and keeping a nude gap in the middle makes the manicure look intentional and graphic. It also helps the French line look crisp even as your nails grow because the center gap draws the eye. You get a "designer" look without needing rhinestones.
Shape: long stiletto or long tapered almond. Tip width: 2-3 mm. Leave a 1 mm nude gap centered on the smile line before you seal.
Pro tipUse striping tape to mark the center gap so the window stays straight across all nails.
Watch outDon't freehand the gap - crooked negative space makes the set look uneven.
6. Espresso Brown French with Glossy Gel Liner Smile
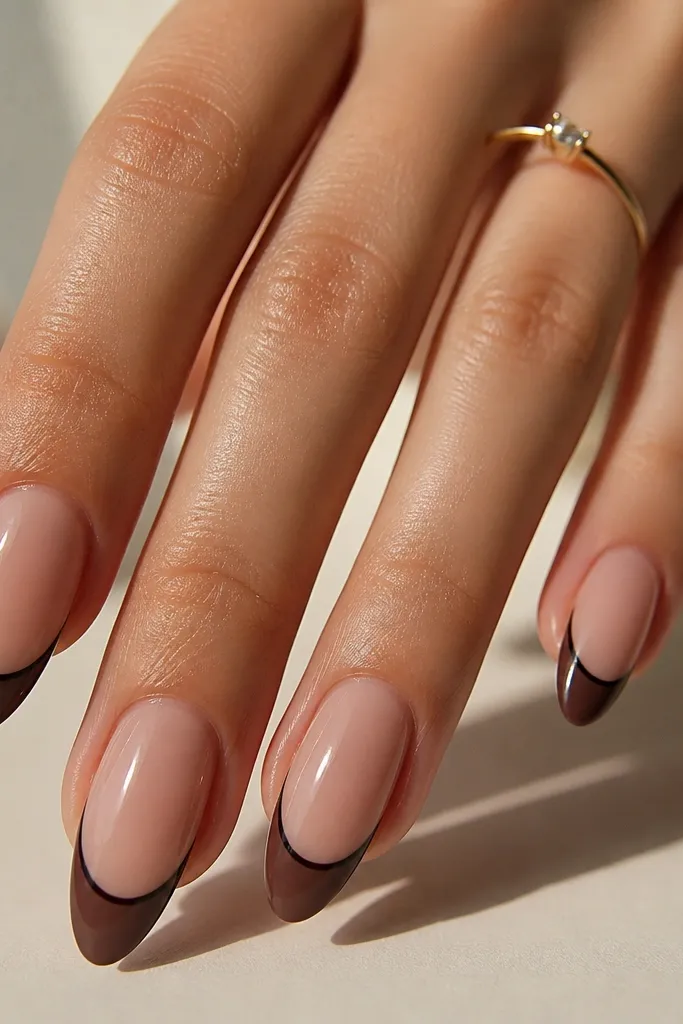
A liner smile makes the French look sharper and more expensive. The brown satin gives depth, and the glossy tracing line creates that "cutting edge" look. It's especially flattering if you have shorter nails because the liner sharpens the boundary and makes the tip feel more defined. This style also photographs well because the liner catches light in a thin highlight.
Shape: medium almond or squoval. Tip: satin espresso brown, then trace the top edge with a thin brush and gel liner. Keep the liner width under 0.5 mm.
Pro tipCure the liner separately for a full hard set before top coat so it doesn't smear.
Watch outAvoid thick liner - it turns the French into a blocky outline.
7. Mocha Chrome French with Brown Ombre Base
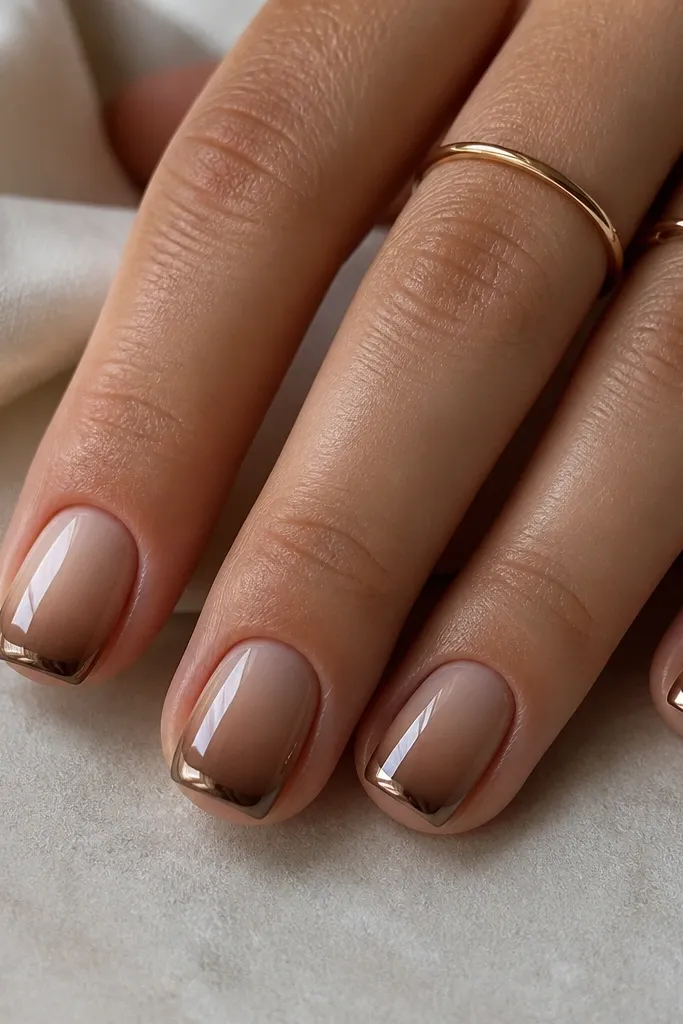
This one blends the French into the nail so it looks smooth and high-end. The ombre base adds extra dimension, and the chrome tip keeps the French idea clear. It works year round because the brown tones stay neutral and the chrome adds brightness. If you're worried about regrowth lines, this style hides them better because the base already has depth.
Shape: short square or short squoval. Build a nude-to-mocha ombre on the base, then apply chrome only to the tip band. Tip width: 2.5 mm for a clean "French" read.
Pro tipUse a sponge to feather the ombre edge so it fades over 2-3 mm, not in a hard line.
Watch outSkip a hard ombre line - it makes regrowth obvious.
8. Caramel Brown French with Rhinestone Micro-Dots
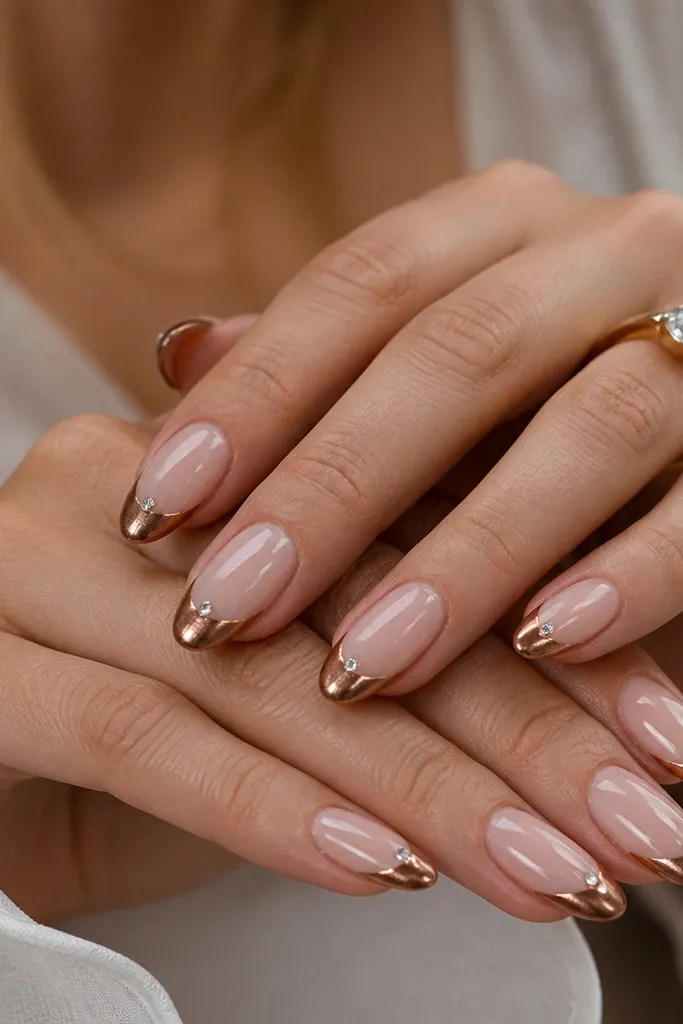
This is the "party version" that still looks clean. The rhinestone placement is small and controlled - one or two stones at the outer corner - so it doesn't look like a drag-bride situation. Caramel chrome keeps it warm and flattering, and the stones add sparkle without covering the whole tip. It's a great pick if you want brown French nails for events but still want something you can wear daily.
Shape: medium almond. Tip width: 2-3 mm. Place stones on the outer 1/3 of the smile curve so the sparkle faces forward when your hands move.
Pro tipUse a dotting tool to position stones before you cure; move them while the adhesive is still workable.
Watch outAvoid clustering stones - too many makes the French line disappear.
9. Dark Brown French with Pearly Champagne Underlay
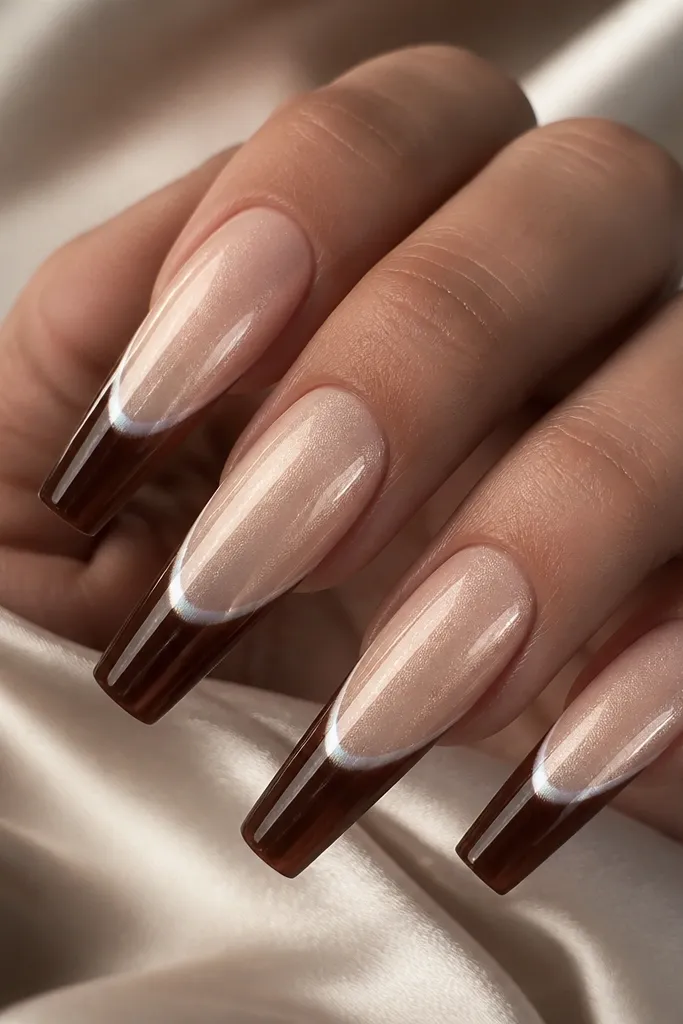
The underlay glow is what makes this look luxe. Dark brown can look heavy on its own, but a sheer champagne-pearl layer behind it gives a soft highlight that keeps the manicure bright. The chrome is optional here; the pearl underlayer already adds dimension. It reads fancy for winter and still works in spring because the base is light and luminous.
Shape: long coffin or long almond. Base: sheer champagne-pearl gel. French: dark brown applied over the pearl so a thin halo shows at the inner edge.
Pro tipKeep the halo thin (about 0.5-1 mm) so it looks like light, not like a second French line.
Watch outDon't make the halo wide - it turns into a layered color block.
10. Warm Brown French with Matte Top + Gloss Chrome Tip
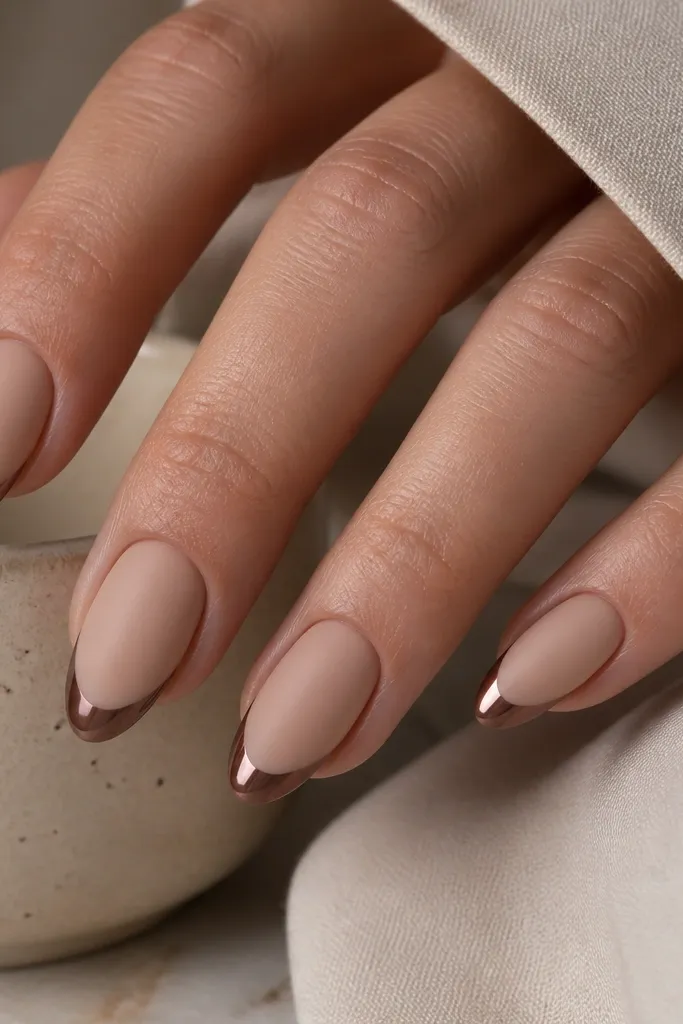
Contrast is the trick here. Matte base makes your nails look smooth and modern, while glossy chrome tips give the French line that "jewelry" effect. Warm brown stays cozy, and the glossy tip makes the set look intentional even if the matte starts to dull slightly with wear. This one looks great in photos because the light hits the chrome hard.
Shape: medium almond. Base: nude matte gel. French: warm brown chrome applied over a glossy tack layer, then seal with a gloss top only on the tip area.
Pro tipMask the tip area with a small piece of tape when applying matte top so you keep the chrome mirror finish.
Watch outAvoid putting matte top over chrome - it kills the reflectiveness.